Installing a DIY sprinkler system transforms your lawn care routine from a daily chore into a hands-off operation that saves water, money, and countless hours of dragging hoses around your property. While the project might seem intimidating at first glance, breaking it down into manageable phases makes it surprisingly achievable for most homeowners with basic DIY skills.
The real beauty of tackling sprinkler system installation yourself lies in the control you gain over both the process and your budget. Professional installations typically run between $2,500 and $4,500 for an average-sized yard, but doing it yourself cuts that cost by 50-70%. You’ll invest in materials and a weekend or two of your time, but you’ll understand every component of your system intimately. That knowledge proves invaluable when maintenance needs arise or when you want to expand coverage to new garden beds.
Modern sprinkler systems offer far more than the oscillating spray patterns your parents used. Today’s options include water-conserving rotor heads, precision spray nozzles, and smart controllers that adjust watering schedules based on weather conditions and soil moisture. You can design zones tailored to different plant needs, ensuring your thirsty lawn gets adequate hydration while your drought-tolerant perennials aren’t overwatered.
This guide walks you through everything from mapping your property and calculating water pressure to trenching lines and programming your controller. We’ll help you avoid common pitfalls that waste water and money while building a system that keeps your landscape thriving through the seasons. Whether you’re working with a compact urban lot or several acres, the principles remain consistent and completely manageable.
Understanding Your Irrigation Options: Sprinkler vs. Drip Systems
Before you start digging trenches and laying pipe, you need to decide which irrigation method matches your landscape needs. The good news? You’re not locked into just one approach.
Sprinkler systems are the workhorses for large lawn areas. They deliver water from above, mimicking natural rainfall across broad swaths of grass. If you’ve got a half-acre of turf to maintain, sprinklers are your DIY installation ally. They integrate beautifully with a proper drainage system to prevent pooling and runoff issues.
Drip irrigation takes a completely different path. Instead of overhead spray, it delivers water directly to plant roots through a network of tubes and emitters placed at soil level. This precision approach shines in garden beds, around trees and shrubs, and along foundation plantings where you want targeted hydration without wetting foliage or hardscaping.
| Feature | Sprinkler Systems | Drip Irrigation |
|---|---|---|
| Best For | Lawns, large turf areas | Garden beds, shrubs, vegetables |
| Water Efficiency | 70-85% efficient | 90-95% efficient |
| Coverage Type | Broad spray patterns | Pinpoint root zone delivery |
| Installation Complexity | Moderate (trenching required) | Simple (mostly above-ground) |
The efficiency difference matters more than you might think. While spray irrigation loses water to evaporation and wind drift, drip systems put nearly every drop exactly where plants need it. That translates to lower water bills and healthier plants with deeper root systems.
Here’s the smart strategy most experienced gardeners adopt: use both. Install pop-up sprinklers for your lawn zones, then branch off with drip lines for your perennial beds and vegetable garden. You can run them on separate zones from the same controller, giving each area precisely what it needs.
Your landscape layout will guide this decision. Got mostly grass? Sprinklers dominate your installation. Heavy on ornamental beds and edibles? Drip lines become your primary focus. Most yards benefit from a hybrid approach that plays to each system’s strengths while keeping your DIY installation manageable and your water usage sustainable.
Planning Your DIY Sprinkler System Installation
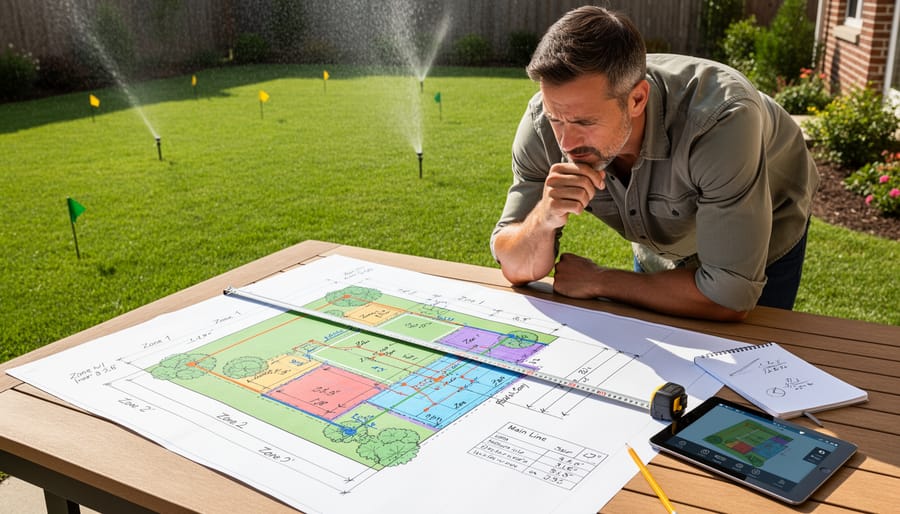
Measuring Your Lawn and Creating Zones
Before you start digging or buying sprinkler heads, you need to map out your yard like you’re planning a garden bed. Grab a tape measure, some graph paper, and a pencil. Start by measuring your property’s dimensions and sketching it to scale. Include everything: your house, driveway, walkways, trees, flower beds, and any other permanent features. This becomes your master plan.
Now walk your property and really observe it. Notice which areas bake in full sun all afternoon and which stay shaded under trees. Your sunny lawn will need more water than those shady spots near your fence line. Mark these differences on your sketch. Gardens and shrub beds have different watering requirements than grass, so identify those areas too. Understanding proper drainage patterns helps you avoid overwatering low spots where water naturally collects.
Next, divide your lawn into zones. Each zone should group similar plants with similar water needs together. A typical residential system has four to six zones, though your setup depends on water pressure and lot size. Keep each zone under 10-12 sprinkler heads to maintain adequate pressure. Sun-drenched turf goes in one zone, while shade-loving areas get their own. Separate your vegetable garden or flower beds into dedicated zones since they need different watering schedules than grass.
This planning stage might feel tedious, but trust me, it saves hours of frustration later. You’ll know exactly how many supplies to buy and where every component goes. Plus, a well-planned system waters efficiently, cutting waste and lowering your water bill.
Testing Water Pressure and Flow Rate
Before you start digging trenches for your DIY sprinkler system installation, you need to know two critical numbers: your home’s water pressure and flow rate. These measurements directly determine how many sprinkler heads you can run simultaneously and which components will work best for your setup.
Testing water pressure is straightforward. Pick up an inexpensive pressure gauge (around $10 at any hardware store) and screw it onto an outdoor faucet. Turn the water on full blast and read the gauge. Most residential systems fall between 40-70 PSI, which works perfectly for standard sprinkler heads. Below 40 PSI means you’ll need to adjust your design or consider a booster pump.
Flow rate takes a bit more effort but uses tools you already have. Here’s the simple bucket test:
- Place a 5-gallon bucket under your outdoor faucet
- Turn the water on completely and start timing
- Note how many seconds it takes to fill the bucket
- Divide 300 by the number of seconds to get gallons per minute (GPM)
Run this test at the faucet closest to where your main line enters the house for the most accurate reading. Your flow rate determines sprinkler zone size. If you measure 10 GPM and each sprinkler head needs 2 GPM, you can run four heads per zone with a small safety margin. Planning zones around your actual water capacity prevents weak, ineffective watering and protects your system from damage.
Choosing Sprinkler Head Types and Placement
Selecting the right sprinkler head makes all the difference in water efficiency and lawn health. Spray heads work beautifully for smaller areas up to 15 feet, delivering a fine mist that’s perfect for flower beds and tight spaces. Rotors cover larger distances (up to 40 feet) with rotating streams, making them ideal for open lawn areas. For shrubs and trees, bubblers gently saturate the root zone without wasteful overspray.
Placement strategy is crucial. Walk your yard and mark zones based on sun exposure, plant types, and landscape drainage patterns. Spray heads should overlap by about 50% for complete coverage, while rotors need roughly 60% overlap to avoid dry spots. Don’t mix head types on the same zone since they have different precipitation rates.
Position heads away from sidewalks and driveways to prevent water waste. Corner areas need special attention with matched precipitation rate heads to avoid overwatering or creating brown patches.
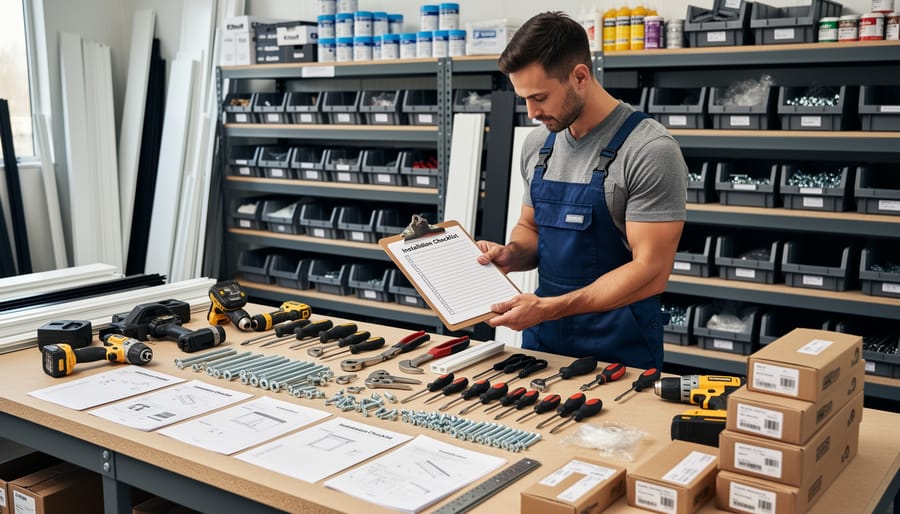
Essential Tools and Materials for Your DIY Sprinkler Installation
Getting your DIY sprinkler system off the ground starts with gathering the right supplies. While the specific materials vary based on your yard’s size and layout, having a comprehensive checklist prevents those frustrating mid-project hardware store runs.
For piping, you’ll primarily work with PVC pipes and fittings in various sizes. Most residential systems use 3/4-inch or 1-inch diameter PVC pipe for main lines, with 1/2-inch pipe for lateral lines feeding individual sprinkler heads. Stock up on elbows, tees, and couplings to navigate corners and create junctions. Don’t forget PVC primer and cement for creating watertight connections that’ll last years.
Your sprinkler heads come next. Pop-up spray heads work beautifully for smaller areas and garden beds, while rotor heads cover larger lawn expanses efficiently. Choosing the right heads for each zone prevents water waste and ensures even coverage. I’m a big fan of pressure-regulating heads that adapt to varying water pressure and reduce overspray.
On the tool front, you’ll need a trenching shovel or flat-edge spade for digging. If you’re covering significant ground, renting a trencher can save your back and hours of labor. A PVC pipe cutter makes clean cuts far easier than a hacksaw, though that works in a pinch. Add a tape measure, adjustable wrench, screwdrivers, and Teflon tape to your kit.
The control system requires a timer or controller matched to your number of zones, along with control valves for each zone. Anti-siphon valves protect your home’s water supply from contamination and are often required by local codes.
For budget-conscious DIYers, consider polyethylene tubing as an alternative to rigid PVC in areas where flexibility helps. It’s easier to work with and more forgiving during freeze-thaw cycles. Reclaimed or recycled PVC from building supply resale stores can slash costs while supporting sustainability.
Speaking of sustainability, look for WaterSense-labeled products that meet EPA efficiency standards. Rain sensors automatically shut down your system during storms, preventing unnecessary watering. These small investments pay dividends through lower water bills and reduced environmental impact.
Finally, grab marking flags for layout planning, a notebook for documenting your system design, and plenty of patience. Having everything assembled before breaking ground transforms this project from overwhelming to totally manageable.
Step-by-Step DIY Sprinkler System Installation Process
Step 1: Mark Your Layout and Dig Trenches
Before you break ground, call 811 at least two days ahead to have underground utilities marked. This free service protects you from hitting gas lines, electrical cables, or water pipes. Trust me, the brief wait is worth avoiding a disaster.
Once you’ve got the all-clear, transfer your sprinkler plan to the ground using marking paint or landscaping flags. Walk your layout with the design in hand, marking where each sprinkler head will go and painting lines to show the pipe routes. Use bright colors that stand out against your grass.
For digging trenches, you have options depending on your soil and stamina. A flat-edge spade works fine for smaller jobs, though a trenching shovel with its narrow blade makes cleaner cuts. Trenches should run 6 to 8 inches deep in most climates, deeper if you’re in a freeze-prone area. Make them about 4 inches wide.
Here’s a time-saver: slice the turf vertically along both sides of your trench line, then peel back the sod in strips. Set these aside to replace later. This approach gives you cleaner edges and healthier grass recovery.
If your yard has existing drainage issuesnow’s the perfect time to address them by adjusting your trench slopes slightly. Keep removed soil on tarps for easy cleanup and refilling once pipes are laid.
Step 2: Install the Backflow Prevention Device
Here’s why this step matters: backflow preventers are required by code in most areas to protect your home’s drinking water from contamination. When your sprinkler system runs, water pressure can drop unexpectedly, potentially pulling fertilizers, pesticides, or stagnant water back into your clean water supply. Not exactly what you want in your morning coffee.
Install the backflow preventer on your main water line after the shutoff valve, before the sprinkler system branches off. You’ll typically mount it 12 inches above ground on an exterior wall or in a protected location. The device has directional arrows showing proper water flow orientation, so double-check before securing.
Here’s the reality: this component requires permits and inspection in many jurisdictions. You’ll need proper pressure testing equipment and knowledge of local plumbing codes. If you’re comfortable with basic plumbing and your municipality allows homeowner installation, follow the manufacturer’s instructions carefully. Otherwise, hiring a licensed plumber for this single component protects both your water supply and your DIY budget. You can handle everything else yourself once this critical piece is properly installed and inspected.
Step 3: Lay Out and Connect Your Main Lines
Now it’s time for the satisfying work of building your irrigation backbone. This is where your careful planning pays off as you transform those lines on paper into a real water distribution system.
Start by laying out all your PVC pipe along the planned routes before making any cuts. This dry run lets you visualize the system and catch measurement errors before they become expensive mistakes. Use landscape marking paint or flags to mark where joints and sprinkler heads will go. Trust me, a few extra minutes here saves hours of frustration later.
Measure twice, cut once isn’t just a cliché. Use a hacksaw or PVC cutter for clean, square cuts. Rough or angled cuts create weak spots that can leak or fail completely. After cutting, use sandpaper or a deburring tool to smooth the edges. Those little burrs might seem harmless, but they prevent proper sealing and reduce water flow.
Getting your PVC connections right is critical for a leak-free system. Here’s the proper sequence:
- Dry-fit all pieces first to confirm everything aligns correctly
- Mark alignment lines across both pieces with a permanent marker so you can orient them properly after applying cement
- Apply PVC primer to both the inside of the fitting and outside of the pipe
- Immediately apply PVC cement over the primed areas
- Push the pipe into the fitting with a slight twist to spread the cement evenly
- Hold the connection firmly for 30 seconds, aligning your reference marks
Work in sections and give joints at least 15 minutes to cure before handling. In cooler weather, double that time. The purple primer isn’t just decorative; it cleans and prepares surfaces for maximum bonding strength.
Step 4: Install Zone Valves and Lateral Lines
Now you’re ready to connect your water source to the individual zones. This step brings your DIY sprinkler system installation closer to reality.
Start by assembling your manifold, which houses all the zone valves in one location. Most homeowners position this near the water source or main irrigation line for easy access. Install an anti-siphon valve for each zone to prevent contaminated water from flowing back into your home’s water supply. These valves must sit at least 6 inches above the highest sprinkler head in that zone to function properly.
Place your assembled manifold inside a valve box that sits flush with the ground. This protects your valves from weather and lawn equipment while keeping them accessible for adjustments. You can find these boxes at any irrigation supply store, and they’re inexpensive insurance for your system.
From each zone valve, run your lateral lines (typically 3/4-inch PVC pipe) to where your sprinkler heads will go. Bury these lines 8-12 inches deep, following your layout map carefully. Use elbow joints and tees where the pipes need to turn or branch. Leave a bit of slack in the lines to prevent stress from ground settling.
Before backfilling, test each zone by turning on the water briefly. This helps you spot leaks now rather than after everything’s buried.
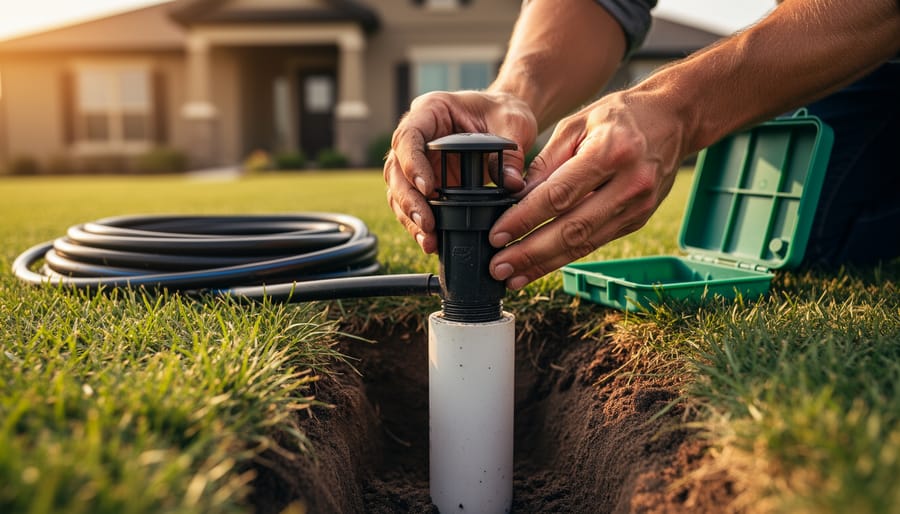
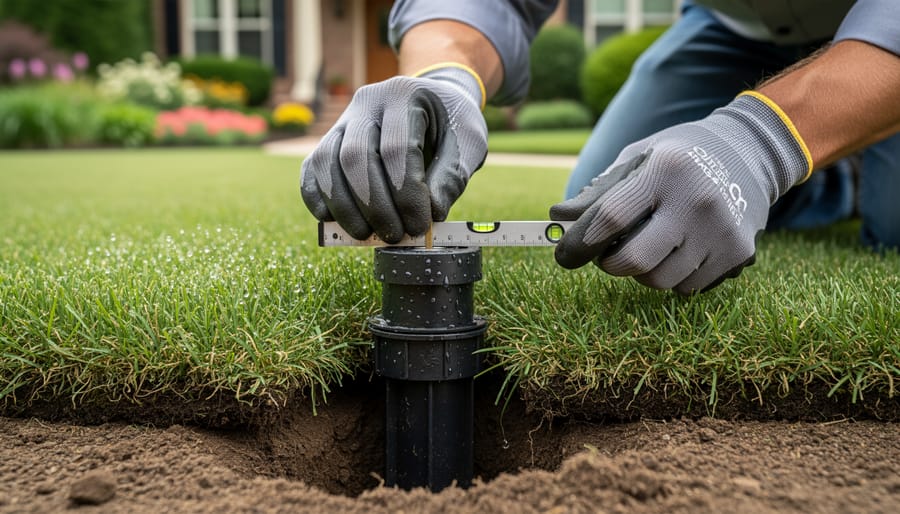
Step 5: Position and Attach Sprinkler Heads
Now comes the satisfying part where you’ll see your DIY sprinkler system really take shape. Start by screwing threaded risers into each lateral line fitting, hand-tightening them firmly. The riser height matters more than you might think. You want the sprinkler head to sit exactly at ground level after you’ve finished grading and seeding your lawn. Too low and you’ll have water pooling issues; too high and you’ll be clipping heads with your mower.
Before permanently attaching each sprinkler head, check that it’s level using a small torpedo level. This ensures proper spray pattern distribution. If you’re installing pop-up heads, they should retract completely when not in use. Adjust the spray arc and distance according to your system design, rotating the nozzle until it matches your coverage plan.
Take a few extra minutes to position rotating heads so they throw water away from structures and hardscaping. This prevents water waste and protects your home’s foundation. Once everything’s aligned, give each connection a final tightening and test the zone briefly to verify coverage before backfilling your trenches.
Step 6: Connect to Your Water Source and Controller
Now comes the moment where your DIY sprinkler system comes to life. You’ll need to tap into your home’s water supply and get your controller up and running.
Start with the water connection. Most homeowners tie into an outdoor hose bib or the main water line after the water meter. If you’re using a hose bib connection, install a backflow preventer first. This critical device prevents contaminated water from flowing back into your drinking supply. It’s required by code in most areas, and it’s absolutely worth the investment for your family’s safety.
For the controller installation, choose a protected location like your garage or covered porch. Mount it at eye level on a solid surface. If you’re running multiple zones, you’ll have one wire for each valve plus a common ground wire. Color-code and label everything as you go.
Here’s the electrical part, and I promise it’s simpler than it sounds. Turn off power at the breaker before starting any wiring work. Most controllers run on standard 110V household current and use low-voltage wires to activate the valves. Strip about half an inch of insulation from each wire end, connect them to the corresponding terminals on your controller, and tighten securely. Double-check your valve-to-zone assignments before powering up.
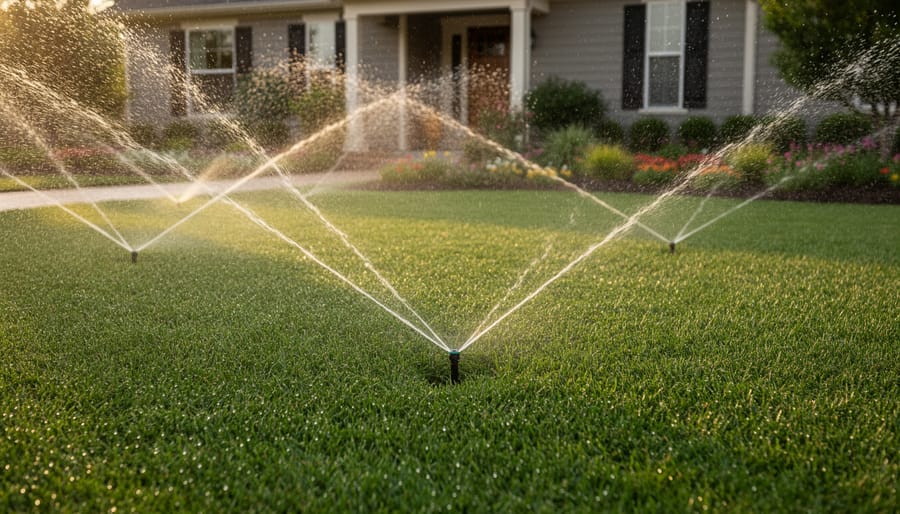
Testing and Adjusting Your New Sprinkler System
Congratulations! Your DIY sprinkler system installation is nearly complete. Now comes the exciting part: bringing it to life and making sure every zone delivers the right amount of water exactly where you need it.
Start by testing one zone at a time. Turn on the system and watch carefully as each zone activates. You’re looking for even coverage, proper spray patterns, and any obvious problems like leaking connections or heads that won’t pop up. Walk through each area and observe how the water distributes across your lawn. This hands-on approach is the best way to spot issues before they become bigger headaches.
Low water pressure is probably the most common challenge you’ll encounter. If your sprinkler heads barely sputter or don’t reach their intended coverage area, you might have too many heads on a single zone. The fix? Split the zone into two separate runs or reduce the number of heads per zone. Also check that your control valves are fully open and that there aren’t any crimped pipes restricting flow.
Poor coverage usually means you need to adjust individual sprinkler head positions and spray patterns. Most heads have a simple adjustment screw on top that lets you change the arc and distance. Take your time with this step. Grab a screwdriver and tweak each head until you achieve good overlap between adjacent sprinklers. Proper overlap prevents dry spots and ensures water-efficient coverage.
Watch for any areas getting drenched while others stay dry. This signals you need to reposition heads or switch to different nozzles with appropriate flow rates. Many sprinkler heads come with interchangeable nozzles designed for various coverage needs.
Run each zone for 10-15 minutes during your initial testing. Place empty tuna cans or rain gauges in different spots to measure how much water each area receives. This simple test helps you program your controller for the right watering duration, supporting both a healthy lawn and water conservation. Adjust your timer settings based on what you discover.
Programming Your Irrigation Controller for Water Efficiency
Congratulations on completing your DIY sprinkler system installation! Now comes the crucial part: programming your controller to maximize water efficiency while keeping your lawn healthy. A poorly programmed system wastes water and money, so let’s get this right.
Start by understanding your grass type. Cool-season grasses like fescue and bluegrass need about 1 to 1.5 inches of water per week during their active growing seasons, while warm-season varieties like bermuda and zoysia can handle slightly less. Your watering schedule should adjust throughout the year. During peak summer heat, you might water three times weekly, but spring and fall may only require once or twice.
The best time to water is early morning, between 4 and 9 a.m. This reduces evaporation loss and gives grass blades time to dry before evening, preventing fungal diseases. Avoid watering during the heat of the day when you’ll lose significant moisture to evaporation.
Most controllers let you set run times for each zone. Sprinkler heads typically need 15 to 30 minutes, depending on your water pressure and coverage. Run a simple test: place several containers around a zone, run the system for 15 minutes, and measure the water collected. This tells you exactly how long each zone needs to deliver that magic one-inch weekly total.
Here’s where technology really helps your conservation efforts. Rain sensors automatically shut off your system when Mother Nature does the watering for you. They’re inexpensive and pay for themselves quickly. Smart controllers take efficiency even further by adjusting schedules based on weather forecasts, soil moisture, and local evaporation rates.
Don’t just set and forget. Check your schedule monthly and adjust for seasonal changes. Your lawn will thank you, and so will your water bill.
Common DIY Installation Mistakes and How to Avoid Them
Let’s be honest: even the most enthusiastic DIYers stumble when tackling their first sprinkler installation. The good news? Most mistakes are totally preventable once you know what to watch for.
Skipping the planning phase ranks as the biggest culprit. I’ve seen countless homeowners jump straight to digging trenches without measuring water pressure or calculating gallons per minute. The result? Sprinkler heads that barely sputter or zones that can’t all run simultaneously. Take the time upfront to map your yard on graph paper, measure your water flow rate, and group zones based on actual water availability. Yes, it feels tedious, but it prevents heartbreak later.
Incorrect pipe sizing trips up many first-timers too. Using pipe that’s too narrow creates pressure loss, especially over long runs. A good rule of thumb: use 1-inch PVC for main lines and 3/4-inch for lateral lines, but always check manufacturer specs for your specific sprinkler heads. Going too small means weak spray patterns that leave dry patches.
Another classic mistake involves mixing sprinkler head types within the same zone. Combining spray heads (which dispense about 1.5 inches per hour) with rotors (around 0.5 inches per hour) creates wildly uneven watering. Your lawn ends up with soggy spots and parched areas. Stick with one head type per zone, grouped by similar watering needs.
Poor depth consistency causes problems too. Some folks bury pipes too shallow in one area and too deep in another. Aim for 8-10 inches deep consistently to protect pipes from damage while staying below the frost line in cold climates. This also ties into proper water drainage solutions for your overall landscape.
Finally, forgetting to install a backflow preventer isn’t just a mistake. It’s often illegal and genuinely dangerous, potentially contaminating your household drinking water. Check local codes before you start digging.
Winterization and Seasonal Maintenance for Your DIY System
Protecting your DIY sprinkler system from freezing temperatures is critical if you live anywhere that sees winter frosts. Just one hard freeze can crack pipes, split valves, and turn your careful installation project into a costly repair job. The good news? Winterizing is straightforward once you know the process.
The most reliable winterization method involves compressed air. You’ll need an air compressor rated at least 10 CFM (cubic feet per minute) for residential systems, though larger properties may require commercial equipment or rental units.
Here’s how to winterize your system using compressed air:
- Turn off the water supply to your system and shut down the controller to prevent accidental zone activation.
- Attach the air compressor to your system’s drain valve or a special blowout adapter on the mainline.
- Set the compressor to no more than 50 PSI for PVC pipes or 80 PSI for polyethylene tubing.
- Activate one zone at a time through your controller, allowing compressed air to push water through each line.
- Let each zone run until you see only mist coming from the sprinkler heads, usually 2-3 minutes.
- Move through all zones systematically, then repeat the entire cycle once more for thorough water removal.
Once you’ve blown out the lines, drain your backflow preventer if it’s above ground. Many devices have small drain caps that need opening. Remember those drainage considerations from your installation? They matter now too. Low spots may still hold water, so walk your property checking for pooling.
Year-round maintenance keeps your system efficient. Inspect heads monthly during growing season, clearing debris and adjusting spray patterns. Replace broken nozzles immediately. Clean filters quarterly. Test your rain sensor before each season starts.
Taking these steps seriously means your DIY system will serve you reliably for decades, not just seasons.
Congratulations! You’ve just completed your own DIY sprinkler system installation, and that’s something to be genuinely proud of. Not only have you saved yourself hundreds or even thousands of dollars in professional installation costs, but you’ve also taken control of your lawn’s water efficiency. Your new system will deliver water directly where it’s needed, reducing waste and lowering your water bills while keeping your grass healthy and green.
The best part? You can now sit back and let automation handle the daily task of watering. No more dragging hoses around or forgetting to water during busy weeks. Your mornings just got easier.
Remember that while your new sprinkler system is designed for low maintenance, it still needs occasional attention. Check for clogged heads seasonally, adjust zones as your landscape grows, and winterize the system before freezing temperatures arrive in colder climates.
Now that you’ve mastered this project, why not explore more ways to improve your lawn care routine? Browse our other guides on sustainable gardening practices, soil health, and water-saving techniques. Your journey to a beautiful, eco-friendly yard is just beginning, and we’re here to help every step of the way.