Understanding nitrogen in your lawn soil starts with recognizing a fundamental truth: nitrogen moves. Unlike phosphorus and potassium that stay put in your soil for months or years, nitrogen leaches away with rain, evaporates into the air, and gets consumed rapidly by grass and soil microbes. This makes nitrogen testing tricky but absolutely essential for anyone committed to feeding their lawn efficiently without wasting money or harming the environment.
Testing your soil for nitrogen means accepting that you’re capturing a snapshot of a constantly changing nutrient. The nitrogen present today might be gone next week after a heavy rainstorm. Despite this challenge, regular nitrogen testing remains one of the most valuable tools in your lawn care arsenal because it prevents the common mistakes of over-fertilizing, which burns grass and pollutes waterways, or under-fertilizing, which leaves your turf weak and vulnerable to weeds and disease.
The key to useful nitrogen testing lies in timing and interpretation. Test in early spring before your first fertilizer application to establish a baseline, then use that information alongside your grass type, recent weather patterns, and lawn appearance to make smart fertilization decisions throughout the season. Most home lawns need between 2 to 4 pounds of nitrogen per 1,000 square feet annually, but your specific soil test results will reveal whether you’re at the low end or high end of that range, saving you from the guesswork that leads to either patchy, pale grass or excessive growth that demands constant mowing.
What Makes Nitrogen Different from Other Soil Nutrients
Think of nitrogen as the restless wanderer of the soil world. While stable nutrients like phosphorus and potassium settle down and stick around in your soil for months or even years, nitrogen is constantly on the move, shape-shifting, and disappearing when you least expect it.
Here’s what makes nitrogen so uniquely challenging: it’s incredibly mobile. Rain or irrigation can easily wash nitrogen deeper into the soil profile, beyond your grass roots’ reach. It’s also volatile, meaning it can literally escape into the atmosphere as a gas—a process called volatilization that happens especially fast on hot days or when nitrogen fertilizer sits on the soil surface. And perhaps most fascinating, nitrogen exists in multiple forms that are constantly transforming through biological processes. Soil microbes are constantly converting nitrogen from one form to another, eating it up, or releasing it back into forms your grass can use.
Compare this to nutrients like phosphorus, which binds tightly to soil particles and stays put, or potassium, which moves slowly and predictably. These nutrients are like money in a savings account—test your soil once, and the results remain relevant for several years. Nitrogen, on the other hand, is like cash in your pocket during a shopping spree. What you have today might be completely different next week.
This dynamic behavior explains why nitrogen testing is trickier and why many traditional soil tests don’t even include it. A nitrogen test gives you a snapshot of one moment in time, but that picture can change dramatically based on temperature, rainfall, microbial activity, and even what happened in your lawn last season.
Understanding this fundamental difference helps you approach nitrogen management more strategically. It’s not about getting one perfect number, but rather learning to read your lawn’s ongoing nitrogen needs and responding thoughtfully throughout the growing season.
The Truth About Nitrogen Soil Tests (And Their Limitations)
What Nitrogen Tests Actually Measure
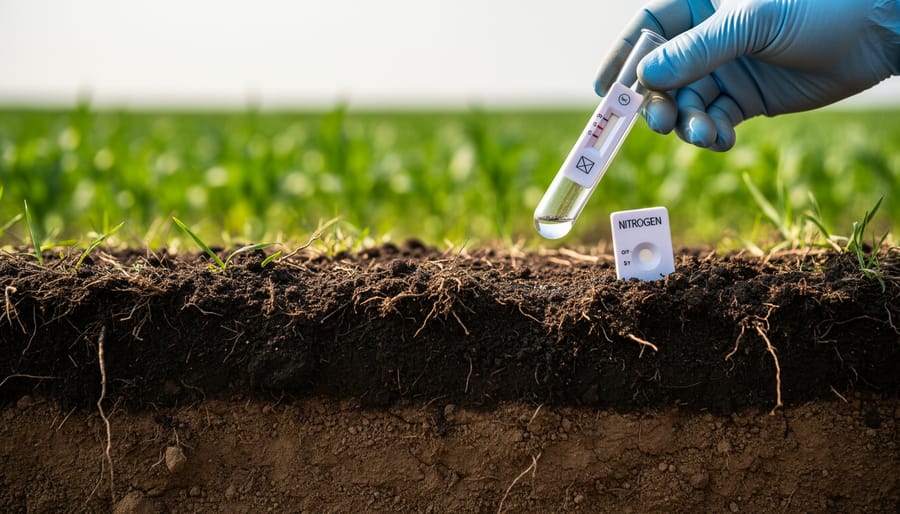
When you send your soil sample off to the lab, you might wonder what exactly they’re measuring. Here’s the thing: nitrogen is a bit of a shapeshifter in soil, and tests typically measure it in different forms that tell different parts of the story.
Most soil tests focus on nitrate-nitrogen, which is the form your grass can use immediately. Think of nitrate as the cash in your lawn’s wallet—it’s ready to spend right now. Your test results might show this as NO3-N or simply nitrate, measured in parts per million. This is the number that matters most for deciding whether you need to fertilize soon, since nitrate is water-soluble and changes quickly based on rainfall, temperature, and microbial activity.
Some tests also measure ammonium-nitrogen, shown as NH4-N. Ammonium is like a savings account—not immediately available, but it converts to nitrate through a natural soil process. In cooler soils, this conversion happens slowly, while warmer conditions speed things up. Understanding both forms gives you a more complete picture of your nitrogen situation.
You might also see total nitrogen on your report, which includes nitrate, ammonium, and organic nitrogen combined. While this sounds useful, it’s actually less helpful for making immediate fertilizer decisions. The organic portion is locked up in soil organic matter and releases gradually over time, making it tough to predict how much will actually become available to your lawn this season.
The key takeaway? Focus primarily on your nitrate-nitrogen levels when making fertilization decisions, but don’t ignore the other forms entirely—they provide valuable context for sustainable lawn management.
Why Timing Makes or Breaks Your Test Results
Timing truly is everything when it comes to nitrogen soil testing. Unlike other nutrients that remain relatively stable in soil, nitrogen is remarkably dynamic and can fluctuate dramatically based on recent weather and lawn care activities.
Here’s what you need to know: recent heavy rainfall can wash nitrogen deeper into the soil profile or even carry it away entirely, giving you falsely low readings. On the flip side, testing right after fertilizing will show artificially high levels that don’t reflect your soil’s actual fertility. Temperature matters too since microbial activity that releases nitrogen ramps up in warm conditions and slows down when it’s cool.
For the most accurate snapshot, test during your grass’s active growing season when it’s actually using nitrogen. Spring and early fall are ideal for cool-season grasses, while late spring through summer works best for warm-season varieties. Wait at least three to four weeks after your last fertilizer application, and try to sample when soil is moderately moist, not waterlogged or bone-dry. If you’ve had a major rain event, give it about a week for things to stabilize.
This strategic timing ensures your test results actually reflect what your lawn can access, helping you make fertilizer decisions that are both effective and environmentally responsible.

How to Collect Soil Samples That Give You Reliable Nitrogen Data
The Right Tools for the Job
You don’t need expensive equipment to collect accurate soil samples, though investing in quality tools makes the job easier and more consistent. For budget-conscious gardeners, a clean garden trowel or spade works perfectly fine. The key is ensuring whatever tool you use is clean and rust-free to avoid contaminating your samples.
If you’re planning to test regularly, a soil probe is worth considering. Basic stainless steel probes start around $15-30 and create uniform samples at consistent depths, which improves accuracy between testing cycles. These simple T-handle or tube-style probes work beautifully for most home lawns and will last years with minimal care.
For larger properties or professional-grade precision, step-probe samplers ($50-150) make collecting multiple cores quick and efficient. These tools feature measurements marked on the shaft and easy soil release mechanisms that speed up the process considerably.
Whatever your budget, also grab a clean plastic bucket for mixing your samples and some labeled plastic bags for storage. Avoid metal containers, as they can skew mineral readings. Many gardeners find that starting simple and upgrading as their testing routine develops works best, letting experience guide future investments in equipment.
Sampling Patterns That Capture Your Lawn’s True Story
Think of your lawn like a patchwork quilt—each section has its own personality. To get an accurate nitrogen reading, you’ll need to sample strategically rather than randomly poking your soil probe around.
For most home lawns under 5,000 square feet, collect 10-15 soil cores using a zigzag pattern. Walk across your lawn in a Z-shape, taking samples at regular intervals. This method captures variation without making you feel like you’re conducting a military operation. Larger lawns benefit from a grid pattern, dividing the space into quadrants and sampling each section separately.
Here’s where it gets interesting: resist the temptation to oversample problem areas. That brown patch near the driveway might be compelling, but mixing too many samples from struggling zones will skew your results toward deficiency. Instead, sample your healthy zones separately from troubled spots. This gives you baseline data for what’s working and targeted information for what needs help.
Aim for 6-8 inches deep with each core, and mix all samples from similar areas together in a clean bucket. This composite approach smooths out minor variations while maintaining the integrity of distinct lawn zones. The result? Test results that actually reflect what’s happening beneath your feet.
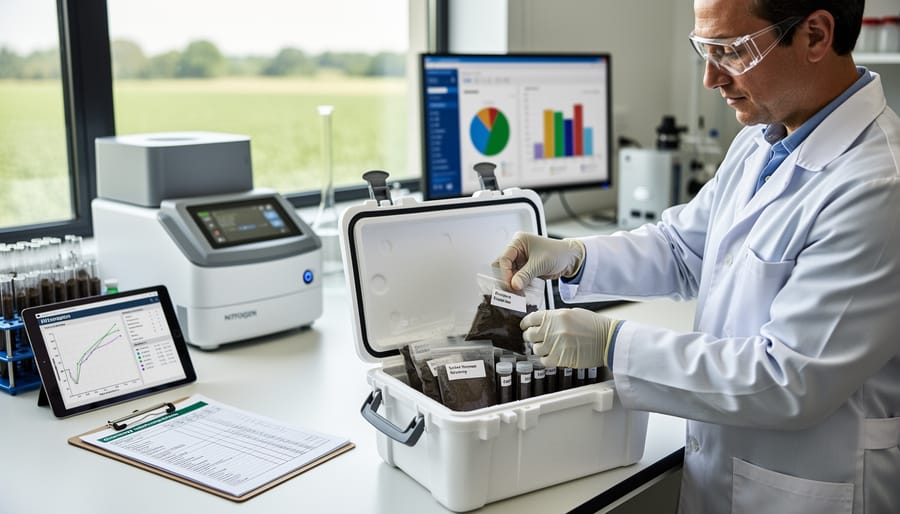
Handling and Storing Samples Before Testing
Time is of the essence once you’ve collected your nitrogen samples. Think of nitrogen as the fresh produce of soil testing – it doesn’t keep well! Here’s how to preserve accuracy: First, keep samples cool immediately after collection. A cooler with ice packs works perfectly if you can’t get to the lab right away. Avoid plastic bags, which trap moisture and create a breeding ground for microbes that quickly convert nitrogen into forms your test won’t detect accurately. Instead, use paper bags or breathable containers that allow air circulation. Your goal is to get samples to the lab within 24 hours, though 48 hours is acceptable if you’ve kept them properly chilled. Room temperature storage is nitrogen’s enemy – leaving samples in a hot car or sunny spot can compromise results in just a few hours. If same-day delivery isn’t possible, refrigerate samples at around 40 degrees Fahrenheit, but never freeze them. This careful handling ensures the nitrogen levels you test reflect what’s actually available to your lawn, not what’s been lost to bacterial activity during storage.
Reading Your Nitrogen Test Results Like a Pro
Understanding the Numbers (And What They Mean for Your Lawn)
When your soil test results arrive, you might feel like you’re deciphering a secret code. Let’s break it down together so you can confidently understand what your lawn is telling you.
Most labs measure nitrogen in parts per million (ppm) or pounds per acre. Here’s the simple conversion: 1 ppm roughly equals 2 pounds per acre in the top 6 inches of soil. So if your test shows 10 ppm of available nitrogen, that translates to about 20 pounds per acre.
Labs typically categorize nitrogen levels as low, medium, or high. Low readings (usually under 10 ppm) mean your lawn is hungry and will respond enthusiastically to nitrogen fertilizer. You’ll likely see that vibrant green-up and faster growth we all love. Medium readings (10-25 ppm) suggest your lawn has adequate nitrogen but might benefit from a maintenance application during the growing season. High readings (above 25 ppm) are your green light to skip the nitrogen fertilizer for now, saving you money and protecting nearby waterways from unnecessary runoff.
Here’s something important to remember: unlike phosphorus and potassium, which stick around in soil for months, nitrogen is a wanderer. It moves through soil quickly, especially after rain or irrigation. That’s why a single test gives you just a snapshot of that particular moment. Your spring test results might look completely different by midsummer.
Think of nitrogen testing as checking your lawn’s current appetite rather than diagnosing a long-term deficiency. This real-time information helps you fertilize precisely when and where needed, promoting a healthier lawn while being a responsible environmental steward.
How Organic Matter Affects Your Nitrogen Picture
Here’s something many gardeners don’t realize: your soil’s organic matter content acts like a nitrogen savings account for your lawn. Soils rich in organic matter naturally release nitrogen as microorganisms break down plant residues, animal manure, and other organic materials. This slow-release process can provide a steady nitrogen supply throughout the growing season.
Generally, soils with 3-5% organic matter contain enough microbial activity to mineralize significant amounts of nitrogen, sometimes enough to reduce your fertilizer needs by 25-50%. That’s why a soil test measuring both nitrogen and organic matter gives you the complete nutritional picture. Sandy soils typically hold less organic matter and require more frequent nitrogen applications, while clay-rich or well-composted soils act as better nutrient reservoirs.
The takeaway? Building organic matter through regular composting, leaving grass clippings on your lawn, and avoiding harsh chemicals creates a more self-sustaining nitrogen cycle. Your soil test results become more meaningful when you understand this connection, helping you fertilize smarter rather than harder.
Red Flags That Suggest You Need a Second Opinion
Sometimes your test results might raise an eyebrow, and that’s when it’s worth seeking expert advice. If your nitrogen levels come back extremely high (over 50 ppm) without recent fertilization, something unusual might be happening in your soil biology or there could be contamination issues. Conversely, if you’re seeing very low readings (under 5 ppm) consistently across multiple tests despite regular organic matter additions, you might have drainage problems or other soil health issues at play.
Watch out for results that fluctuate wildly between tests taken just weeks apart, which could indicate sampling inconsistencies or lab errors. If your lawn looks healthy and green but tests show severe nitrogen deficiency, trust your eyes and retest before making drastic changes. Similarly, if you’re experiencing persistent problems like yellowing grass despite test results showing adequate nitrogen, the real culprit might be pH imbalances, compaction, or other nutrient deficiencies that need professional diagnosis. A local agricultural extension office or certified soil scientist can help interpret puzzling results and recommend appropriate next steps.
Turning Test Results Into a Sustainable Nitrogen Management Plan
Calculating Your Actual Nitrogen Needs
Once you’ve got your test results in hand, it’s time to do a little math—but don’t worry, this is the kind of simple calculation that won’t require dusting off your high school algebra textbook!
The basic formula is: Nitrogen needed (pounds per 1,000 sq ft) = Target nitrogen rate – Current soil nitrogen level. Your soil test report will tell you the existing nitrogen level, usually measured in parts per million or pounds per acre. Most reports include a conversion to pounds per 1,000 square feet, which is what we’re after.
Here’s a practical example: Let’s say you have cool-season grass like Kentucky bluegrass, which typically needs about 3-4 pounds of nitrogen per 1,000 square feet annually. Your soil test shows you currently have 1 pound available. That means you’d need to apply roughly 2-3 pounds throughout the growing season, split into multiple applications for best results.
Warm-season grasses like Bermuda or zoysia have different appetites—usually 2-4 pounds annually, with most needed during active summer growth. If your test shows adequate nitrogen in early spring, you might skip that first application and focus on feeding during peak growing months instead.
Remember, these aren’t all-at-once applications. Dividing your total nitrogen needs into 3-4 smaller feedings prevents waste, reduces environmental runoff, and keeps your lawn happier. A sustainable approach means applying only what your grass actually needs, when it needs it most.
Choosing the Right Nitrogen Sources for Your Situation
Once you’ve interpreted your soil test results, it’s time to match the right nitrogen source to your lawn’s needs. Think of this like choosing between a quick energy drink versus a slow-burning breakfast—both have their place depending on your situation.
Quick-release fertilizers deliver nitrogen rapidly, usually within days. They’re ideal when your test shows severe deficiency and you need fast greening before a special event. However, they require more frequent applications and can leach into groundwater if you overdo it. Slow-release formulas, on the other hand, feed your lawn gradually over weeks or months, reducing application frequency and environmental impact. If your test shows moderate deficiency, slow-release is typically the smarter, more sustainable choice.
The organic versus synthetic debate deserves consideration too. Synthetic fertilizers offer precise nitrogen concentrations that match test recommendations exactly—helpful when you need specific amounts. But organic nitrogen sources like compost, blood meal, or grass clippings build soil health while feeding your lawn. They release nutrients slowly and improve soil structure over time, though their nitrogen content varies.
Here’s my practical advice: if your test shows mild deficiency and you’re focused on sustainability, go organic. For moderate to severe deficiency with specific nitrogen targets, consider a slow-release synthetic or blend both approaches. Your soil test results should guide the amount, but your environmental values and maintenance preferences help determine the source.
Beyond the Lab: Observing Your Lawn’s Real-Time Nitrogen Status
While soil tests provide the scientific foundation for your lawn care decisions, your own observations between testing cycles offer valuable real-time feedback about your lawn’s nitrogen status. Think of yourself as a lawn detective, gathering clues that tell the story of what’s happening beneath the surface.
The most obvious indicator is grass color. Healthy, well-nourished lawns display a rich, deep green color. When nitrogen becomes limiting, you’ll notice a gradual shift toward pale green or yellowish hues, typically starting with older blades at the base of the plant. This happens because nitrogen is mobile within the grass plant, moving from older tissue to support new growth. Pay attention to these nitrogen deficiency symptoms early, as they’re your lawn’s way of asking for help.
Growth patterns tell another important story. A nitrogen-deficient lawn grows slowly and appears sparse, with thin blades and poor density. When you mow, you’ll notice significantly fewer clippings than usual. In contrast, a lawn receiving adequate nitrogen produces vigorous growth and abundant clippings. If your mowing frequency drops or your clipping volume suddenly decreases without explanation, nitrogen shortage might be the culprit.
Consider keeping a simple lawn journal noting mowing frequency, clipping volume, and color observations. This practice creates a baseline for comparison and helps you recognize patterns across seasons. Environmental factors like temperature, rainfall, and stress from heat or disease can influence these visual cues, so combine your observations with periodic soil testing for the complete picture. This holistic approach empowers you to make timely adjustments while maintaining sustainable fertilization practices that protect both your lawn and the environment.
Common Nitrogen Testing Mistakes (And How to Avoid Them)
Even experienced gardeners sometimes stumble when testing nitrogen levels, but these common pitfalls are easy to avoid once you know what to watch for.
One of the biggest mistakes is testing immediately after fertilizing. I learned this the hard way when my first test showed sky-high nitrogen readings that didn’t match my lawn’s yellowing appearance. The lesson? Wait at least 3-4 weeks after any fertilizer application to get accurate baseline readings. Think of it like checking your bank balance right after payday versus mid-month – timing matters.
Using dirty or contaminated tools is another sneaky culprit. That trowel you just used to spread compost? It can throw off your results significantly. Always clean your sampling tools with water and let them dry completely between uses. Better yet, keep a dedicated set of tools just for soil testing. This small step prevents cross-contamination and ensures your results reflect what’s actually happening in your soil.
Mixing samples from drastically different areas is tempting when you’re trying to save time, but it gives you a muddy picture of your lawn’s needs. That shady patch under your oak tree has very different nitrogen dynamics than your sunny front yard. Test them separately for the most accurate, actionable results.
Finally, misreading recommendations trips up many folks. When your test suggests “20 pounds of nitrogen per acre,” don’t assume that’s what you need right now. Factor in your grass type, season, and growth goals. A cool-season lawn in early spring has different requirements than the same lawn in midsummer. Take time to understand the context behind the numbers, and don’t hesitate to reach out to your local extension office if you’re unsure. This sustainable approach prevents over-application and protects both your lawn and the environment.
Nitrogen soil testing isn’t a magic bullet, but it’s definitely a powerful ally in your quest for a healthier, greener lawn. Think of it as one essential tool in your complete turf nutrition toolkit, working best when combined with good old-fashioned observation and sustainable lawn care practices. After all, no test can replace the insights you gain from regularly walking your lawn, noticing patterns, and understanding how your grass responds to different conditions throughout the seasons.
The real beauty of nitrogen testing is that it empowers you to make targeted, informed decisions rather than guessing or following a one-size-fits-all approach. By understanding your soil’s actual nitrogen status, you can avoid the twin pitfalls of under-feeding (which leaves your lawn struggling) and over-feeding (which wastes money and harms the environment through nutrient runoff). This precision approach means you’re applying fertilizer only when and where it’s truly needed, which is better for your wallet, your lawn, and local waterways.
Remember that sustainable lawn care is about working with nature, not against it. Combine your testing data with practices like grasscycling, proper mowing height, and encouraging beneficial soil microbes. Pay attention to what your lawn tells you through its color, growth patterns, and overall vigor.
You’ve got this. Armed with knowledge from nitrogen testing and a commitment to thoughtful, environmentally conscious practices, you’re well-equipped to create the lawn you’ve always wanted while being a responsible steward of your little piece of the planet.