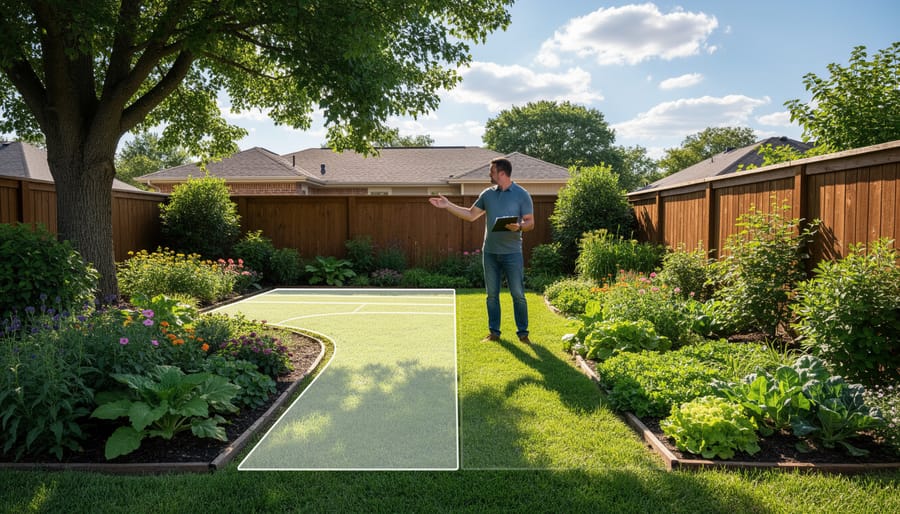
Map your garden space on graph paper with a 1:1 foot scale, marking sunlight patterns throughout the day to identify full sun (6+ hours), partial shade (3-6 hours), and full shade zones. Start with anchor plants—your tallest vegetables, shrubs, or ornamental grasses—positioning them on the north side so they won’t shade smaller companions, then build outward using the proven “thriller, filler, spiller” principle that landscape designers rely on for balanced, visually appealing beds.
Create planting zones based on water and maintenance needs rather than aesthetics alone. Group thirsty tomatoes, cucumbers, and lettuce together where you can efficiently water them, while drought-tolerant herbs like rosemary, thyme, and lavender occupy drier areas that complement your lawn’s natural moisture patterns. This zoning approach cuts water waste by up to 40% and dramatically reduces the time you spend dragging hoses across your yard.
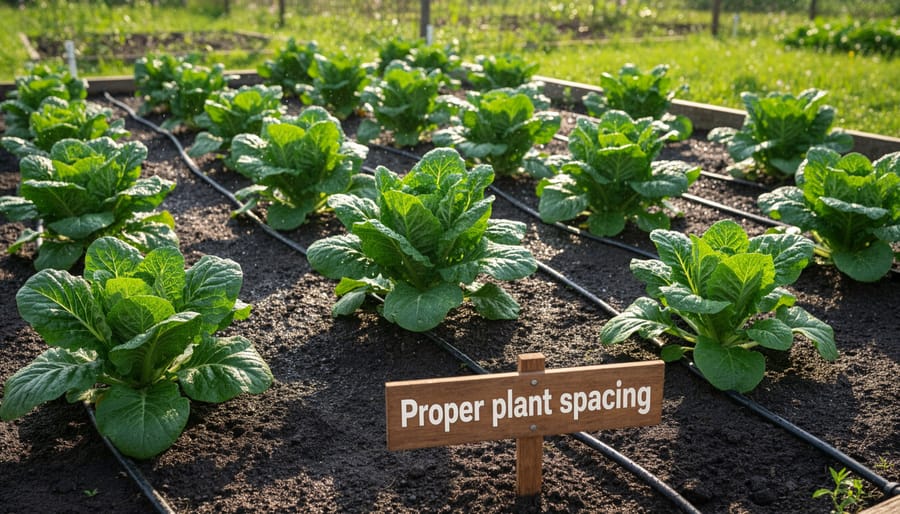
Space plants according to their mature width, not their nursery pot size—overcrowding invites disease, blocks airflow, and creates maintenance headaches within months. A general rule: allow 18-24 inches between most vegetables, 24-36 inches for sprawling crops like squash, and follow the specific spacing on perennial tags since these investments will occupy the same spot for years.
Design pathways wide enough for your actual needs—30 inches minimum for comfortable walking and wheelbarrow access, 48 inches if you need mower clearance between beds. Well-planned circulation prevents soil compaction, protects plant roots, and transforms garden maintenance from frustrating obstacle courses into enjoyable routines that keep both your beds and surrounding lawn looking intentional and cared for.
Understanding Your Yard’s Unique Canvas
Reading Your Sun and Shade Patterns
Understanding your garden’s light conditions is absolutely foundational to successful planting, yet it’s something many gardeners overlook in their excitement to get plants in the ground. Start by tracking sunlight patterns in your planned garden areas throughout a single day—ideally during the growing season when the sun is highest. Visit your space at 9 AM, noon, 3 PM, and 6 PM, noting which areas receive direct sun, dappled shade, or full shade.
Remember that sunlight shifts dramatically with seasons. That sunny spot in July might be shaded by deciduous trees in spring, affecting early bloomers and vegetables. Take photos from the same vantage points to compare seasonal changes.
Use this information to orient your beds wisely. In northern climates, south-facing beds capture maximum sunlight for sun-loving vegetables, while east-facing spots work beautifully for plants preferring morning sun and afternoon relief. This strategic approach not only ensures healthier plants but reduces water needs and maintenance—a win for sustainability. Shade areas aren’t wasted space either; they’re perfect for creating low-maintenance groundcover zones that reduce mowing needs while supporting woodland natives.
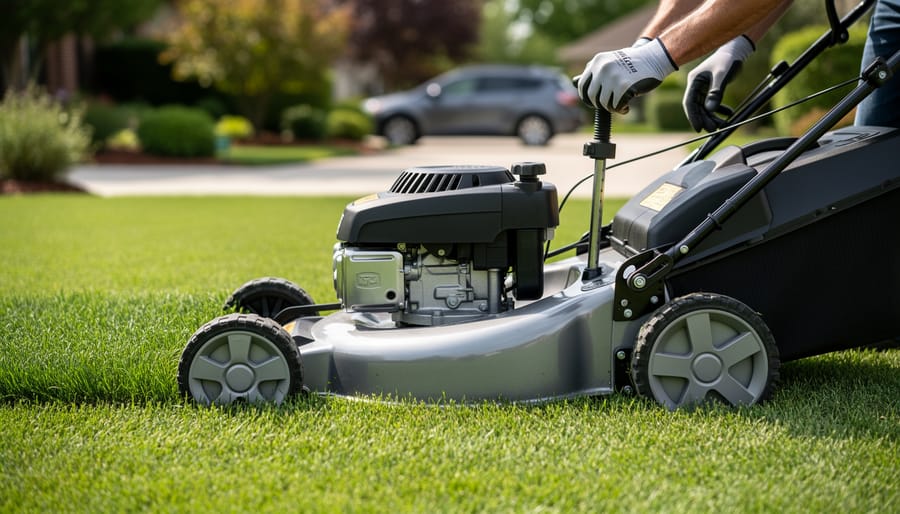
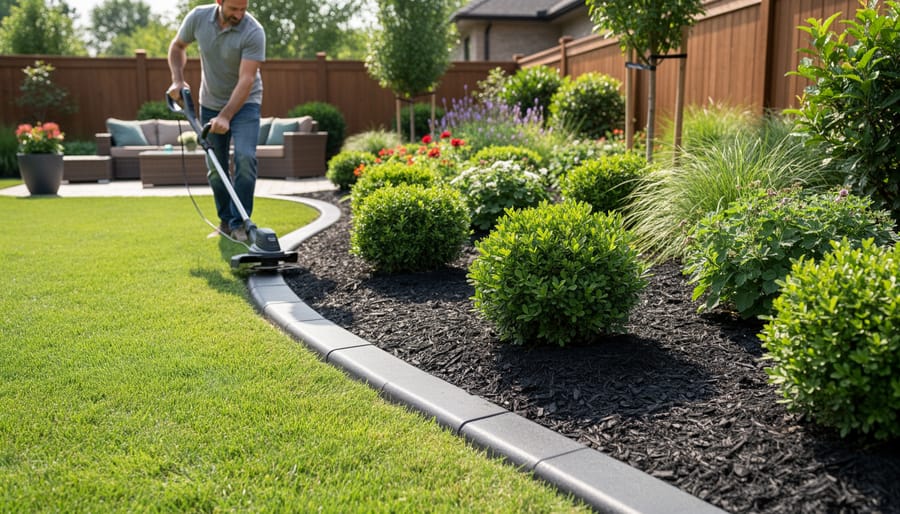
The Mowing-Garden Interface
Here’s a secret that’ll save you hours of frustration: the best garden beds are designed with your mower in mind from day one. I learned this the hard way after spending countless weekends wrestling my mower around wavy bed edges and tight corners that seemed charming on paper but became maintenance nightmares in reality.
The key is creating what I call “mower-friendly curves.” Instead of tight, intricate edges, aim for gentle, sweeping arcs with a minimum radius of about three feet. This allows your mower to follow the bed line smoothly in one pass, eliminating the need for excessive trimming afterward. Think of it like designing roads: gradual curves are easier to navigate than sharp turns.
Strategic placement makes a tremendous difference too. Position beds away from obstacles like trees, fences, and structures by at least two mower-widths. This gives you a comfortable buffer zone and prevents those awkward spots where you’re forced to use a trimmer because the mower simply won’t fit.
Consider installing a mowing strip between your lawn and garden beds. A four to six-inch border of flat pavers, bricks, or metal edging creates a physical barrier that catches one wheel of your mower, letting you trim the edge while mowing rather than making a separate pass with hand tools. It’s a game-changer for efficiency and creates wonderfully crisp lines.
For beds bordering pathways or hardscaping, keep plantings slightly recessed so foliage doesn’t spill onto mowing surfaces. This sustainable approach reduces the need for chemical edging treatments and minimizes plant damage from equipment contact.
Foundation Garden Layout Patterns That Stand the Test of Time
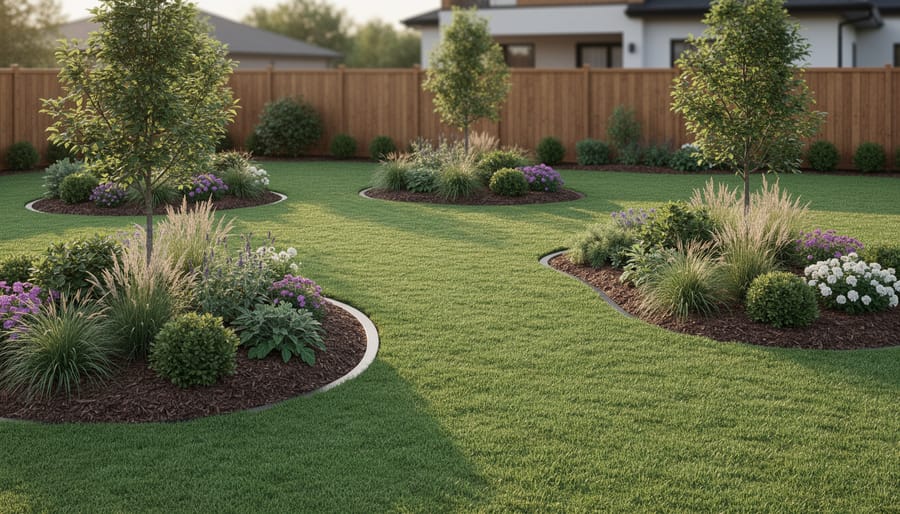
Island Beds: The Lawn-Friendly Option
Island beds are wonderful free-standing features that bring visual interest to your lawn while keeping maintenance practical. Unlike traditional border plantings that hug walls or fences, these beds rise like sculptural elements from your grass, creating natural focal points that draw the eye from multiple angles.
The beauty of island beds lies in their versatility. You can create kidney-shaped curves for a flowing, naturalistic feel, or opt for crisp ovals and circles for more formal gardens. Whatever shape you choose, keep proportions in mind. A good rule of thumb is making beds at least 5-6 feet wide at their broadest point. Anything narrower looks a bit lost in open lawn and limits your planting options.
Here’s where mowing ease comes into play. Design smooth, gentle curves rather than fussy indentations. Your mower will thank you, and you’ll save time on trimming. Consider installing a mowing strip—a flat border of stones or pavers set flush with the grass—around the bed’s perimeter. This sustainable solution reduces string trimming needs and creates clean edges without chemical edging products.
Plant height follows a simple guideline for island beds: tallest plants in the center, graduating down toward the edges. This creates a pleasing mounded effect visible from all sides. However, don’t take this too literally. Varying heights slightly throughout adds natural movement and prevents the “birthday cake” look.
Since these beds are surrounded by lawn, remember that grass competition for nutrients and water is real. Mulch generously and provide adequate spacing between your outermost plants and the lawn edge.
Border and Foundation Plantings
Border and foundation plantings create the frame for your entire landscape, so getting them right really matters. Think of these beds as the transition zone between your carefully maintained lawn and the vertical elements of your property—fences, walls, and your home itself.
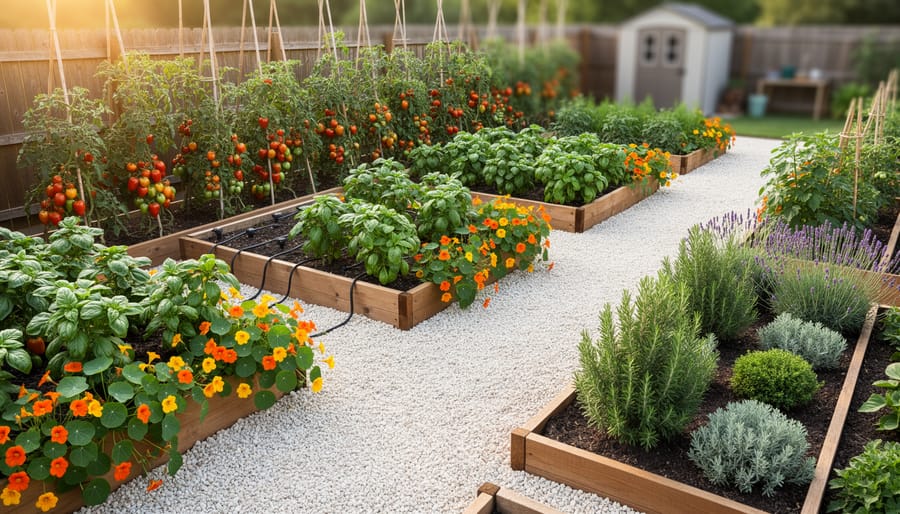
The key to successful border plantings is proper depth. A common mistake I see is beds that are too shallow, leaving plants looking squeezed and awkward. Aim for a minimum depth of 3 to 4 feet for most perimeter beds, though 5 to 6 feet works even better if space allows. This gives you room to layer plants effectively and creates visual depth.
Layering is your secret weapon here. Place taller plants toward the back, mid-height selections in the middle, and low growers at the front edge. This tiered approach ensures everything gets noticed and receives adequate sunlight. For foundation plantings specifically, keep mature plant heights in mind—you don’t want shrubs eventually blocking windows or growing into eaves.
Now, here’s something crucial: foundation plantings present unique challenges with drainage issues. The soil near your house foundation often compacts easily and may not drain well. Always ensure beds slope gently away from your foundation, and consider incorporating organic matter to improve soil structure. Native plants often perform beautifully in these situations since they’re adapted to local conditions and typically require less water once established—a win for sustainability and your water bill.
Formal vs. Naturalistic Layouts
Choosing between formal and naturalistic layouts is a bit like deciding between a tailored suit and your favorite comfy sweater—both have their place, and the right choice depends on your lifestyle and what makes you happy when you look outside.
Formal layouts feature geometric precision: think straight lines, symmetrical beds, repeated patterns, and crisp edges. These designs work beautifully with traditional, colonial, or classical architecture. They create visual order and can make smaller spaces feel more organized. However, they do require more maintenance commitment. Keeping those edges sharp and maintaining symmetry means regular trimming, edging, and more frequent mowing sessions around structured beds.
Naturalistic layouts embrace curves, flowing borders, and asymmetrical groupings that mimic nature’s randomness. These designs complement cottage-style homes, ranch houses, and contemporary architecture equally well. From a sustainability perspective, naturalistic layouts shine—they typically require less intensive maintenance, allow for more diverse plant communities, and create better habitat for beneficial insects and pollinators. The informal edges are more forgiving, meaning you can let things grow a bit wilder between maintenance sessions without losing the intended look.
Consider your honest assessment of maintenance capacity. If you love spending weekend mornings perfecting every detail, formal layouts can be deeply satisfying. If you prefer a more relaxed approach that still looks intentional, naturalistic designs offer beauty without demanding precision.
Many gardeners find success blending both approaches—perhaps formal beds near the house transitioning to naturalistic plantings toward the property’s edges. This creates visual interest while balancing maintenance demands practically.
The Science of Spacing and Plant Placement
The Height Hierarchy Principle
Think of your garden bed like theater seating—everyone deserves a view! The height hierarchy principle is simple yet transformative: arrange your tallest plants at the back (or center, if viewing from all sides), medium-height selections in the middle, and low growers at the front.
For a typical border garden against a fence or wall, position plants over 4 feet tall (like delphiniums, sunflowers, or ornamental grasses) at the rear. Your middle tier should feature plants ranging from 18-36 inches, such as coneflowers, salvias, or daylilies. Finally, place ground-hugging beauties under 12 inches—like creeping thyme, alyssum, or sedums—along the front edge.
This layering accomplishes two essential goals: it prevents your shorter plants from being shaded out by taller neighbors, and it creates that visually pleasing cascading effect that makes gardens feel professionally designed. I learned this lesson the hard way when my first vegetable garden placed tomatoes in front of lettuce—the poor greens never had a chance!
For island beds viewable from multiple angles, work from the tallest plants in the center outward. Leave roughly 12-18 inches between plants initially; they’ll fill in as they mature. This approach maximizes sunlight exposure for every plant while creating natural visual interest that guides the eye through your landscape.
Spacing for Mature Growth (Not Nursery Size)
Here’s the thing most gardeners get wrong: they plant based on how big the plants are at purchase, not how large they’ll actually become. That adorable six-inch perennial? It might spread three feet wide in just two seasons. Those gaps you leave today might feel wasteful, but they’re essential for healthy, sustainable growth.
Start by researching your plants’ mature sizes—both height and spread—and use those dimensions for spacing calculations. When measuring your beds, account for each plant’s full width, adding a few extra inches for air circulation. This prevents overcrowding, reduces disease pressure, and minimizes the need for transplanting later.
I know those empty spaces can feel discouraging at first. Here’s where sustainable filler strategies come in handy. Plant quick-growing annuals between perennials during establishment years—marigolds, zinnias, or nasturtiums work beautifully and attract beneficial pollinators. You can also use low-growing groundcovers that won’t compete aggressively, or apply organic mulch to suppress weeds while maintaining soil moisture.
Another approach? Plant in layers using the “thirds rule”: place your plants at one-third to one-half their mature spacing initially, then transplant or share extras as they fill in. This creates fuller-looking beds sooner while still respecting long-term growth needs, and you’ll have plants to share with fellow gardeners.
Companion Planting Within Your Layout
Strategic plant partnerships can transform your garden layout from a collection of individual plants into a thriving ecosystem. When planning your beds, consider placing tomatoes alongside basil to naturally deter pests, or interplanting carrots with onions to confuse carrot flies. Tall sunflowers or corn can support climbing beans while the beans fix nitrogen in the soil, benefiting all nearby plants. Marigolds scattered throughout vegetable beds add cheerful color while repelling aphids and nematodes. The classic “Three Sisters” combination of corn, beans, and squash demonstrates how companion planting creates mutual benefits—the squash’s broad leaves suppress weeds and retain moisture, reducing your maintenance workload. As you sketch your layout, group compatible plants together rather than segregating by type alone. This thoughtful integration mimics natural plant communities, creating healthier soil, reducing your need for chemical interventions, and making your garden more resilient overall.
Creating Beds That Work With Your Maintenance Style
Low-Maintenance Layout Strategies
Smart garden planning isn’t just about what looks beautiful today—it’s about creating spaces that practically care for themselves. I’ve seen countless gardeners start with ambitious plans, only to feel overwhelmed by constant weeding, daily watering marathons, and gaps where annuals have faded. Let’s talk about design strategies that actually work with your schedule, not against it.
Start with ground covers as your secret weapon. Instead of leaving bare soil between larger plants (which weeds see as an open invitation), fill those gaps with low-growing spreaders like creeping thyme, ajuga, or sweet woodruff. These living mulches suppress weeds naturally while reducing water evaporation from the soil. Plant them about 8-12 inches apart, and they’ll knit together within a season.
Proper bed edging makes a world of difference. Install a physical barrier at least 4-6 inches deep between your lawn and garden beds to prevent grass from creeping in. Metal edging, commercial plastic barriers, or even a maintained trench work beautifully. This simple step can cut your edging time by 80 percent compared to beds without definition.
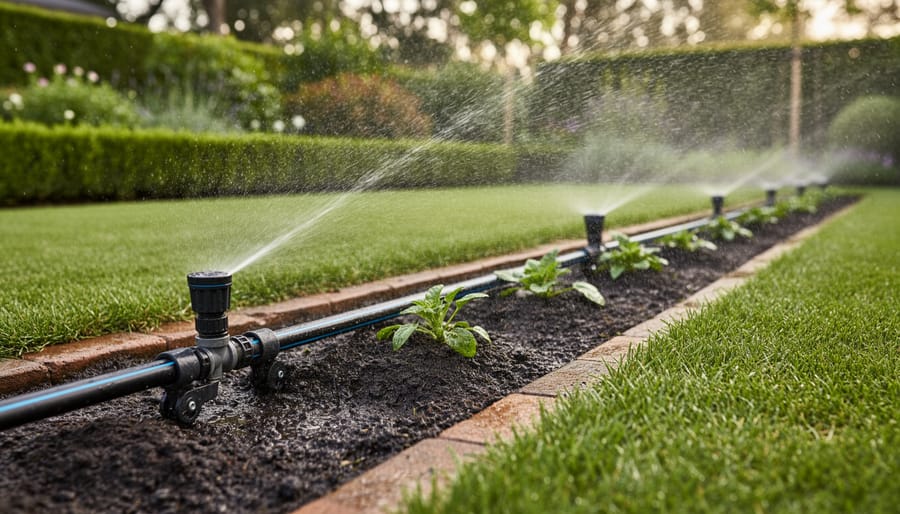
Group plants by water needs—drought-tolerant varieties together, moisture-lovers in another section. This zoning prevents overwatering some plants while underwatering others. Consider installing soaker hoses or drip irrigation under mulch for hands-off watering.
Finally, embrace perennials over annuals wherever possible. While annuals offer explosive color, perennials return year after year, requiring only occasional division. A well-designed perennial bed might need replanting every 3-5 years rather than every spring, giving you weekends back for actually enjoying your garden.
Equipment Access and Storage Considerations
A garden layout that looks beautiful on paper can quickly become frustrating if you haven’t thought through the practical side of maintaining it. Trust me, I learned this the hard way when I planted a gorgeous perennial bed that looked perfect until I realized my wheelbarrow couldn’t actually reach it without trampling other plants!
Start by mapping pathways that are at least 24 inches wide for comfortable wheelbarrow access. These don’t need to be elaborate—simple mulched paths work wonderfully and add visual structure to your beds. Position your main routes to connect high-traffic areas: from your tool shed to garden beds, from compost bins to planting areas, and around the perimeter of larger beds for easy harvesting and maintenance.
Water access deserves careful consideration too. Before finalizing your layout, check if your hose can reach every corner of your planned beds without stretching or requiring multiple connections. If not, consider adding a secondary water source or positioning thirsty plants closer to existing spigots. This simple planning step will save you countless headaches during hot summer months.
Speaking of compost, integrate your composting area into your design from the start rather than tucking it away as an afterthought. Position bins within reasonable distance of your beds but not so close that they interfere with planting. Before digging anywhere for permanent structures or pathways, always check for underground utilities to avoid costly mistakes.
A well-planned layout considers both the plants and the gardener who tends them, creating a sustainable system that’s actually enjoyable to maintain.
Seasonal Planning and Year-Round Interest
Layering Bloom Times
Creating a garden that offers visual interest throughout the growing season is one of the most rewarding aspects of thoughtful planning. The secret lies in selecting plants with staggered bloom times and arranging them strategically within your layout.
Start by mapping out your garden into three visual layers: front, middle, and back. In each layer, incorporate plants that peak at different times. For spring, position early bloomers like crocuses and daffodils in clusters near the front where they’ll announce the season’s arrival. As these fade, early summer perennials like salvia and coreopsis take center stage in the middle layer.
Here’s a practical approach I’ve found works beautifully: divide your garden bed into seasonal zones, dedicating roughly one-third of your space to spring bloomers, one-third to summer stars, and one-third to fall favorites like asters and sedums. This ensures you’ll always have something in bloom.
Succession planting works particularly well with annuals. After your spring pansies finish, replant those same spots with heat-loving zinnias or marigolds. This approach maximizes your garden’s productivity and keeps bare spots to a minimum.
Consider foliage too—plants with interesting leaves bridge the gaps between bloom times and provide structure year-round. Hostas, ornamental grasses, and artemisia offer texture even when flowers aren’t stealing the show, creating a sustainable garden that requires less replacement and resources.
Winter Structure and Wildlife Support
A truly sustainable garden layout thinks beyond the growing season to support wildlife when they need it most. When planning your beds, designate spaces for plants that offer winter structure and food sources—these hardworking additions benefit both your landscape’s appearance and the ecosystem.
Evergreens like boxwood, holly, and dwarf conifers provide year-round bones to your design while offering shelter for overwintering insects and nesting sites for birds. Position them as anchor plants in your layout, typically at corners or intervals along borders to create visual continuity.
Ornamental grasses deserve prime real estate in winter gardens. Varieties like switchgrass, little bluestem, and feather reed grass look spectacular rimmed with frost and provide seeds that sustain songbirds through cold months. Their upright forms also add movement and texture when most perennials have died back.
Here’s a practical tip: resist the urge to deadhead everything in fall. Coneflowers, black-eyed Susans, and sedums produce seed heads that goldfinches and chickadees actively seek out. Include clusters of these in sunny sections of your layout for maximum wildlife benefit. This approach requires minimal effort—essentially doing less work—while creating a garden that gives back throughout winter.
Common Layout Mistakes (And How to Fix Them)
Overcrowding and Undersizing Beds
We’ve all been there—what started as a carefully planned garden bed has turned into a leafy jungle where plants compete for light, water, and breathing room. Overcrowding is one of the most common layout mistakes, and it happens gradually as plants mature beyond their anticipated size.
Start recognizing the warning signs: plants leaning awkwardly toward sunlight, yellowing lower leaves from poor air circulation, or that telltale dampness that invites fungal diseases. If you can’t comfortably reach into your bed for maintenance without damaging foliage, it’s time to reassess.
The sustainable solution isn’t starting over—it’s strategic restructuring. Begin by identifying which plants have outgrown their allotted space. Perennials like hostas, daylilies, and ornamental grasses often benefit from division every three to five years anyway. This process rejuvenates the plants while giving you extras to expand your bed or share with neighbors.
When expanding beds, consider your mowing patterns and maintenance access. Adding 12-18 inches to bed width can dramatically improve plant health without creating maintenance headaches. Use natural mulch to define new boundaries while suppressing weeds sustainably.
Timing matters for relocation—spring and fall offer the best conditions for transplanting, when plants aren’t stressed by extreme heat. Always dig generous root balls and water thoroughly after moving. Sometimes the kindest thing you can do for an overcrowded garden is give your plants the space they truly need to thrive.
Ignoring Access and Flow
We’ve all been there—you plant an ambitious garden bed only to realize you can’t actually reach the plants in the back without trampling everything in front. I learned this lesson the hard way when I created a beautiful perennial border that became completely inaccessible after the first growing season.
The golden rule is simple: you should be able to reach any plant without stepping into the bed. For borders against fences or walls, keep plantings within 2-3 feet of the edge. For island beds accessible from all sides, ensure no plant sits more than 2 feet from a path. If you’ve already planted beds that are too deep, don’t despair. Adding stepping stones strategically through the bed creates access points without a complete redesign.
Pathways deserve equal consideration in your planning. They’re not just decorative—they’re essential for maintenance, harvesting, and simply enjoying your space. Aim for main pathways at least 3 feet wide to accommodate wheelbarrows and comfortable passage. Secondary paths between beds can be narrower, around 18-24 inches.
If you’re retrofitting paths into an existing layout, consider sustainable materials like wood chips, gravel, or even clover groundcover between beds. These options improve functionality while maintaining the natural aesthetic most gardeners prefer. Remember, a beautiful garden you can’t maintain easily becomes a frustrating chore rather than a joy.
Here’s the truth about garden planting layouts: you don’t need to transform your entire yard this weekend. Start with one well-planned bed and really give it your attention. Choose a manageable space, apply the layout principles we’ve discussed, and learn what works in your specific conditions. There’s something incredibly satisfying about mastering a small area before expanding your vision.
Remember that the best gardens are living projects that evolve with the seasons and with your growing experience. That first layout you create isn’t set in stone. As you observe how plants perform, where water pools after rain, and which areas get more sun than expected, you’ll naturally adjust and refine your design. This is part of the process, not a failure in planning.
The sustainable approach means working with your landscape rather than against it. Pay attention to your soil, choose plants suited to your climate, and design layouts that reduce water waste and maintenance demands. These practical considerations will serve you far better than any trendy design that doesn’t match your reality.
Every experienced gardener started exactly where you are now, layout plan in hand, wondering if they’re doing it right. The answer is yes, you are. Take that first step, plant that first bed, and trust the learning process.