Walk the perimeter of your yard during a heavy rainstorm and mark every spot where water pools, flows toward your foundation, or creates muddy channels across your lawn. These problem areas reveal exactly where you need to focus your grading and drainage efforts, saving you from unnecessary work and expense.
Understanding how water moves across your property is the foundation of effective yard management. Poor drainage doesn’t just create unsightly puddles; it drowns grass roots, attracts mosquitoes, damages foundations, and turns your lawn into a muddy mess. The good news? Most drainage issues stem from simple grading problems you can identify and often fix yourself with the right knowledge and approach.
Proper grading means shaping your yard so water flows away from structures and problem areas at a slope of at least two percent (dropping two inches for every ten feet). Combine this with strategic drainage solutions like French drains, dry creek beds, or rain gardens, and you create a system that works with nature rather than fighting it.
The key is developing a comprehensive plan before you start moving soil or installing pipes. Assess your entire property as a connected system, considering where water enters, how it travels, and where it should exit. Some projects require nothing more than a weekend, a rake, and quality topsoil. Others demand professional excavation equipment and expertise. Knowing the difference protects both your investment and your back.
This guide walks you through identifying drainage problems, understanding grading principles, evaluating your options, and creating a sustainable solution that keeps your lawn healthy and your property protected for years to come.
What Grading and Drainage Actually Mean for Your Yard
If you’ve noticed puddles that linger for days after a rainstorm or water creeping toward your foundation, you’re dealing with grading and drainage issues. Let me break down what these terms actually mean in plain language.
Grading refers to the slope and elevation of your land. Think of it as the contour or shape of your yard’s surface. Proper grading means your soil slopes gently away from your home and other structures, typically at a grade of about 2-3% (that’s roughly 2-3 inches of drop for every 10 feet of distance). This might sound technical, but picture it like a very subtle hill that guides water where you want it to go.
Drainage is all about how water moves across and through your property. It encompasses everything from surface runoff flowing across your lawn to water percolating through the soil. Good drainage ensures water doesn’t pool in unwanted areas or, worse, seep into your basement or crawl space.
Here’s the key: grading and drainage work as a team. The grading creates the path, and drainage is the journey water takes along that path. When they’re working in harmony, rainwater flows smoothly away from vulnerable areas, your grass stays healthy instead of waterlogged, and you avoid costly water damage to your home’s foundation.
Why should you care beyond just avoiding soggy spots? Poor grading and drainage can create breeding grounds for mosquitoes, promote fungal diseases in your lawn, kill plants that can’t tolerate wet conditions, and even compromise your home’s structural integrity over time. On the flip side, a well-planned system supports healthier soil, reduces erosion, and creates opportunities for sustainable water management practices like rain gardens that benefit both your yard and the broader environment.
Signs Your Yard Has Grading or Drainage Problems
Standing Water and Soggy Patches
The telltale signs of drainage problems are often right under your feet—literally! Start by taking a walk around your yard after a good rain. Look for areas where water collects in puddles that persist for more than 24 hours. These low spots prevent grass roots from getting oxygen and create perfect breeding grounds for mosquitoes.
Pay attention to sections of lawn that feel perpetually squishy when you walk on them, even days after rainfall. These soggy patches often develop a different appearance—the grass may look darker, grow more slowly, or give way to moss and weeds that thrive in wet conditions. You might notice muddy areas that never quite firm up, especially near downspouts, along fence lines, or at the base of slopes.
Don’t forget to check less obvious spots like the edges of patios, driveway borders, and foundation perimeters. Morning dew can also reveal problem areas—if certain sections stay wet while surrounding grass dries quickly, you’ve likely found a drainage issue worth addressing.
Foundation and Structural Warning Signs
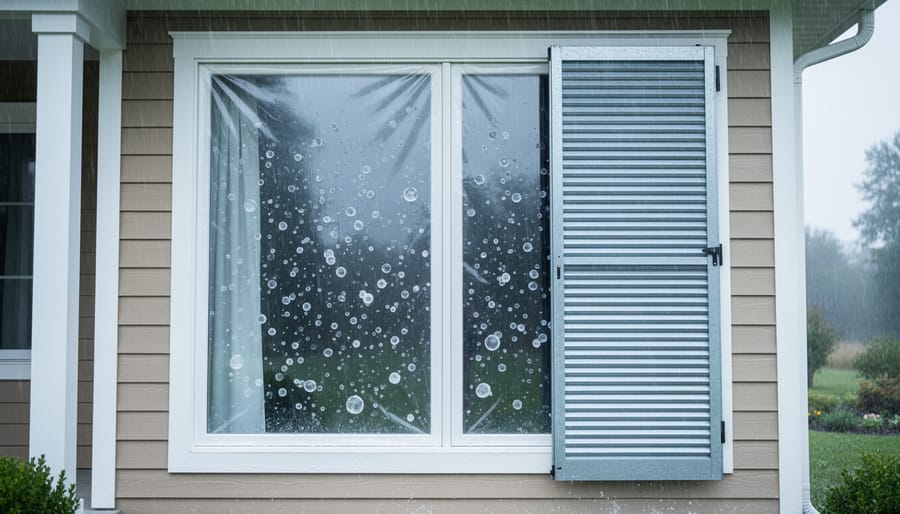
Your foundation is literally the bedrock of your home, and improper grading can put it at serious risk. If you notice damp spots or puddles in your basement after heavy rain, that’s often your first clue that water is flowing toward your foundation instead of away from it. Check your basement walls carefully for vertical or horizontal cracks, especially near corners and windows. While hairline cracks are sometimes normal settling, wider cracks or those that grow over time signal water pressure building up against your foundation.
Water stains are another telltale sign. Look for discolored streaks on foundation walls, both inside and outside your home. These brownish or whitish marks show where water has repeatedly pooled and seeped through. You might also notice efflorescence, that chalky white residue that appears when water evaporates and leaves minerals behind. Don’t ignore musty odors either—they indicate moisture problems that proper grading could prevent. Catching these warning signs early protects your home investment and creates a healthier environment for both your family and your garden.
Lawn Health Indicators
Your lawn often speaks louder than words when drainage problems exist. Brown or yellow patches that persist despite proper watering and fertilization frequently signal waterlogged soil beneath the surface. These soggy conditions suffocate grass roots, preventing them from absorbing the oxygen they need to thrive.
Keep an eye out for fungal issues too. Mushrooms popping up after rain, slimy patches, or grass blades covered in powdery substances all indicate excessive moisture lingering where it shouldn’t. Fungi love consistently damp environments, and poor drainage creates the perfect breeding ground.
You might also notice your grass simply dying in low-lying areas or spots where water tends to collect. If reseeding these areas doesn’t help, the problem isn’t the grass variety—it’s what’s happening below ground. Standing water, even for just a day or two after rainfall, stresses grass to its breaking point. These visible symptoms are your lawn’s way of asking for better drainage, and addressing grading issues now can prevent more extensive damage down the road while supporting a healthier, more sustainable lawn ecosystem.
Erosion and Runoff Issues
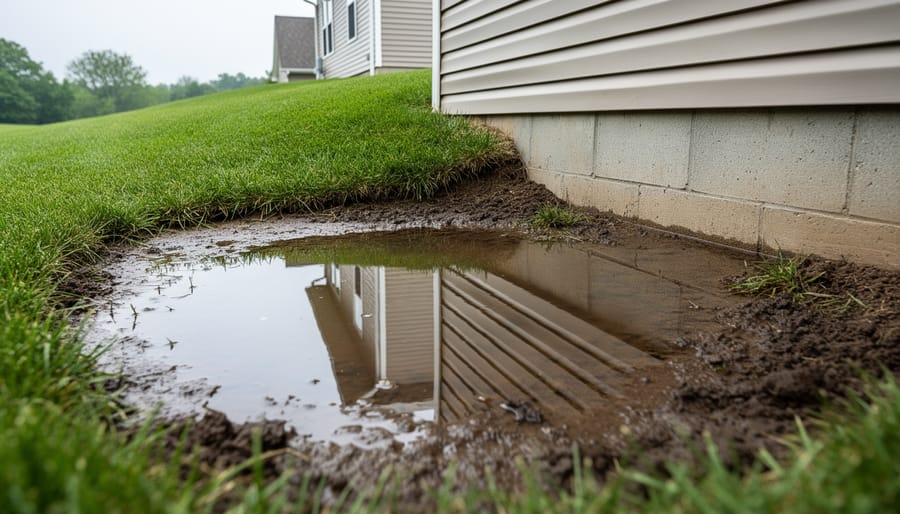
Walk your yard after a good rain to spot trouble signs. Look for bare patches where soil has washed away, small channels or gullies forming in your lawn, and pooling water near your foundation. If you notice water flowing toward your house instead of away from it, you’ve got a grading problem that needs attention. Muddy runoff staining driveways or patios also signals erosion issues. These warning signs mean your yard isn’t properly directing water, which can damage your foundation, kill grass, and wash away precious topsoil you’ve worked hard to build.
The Fundamentals of Proper Yard Grading
The Essential Slope: What You Need to Know
Here’s the thing about proper yard drainage: it all comes down to getting that slope just right. The magic number you’ll want to remember is 2%. That means your yard should drop about 2 feet in elevation for every 100 feet of distance away from your home’s foundation. If math isn’t your strong suit, don’t worry—think of it as a gentle, almost imperceptible grade that you’d barely notice when walking across your lawn.
Why does this specific slope matter so much? Water is lazy—it always takes the path of least resistance. With a 2% grade, you’re creating a gentle highway that encourages water to flow away from your house and garden beds at a steady, controlled pace. Too steep, and you’ll get erosion problems that wash away precious topsoil and nutrients. Too flat, and water sits there like an unwelcome guest, creating puddles, drowning grass roots, and inviting mosquitoes to set up camp.
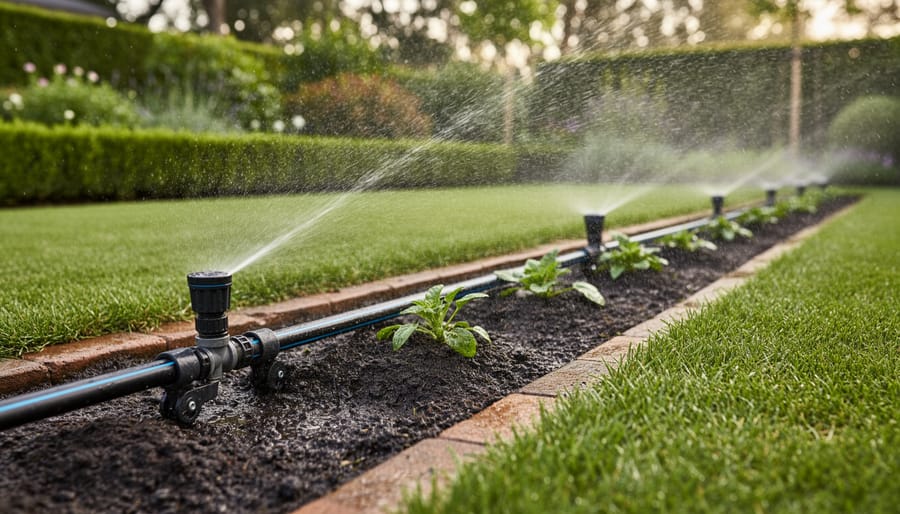
This principle applies whether you’re dealing with rainfall runoff or irrigation water. Getting your slope right is the foundation of sustainable lawn care—it protects your soil structure, prevents water waste, and keeps your grass healthy without requiring excessive intervention or chemical treatments down the road.
Grading Around Your Foundation
The area immediately surrounding your home’s foundation deserves special attention when planning your grading strategy. This critical zone, typically the first 10 feet from your foundation walls, acts as your home’s primary defense against water damage and foundation issues.
Here’s what you need to establish in this zone: aim for a minimum slope of 6 inches of drop over the first 10 feet moving away from your foundation. This translates to about a 5% grade, which is enough to move water efficiently without causing erosion. If you have heavy clay soil that drains slowly, you might even want to increase this slightly.
As you regrade around your foundation, pay particular attention to areas where concrete walkways, patios, or driveways meet your home. These transition zones can create water traps if not properly addressed. The ground level should always slope away from the foundation, even if it means the soil sits slightly below adjacent hardscaping.
Don’t forget to account for your existing landscaping in this zone. While it’s tempting to pile mulch against your foundation for aesthetic reasons, maintaining that proper slope is more important. Keep mulch and soil at least 6 inches below any wood siding or trim to prevent moisture damage and create a clear drainage path that protects your home’s structural integrity.
Working With Your Yard’s Natural Topography
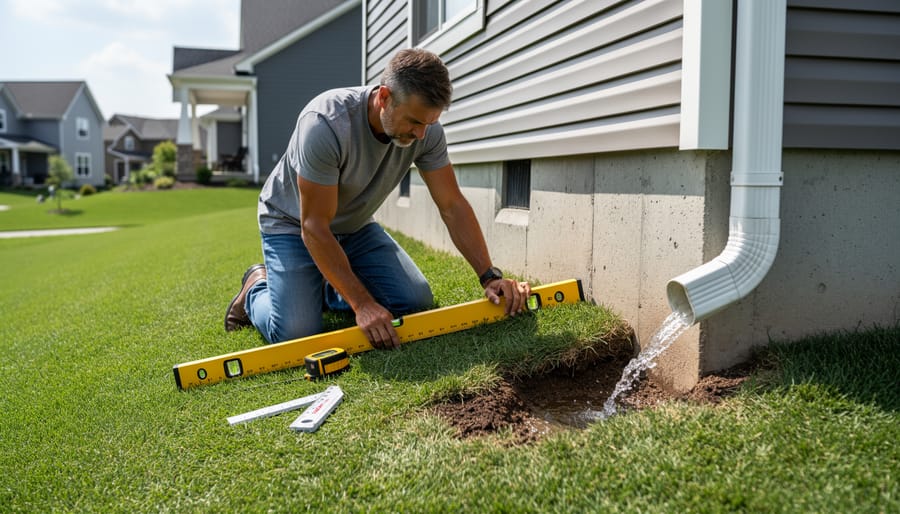
Before you start moving soil around, take time to understand what you’re already working with. Grab a long board or a straight piece of lumber and walk your yard after a good rain. You’ll quickly spot where water naturally pools and where it flows—these low and high points are telling you a story about your landscape.
Start by identifying your yard’s highest elevation, typically near your home’s foundation if it was graded properly during construction. From there, notice how the land slopes. Does water flow toward flower beds, your neighbor’s property, or ideally toward a street drain? Take photos and make simple sketches with notes about problem areas.
Here’s the key: fighting your yard’s natural topography is expensive and often unsustainable. Instead, work with what nature gave you. That low spot in the corner? It might be perfect for a rain garden filled with water-loving native plants. That gentle slope? Enhance it slightly rather than trying to flatten everything.
Use stakes and string to visualize existing grades, or simply observe during heavy rain. Understanding these natural patterns before planning any changes will save you time, money, and frustration while creating drainage solutions that actually work with your landscape’s personality.
Drainage Solutions That Actually Work
Surface Drainage Strategies
Nature has been managing water flow for millennia, and we can borrow those same principles for our yards. Surface drainage strategies work with your landscape’s natural contours to guide water where you want it to go, without relying on pipes or pumps.
Swales are shallow, vegetated channels that slow and direct runoff while allowing water to soak into the soil. Think of them as gentle ditches filled with grass or native plants. They’re perfect along property lines or between different yard zones. I love how swales do double duty, managing drainage while creating attractive landscape features.
Berms are the opposite: raised mounds of soil that redirect water flow. Place them strategically to guide water away from foundations or toward rain gardens. The beauty of berms is they also add visual interest and elevation changes to flat yards.
Surface grading is simply shaping your soil to create gentle slopes that direct water naturally. The golden rule is a minimum two percent slope away from buildings, which translates to about 2-3 inches of drop over 10 feet. It sounds technical, but once you understand the concept, it’s quite intuitive.
These techniques are wonderfully sustainable because they work with natural processes rather than against them. Plus, they require minimal maintenance once established and actually improve over time as vegetation takes hold.
French Drains and Underground Systems
When surface solutions aren’t cutting it, it’s time to go underground. French drains are wonderfully effective for persistent water problems and they’re more approachable than you might think. Essentially, you’re creating an underground pathway for water by digging a trench, lining it with landscape fabric, filling it with gravel, and burying a perforated pipe that redirects water away from problem areas.
These systems shine in low spots where water consistently pools or along foundation walls where moisture threatens your home. Before digging, always check for underground cables and utilities to avoid costly mistakes.
Catch basins work alongside French drains by collecting surface water through grated tops and channeling it into your drainage system. They’re perfect for capturing runoff at the bottom of slopes or in naturally low areas.
For yards with heavy clay soil or high water tables, subsurface drainage becomes essential. The investment pays off by preventing the frustrating cycle of soggy patches that never quite dry out. While simpler French drain installations can be DIY projects, complex systems with multiple catch basins often benefit from professional design to ensure proper slope and capacity for your specific conditions.
Downspout Extensions and Rain Gardens
Your roof collects an incredible amount of water during rainstorms, and where that water goes can make or break your yard’s drainage system. Simply dumping it next to your foundation is asking for trouble, both for your home and your lawn.
Downspout extensions are your first line of defense. These simple attachments direct water at least 4-6 feet away from your foundation, preventing basement flooding and soil erosion near your home. You can use flexible plastic extensions, underground drainage pipes, or even decorative splash blocks. The goal is getting that concentrated flow far enough away to disperse safely.
Here’s where it gets exciting for sustainable gardeners: rain gardens offer an eco-friendly destination for all that roof runoff. These shallow depressions filled with native plants act like natural sponges, absorbing water that would otherwise create soggy spots or runoff. Position your rain garden 10-15 feet from your foundation in a naturally low area or create one yourself.
Rain gardens aren’t just practical; they’re beautiful. Native perennials, ornamental grasses, and flowering shrubs thrive in these moisture-loving environments while filtering pollutants and providing habitat for pollinators. It’s drainage that does double duty, protecting your yard while supporting local ecosystems. Start small with a 100-square-foot garden and expand as you see the benefits.
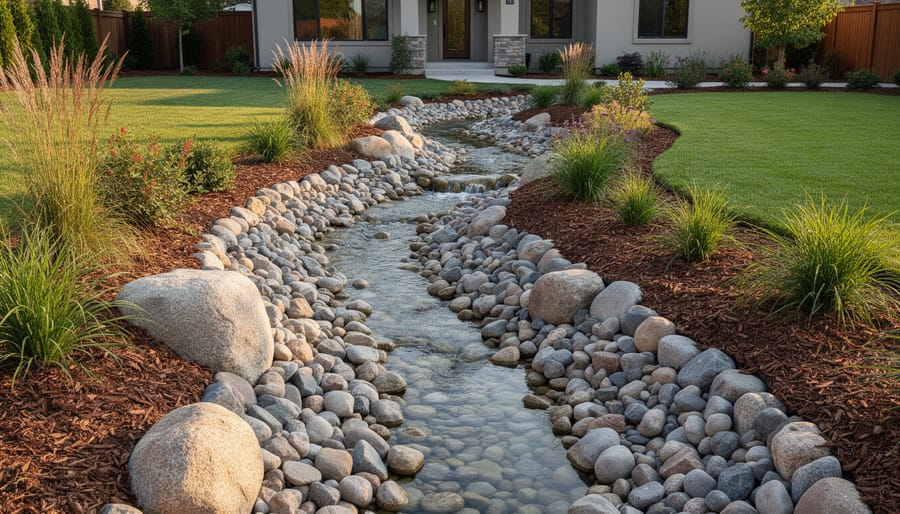
Dry Creek Beds and Natural Features
Here’s a solution that’s both beautiful and functional: dry creek beds mimic natural waterways, channeling runoff through your landscape while adding visual interest. These features work wonderfully in areas where water naturally flows during heavy rains, transforming a drainage problem into an attractive focal point.
Creating a dry creek bed starts with digging a shallow, gently winding channel along your drainage path, typically 1-2 feet wide. Line it with landscape fabric to prevent weed growth, then fill with river rocks of varying sizes. Place larger boulders along the edges for a natural look. The rocks slow water flow, allowing it to percolate into the soil rather than rushing away, which supports groundwater recharge and reduces erosion.
You can enhance dry creek beds with native plants along the banks, choosing species that tolerate both dry conditions and occasional flooding. Ornamental grasses, sedges, and moisture-loving perennials create a lush appearance while their root systems further stabilize the soil. This sustainable approach manages water effectively while creating habitat for beneficial insects and wildlife, proving that drainage solutions can be as attractive as they are practical.
Planning Your Grading and Drainage Project
Assessing Your Current Situation
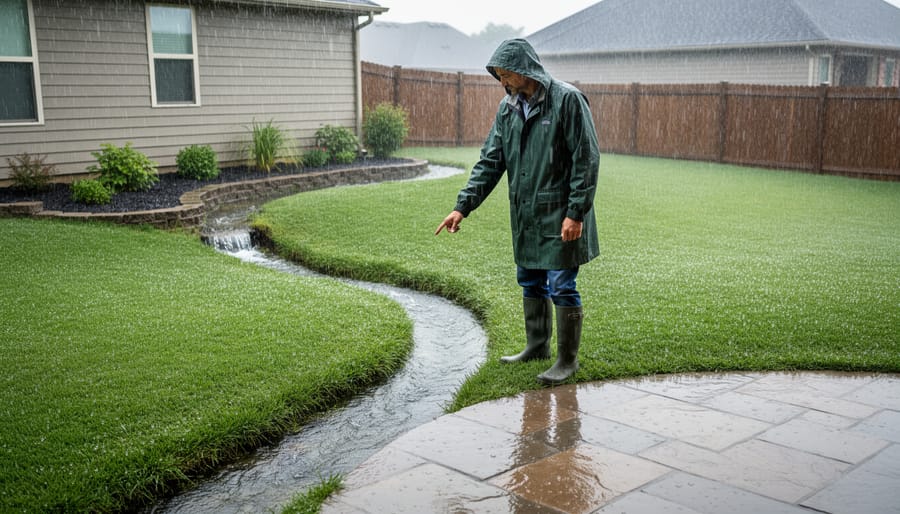
Before you grab a shovel or start sketching plans, take time to really understand what’s happening in your yard. The next time it rains, put on your boots and observe how water moves across your landscape. Where do puddles form? Which areas stay soggy long after the rain stops? You’ll want to note if water flows toward your foundation, pools near garden beds, or creates muddy patches in your lawn.
Grab your smartphone and document these problem spots with photos and short videos during and after rainfall. This visual record becomes invaluable when planning solutions or consulting with professionals. Mark the wet zones with temporary stakes or spray paint so you can identify them on dry days too.
Walk your property’s perimeter and look for signs of poor drainage like soil erosion, water staining on fences or buildings, and struggling plants in waterlogged areas. Check downspouts to see where they’re directing water. Before making any major changes, remember to check for underground utilities first to avoid costly mistakes.
This assessment phase might take a few rain events to complete, but understanding your yard’s unique water patterns is the foundation for creating an effective, sustainable drainage solution.
Creating Your Drainage Map
Start by grabbing a clipboard and heading outside with your yard’s rough dimensions. You don’t need fancy equipment—a simple sketch on graph paper works wonderfully. Walk your property during or right after a rainstorm to see where water naturally flows and pools.
Mark existing features like downspouts, slopes, patios, and garden beds on your sketch. Use a basic line level (a string with a level attached) or even a long board with a carpenter’s level to identify which way your ground slopes. Note areas where water collects or where you’ve noticed soggy spots.
Before you dig anywhere, contact your utility company to mark underground utilities—this free service prevents costly and dangerous mistakes. Draw arrows on your map showing your ideal water flow paths, directing runoff away from foundations and toward rain gardens, dry wells, or street drainage.
Take photos from multiple angles to reference later. This visual documentation becomes invaluable when planning solutions, whether you’re tackling the project yourself or consulting with professionals. Your drainage map doesn’t need to be perfect—it just needs to capture the reality of how water moves through your landscape.
Choosing the Right Solutions for Your Yard
Finding the right drainage solution doesn’t have to be overwhelming. Think of it like choosing plants for your garden—you need to match the solution to your specific conditions.
Start by honestly assessing your situation. For minor puddling in a small area, simple solutions like extending downspouts or creating a shallow swale might be all you need. These are perfect weekend DIY projects that won’t break the bank. If you’re dealing with water pooling across large sections of your lawn or experiencing basement moisture issues, you’ll likely need more comprehensive grading work or a French drain system.
Budget plays a practical role here. Surface solutions like rain gardens or dry creek beds offer environmentally friendly options that you can tackle incrementally, spreading costs over time. They also add beautiful landscape features while solving drainage problems naturally.
Your skill level matters too. Installing catch basins or underground drainage pipes requires more expertise and specialized tools. There’s no shame in calling professionals for complex projects—think of it as investing in your home’s foundation rather than just fixing a lawn problem.
Consider long-term sustainability as well. Solutions that work with your yard’s natural topography and redirect water to beneficial areas, like garden beds or rain barrels, give you double value while supporting eco-friendly practices.
DIY-Friendly Grading and Drainage Improvements
Small-Scale Grading Adjustments
For minor drainage issues near your foundation or small depressions in your yard, you can often make effective corrections yourself using basic tools and topsoil. Start by identifying problem areas where water pools after rain. Using a garden rake and shovel, gradually build up low spots with quality topsoil, creating a gentle slope away from your home’s foundation. Aim for a grade of about 6 inches of drop over the first 10 feet from your foundation.
When adding soil, work in layers of 2-3 inches at a time, compacting each layer gently to prevent future settling. This approach is surprisingly sustainable since you’re working with natural materials and avoiding harsh chemicals or extensive excavation. For those small depressions in your lawn, fill them gradually and reseed or lay sod to match your existing grass. Remember, patience pays off here. Making adjustments over time prevents soil erosion and gives you better long-term results than rushing the job.
Installing Simple Drainage Features
Once you’ve addressed major grading concerns, installing simple drainage features can make a tremendous difference in managing water flow. The beauty of these projects is that they’re genuinely DIY-friendly and won’t break the bank.
Downspout extensions are perhaps the easiest starting point. These direct roof runoff away from your foundation and prevent those persistent soggy spots near your house. Aim to extend water at least 6-10 feet from your home’s perimeter. You can use flexible corrugated pipe buried just below the surface, or create attractive above-ground solutions using decorative rain chains and splash blocks.
Small dry creek beds offer both function and charm. They channel water through low-lying areas while adding visual interest to your landscape. Start by excavating a shallow depression following your natural drainage path, line it with landscape fabric, then fill with river rocks of varying sizes. The larger stones stay put during heavy rain while creating a naturalized look.
Surface channels or swales work wonderfully for redirecting sheet flow. These are simply shallow, vegetated depressions that guide water where you want it to go. Before starting any landscaping project involving digging, always call 811 to locate underground utilities. Plant these channels with water-tolerant native grasses for a sustainable, low-maintenance solution that filters runoff naturally while protecting your lawn from erosion.
When to Call in the Professionals
While DIY grading and drainage projects can be incredibly rewarding, there are situations where bringing in the professionals is the wisest choice for your yard and your wallet. Let’s talk about when it’s time to make that call.
If you’re dealing with significant water pooling that affects your home’s foundation or creates persistent basement moisture, this isn’t a weekend project. Foundation-related drainage issues require professional assessment to prevent costly structural damage down the road. Similarly, if your yard needs major regrading that involves moving large volumes of soil or changing the slope by more than a few inches, professional equipment and expertise become essential.
Complex drainage systems also warrant professional help. Installing French drains that extend more than 50 feet, creating sophisticated channel drainage networks, or incorporating underground systems all require precise planning and execution. Professionals understand soil compaction rates, proper pipe grades, and filter fabric requirements that make the difference between a solution that lasts decades and one that fails within a year.
Before any major project, professionals should conduct thorough site assessments, including checking for underground cable concerns, utility lines, and existing drainage infrastructure. They’ll typically provide detailed plans, obtain necessary permits, and guarantee their work.
Expect to pay for expertise, but remember that professionals bring specialized equipment, labor teams, and accountability. A reputable drainage contractor will offer multiple solutions at different price points, explain the pros and cons of each approach, and provide references from similar projects.
The investment in professional help often proves cheaper than attempting complex work yourself, making mistakes, and then paying someone to fix both the original problem and your DIY attempt. When safety, home protection, or technical complexity are involved, professionals are your best partners in creating lasting drainage solutions.
Maintaining Your Grading and Drainage System
Once you’ve invested time and effort into establishing a proper grading and drainage system, a little ongoing maintenance will keep it functioning beautifully for years to come. Think of it like tending a garden—regular attention prevents small issues from becoming major headaches.
Start with seasonal check-ups, particularly in spring and fall. Walk your property after heavy rains to observe how water moves across your landscape. Look for new low spots, areas where mulch has washed away, or places where water pools unexpectedly. These early warning signs are much easier to address than full-blown drainage failures.
Keep your drainage channels and swales clear of debris. Fallen leaves, grass clippings, and organic matter can accumulate surprisingly quickly, especially during autumn. A simple monthly inspection and quick cleanup with a rake will prevent blockages that redirect water where you don’t want it. This is also a perfect time to check any installed drainage features like French drains or channel drains for clogs.
If you’ve used mulch in drainage areas, replenish it annually. Organic mulches break down naturally, which is wonderful for soil health but means they need topping up to maintain proper water flow. Choose sustainably sourced mulch options to align with environmentally friendly practices.
Watch for settling, particularly during the first year after regrading. Some soil compaction is natural, and you may need to add topsoil to maintain proper slopes. This is completely normal and nothing to worry about.
Don’t forget about your lawn’s role in the drainage equation. Aerate compacted areas annually to improve water infiltration. Healthy, deep-rooted grass acts like a living sponge, absorbing water and preventing runoff. Consider overseeding bare patches promptly, as exposed soil erodes more easily and disrupts your carefully planned grades.
Finally, document what you observe. Take photos of problem areas in different seasons. You’ll start recognizing patterns that help you make informed decisions about adjustments. Good drainage maintenance isn’t about perfection—it’s about staying observant and addressing small issues before they grow.
Taking care of your yard’s grading and drainage isn’t just about preventing puddles or soggy patches on your lawn. It’s about protecting one of your most significant investments: your home. When water flows away from your foundation properly, you’re safeguarding against basement flooding, structural damage, and foundation issues that can cost thousands to repair. At the same time, you’re creating the ideal conditions for a healthy, vibrant lawn that’s the envy of the neighborhood.
The good news is that you don’t need to tackle everything at once. Start with a simple assessment of your property after the next heavy rain. Watch where water collects, notice where it flows, and identify any problem areas. From there, you can prioritize improvements based on urgency and budget. Maybe you begin with extending a downspout or filling in a low spot near your patio. Perhaps you tackle a more ambitious French drain project over a weekend or two. Every step forward is progress toward a better-functioning landscape.
Remember, too, that managing water responsibly benefits more than just your property. When you direct runoff thoughtfully, you’re reducing the burden on storm drains, minimizing erosion, and helping prevent pollutants from washing into local waterways. By allowing water to infiltrate naturally where appropriate, you’re recharging groundwater supplies and supporting the broader ecosystem.
Whether you’re a first-time homeowner puzzling over drainage issues or an experienced gardener fine-tuning your landscape, proper grading and drainage planning is an investment that pays dividends for years to come. Your lawn will thank you, your home will thank you, and you’ll enjoy greater peace of mind with every rainstorm.