Match your soil’s pH to zoysiagrass’s preferred range of 6.0 to 6.5 before planting by conducting a simple soil test through your local extension office or using a home testing kit. Test clay-heavy soils for drainage by digging a 12-inch hole, filling it with water, and ensuring it drains within 8-12 hours—zoysiagrass tolerates various soil types but fails in waterlogged conditions. Amend compacted or sandy soils with 2-3 inches of organic compost worked into the top 6 inches, creating the well-draining yet moisture-retentive environment where zoysia thrives.
Understanding soil-turfgrass compatibility transforms zoysiagrass from a struggling patch into the dense, drought-tolerant carpet it’s famous for becoming. This warm-season grass rewards patient gardeners with exceptional heat tolerance, reduced water needs compared to cool-season alternatives, and a natural resistance to many common lawn pests—but only when soil conditions support its aggressive root development during establishment.
The secret lies in preparation rather than maintenance. While zoysiagrass adapts to everything from sandy coastal soils to heavy clay, it establishes fastest in properly prepared ground with adequate drainage and balanced fertility. Skip the guesswork about whether your existing soil will work, and instead focus on the specific adjustments that guarantee success. Whether you’re replacing a thirsty fescue lawn or starting fresh, zoysiagrass offers a sustainable solution for reduced mowing, watering, and chemical inputs—provided your foundation is right from day one.
What Makes Zoysiagrass Different from Other Turfgrasses
The Zoysiagrass Family: Common Varieties
Before we dig into soil specifics, let’s get acquainted with the main members of the zoysiagrass family. Understanding which variety you’re working with helps you fine-tune your soil preparation for the best results.
The three primary species you’ll encounter are Zoysia japonica, Zoysia matrella, and Zoysia tenuifolia. Zoysia japonica is the most cold-hardy of the bunch and the most commonly planted in transitional zones. It adapts well to a broader range of soil conditions, including heavier clay soils, making it a forgiving choice for beginners. Think of it as the versatile workhorse of the family.
Zoysia matrella, often called Manila grass, prefers warmer climates and has a finer texture. It tends to perform best in well-draining, sandy soils and can be a bit pickier about heavy clay. If your property has sandier soil, this variety might be your perfect match.
Zoysia tenuifolia, the delicate cousin known as Korean velvet grass or mascarene grass, creates an incredibly fine, carpet-like lawn. It’s less commonly used for full lawns due to its slower growth but thrives in sandy, well-draining soils with excellent aeration.
While all three species share zoysia’s famous drought tolerance and low-maintenance nature, knowing your specific variety helps you make smarter soil amendments and set realistic expectations for establishment and long-term care.
Climate and Growing Zone Considerations
Zoysiagrass thrives in warm, humid climates typical of USDA hardiness zones 6 through 11, making it a versatile choice for many gardeners. As one of the most adaptable warm-season grasses, zoysia performs exceptionally well when climate and soil conditions align properly.
In transition zones, where both cool and warm-season grasses can grow, zoysiagrass becomes particularly valuable. The interaction between your climate and soil type significantly impacts success. Well-drained sandy loams in warmer regions allow zoysia to establish quickly, while heavy clay soils in cooler transition zones may slow growth but still support healthy lawns with proper amendments.
Temperature matters tremendously. Zoysia enters dormancy when soil temperatures drop below 55°F and greens up when they consistently reach 65-70°F. If you’re in the northern range of its zone, combining well-draining amended soil with southern or western exposure maximizes warmth and extends your growing season. Conversely, gardeners in hotter zones benefit from soil that retains some moisture while draining excess water, preventing heat stress and creating sustainable growing conditions without excessive irrigation.
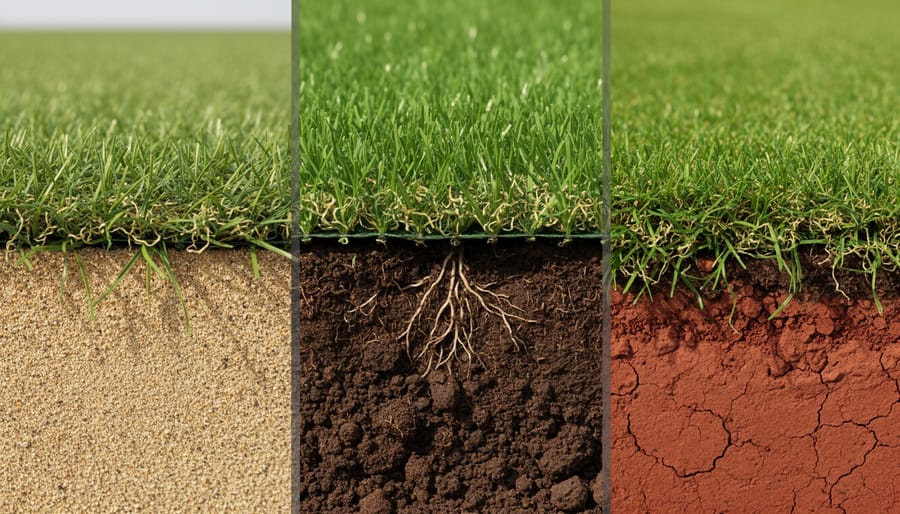
Zoysiagrass and Soil Type: Finding the Perfect Match
Sandy Soils: Zoysia’s Comfortable Home
If you’re blessed with sandy soil in your yard, you’ve actually got a head start with zoysiagrass. While many turf varieties struggle in these conditions, zoysia thrives where others fail, making it an excellent choice for coastal regions and areas with naturally loose, granular soil.
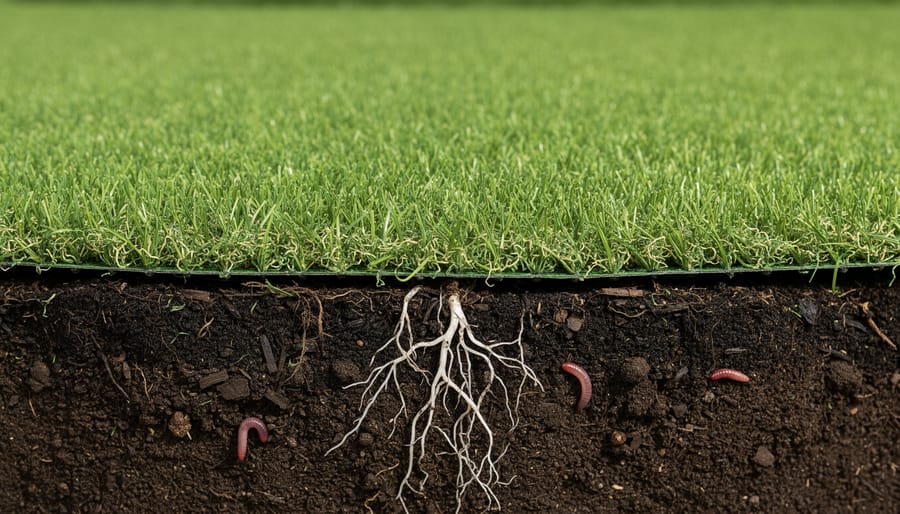
Sandy soils offer zoysiagrass the well-drained environment it craves. These soils allow water to percolate quickly, preventing the waterlogged conditions that can lead to root rot and fungal diseases. Zoysia’s deep, vigorous root system takes full advantage of this drainage, reaching down to access moisture and nutrients that remain below the surface. This natural pairing means less worry about standing water and better overall plant health.
The downside of sandy soils is their inability to retain nutrients and moisture for extended periods. Think of sand like a colander – things move through quickly. To optimize your sandy site for zoysia, work in organic matter like compost before planting. Aim for about 2-3 inches incorporated into the top 6 inches of soil. This amendment acts like a sponge, helping retain both water and nutrients without compromising drainage.
You’ll also want to adopt a lighter, more frequent fertilization schedule. Instead of heavy applications that wash through sandy soil, apply smaller amounts every 4-6 weeks during the growing season. Similarly, water more frequently but for shorter durations to keep the root zone consistently moist.
The good news? With these simple adjustments, your sandy soil becomes the perfect foundation for a lush, resilient zoysia lawn that’s naturally sustainable and low-maintenance.
Clay Soils: Challenges and Solutions
Clay soils can feel like both a blessing and a challenge when it comes to growing zoysiagrass. The good news? Zoysia actually tolerates clay better than many other warm-season grasses, thanks to its robust root system. However, clay’s tendency to compact and drain poorly means you’ll need to take some proactive steps to set your lawn up for success.
The main issue with heavy clay is water movement. When clay stays too wet, zoysiagrass roots can suffocate, leading to thin patches and disease problems. Conversely, when clay dries out, it becomes rock-hard, making it difficult for roots to penetrate and access nutrients. The solution starts with improving drainage and soil structure before you even think about planting.
Begin by working organic matter into your clay soil. Compost is your best friend here—aim to incorporate 2 to 3 inches across the planting area, tilling it to a depth of 6 to 8 inches. This amendment helps create air pockets, improves drainage, and adds beneficial microorganisms that naturally support healthy grass growth. If you’re dealing with severely compacted clay, consider adding coarse sand along with the compost, using a ratio of about 1 part sand to 2 parts compost.
Core aeration becomes essential for established zoysiagrass in clay soils. Plan to aerate at least once yearly during the growing season, preferably in late spring when the grass is actively growing. This practice relieves compaction and allows oxygen, water, and nutrients to reach the root zone more effectively.
Don’t forget about topdressing with compost after aeration—it’s a sustainable practice that gradually transforms your clay into a more hospitable growing environment. With patience and these amendments, your zoysiagrass will develop the deep, healthy root system needed to thrive even in challenging clay conditions.
Loamy Soils: The Goldilocks Zone
If you’re lucky enough to have loamy soil in your yard, you’ve already won half the battle with zoysiagrass. Loam is essentially the Goldilocks of soil types—not too sandy, not too clay-heavy, but just right. This balanced combination of sand, silt, and clay provides excellent drainage while retaining enough moisture and nutrients to keep your zoysia happy and thriving.
In loamy conditions, zoysiagrass typically establishes quickly and develops that dense, carpet-like texture we all love. The soil structure allows roots to penetrate deeply without fighting through compacted layers, while the natural fertility means you won’t need to rely heavily on synthetic fertilizers—a win for both your wallet and the environment.
That said, even perfect loam can benefit from a little TLC. Before planting, work in a modest amount of compost to boost organic matter content. This enhances the soil’s ability to support beneficial microorganisms that keep your lawn naturally healthy. Testing your pH is still worthwhile—if it drifts below 6.0, a light application of lime will nudge it into the ideal range. With loamy soil as your foundation, minimal intervention creates maximum results.
What to Do When Your Soil Isn’t Ideal
Don’t let imperfect soil discourage you from growing beautiful zoysiagrass. If your soil test reveals heavy clay, start by working in compost or aged manure to improve drainage and aeration. For sandy soils that drain too quickly, incorporate organic matter to boost water retention and nutrient-holding capacity. Aim to mix amendments into the top 6-8 inches before planting.
When pH levels fall outside the ideal 6.0-7.0 range, make gradual adjustments. Lower acidic soil pH by applying lime according to test recommendations, while sulfur can help reduce alkalinity. These changes take time, so apply amendments several months before planting if possible.
Consider building raised beds if drainage issues are severe or if you’re dealing with compacted soil that’s difficult to amend. Even a 4-6 inch elevation can make a remarkable difference. Remember, improving soil is an ongoing process. Annual topdressing with compost continues building soil health while your zoysiagrass establishes, creating a sustainable foundation for long-term lawn success.
The pH Sweet Spot: Getting Acidity Right for Zoysiagrass
Zoysiagrass’s Ideal pH Range
Zoysiagrass thrives best when your soil pH falls between 6.0 and 6.5, a slightly acidic range that’s honestly quite forgiving for most lawns. Think of pH as the gatekeeper for your grass’s dining experience—when it’s in this sweet spot, zoysiagrass can efficiently absorb the nutrients it needs to develop that dense, carpet-like texture we all love.
Why does this particular range matter so much? It’s all about nutrient availability. When pH dips too low (below 5.5), essential nutrients like phosphorus and calcium become less accessible, even if they’re present in your soil. Your grass essentially can’t grab what it needs. On the flip side, if pH climbs above 7.0 into alkaline territory, iron and manganese become locked up, potentially leading to that telltale yellowing effect despite your best fertilizing efforts.
The good news is that zoysiagrass is more pH-tolerant than many lawn grasses, surviving in ranges from 5.5 to 7.0. However, aiming for that 6.0-6.5 target zone gives you the best results and reduces the need for corrective amendments down the road. Testing your soil pH before planting isn’t just a smart move—it’s the foundation for a sustainable, low-maintenance lawn that works with your soil rather than fighting against it.
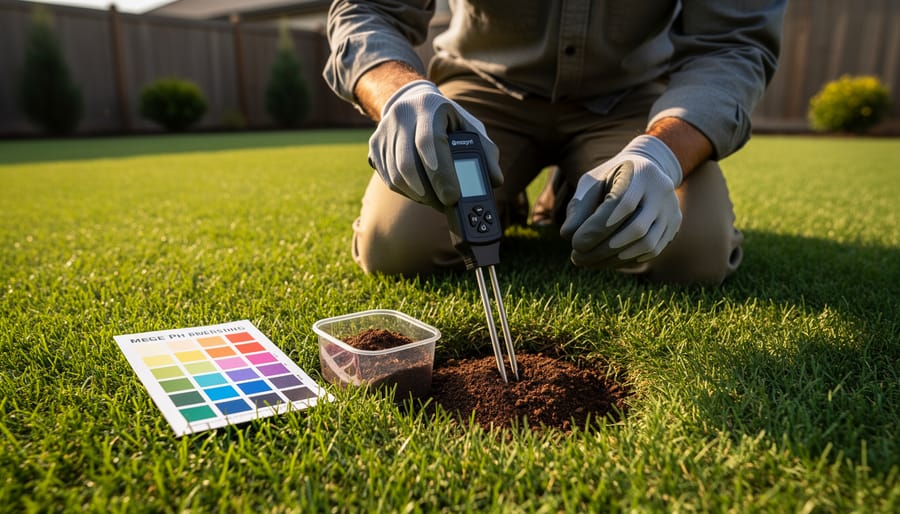
How to Test Your Soil pH (Without Wasting Money)
Testing your soil pH doesn’t require fancy equipment or a trip to the local extension office, though those options certainly have their place. For zoysiagrass, which thrives in a pH range of 6.0 to 7.0, knowing your starting point is essential before you invest in sod or plugs.
The simplest approach? Grab an inexpensive pH test kit from your garden center for around ten dollars. These colorimetric kits use a color-matching system that’s surprisingly accurate for basic lawn care decisions. Just collect soil samples from several spots in your lawn (dig down about 4 to 6 inches), mix them together, and follow the kit instructions. I’ve used these for years with great results.
If you’re feeling adventurous, there’s the classic vinegar and baking soda test. While not precisely accurate, it’ll tell you if you’re dealing with extreme pH issues. Add vinegar to dry soil—if it fizzes, your soil is alkaline. Add baking soda to wet soil—fizzing means acidic conditions. No reaction either way suggests you’re somewhere in the neutral zone where zoysiagrass feels right at home.
For new lawn installations or persistent problems, professional lab testing is worth the investment. University extension services typically charge between fifteen and thirty dollars and provide detailed nutrient analysis alongside pH readings. This comprehensive approach helps you address multiple soil issues simultaneously, saving money in the long run by preventing guesswork amendments. Think of it as getting a complete physical rather than just checking your temperature.
Raising pH in Acidic Soils
If your soil test reveals a pH below 6.0, don’t worry—raising pH is completely manageable with the right approach. The most effective and sustainable method is applying lime, which gradually neutralizes soil acidity while adding beneficial calcium.
Timing matters significantly for lime applications. Fall is ideal because it gives the material several months to break down and adjust pH before spring growth. However, early spring works too if you’re planning ahead for summer establishment. Apply lime at least 2-3 months before sodding or seeding to allow proper soil integration.
Choose pelletized or pulverized dolomitic limestone for easier handling and application. Your soil test results will indicate exactly how much lime you need—typically 25-50 pounds per 1,000 square feet for moderately acidic soils. Spread it evenly using a broadcast spreader, then water thoroughly to begin the activation process.
For a more sustainable approach, consider incorporating compost or well-aged manure alongside lime applications. These organic materials not only help buffer pH but also improve soil structure and microbial activity, creating a healthier foundation for your zoysia. Retest your soil annually, as pH adjustments aren’t permanent—you may need occasional maintenance applications to keep levels optimal for that gorgeous, thick zoysia lawn you’re working toward.
Lowering pH in Alkaline Soils
If your soil test reveals a pH above 7.5, you’ll need to take action before planting zoysiagrass, as alkaline conditions can lock up essential nutrients like iron and manganese. The good news? Lowering pH is entirely doable with patience and the right approach.
Elemental sulfur is your most reliable option for acidifying soil. It works gradually as soil bacteria convert it to sulfuric acid, making it a safe, sustainable choice. Apply about 1 to 2 pounds of sulfur per 100 square feet to lower pH by approximately one point, but always follow your soil test recommendations for precise amounts. Work it into the top 6 inches of soil several months before planting, as the process takes time.
For a more eco-friendly approach, incorporate organic amendments like compost, peat moss, or composted pine bark. These materials naturally acidify soil while improving structure and water retention. Spread a 2 to 3-inch layer and till it in thoroughly.
Remember, this isn’t a one-and-done fix. Retest your soil annually, especially if you have hard water or live in naturally alkaline regions, as pH tends to creep back up over time. Consistent monitoring ensures your zoysiagrass receives the nutrients it needs to thrive.
Real-World Success: Preparing Your Soil Before Planting Zoysiagrass
The Pre-Planting Soil Assessment
Before you plant a single plug of zoysiagrass, let’s talk about what’s happening beneath your feet. Think of this as giving your lawn a physical before the big game—you want to know exactly what you’re working with so your zoysia can thrive from day one.
Start by testing your soil pH. Zoysiagrass prefers a range between 6.0 and 7.0, which is slightly acidic to neutral. You can grab an affordable test kit from your local garden center or send a sample to your county extension office for a more detailed analysis. Trust me, this fifteen-dollar investment will save you headaches down the road.
Next, check your drainage. Dig a hole about 12 inches deep, fill it with water, and see how long it takes to drain. If water’s still sitting there after 24 hours, you’ve got drainage issues that need addressing—zoysiagrass doesn’t appreciate wet feet.
Evaluate your soil texture by doing the simple squeeze test. Grab a handful of moist soil and squeeze it. Does it hold together in a ball but crumble easily? That’s ideal. Too sandy and it won’t retain moisture; too clayey and you’ll need to work in organic matter.
Finally, assess compaction by trying to push a screwdriver into the soil. If it slides in easily to about 6 inches, you’re good. Resistance means compaction problems that should be solved with aeration before planting.
Amendment Application Timeline
Timing is everything when it comes to amending your soil for zoysiagrass success. Ideally, you’ll want to apply your amendments at least 4-6 weeks before planting. This gives the materials time to integrate with your existing soil and begin working their magic.
For spring plantings, aim to amend your soil in late winter or very early spring—think February or March in most regions. If you’re planning a late spring or early summer establishment (which is often ideal for warm-season zoysiagrass), get those amendments down by mid-April at the latest.
Here’s a sustainable approach: spread your organic matter, whether that’s compost, aged manure, or peat moss, evenly across the planting area. Follow up with any pH adjusters like lime or sulfur based on your soil test results. Work these amendments into the top 6-8 inches of soil using a rototiller or good old-fashioned elbow grease with a garden fork.
After incorporating amendments, water the area lightly and let it settle. This waiting period allows beneficial microorganisms to activate and helps amendments fully integrate. A week before planting, do a final light cultivation to create that perfect seedbed. This patient preparation sets the stage for zoysiagrass roots to establish quickly and thrive for years to come.
Sustainable Soil Building Practices
Building healthy soil for your zoysiagrass doesn’t require synthetic shortcuts. Instead, focus on feeding the soil ecosystem that will, in turn, nourish your lawn. Adding organic matter is your best friend here—think compost, well-aged manure, or leaf mold worked into the top few inches before planting. A half-inch layer of quality compost spread annually acts as a slow-release fertilizer while improving soil structure and water retention.
For established lawns, top-dressing with compost once or twice yearly keeps microbial activity humming without disrupting your turf. This practice is especially valuable in clay soils, gradually improving drainage, or in sandy soils where it boosts nutrient-holding capacity. Leaving grass clippings on your lawn also returns valuable organic matter and nitrogen to the soil naturally.
Consider organic soil amendments like composted pine bark or biochar for long-term improvements. These materials support beneficial microorganisms and earthworms that create natural air channels and break down thatch. This sustainable approach may work more slowly than chemical fixes, but you’re building soil health that compounds year after year, creating the ideal foundation for resilient zoysiagrass.
Maintaining Soil Health After Your Zoysia Is Established
Once your zoysia is thriving, the key to keeping it that way lies in consistent soil care. Think of it as maintaining a friendship—regular check-ins make all the difference. The good news? Zoysiagrass is relatively low-maintenance compared to other lawn types, but a little attention to your soil will reward you with a lush, resilient lawn for years to come.
Start by testing your soil every two to three years. This simple step helps you track pH levels and nutrient availability, ensuring your zoysia has everything it needs. Spring is ideal for testing, as it allows you to make adjustments before the growing season kicks into high gear. Most county extension offices offer affordable testing, or you can grab a home test kit from your local garden center.
Pay attention to seasonal adjustments too. In early spring, a light application of compost or organic fertilizer helps jumpstart growth as your zoysia emerges from dormancy. Avoid overdoing nitrogen—zoysia naturally requires less than cool-season grasses, and excess can actually weaken its natural disease resistance. A slow-release organic option works beautifully here, feeding your lawn gradually throughout the season.
During summer, focus on maintaining proper moisture levels without overwatering. Zoysia’s deep root system is drought-tolerant once established, but consistent moisture helps it stay dense and crowd out weeds. Aim for about one inch of water per week, either from rainfall or irrigation.
As fall approaches, consider aerating your lawn every few years, especially if you notice soil compaction from foot traffic. This improves oxygen flow and nutrient absorption, keeping roots healthy heading into winter. Skip heavy fertilization in fall—zoysia slows down naturally as temperatures drop, and excess nutrients can encourage disease.
Finally, leave grass clippings on your lawn when you mow. They break down quickly, returning valuable organic matter and nutrients to the soil. This sustainable practice reduces waste and keeps your soil ecosystem thriving with minimal effort on your part.
Creating a thriving zoysiagrass lawn truly comes down to one fundamental principle: giving your grass the soil foundation it needs to flourish. Throughout this guide, we’ve explored how zoysia’s preference for well-drained, slightly acidic to neutral soil shapes every decision you’ll make, from initial testing to ongoing amendments. The good news? With a simple soil test and some thoughtful preparation, most yards can become ideal homes for this resilient, low-maintenance grass.
If you haven’t already, now’s the time to test your soil. Understanding your starting point empowers you to make targeted improvements rather than guessing what your lawn needs. Whether you’re adjusting pH, improving drainage, or enhancing nutrient levels, each step you take builds toward long-term success.
Remember, establishing zoysiagrass is an investment in a sustainable, beautiful lawn that rewards patience with years of thick, soft turf that naturally resists weeds and tolerates drought. By matching your soil to zoysia’s needs, you’re not just planting grass—you’re cultivating an eco-friendly landscape that saves water, reduces chemical inputs, and gives you more time to enjoy your outdoor space. Your dream zoysia lawn is absolutely within reach, starting with the soil beneath your feet.