
Your reel mower’s performance depends entirely on the sharpness of its bedknife, that stationary blade working in tandem with your spinning reel. When you notice ragged, brown-tipped grass or hear your mower working harder than usual, backlapping alone won’t solve the problem—you need actual sharpening.
Understanding when to sharpen versus when to backlap saves you time and money. Backlapping with compound handles minor dulling and maintains contact between blades, but once you’ve worn down the cutting edge or developed nicks and burrs, only proper grinding restores that precise cutting geometry. Most homeowners need true sharpening every 2-3 seasons depending on lawn size and mowing frequency, though hitting rocks or debris accelerates this timeline.
You face three practical options: investing in a bedknife grinding attachment for your bench grinder (typically $150-300), using handheld sharpening stones for careful manual work, or sending your bedknife to professional sharpening services. Each approach has distinct advantages. DIY sharpening with the right equipment gives you control and long-term savings, while professional services guarantee precision if you’re uncomfortable working with tight tolerances.
The key is maintaining that critical blade-to-bedknife relationship—improper sharpening that changes angles or creates uneven surfaces defeats the purpose entirely. This guide walks you through choosing the right sharpening method for your situation, executing the process correctly, and knowing when professional help makes more sense than going it alone.
Why Your Bedknife Needs Sharpening (And How to Tell)
If you’ve ever wondered why your reel mower suddenly seems to struggle or leaves your grass looking frayed, the culprit is likely your bedknife. This stationary blade sits at the base of your mower and works with the spinning reel blades to create that beautiful scissor-cut action. Think of it as the lower half of a pair of scissors—when it gets dull, everything suffers.
The bedknife’s role is crucial: as the reel blades rotate past it, grass gets trapped between them and sheared cleanly. When both components maintain proper blade balance and sharpness, you get that pristine cut that makes reel mowing worthwhile. But when the bedknife dulls, the magic stops.
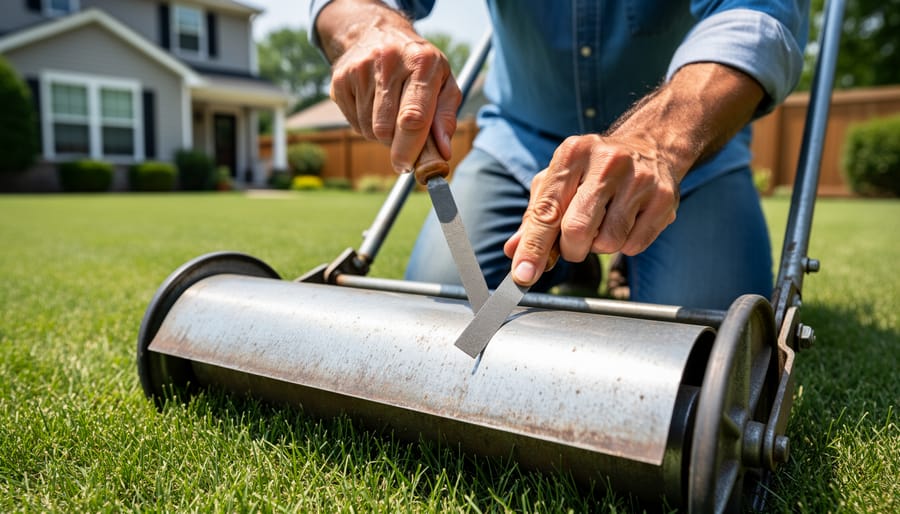
So how can you tell your bedknife needs attention? The most obvious sign is ragged, brown-tipped grass that looks torn rather than cut. This happens because dull edges crush and tear instead of slicing cleanly, leaving your lawn vulnerable to disease and stress. You might also notice you’re pushing harder than usual—a dull bedknife creates more resistance as the mower struggles to cut effectively.
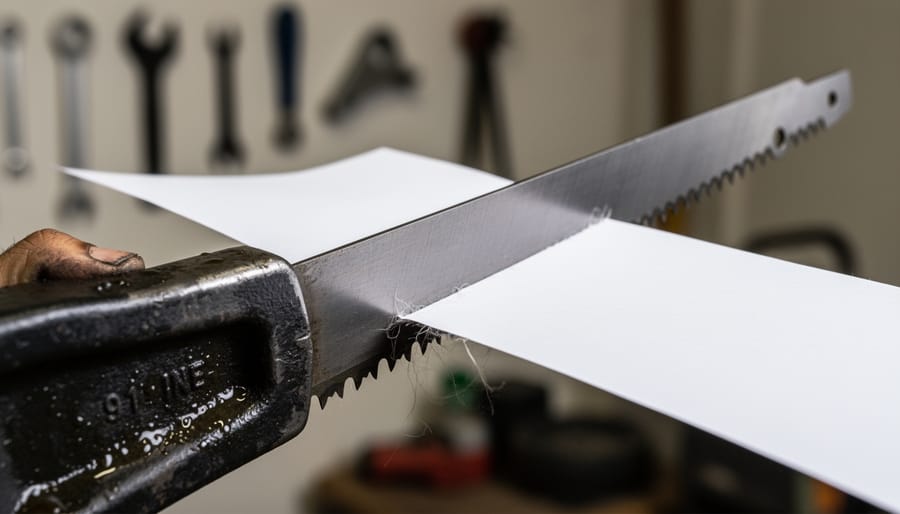
Here’s a simple test: take a piece of newspaper and carefully slide it between the bedknife and a reel blade while rotating the reel slowly. A sharp setup should cleanly cut the paper with minimal effort. If the paper tears, gets caught, or doesn’t cut at all, sharpening is overdue.
I learned this lesson the hard way one summer when I kept adjusting my reel tighter and tighter, thinking alignment was the problem. My lawn looked progressively worse until a neighbor pointed out the torn grass tips. After sharpening the bedknife, the difference was immediate—that smooth, effortless glide returned, and my lawn recovered its healthy appearance within a week.
Remember, a well-maintained bedknife isn’t just about easier mowing. It’s essential for sustainable lawn care, reducing stress on your grass and minimizing the need for corrective treatments. Your lawn literally depends on that sharp edge.

Understanding Bedknife Sharpening Options
Backlapping: Your First Line of Defense
Before we dive into the world of sharpening tools and techniques, let’s talk about backlapping, a term you’ve probably encountered if you’ve been using your reel mower for a while. Think of backlapping as your regular tune-up rather than a complete overhaul.
Backlapping involves applying a special abrasive compound to your mower’s reel blades and then running the mower backwards. This process helps maintain the contact between the reel and bedknife, smoothing out minor imperfections and burrs that develop during normal use. It’s kind of like honing a kitchen knife between proper sharpenings.
Here’s the thing: backlapping is wonderful for routine maintenance, and if you’re doing it every month or two during the growing season, you’ll extend the life of your cutting edges considerably. It’s an eco-friendly practice that reduces the frequency of more intensive sharpening. However, backlapping has its limits.
When your mower starts tearing grass rather than cutting cleanly, or you notice the blades no longer make that satisfying snipping sound even after backlapping, it’s time for actual sharpening. Backlapping can’t restore a dull edge or fix blades that have lost their proper angle. It also won’t help if your bedknife has developed significant nicks or damage.
If you’re reading this article, you’ve likely reached that point where backlapping alone isn’t cutting it anymore. That’s perfectly normal and indicates it’s time to move beyond maintenance into true sharpening territory.
Professional Sharpening Services
Sometimes, despite your best DIY efforts, your reel mower needs the expertise of a professional sharpening service. This is especially true when the bedknife has significant nicks, uneven wear, or you’ve let maintenance slide for several seasons. Professional grinding services use specialized equipment to restore the precise cutting edge your mower needs.
Most homeowners only need professional sharpening every 2-3 years, depending on lawn size and mowing frequency. Between professional services, regular backlapping keeps the edges keen. Expect to pay between $50-150 for professional bedknife grinding, with costs varying by location and whether you need the reel sharpened too.
The main advantage of professional service is precision. Experts maintain the exact bedknife angle and ensure perfectly flat surfaces, which is challenging with handheld sharpeners. The downside? You’ll be without your mower for a few days, and there’s the cost to consider.
Think of it like maintaining a quality garden tool. While you can sharpen your pruning shears at home, sometimes they need professional attention. The same principle applies here. If you’re uncomfortable tackling the job yourself or your mower isn’t cutting cleanly after backlapping, professional service is a smart, sustainable investment in your equipment’s longevity.
DIY Bedknife Sharpeners: Taking Control
So you’ve been backlapping your reel mower regularly and keeping that blade-to-bedknife contact adjusted just right, but you’ve noticed the cutting quality just isn’t what it used to be. Welcome to the world of bedknife sharpening—a skill that puts you firmly in control of your mower’s performance and saves you money in the long run.
DIY bedknife sharpeners are specialized tools designed to grind a fresh edge onto your bedknife without removing it from the mower. Think of them as precision file guides that ensure you maintain the correct angle while removing metal consistently across the entire blade. They typically attach directly to your mower and use either grinding wheels or abrasive stones to restore that critical cutting edge.
Who benefits most from owning a sharpening kit? If you’re mowing more than 5,000 square feet regularly, maintaining sports fields, or simply enjoy the satisfaction of complete equipment independence, a DIY sharpener makes practical sense. The initial investment—usually between 50 and 200 dollars—pays for itself after just a few sharpenings compared to professional service fees.
Here’s the reality check: sharpening a bedknife properly takes practice. Your first attempt might be uneven or require multiple passes to get right. That’s completely normal. Most users need three to five sharpening sessions before they feel confident in their technique. The good news? Modern sharpeners are designed with beginners in mind, featuring adjustable guides and clear instructions that make the learning curve manageable.
The environmental angle here matters too. Extending your bedknife’s lifespan through regular home sharpening means fewer replacement parts manufactured and shipped, reducing your lawn care footprint while keeping your cut pristine.
Types of Reel Mower Bedknife Sharpeners
Handheld Sharpening Files and Stones
If you enjoy a hands-on approach to lawn care maintenance, handheld files and stones offer the most traditional and sustainable method for sharpening your reel mower’s bedknife. These tools have been keeping cutting edges sharp for generations, and they’re still remarkably effective when used correctly.
The basic technique involves securing your mower (upside down or on its side) and carefully running a flat mill file or sharpening stone along the beveled edge of the bedknife at the correct angle, typically between 30 and 45 degrees. You’ll make consistent strokes from one end to the other, working to create a uniform edge. It takes patience and practice, but there’s something satisfying about restoring that keen edge yourself.
The biggest advantages? These tools are incredibly affordable, usually under twenty dollars, and they never need electricity or replacement parts. You’re also in complete control, which means less risk of removing too much metal. The downsides include a steeper learning curve and more physical effort, especially if your bedknife is quite dull. This method works best for regular maintenance rather than major restoration work.
For files, look for quality mill bastard files between 8 and 12 inches long. For stones, consider combination Arkansas stones or diamond-coated sharpening stones designed for flat surfaces. Remember that maintaining your sharpening stones properly ensures they’ll serve you well for years to come.
Mounted Grinding Systems
If you’re ready to move beyond manual filing or want the precision of professional-level sharpening at home, mounted grinding systems might be your next step. These aren’t your average handheld tools—they’re more substantial setups that attach to workbenches or specialized stands, bringing consistent, accurate results that can transform your sharpening routine.
Think of mounted grinding systems as the middle ground between doing everything by hand and dropping your mower off at the repair shop. They typically consist of a grinding wheel or stone mounted on an adjustable arm or carriage that moves along the bedknife in a controlled path. Some attach directly to your reel mower, while others require you to remove the bedknife and secure it in a jig. The key advantage is consistency—the grinding angle stays constant across the entire blade length, something that’s surprisingly difficult to achieve manually.
For those of us who value precision, these systems truly shine. They maintain the factory-specified angle with remarkable accuracy, which means your bedknife contacts the reel evenly across its width. This translates to that crisp, clean cut we’re all chasing. Plus, they remove material more uniformly, actually extending the life of your bedknife compared to uneven hand-sharpening.
The considerations are practical ones. First, you’ll need dedicated space—these aren’t tools you pull out of a drawer. A corner of your garage or shed works well. Second, there’s the investment. Quality grinding systems typically run between 150 to 400 dollars, which sounds steep until you calculate what you’d spend on professional sharpening over several seasons. For someone maintaining multiple reel mowers or planning to stick with reel mowing long-term, the math often works in your favor.
One sustainable bonus worth mentioning: mastering a mounted system means you can help neighbors and fellow gardening enthusiasts keep their reel mowers running beautifully, building community while reducing the carbon footprint of professional service trips.

How to Sharpen Your Bedknife: A Step-by-Step Approach
Preparation and Safety First
Before you begin sharpening your bedknife, let’s make sure you’re set up for success and safety. Trust me, a little preparation goes a long way toward getting professional results at home.
First, choose a well-lit workspace with a sturdy workbench or table. You’ll need good visibility to assess the bedknife’s condition and monitor your sharpening progress. Gather your safety gear: work gloves to protect your hands from sharp edges, safety glasses to shield your eyes from metal filings, and a dust mask if you’re using power tools.
Now for the hands-on part. Consult your mower’s manual for specific instructions on removing the bedknife, as methods vary by model. Generally, you’ll need basic tools like wrenches or screwdrivers to loosen the mounting bolts. Take a photo before disassembly to remember the correct orientation and spacing.
Once removed, thoroughly clean the bedknife with a wire brush and degreaser to remove grass clippings, rust, and built-up grime. This step is essential because debris can interfere with sharpening and prevent you from seeing nicks or uneven wear patterns. A clean bedknife also helps your sharpening tools work more effectively, giving you that precise edge needed for a beautiful, sustainable lawn cut.
The Sharpening Process
Let me walk you through the sharpening process with confidence – it’s more straightforward than you might think, and honestly, there’s something satisfying about bringing your bedknife back to peak performance.
Start by securing your reel mower so it won’t move during sharpening. Remove the reel if possible, though some sharpening tools work with the reel in place. Clean the bedknife thoroughly, removing any grass clippings, dirt, or rust that could interfere with the sharpening process.
If you’re using a flat file, which is the most accessible tool for beginners, position it against the bedknife’s cutting edge at the manufacturer’s recommended angle – typically between 30 and 35 degrees. Understanding proper sharpening angles makes all the difference between a sharp edge and wasted effort. Push the file forward in smooth, even strokes along the entire length of the bedknife, never pulling backward as this dulls the file.
For grinding wheels or specialized sharpening jigs, follow the manufacturer’s instructions carefully. These tools typically maintain the correct angle automatically, which is perfect if you’re worried about consistency. Work slowly and check your progress frequently – you’re removing metal, and there’s no putting it back.
Here’s where beginners often stumble: applying uneven pressure. Keep your strokes consistent across the entire blade length. Another common mistake is over-sharpening, creating a knife edge that’s too thin and fragile. You want a sharp, durable edge, not a razor blade.
Check your progress by running your finger gently along the edge (carefully!) or performing the paper test – a sharp bedknife should cleanly slice paper. Once you’ve achieved a uniform edge with no nicks or flat spots, you’re done. The whole process might take 15-30 minutes depending on the bedknife’s condition.
Remember, this is a sustainable practice that extends your mower’s life significantly. You’re not just saving money – you’re keeping quality equipment out of landfills while maintaining that perfect cut your lawn deserves.
Testing and Adjusting After Sharpening
After sharpening, it’s time to verify your work and get everything back together properly. The classic paper test is your best friend here—hold a sheet of newspaper against the bedknife and slowly rotate the reel. A properly sharpened edge should slice cleanly through without tearing or pushing the paper away. If it tears or bends the paper, you’ll need a bit more sharpening work.
When reinstalling your bedknife, make sure all mounting surfaces are spotlessly clean. Even tiny grass clippings or debris can prevent proper contact with the reel blades. Tighten the bolts evenly and gradually, working from the center outward to avoid warping.
Now comes the crucial adjustment step. The bedknife and reel should just barely touch—you’re aiming for light contact across the entire width. Spin the reel slowly and listen for a gentle whisper of metal-on-metal contact. Too tight creates excessive friction and premature wear; too loose means ragged cuts and unhappy grass.
Test your mower on a small patch of lawn. The cut should be crisp and clean, like scissor-snipped hair rather than torn edges. If you notice brown tips appearing within a day or two, your adjustment needs fine-tuning. This attention to detail ensures your sustainable mowing practice delivers beautiful, healthy results.
Integrating Sharpening Into Your Maintenance Routine
Creating a maintenance routine that includes regular bedknife sharpening doesn’t have to be complicated. Think of it as part of your mower’s seasonal check-up, much like changing the oil in your car or cleaning your gutters before winter.
So when should you sharpen versus backlap? Here’s a helpful rule of thumb: backlapping is your weekly or bi-weekly tune-up, perfect for maintaining an already sharp cutting unit between proper sharpenings. If you’re backlapping more than once a week or noticing the cutting quality isn’t improving after a session, it’s time for actual sharpening. Most homeowners with average-sized lawns need to sharpen their bedknife once or twice per season, though this varies based on grass type, soil conditions, and how often you mow.
A sustainable maintenance schedule might look like this: backlap every two weeks during peak growing season, check and adjust bedknife-to-reel contact monthly, and plan for sharpening in early spring before the growing season kicks into high gear and again in mid-summer if needed. Since sharp blades improve cut quality dramatically, staying on schedule pays off in a healthier, better-looking lawn.
Here’s something many experienced groundskeepers swear by: keep a simple maintenance log. Jot down when you backlap, sharpen, or adjust your mower. Note any changes in cutting performance or unusual wear patterns. This record becomes invaluable for predicting when maintenance is needed and identifying problems before they become expensive repairs. You can use a notebook, a phone app, or even just mark dates on your garage calendar.
The beauty of this approach is that it becomes second nature over time. You’ll develop a feel for when your mower needs attention, and that regular care extends the life of your equipment while keeping your lawn in top condition. Plus, you’re maintaining equipment rather than replacing it, which aligns perfectly with sustainable gardening practices.
Common Mistakes to Avoid When Sharpening Bedknives
Let’s be honest—we’ve all been there. You’re motivated to get your reel mower cutting like new, but sometimes enthusiasm can lead us astray. Here are the most common pitfalls I’ve seen (and yes, made myself) when sharpening bedknives, so you can skip the learning curve.
The biggest mistake? Over-sharpening. I get it—you want that perfect edge, but grinding away too much metal weakens the bedknife and shortens its lifespan dramatically. Think of it like pruning: less is often more. Take off just enough to restore the edge, then stop. If you’re removing more than a few thousandths of an inch, you’re probably overdoing it.
Getting the angle wrong is another classic error. Bedknives need a specific angle to work properly with the reel blades—typically between 30 and 35 degrees. Too steep, and you’ll have excessive contact wear. Too shallow, and you won’t get clean cuts. When in doubt, check your mower’s manual or measure the existing angle before you start grinding.
Uneven grinding creates wavy cutting edges that produce striped, uneven lawns. This usually happens when you apply inconsistent pressure or don’t maintain steady movement across the grinding surface. Take your time and use even, deliberate passes.
Here’s something many people overlook: after sharpening, you must readjust the bedknife-to-reel clearance. A freshly sharpened bedknife changes the geometry slightly, and skipping this adjustment means you won’t benefit from all that careful work.
Finally, always test your results. Run a piece of paper through the cutting edge before reassembling everything. If it doesn’t slice cleanly, you’ll save yourself frustration by addressing issues now rather than after mowing half your lawn. This simple check ensures your effort translates into actual results.
Recommended Bedknife Sharpening Tools and Products
Finding the right sharpening tool depends on how often you mow, your budget, and how hands-on you want to get with maintenance. Let me walk you through options that work for different situations.
For occasional home users with one or two reel mowers, a handheld sharpening file or stone offers an economical entry point around 15-30 dollars. These require patience and a steady hand, but they’re sustainable choices with zero electricity use and practically unlimited lifespan. The Mill File is particularly popular among gardeners who enjoy the meditative quality of manual maintenance. Just know there’s a learning curve, and you’ll need to practice maintaining consistent angles.
Mid-range rotary sharpening kits, priced between 50-100 dollars, attach to power drills and significantly speed up the process. The Relief Bedknife Sharpening Kit is a solid choice here, providing grinding wheels specifically designed for bedknife angles. These work well for homeowners who sharpen annually or bi-annually and want professional-looking results without professional costs. They use electricity, but the relatively brief runtime keeps energy consumption low.
For frequent users or those maintaining multiple mowers, bench-mounted grinding systems ranging from 150-400 dollars become worthwhile investments. Models like the American Lawnmower Company Sharpening System offer precision angle guides and consistent results. While the upfront cost is higher, these tools last decades with proper care, making them economically and environmentally sensible for serious reel mower enthusiasts.
Professional-grade lapping compounds, around 20-30 dollars per container, deserve mention as complementary products rather than standalone solutions. They’re excellent for maintaining sharpness between proper grindings and can extend the time between major sharpening sessions.
When choosing, consider your commitment level honestly. A 200-dollar grinder gathering dust isn’t sustainable, while a 20-dollar file that gets used regularly is. I’ve seen gardeners achieve beautiful results with simple tools and patience, while others appreciate the speed and consistency of powered options.
Look for tools with replaceable parts rather than disposable units. Quality steel files can be resharpened themselves, and grinding wheels should be replaceable without replacing the entire system. This approach reduces waste and long-term costs.
Whatever you choose, proper storage matters. Keep metal tools rust-free with light oil coatings, store them in dry locations, and they’ll serve you for years. The best sharpening tool is ultimately the one you’ll actually use consistently, keeping your mower cutting cleanly and your lawn healthy.
Learning to sharpen your reel mower bedknife is absolutely within your reach, and it’s one of those skills that truly empowers you as a gardener. While it might seem intimidating at first, remember that every expert started exactly where you are now, wondering if they could really do this themselves. The good news? You absolutely can.
Start simple. If you’re new to reel mower maintenance, begin with backlapping. Get comfortable with the adjustment process, learn how your mower responds, and build your confidence. This foundation makes the transition to actual sharpening feel natural rather than overwhelming. As you become familiar with your equipment’s quirks and needs, you’ll notice when backlapping isn’t quite enough anymore, and that’s your signal to level up your skills.
The beauty of maintaining your own bedknife is multifaceted. Yes, you’ll save money by avoiding frequent professional services, but there’s something more valuable at play here. You’re extending the life of quality equipment, reducing waste, and embracing sustainable gardening practices that align with environmentally conscious lawn care. Each sharpening session means less equipment ending up in landfills and more resources staying in productive use.
Beyond the practical benefits, there’s genuine satisfaction in this work. Running your hand along a freshly sharpened bedknife, hearing that crisp scissor-cut sound on your first post-sharpening pass, and seeing the perfect stripe pattern across your lawn creates a sense of accomplishment that’s hard to match. This hands-on connection to your overall mower maintenance transforms lawn care from a chore into a rewarding craft. Your lawn will thank you with healthier, more resilient grass, and you’ll gain the confidence that comes with true equipment mastery.


