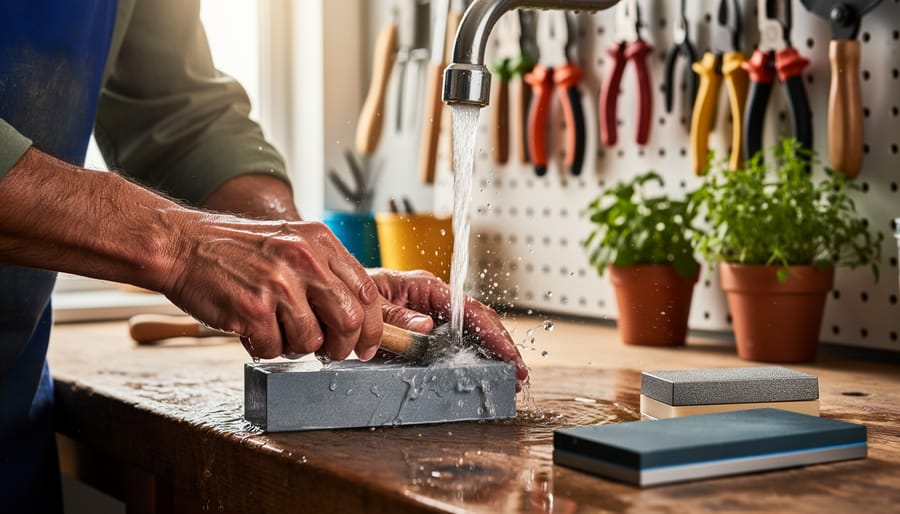
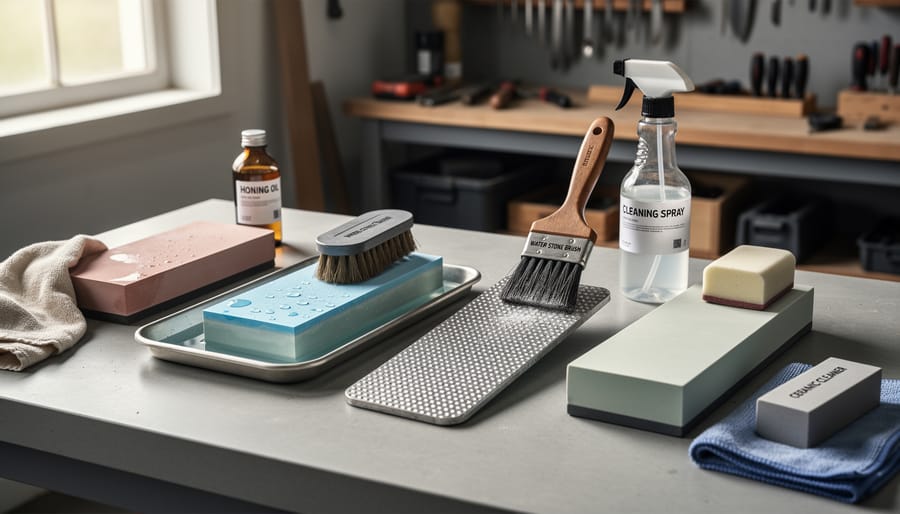
Scrub your water stones under running tap water with a dedicated nagura stone or old toothbrush to dislodge metal particles embedded in the pores—this simple weekly rinse prevents glazing that makes sharpening feel like you’re dragging tools across glass instead of honing them. For oil stones, spray degreaser directly onto the surface, let it sit for five minutes, then wipe clean with shop rags, repeating until the cloth comes away without dark residue. Diamond plates need only soapy water and a soft brush, making them the lowest-maintenance option for gardeners who’d rather spend time actually using their pruners and hoes than fussing over maintenance equipment.
Most sharpening stones lose effectiveness not from wear but from loading—that stubborn accumulation of metal particles, oil, and gunk that fills the abrasive surface and prevents proper contact with your blade edges. When your favorite pruning shears take twice as long to sharpen as they used to, or your garden spade seems to skate across the stone without catching, you’re looking at a clogged stone crying out for restoration.
The good news is that cleaning sharpening stones requires no specialized products or complicated procedures. Whether you maintain water stones for your fine woodworking tools, oil stones inherited from a grandfather who knew the value of sharp implements, or modern diamond plates for quick garden tool touch-ups, the right cleaning approach takes minutes and can fully restore cutting performance. Even severely neglected stones caked with years of debris respond remarkably well to proper cleaning techniques, and establishing a simple maintenance routine means you’ll never face that frustration again.
Why Your Sharpening Stone Needs Regular Cleaning
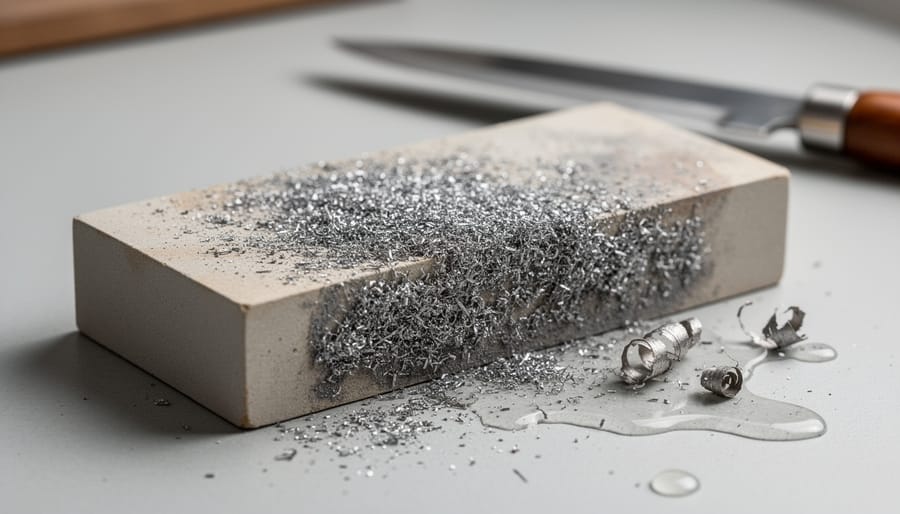
Every time you run your pruners, hoes, or mower blades across a sharpening stone, something happens beneath the surface that most gardeners don’t think about. Those tiny metal particles you’re grinding away don’t just disappear into thin air. They lodge themselves deep into the stone’s pores, mixing with whatever lubricant you’re using, whether that’s water, oil, or honing fluid. Over time, these microscopic bits of metal, combined with dust and debris from your garden tools, create a glazed layer that essentially clogs your stone.
Think of it like trying to clean dishes with a sponge that’s already full of grease. You’re not really getting anywhere, are you? A clogged sharpening stone won’t cut efficiently, meaning you’ll spend twice as long sharpening and still won’t achieve the edge you need. I learned this the hard way after wondering why my pruning shears weren’t staying sharp garden tools should be, only to discover my stone was packed with months of metal buildup.
The connection between clean stones and truly razor-sharp garden tools is direct and undeniable. A clean stone exposes fresh abrasive particles that can properly bite into metal, creating that precise edge that makes garden work easier and more enjoyable. Dull tools require more force, which increases your fatigue and the risk of accidents.
Here’s where sustainability comes into play. Maintaining tools properly, including your sharpening stone, means you’re not constantly replacing equipment that could last decades with proper care. A well-maintained stone can serve you for years, reducing waste and saving money. Plus, sharp tools make cleaner cuts on plants, promoting healthier growth and reducing plant stress. It’s a simple practice that ripples outward into more sustainable gardening overall.
Understanding Different Types of Sharpening Stones
Oil Stones (Arkansas, India Stones)
Oil stones, including Arkansas and India stones, have been the go-to choice for sharpening garden tools for generations, and for good reason. These natural and synthetic stones rely on oil as their lubricant, which means their cleaning process differs significantly from water stones. The oil creates a slurry during sharpening that helps carry away metal particles, but over time, this can build up and clog the stone’s pores, making it less effective at putting that perfect edge on your pruning shears or hoe.
To clean oil stones properly, start by wiping away excess oil and debris with a clean rag. For deeper cleaning, use a solvent like mineral spirits or kerosene in a well-ventilated area. Pour a small amount onto the stone’s surface and scrub with a stiff brush, working the solvent into the pores. The solution will turn dark as it lifts embedded metal particles and old oil. Wipe clean and repeat if necessary. Some gardeners swear by leaving particularly dirty stones soaking in solvent overnight, though this requires patience.
Here’s a sustainable tip: between deep cleanings, simply wiping your oil stone after each use and applying fresh honing oil keeps it working efficiently longer, reducing the need for harsh solvents and extending the stone’s lifespan considerably.
Water Stones (Japanese Whetstones)
Water stones, or Japanese whetstones, are beloved by gardeners who want that razor-sharp edge on pruners and shears, but they need a bit more TLC than their synthetic cousins. These natural or ceramic stones work differently because they’re designed to release tiny particles during sharpening, creating a slurry that actually helps with the cutting action. This is great for sharpening, but it means they get loaded with metal particles and debris much faster.
After each use, rinse your water stone thoroughly under running water while gently scrubbing with your fingers or a soft brush. You’ll see a grayish slurry wash away, and that’s exactly what you want. Never use soap, as it can clog the stone’s pores and reduce its effectiveness. Some folks soak a dedicated cleaning stone or use a nagura stone to help release embedded particles, which is particularly handy for finer grit stones.
Between sharpenings, store your water stones completely dry in a well-ventilated spot. While they need soaking before use, keeping them perpetually wet invites mold and can cause cracking during temperature changes. If you notice your stone cutting slower than usual, it’s probably glazed over with metal particles and needs a good scrub or flattening with a diamond plate.
Diamond and Ceramic Stones
If you’re looking for a low-maintenance option for keeping your pruners and garden tools sharp, diamond and ceramic stones are worth considering. These modern alternatives have become increasingly popular among gardeners, and for good reason—they’re incredibly user-friendly when it comes to upkeep.
Unlike traditional whetstones that need soaking or oil applications, diamond stones can be used with just a light spray of water or even dry in some cases. This makes them perfect for quick touch-ups between major garden projects. Ceramic stones operate similarly, requiring only water as a lubricant. The best part? Cleaning these stones is refreshingly simple. A quick rinse under running water with a soft brush removes metal particles and debris. For stubborn buildup, a mild dish soap solution works wonders without damaging the surface.
These stones resist loading (that gunky buildup we discussed earlier) much better than conventional options, meaning you’ll spend less time maintaining your maintenance tools—which is exactly what busy gardeners need. They’re also more environmentally friendly since they eliminate the need for petroleum-based honing oils. While the initial investment might be higher, their durability and minimal upkeep requirements make them cost-effective over time, especially if you sharpen tools regularly throughout the growing season.
Step-by-Step Guide to Cleaning Your Sharpening Stones
Cleaning Water Stones
Water stones are wonderfully effective for sharpening, but they do require a bit of care to keep them in top shape. The good news is that cleaning them is straightforward, and with a little attention, you’ll keep your stones performing beautifully for years to come.
Start by giving your water stone a good soak. Place it in clean water for about 10 to 15 minutes. This helps loosen all that metal residue and grit that’s built up during sharpening. You’ll often see the water turn slightly gray or cloudy, which is exactly what you want. That’s all the debris releasing from the stone’s pores. If you’ve been sharpening garden tools like pruners or hoes, you might notice the buildup is particularly heavy, especially during busy gardening seasons.
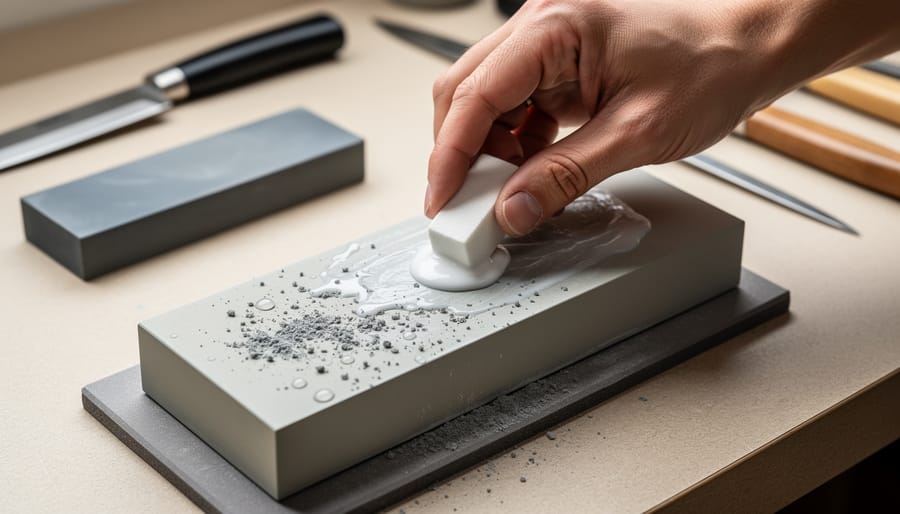
Once soaked, it’s time for scrubbing. A nagura stone is your best friend here. This small, soft stone is specifically designed to clean and refresh water stone surfaces. Simply rub the nagura across your wet water stone in circular motions, creating a light slurry. This slurry actually helps lift embedded metal particles while simultaneously flattening minor surface irregularities. If you don’t have a nagura stone, a stiff nylon scrub brush works well too. Avoid metal brushes, as they can damage the stone’s surface and leave behind particles that will contaminate future sharpening sessions.
For those stubborn metal particles that just won’t budge, try this eco-friendly trick: make a paste with baking soda and water, apply it to the stone, and scrub gently with your brush. The mild abrasive action usually does the trick without harsh chemicals.
After cleaning, rinse your stone thoroughly under running water until it runs completely clear. Proper drying is crucial for water stone longevity. Stand the stone on its edge in a well-ventilated area, allowing air to circulate around all surfaces. Never store a water stone while it’s still wet, as this can encourage mold growth or cause cracking.
Cleaning Oil Stones
Oil stones are wonderful for sharpening your pruning shears and garden knives, but they do need special attention when cleaning time rolls around. Unlike water stones, oil stones develop a thick, gunky buildup that can clog those tiny pores and leave your stone feeling more like a skating rink than a sharpening surface.
The most straightforward approach starts with good old dish soap and hot water. Mix up a solution with a generous squirt of dish soap in a container of very hot water, then use an old toothbrush or scrub brush to work the soapy water into the stone’s surface. You’ll want to scrub in circular motions, really getting into those pores. This method works great for light buildup and regular maintenance cleaning, plus it’s completely safe and eco-friendly.
For stones that are seriously clogged, mineral spirits provide more cleaning power. Working in a well-ventilated area or outdoors is essential here. Pour a small amount of mineral spirits directly onto the stone and scrub vigorously with your brush. The spirits will dissolve that stubborn oil and metal residue beautifully. Once you’ve loosened everything up, wipe the stone clean with old rags you don’t mind tossing afterward. Always wear gloves when handling mineral spirits, and keep them away from any open flames.
If you prefer staying away from petroleum-based products, citrus-based degreasers make excellent eco-friendly alternatives. They work similarly to mineral spirits but with a more pleasant smell and less environmental impact. Simple Green and similar plant-based cleaners also do the job nicely for moderately dirty stones.
After any cleaning method, rinse your stone thoroughly and let it dry completely before storing or using it again.
Cleaning Diamond and Ceramic Stones
Good news for those of you maintaining garden tools with diamond or ceramic stones – these are wonderfully low-maintenance options! Unlike their traditional counterparts, these modern sharpening solutions don’t absorb oils or water, making cleanup remarkably straightforward.
After each sharpening session, simply brush away the metal particles that accumulate on the surface. A soft-bristled brush or even an old toothbrush works perfectly for this task. I keep a dedicated brush right next to my sharpening station, and this quick sweep takes less than thirty seconds. For diamond plates especially, those metal filings can clog the abrasive surface if left behind, reducing effectiveness over time.
Next, wipe the stone down with a damp cloth to remove any remaining debris. If you’ve been sharpening particularly dirty tools straight from the garden, you might notice some stubborn residue. In these cases, add a drop of dish soap to your cloth – nothing fancy needed. The environmentally friendly dish soap you already use in your kitchen works great.
For diamond stones that see heavy use, an occasional deeper clean helps maintain peak performance. Mix warm water with a small amount of mild detergent, then gently scrub the surface with your brush. Rinse thoroughly and let it air dry before storing. This sustainable approach keeps your stones working efficiently for years, reducing the need for replacements and keeping more tools out of landfills.
Eco-Friendly Cleaning Solutions
Let’s talk about keeping your sharpening stones clean without harsh chemicals that harm the environment. As gardeners, we already know the value of working with nature rather than against it, and that philosophy extends perfectly to maintaining our tools.
For most sharpening stones, a simple mixture of white vinegar and water works wonderfully. Mix one part vinegar with three parts warm water, and you’ve got an effective, non-toxic cleaner that cuts through metal particles and oil buildup. I’ve been using this solution for years on my waterstones and oilstones, and it’s never let me down. Just soak the stone for 10-15 minutes, scrub gently with a soft brush, and rinse thoroughly.
Biodegradable dish soap is another garden-shed staple that doubles as an excellent stone cleaner. Choose a plant-based formula without synthetic fragrances or petroleum derivatives. A few drops mixed with warm water creates a gentle degreaser perfect for routine cleaning between sharpening sessions. This works particularly well for synthetic stones that don’t require special treatment.
For stubborn buildup on oilstones, consider using a paste made from baking soda and water. This natural abrasive gently lifts embedded particles without scratching the stone’s surface. Apply it with circular motions using an old toothbrush, let it sit for five minutes, then rinse clean.
These eco-friendly methods not only protect our waterways and soil but also save money while delivering results that rival any commercial cleaner.
Flattening and Restoring Uneven Sharpening Stones
Checking for Flatness
Before you start cleaning, it’s worth checking whether your stone has developed an uneven surface over time. This is especially common if you’ve been sharpening in the same spot repeatedly, which many of us do without realizing it. A dished or hollowed stone won’t sharpen your garden tools effectively because the blade won’t make consistent contact across the entire surface.
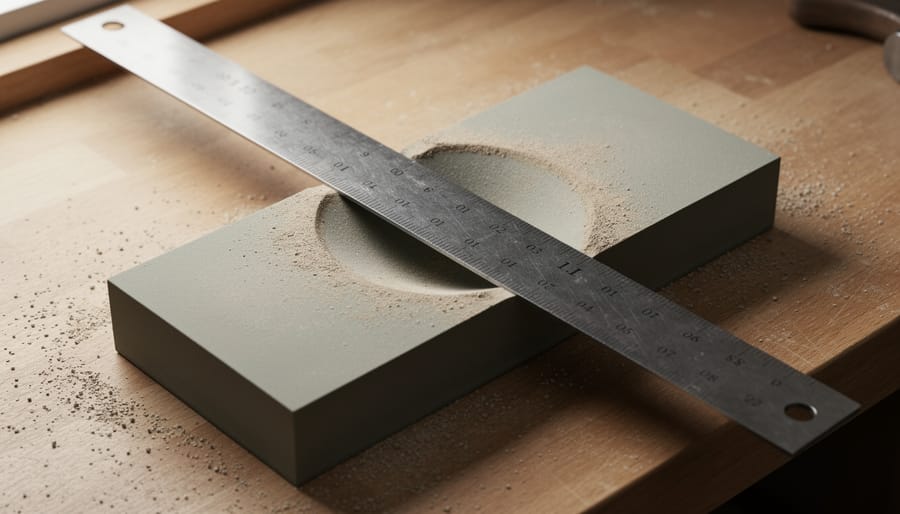
The simplest way to check for flatness is with a metal straightedge or ruler. Place it diagonally across your stone and hold it up to the light. If you can see light peeking through underneath, your stone has developed a dip. Try this test in several directions, including corner to corner and side to side, to get a complete picture of your stone’s condition.
Don’t have a straightedge handy? No worries. Another method is to hold your stone up at eye level and sight along its surface. You’ll often be able to spot any obvious hollows or high spots this way. Even a slight dish of a few millimeters can affect sharpening performance, particularly for longer tools like pruning shears or hedge clippers.
Flattening Methods
Keeping your sharpening stones flat is essential for maintaining those crisp, even edges on your garden tools. When stones develop low spots or become dished out in the center, they’ll actually round over your blade edges instead of sharpening them properly. Let me walk you through three budget-friendly methods that work beautifully.
The flattening stone method is my personal favorite for regular maintenance. These dedicated stones, sometimes called lapping plates, feature an ultra-coarse surface specifically designed to resurface other stones. Simply wet both stones and work your sharpening stone across the flattening stone in figure-eight patterns for about two minutes. You’ll notice a slurry forming, which is perfectly normal. This method works wonderfully for water stones and combination stones alike.
For the truly budget-conscious gardener, the sandpaper-on-glass technique delivers professional results for pennies. Find a piece of thick glass or granite tile at least 12 inches square for stability. Secure 120-grit wet-dry sandpaper to the surface with a few drops of water, then work your stone across it using consistent, overlapping strokes. Progress to 220-grit for a final smooth finish. This approach is surprisingly effective and sustainable since you’re only replacing inexpensive sandpaper rather than buying specialized equipment.
Here’s a trick my grandfather taught me: concrete blocks make excellent emergency flatteners. Find a smooth, flat concrete block or paving stone and wet it thoroughly. Rub your sharpening stone against it in circular motions. While this method is rougher and slower, it’s completely free and works in a pinch when you’re far from your workshop. The key is ensuring the concrete surface itself is genuinely flat before beginning.
How Often to Flatten Your Stones
How often you flatten your sharpening stones really depends on how much you’re using them. If you’re like me and spend every weekend pruning roses or trimming hedges, you’ll want to check your stone’s surface more frequently than someone who only sharpens occasionally.
For regular gardeners maintaining pruning shears and hedge trimmers weekly, plan to flatten your stones every 10 to 15 sharpening sessions. That translates to roughly once every two to three months during peak growing season. You’ll know it’s time when you notice sharpening takes longer than usual or your tools aren’t getting that nice, keen edge they once did.
Casual users who sharpen garden tools monthly can stretch flattening to twice a year. However, don’t wait for obvious problems. Run your finger lightly across the stone’s surface. If you feel any dishing or unevenness, it’s time to flatten, regardless of your schedule.
Here’s a sustainable tip: keeping a simple maintenance log helps you track when you last flattened your stones. This prevents over-flattening, which wastes stone material and shortens its lifespan. Think of it as being kind to both your wallet and the environment by making your tools last longer through proper care.
Proper Storage to Keep Stones Clean Longer
Taking good care of your sharpening stones between uses is just as important as cleaning them properly. Think of it like storing your garden seeds in a cool, dry place rather than leaving them in a damp shed where they might spoil. The same principle applies to your stones.
After cleaning and drying your stones completely, wrap them in clean, lint-free cloth or place them in dedicated storage boxes. This simple step protects them from dust, dirt, and the metal particles that inevitably float around workshops and garden sheds. I learned this lesson the hard way when I left my favorite water stone unwrapped on a shelf, only to find it covered in sawdust and requiring another thorough cleaning before I could use it.
For water stones specifically, store them in a dry location where air can circulate around them. Never seal a damp stone in plastic or an airtight container, as trapped moisture can lead to cracking or even mold growth. If you’re storing stones in a garden shed, avoid placing them directly on concrete floors or against exterior walls where temperature fluctuations and condensation are common.
Oil stones prefer similar conditions but are generally more forgiving. Still, keep them away from extreme temperature swings that can affect the oil residue and potentially cause surface damage. A simple wooden box or drawer works beautifully and adds a sustainable storage solution using materials you might already have around your workshop.
Consider labeling your stones by grit level if you have multiple ones. This practical approach saves time and prevents accidentally grabbing the wrong stone mid-project. Keep them elevated on shelving or in cabinets rather than on the ground, protecting them from accidental kicks, water spills, or curious pets exploring your workspace.
Common Mistakes That Damage Sharpening Stones
Even the most careful gardeners can accidentally damage their sharpening stones without realizing it. Let’s walk through some common mistakes so you can keep your stones in top condition for years to come.
One of the biggest errors is using harsh cleaning agents like dish soap, detergents, or household cleaners on your stones. These chemicals can clog the stone’s pores and leave residues that interfere with sharpening. Stick with plain water for water stones and appropriate solvents for oil stones. Think of it like caring for cast iron cookware – sometimes the simplest approach is best.
Dropping stones is another heartbreaker. Natural and synthetic stones can crack or chip easily, especially when dry. Always work over a soft surface or mat, and handle stones with clean, dry hands to prevent slips. This is particularly important when moving stones between your workspace and proper storage.
Thermal shock is a silent killer of water stones. Never pour hot water over a cold stone or plunge a warm stone into ice-cold water. The rapid temperature change can cause internal cracking that ruins the stone. Room temperature water is always your safest bet.
Cross-contamination between oil and water stones is surprisingly common. Once oil touches a water stone, it’s nearly impossible to remove and will severely compromise its performance. Keep oil-based and water-based stones completely separate, including their cleaning tools and storage areas. Label your stones clearly if you maintain both types in your workshop. This simple organizational step prevents costly mistakes and ensures your garden tools always get the sharp edge they deserve.
When to Replace Your Sharpening Stone
Even with proper care, sharpening stones don’t last forever, and knowing when to retire yours is part of being a responsible tool steward. I learned this lesson the hard way after stubbornly clinging to a worn-out stone that was doing more harm than good to my favorite pruning shears.
The most obvious sign is excessive wear creating a significant dish or depression in the stone’s surface. If you can’t restore flatness through proper flattening techniques, it’s time for a replacement. A severely dished stone will round your tool edges rather than sharpening them properly, which defeats the entire purpose.
Visible cracks are another clear indicator, especially in water stones and natural stones. Even hairline fractures can worsen during use and cause the stone to break apart unexpectedly. This isn’t just frustrating during mid-sharpening sessions, it can actually damage your valuable garden tools.
Deep contamination that resists all cleaning efforts means the stone’s pores are permanently clogged. If your stone stays dark and glazed even after thorough cleaning, or if it simply won’t cut anymore, replacement is more practical than continued frustration.
Here’s the good news: a quality sharpening stone that’s properly maintained can last decades. When replacement time does come, consider it an investment in your garden’s productivity. Sharp tools make gardening more enjoyable and sustainable by reducing the physical effort required and keeping your plants healthier through clean cuts.
Taking care of your sharpening stones isn’t just another chore to add to your weekend list—it’s an investment in every gardening task you’ll tackle down the road. When you maintain clean, properly functioning stones, you’re ensuring that your pruners glide through branches, your spades slice cleanly through soil, and your hoe edges stay crisp season after season. This simple maintenance routine takes mere minutes but saves hours of frustration wrestling with dull tools.
Think about it this way: a well-maintained sharpening stone is the foundation of quality garden tool care. Without it, even the best tools become liabilities rather than assets. Plus, keeping your tools sharp and your stones clean aligns perfectly with sustainable gardening practices. Sharp tools mean cleaner cuts that heal faster on plants, less physical strain on your body, and fewer replacement purchases over time.
So here’s your action step: right after finishing this article, go inspect your sharpening stones. Check for buildup, test for glazing, and give them a proper cleaning if needed. Then commit to a regular schedule—even quarterly maintenance makes a tremendous difference. Your future self, standing in the garden with effortlessly sharp tools, will thank you.