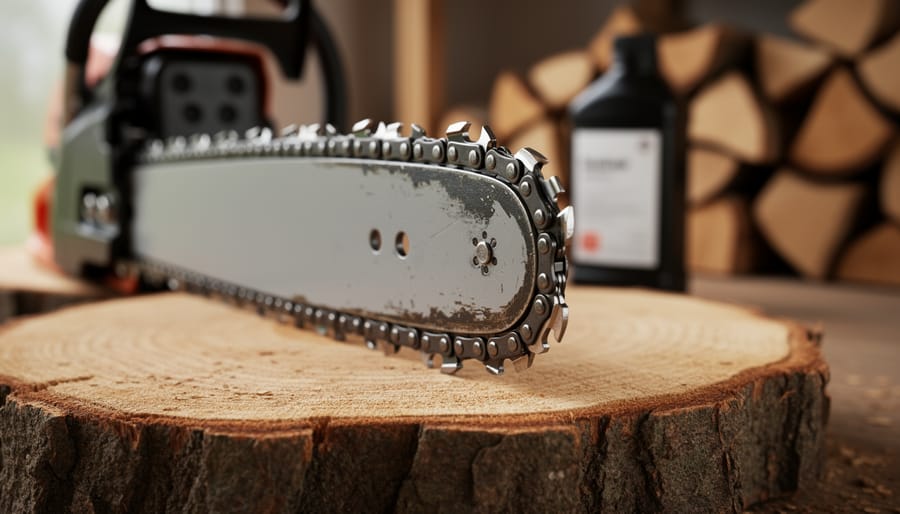
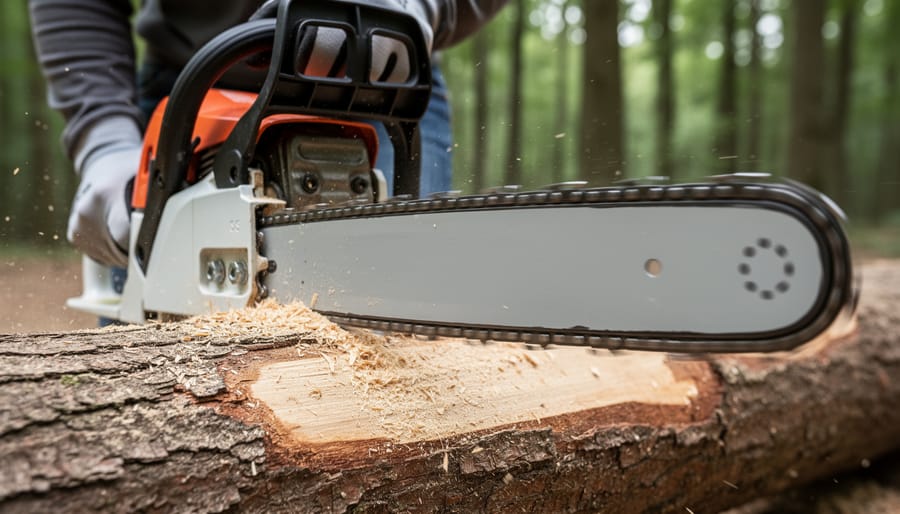
Your chainsaw is only as effective as the angles you maintain on its cutting teeth. A dull or incorrectly sharpened chain transforms what should be smooth cutting into frustrating, exhausting work that produces sawdust instead of wood chips and leaves you fighting the saw through every cut.
The difference between effortless cutting and dangerous struggle comes down to three precise angles: the top plate angle (typically 25-35 degrees), the side plate angle (usually 90 degrees), and the depth gauge height (about 0.025 inches below the cutter). When these angles align correctly, your chain slices through wood like butter. When they’re off by even a few degrees, you’ll notice increased vibration, crooked cuts, and the saw pulling to one side.
Most chainsaw owners focus solely on filing the cutting teeth while neglecting the complete maintenance picture. Understanding sharpening angles means recognizing how each component works together with proper chain tension, adequate bar oil flow, and regular depth gauge adjustment. A perfectly sharpened chain on a poorly maintained bar still won’t cut efficiently.
Whether you’re preparing firewood for winter, clearing storm-damaged trees, or maintaining your property’s timber, mastering these angles transforms your chainsaw from a temperamental tool into a reliable partner. The good news? Once you understand the fundamentals and develop consistent technique, sharpening becomes a quick, satisfying routine that keeps your saw performing at its peak with minimal effort.
Understanding Chainsaw Chain Anatomy and Why Angles Matter
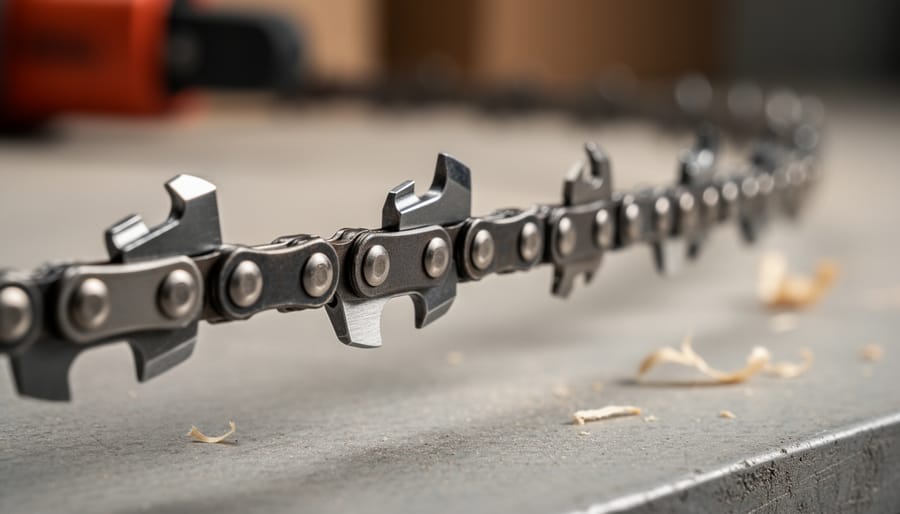
The Three Critical Angles You Need to Know
Getting your chainsaw to cut like a dream comes down to understanding three fundamental angles that work together like a well-choreographed dance. Think of these angles as the secret recipe for perfect cuts—miss one ingredient, and your results will suffer.
The top plate angle, typically set between 25 and 35 degrees, is your primary cutting edge. This is the angle you see when looking down at the tooth from above. It’s what actually slices through wood fibers, much like a knife blade. A steeper angle (around 35 degrees) gives you aggressive cutting in softer woods, while a more gradual angle (25 degrees) holds up better in hardwoods and dirty conditions. Just like blade sharpening precision matters for your lawn mower, getting this angle consistent across all teeth is crucial for smooth operation.
The side plate angle, usually around 80 to 90 degrees, determines how the tooth hooks into the wood. When you look at the chain from the side, this is the vertical cutting edge. Think of it as the angle that pulls the chip away from the cut. Too steep, and your chain dulls quickly; too shallow, and you’ll struggle to get bite into the wood.
Finally, the depth gauge angle controls how deeply each tooth cuts. Set at about 30 degrees, this small ramp in front of each tooth acts as a limiter. The depth gauge sits slightly lower than the cutting tooth—typically about 0.025 inches—creating that angled approach. This prevents the chain from grabbing too aggressively, which could cause dangerous kickback or bogging.
When these three angles work in harmony, your chainsaw transforms into an efficient, safe cutting machine that makes quick work of any job.
Finding the Right Angles for Your Chainsaw Chain
Standard Angles for Common Chain Types
Getting the right angles for your chainsaw chain isn’t one-size-fits-all. Different chain types require specific angles to perform their best, and understanding these differences will help you achieve cleaner cuts while extending the life of your equipment.
Full chisel chains are the workhorses for professional cutting tasks and deliver aggressive, fast cuts through hardwood. These square-cornered cutters perform best with a 30-degree top plate angle and a 60-degree down angle. The sharper geometry means they cut incredibly efficiently, but here’s the trade-off: they dull faster in dirty conditions and require more frequent maintenance. I’ve found them ideal for clean firewood cutting on my property, but they’re less forgiving if you accidentally hit dirt or embedded debris.
Semi-chisel chains offer a friendlier option for most homeowners and gardening enthusiasts. With their rounded cutting corners, they typically use a 30-degree top plate angle and 55-degree down angle. These chains stay sharper longer in less-than-perfect conditions, making them perfect for general yard work where you might encounter the occasional hidden nail in an old fence post or gritty bark. They’re more forgiving during sharpening too, which matters when you’re learning the technique.
Low-profile chains are designed for smaller, lighter saws often used for pruning and occasional cutting tasks. These typically require a 30-degree top plate angle and 60-degree down angle, similar to full chisel chains. They’re excellent for homeowners who prioritize safety and ease of use over maximum cutting speed. The reduced kickback design makes them particularly appropriate for occasional users who want reliable performance without professional-level maintenance demands.
Remember, always verify your specific chain manufacturer’s recommendations, as variations exist even within these categories. Your owner’s manual contains the most accurate specifications for optimal performance.
Adjusting Angles for Different Wood and Conditions
Your chainsaw’s cutting angles aren’t one-size-fits-all, and adjusting them based on what you’re cutting can make a real difference in both performance and how often you need to sharpen. Think of it like choosing the right garden tool for different soil types—a little customization goes a long way.
When tackling hardwoods like oak or maple, you’ll want to reduce your top plate angle by about 5 degrees from the standard 30 degrees. This creates a more aggressive bite, which helps the chain power through denser wood without bogging down. Conversely, softwoods like pine or fir cut beautifully with the standard angles, or you can even increase the angle slightly for smoother, faster cuts.
Frozen wood presents its own challenge. The ice crystals make the wood incredibly hard, almost abrasive. I’ve found that reducing the top plate angle to around 25 degrees and slightly decreasing the depth gauge setting helps the chain maintain its edge longer. It’s similar to how you’d adjust your mower blade height for different grass conditions—small changes yield better results.
If you’re cutting dirty wood, storm debris, or anything that’s been sitting on the ground, your chain will dull faster than you can say “sustainable forestry.” For these abrasive conditions, consider slightly increasing your top plate angle to 35 degrees. This creates a stronger cutting edge that resists damage better, though you’ll sacrifice some cutting speed. The trade-off is worthwhile when you’re dealing with grit and dirt that would otherwise destroy your edge within minutes.
Remember, these adjustments are starting points. Pay attention to how your saw performs and fine-tune accordingly—your experience is your best teacher.
Tools and Techniques for Achieving Perfect Sharpening Angles
File Guides and Manual Sharpening
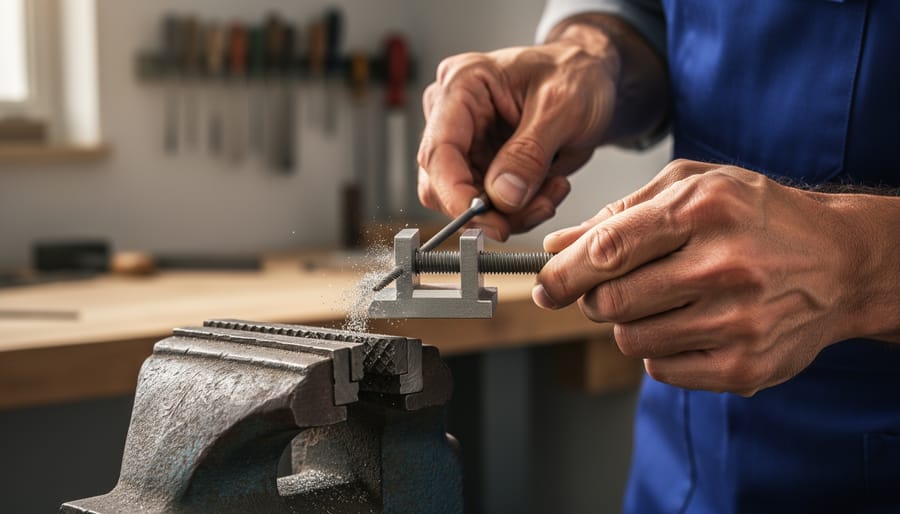
Let me walk you through the most practical and sustainable way to sharpen your chainsaw: using a round file with an angle guide. This method requires minimal investment, creates no electronic waste, and gives you complete control over your tool’s performance. Best of all, once you’ve practiced a few times, you’ll develop a rhythm that makes regular maintenance feel second nature.
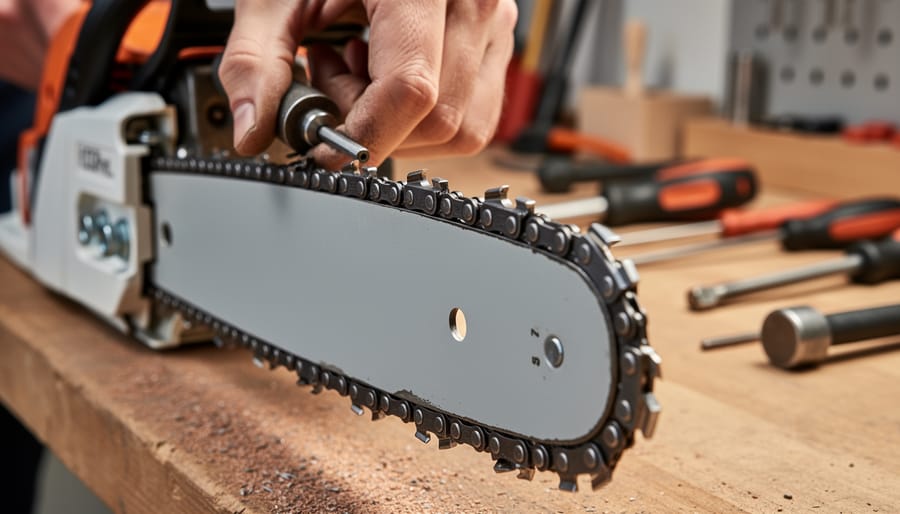
Start by securing your chainsaw in a vise or on a stable surface. Choose a round file that matches your chain’s pitch, typically 3/16, 5/32, or 7/32 inches. Attach a file guide to the file, which usually comes with angle markings at 30 or 35 degrees. These handy guides sit on top of the chain and automatically position your file at the correct height and angle.
Find the master link, the one you marked with a permanent marker so you know where you started. Position the file guide so the reference lines align with the bar, maintaining your target angle of typically 30 degrees. Hold the file with both hands, applying light to moderate pressure, and push it away from you through the cutter in smooth, deliberate strokes. Three to five strokes per tooth usually does the job, though dull chains need more attention.
Work your way around one side of the chain, sharpening every other tooth. Each tooth should receive the same number of strokes to maintain balance. Once you’ve completed all teeth facing one direction, flip the saw around and sharpen the opposite-facing teeth. Consistency matters more than perfection here.
The file should only cut on the forward stroke, so lift it slightly when pulling back. Keep your file movements horizontal, avoiding any rocking motion that creates uneven edges. You’ll notice the cutter taking on a shiny, sharp appearance as you work.
Check your progress by maintaining sharpening tools in good condition and replacing files when they show wear. A fresh file cuts efficiently with less effort, making your sharpening sessions quicker and more effective.
Electric and Bench-Mounted Sharpeners
If you’re maintaining multiple chainsaws or sharpening frequently throughout the growing season, electric and bench-mounted sharpeners can be game-changers for your efficiency. These powered options take the guesswork out of achieving consistent angles, though they do require an upfront investment worth considering carefully.
Electric sharpeners typically range from $50 to $300, with bench-mounted models commanding higher prices. The advantage? They use pre-set angle guides that ensure accuracy every time. You simply position the chain in the grinding wheel’s path, set your angle (usually clearly marked at common settings like 30 or 35 degrees), and let the machine do the work. For those of us who’ve struggled with hand-filing consistency, this precision is incredibly satisfying.
However, before investing, consider your usage patterns. If you’re sharpening once or twice a season for basic yard work, a good hand file might serve you better. Electric sharpeners shine when you’re cutting regularly or managing several chains. They also pair well with other power tool maintenance practices in a well-organized workshop.
From a sustainability perspective, electric sharpeners have trade-offs. They consume electricity and can remove more material than necessary if you’re not careful, potentially shortening chain life. The key is using light, brief passes rather than aggressive grinding. Quality bench-mounted models often include depth gauge wheels and allow for both left and right cutter sharpening without repositioning.
When using powered sharpeners, always wear safety glasses and check that grinding wheels are rated for chainsaw use. Replace worn wheels promptly, and clean metal dust regularly to prevent buildup. With proper technique, these tools deliver professional results while saving considerable time during busy gardening seasons.
The Connection Between Sharpening, Bar Care, and Oiling
How Sharp Angles Reduce Bar Wear
When you maintain sharp cutting edges on your chainsaw with the correct angles, you’re not just improving how it cuts through wood—you’re actually protecting your guide bar from premature wear. Think of it like this: a properly angled chain glides through timber smoothly, while a poorly angled one fights its way through, creating unnecessary friction and heat that gradually damages both the chain and bar.
The magic happens at the cutting surface. When your top plate angle and side plate angle are spot-on (typically 30-35 degrees and 85-90 degrees respectively), each tooth slices cleanly rather than pushing, scraping, or tearing through the wood fibers. This efficient cutting action means less resistance, which translates to reduced heat buildup. Excess heat is the enemy of your bar—it accelerates wear on the grooves where your chain rides and can even cause warping over time.
Proper angles also ensure even pressure distribution across the bar. When one side of your chain cuts more aggressively than the other due to inconsistent sharpening angles, it creates uneven forces that wear down one rail faster than the other. This lopsided wear shortens your bar’s lifespan significantly and can lead to chain derailment issues.
By maintaining correct sharpening angles consistently, you’re essentially practicing preventive maintenance that pays dividends in both performance and equipment longevity—a sustainable approach that saves money and reduces waste from frequently replacing bars and chains.
Why Oiling Matters More with Correctly Angled Chains
Here’s something that might surprise you: a chain sharpened at the correct angle actually needs good lubrication more than a dull one. I know that sounds backward, but let me explain why this matters for your chainsaw’s longevity.
When your chain has properly angled cutting teeth, it slices through wood efficiently with minimal force. This creates a cleaner cutting action that generates less friction and heat. Under these ideal conditions, your bar oil can work as intended, forming a protective film between the chain and bar. The oil flows smoothly through the groove, reaching every critical point where metal meets metal.
In contrast, a dull or incorrectly angled chain requires you to push harder, creating excessive heat that can actually burn off the oil before it does its job. The extra friction also throws oil away from where it’s needed most, leading to premature wear on both your chain and guide bar.
To check if your oiling system is working properly, run your saw briefly near a light-colored surface like cardboard. You should see a fine oil mist forming a pattern. No mist? Your oiler might be clogged or adjusted too low. Also, regularly clean the oil ports on your bar, as sawdust buildup here is a common culprit for poor lubrication.
Think of it this way: sharp angles and proper oiling work as partners in your chainsaw’s health. When you maintain correct sharpening angles, you’re creating the perfect environment for your lubrication system to protect your investment and keep cuts smooth for seasons to come.
Common Sharpening Angle Mistakes (And How to Fix Them)
Inconsistent Angles Between Teeth
One of the most frustrating problems you’ll encounter when sharpening your chainsaw is creating inconsistent angles between teeth. Here’s the thing: even if each individual tooth is sharpened to the correct angle, if they’re not all matching each other, you’re in for a rough ride.
You’ll know you’ve got inconsistent angles when your chainsaw starts vibrating excessively during cuts or pulls to one side, creating crooked cuts that look like they were made by a beginner. I remember the first time I experienced this—I couldn’t understand why my saw was acting drunk, weaving through the wood instead of cutting straight!
The culprit is usually uneven hand pressure when filing or changing your filing angle partway through the sharpening session. Maybe you got tired on tooth number ten, or shifted your stance without realizing it. It happens to all of us.
To identify inconsistent angles, examine your chain closely under good light. The cutting edges should all look uniform, like soldiers in a row. If some teeth appear more hooked or have different facet sizes, you’ve got inconsistencies.
Correcting this requires patience and a systematic approach. Use a filing guide to maintain the exact same angle for every tooth. Mark your starting tooth with a permanent marker so you don’t lose track. Count your file strokes—if tooth one gets five strokes, every tooth gets five strokes. No exceptions.
Check your work frequently by making test cuts in scrap wood. A properly sharpened chain with consistent angles produces even, fluffy sawdust from both sides and cuts straight without guidance.
Over-Sharpening and Angle Deterioration
Here’s something many weekend woodcutters discover the hard way: each time you sharpen your chainsaw, you’re removing metal and gradually changing those carefully maintained angles. It’s a natural part of the process, but over time, repeated sharpenings can leave your cutters looking quite different from their original profile.
You’ll notice the effects when your chain starts requiring more frequent touch-ups or when cutting feels inconsistent despite fresh sharpening. The teeth become shorter, the angles drift from their ideal measurements, and eventually, the depth gauges need more frequent adjustment to compensate. This is particularly common if you’ve been sharpening by hand without regularly checking your work with a gauge.
As a general rule, once your cutters have been reduced to about half their original length, it’s time to consider replacement. The chain has given you good service, but pushing beyond this point means fighting increasingly poor angles and reduced cutting efficiency. Some professionals can restore badly worn chains, but for most home users, investing in a new chain is the sustainable choice. It saves time, reduces fuel consumption from inefficient cutting, and ensures safer operation. Keep track of how many sharpenings you’ve done, and when performance doesn’t bounce back after proper sharpening, trust that your chain has earned its retirement.
Maintaining Your Sharpening Routine for Long-Term Success
Building a sustainable sharpening practice doesn’t need to be complicated, and honestly, it’s one of those habits that pays dividends in saved time and frustration down the road. Think of it like watering your garden—consistency beats sporadic effort every time.
For most homeowners using their chainsaw occasionally for yard cleanup and firewood, plan to sharpen every two to three hours of active cutting. If you’re tackling dirty wood or cutting near the ground where you might hit soil, you’ll need to sharpen more frequently. Professional loggers often touch up their chains multiple times daily, but for backyard use, letting your saw tell you when it needs attention works wonderfully.
Keep a simple log in your shed or garage. Jot down the date, how long you used the saw, and what you were cutting. After a few sessions, you’ll notice patterns that help predict when sharpening is due. This approach fits perfectly into your broader equipment maintenance routine, ensuring all your power tools stay ready for action.
Watch for these telltale signs that sharpening day has arrived: your chainsaw produces fine sawdust instead of chunky chips, you’re pushing harder to make cuts, the saw pulls to one side, or you notice smoke even with proper oiling. These signals mean you’ve waited a bit too long, but recognizing them helps you stay ahead next time.
Store your sharpening tools in one dedicated spot. I keep mine in a small plastic bin with my depth gauge tool, files, and angle guide. When everything lives together, you’re more likely to actually do the sharpening instead of putting it off because you can’t find your equipment.
Consider the environmental angle too—a sharp chain uses less fuel and creates less emissions, making your yard work more sustainable. Plus, you’ll spend less time running the saw, which means less noise pollution for your neighbors and local wildlife. Taking fifteen minutes to sharpen properly saves resources and delivers cleaner, safer cuts every single time.
Mastering the right sharpening angles for your chainsaw isn’t just about fixing a single problem—it’s about transforming how your saw performs every time you pick it up. When you combine proper sharpening with consistent bar maintenance and correct chain oiling, you’re creating a complete care system that extends your equipment’s life, keeps you safer, and makes every cutting task more enjoyable. Think of it as giving your chainsaw the respect it deserves for all the hard work it does in your garden.
The beauty of this skill is that it’s absolutely within your reach. You don’t need to be a professional arborist to sharpen accurately. With a simple file guide and a bit of practice, you’ll soon feel the difference between a properly sharpened chain and a dull one. That smooth, effortless cut through wood becomes your new standard, and you’ll wonder why you waited so long to learn.
Start today by checking your current sharpening angles and inspecting your guide bar for wear. Make oiling a pre-use habit. These small actions compound into significant benefits—cleaner cuts for pruning, faster work when clearing storm debris, and a chainsaw that’s ready when you need it most. Your garden projects deserve tools that perform at their best.