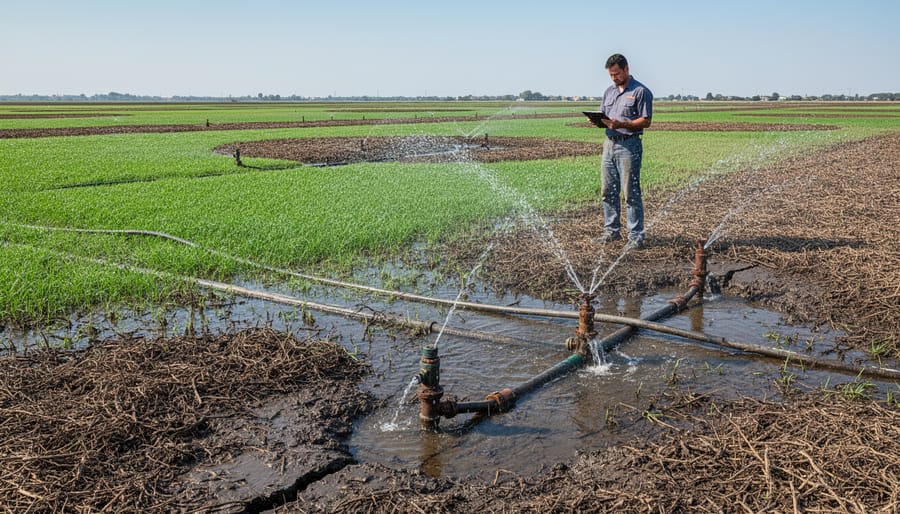
Inspect your irrigation system monthly during the growing season and catch small leaks before they waste hundreds of gallons of water and inflate your utility bill. A cracked sprinkler head or clogged drip emitter might seem minor, but these issues compound quickly, leaving brown patches in your lawn while simultaneously draining your wallet and precious water resources.
Flush your drip irrigation lines twice per season by removing end caps and running water through the system for several minutes to clear accumulated sediment and mineral deposits that restrict water flow. This simple fifteen-minute task prevents the frustrating scenario where half your garden thrives while the other half withers from blocked emitters you didn’t know existed.
Test your sprinkler system’s coverage by placing straight-sided containers at various distances from each head, running the system for fifteen minutes, then measuring water depth to identify uneven distribution patterns. Adjust spray radius and direction accordingly, ensuring every zone receives equal moisture rather than creating the common problem of overwatered areas breeding fungus while dry spots turn crispy.
Clean or replace filters in your system every four to six weeks depending on water quality, as debris buildup reduces pressure and efficiency across your entire network. Well water users especially need this vigilance, since iron particles and sediment clog components faster than municipal water supplies.
Winterize systems before the first freeze by draining all water from lines using compressed air or manual drain valves, preventing burst pipes that require expensive spring repairs and delay your planting season.
The Real Cost of Skipping Irrigation Maintenance
Let’s talk about what happens when you put off those regular irrigation checkups – and trust me, I’ve seen the consequences firsthand in many gardens.
Picture this: a small leak in your drip line goes unnoticed for just one season. That steady drip might waste 15-20 gallons per day, adding roughly $50-100 to your annual water bill. Multiply that across multiple zones or a faulty sprinkler head, and you’re looking at hundreds of dollars literally flowing down the drain. Even worse, those soggy spots become breeding grounds for fungal diseases, while other areas turn brown and patchy from inadequate coverage.
The equipment neglect costs extend beyond your water bill too. A clogged emitter that you ignore today becomes a dead shrub tomorrow – and replacing mature plants isn’t cheap. I’ve watched homeowners spend $300-500 replacing landscape plants that would’ve thrived with properly maintained irrigation.
Then there’s premature equipment failure. Sprinkler heads full of debris wear out faster, requiring replacement every 3-4 years instead of 8-10. Controllers exposed to moisture from undetected leaks might fail completely, setting you back $100-300 for replacement and programming.
From an environmental perspective, we’re talking about thousands of gallons of wasted water annually from a poorly maintained system. In drought-prone areas, that’s not just expensive – it’s irresponsible.
The good news? Most of these problems are completely preventable with simple seasonal maintenance. Spending an hour each season checking your system saves you money, preserves your landscape investment, and honors our commitment to sustainable water use. Your lawn, your wallet, and the environment will thank you.
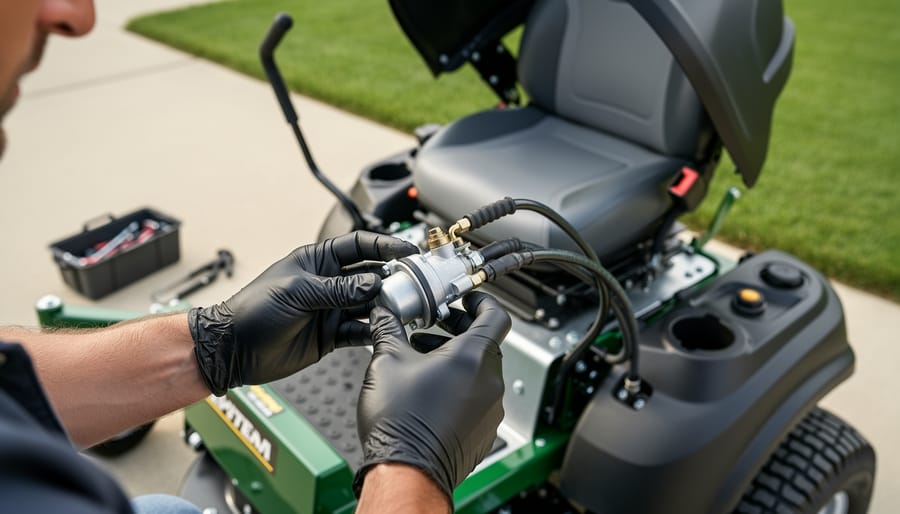
Essential Tools and Supplies You’ll Actually Need
Good news: you don’t need a shed full of specialized equipment to maintain your irrigation system effectively. Most maintenance tasks require just a handful of versatile tools you might already own, plus a few system-specific supplies.
Start with the basics that work across all irrigation types. A quality pair of bypass pruners or scissors dedicated to cutting tubing and hoses will serve you well for years. Look for brands that offer replacement blades to reduce waste. You’ll also want an adjustable wrench for tightening connections, a flathead screwdriver for opening sprinkler heads, and needle-nose pliers for removing debris from emitters and nozzles.
For cleaning tasks, keep a few supplies on hand. A bucket with warm water and mild dish soap works wonders for washing filter screens and sprinkler components. An old toothbrush or dedicated soft-bristle brush helps scrub away mineral deposits without damaging parts. White vinegar is your secret weapon against stubborn calcium buildup and it’s completely eco-friendly.
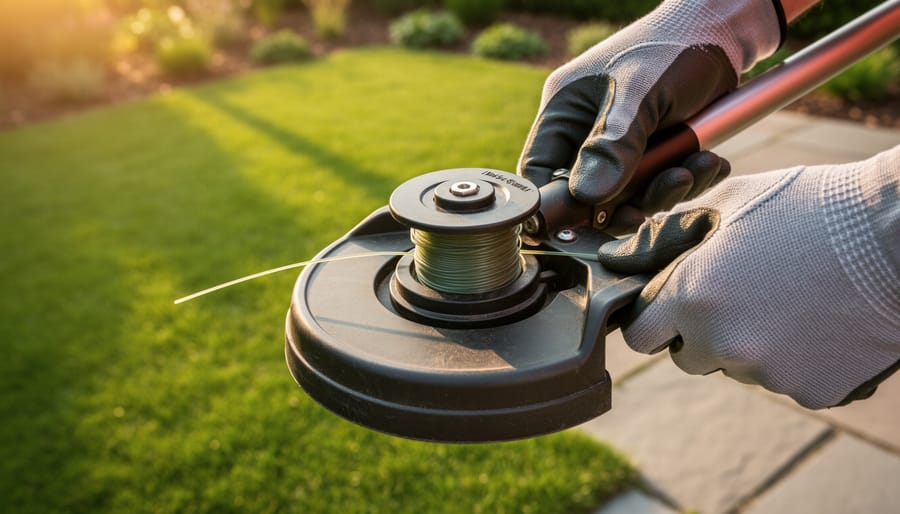
When it comes to replacement parts, stock a small inventory based on your system type. For drip irrigation, keep extra emitters, tubing, and goof plugs (those little caps for sealing unwanted holes). Sprinkler system owners should have replacement nozzles, a few extra sprinkler heads in various spray patterns, and thread seal tape. For all systems, replacement filters are essential. Buy reusable, cleanable filters whenever possible rather than disposable ones.
Consider investing in a pressure gauge that attaches to your outdoor faucet or hose connection. This simple tool helps you monitor water pressure and catch problems early. They’re inexpensive and last indefinitely.
Store your irrigation supplies together in a clearly labeled container. When maintenance time arrives, you’ll have everything in one place, making the job faster and less frustrating. Most homeowners find they spend under fifty dollars initially to stock these essentials, and replacement parts cost just pennies compared to professional repairs or water waste from a malfunctioning system.
Drip System Maintenance: Stop Clogs Before They Start
Monthly Inspections That Take Just 10 Minutes
Set aside ten minutes each month to walk your system while it’s running—it’s the single best way to catch small issues before they become expensive headaches. Think of it as a casual stroll through your garden with purpose.
Start by observing your emitters or sprinkler heads in action. Look for clogged drippers that aren’t releasing water, or sprinklers shooting water in odd directions. You’ll often spot patterns—maybe three emitters in a row aren’t working, suggesting a line problem rather than individual clogs. For drip systems, check that water’s forming consistent droplets, not spraying everywhere, which indicates damaged tubing or loose connections.
Next, examine your irrigation lines for visible damage. Critters love gnawing on tubing, and shifting soil can crack buried pipes. Run your hand along exposed sections feeling for wet spots that shouldn’t be there. These mystery puddles usually mean leaks hiding just below the surface.
Don’t skip the filter check. A clogged filter reduces water pressure throughout your entire system, making everything work harder than necessary. If your system has a pressure gauge, note whether readings stay consistent month to month. Significant drops signal trouble brewing.
Finally, scan for uneven growth patterns in your plants. Yellowing leaves in one zone while neighboring plants thrive often points to irrigation inconsistencies worth investigating.
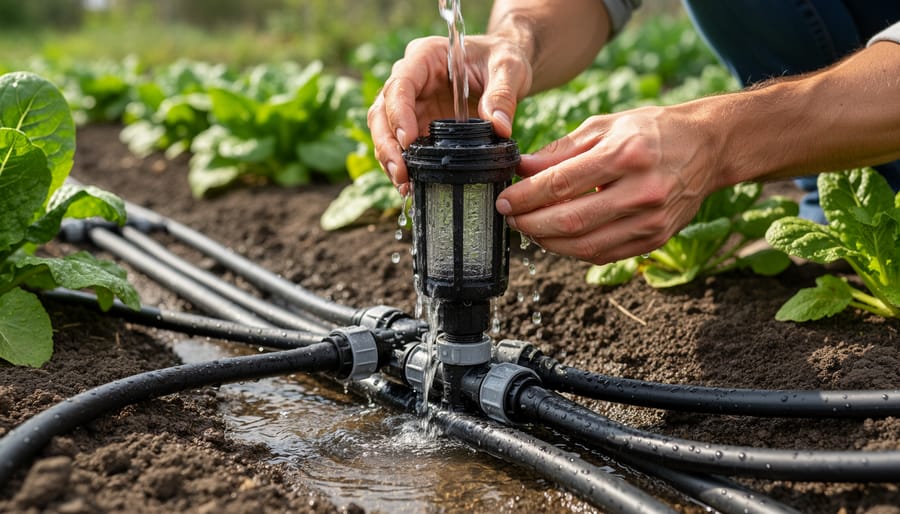
Cleaning Filters and Emitters the Right Way
Regular cleaning and maintenance of filters and emitters keeps your irrigation system running smoothly and prevents water waste. Let’s walk through the process for different components.
For screen filters, start by shutting off your water supply and releasing pressure from the system. Remove the filter housing and carefully extract the screen. Rinse it under running water, using an old toothbrush to gently scrub away debris. For stubborn buildup, soak the screen in a solution of one part white vinegar to three parts water for 30 minutes. This eco-friendly approach dissolves mineral deposits without harsh chemicals.
Disk filters require a similar approach. Disassemble the filter stack and separate the disks. Rinse each disk individually, paying attention to the grooves where sediment accumulates. A soft brush works wonders here, but avoid using excessive force that might damage the delicate grooves.
When it comes to clogged emitters in drip systems, patience is key. Remove affected emitters and soak them in vinegar solution overnight. For inline emitters you can’t remove easily, flush the system with the vinegar mixture by running it through for 15-20 minutes. Some gardeners swear by adding a few drops of dish soap to help break down organic matter, though plain vinegar usually does the trick.
Always reassemble components carefully, checking gaskets and seals for wear. Replace any damaged parts to prevent leaks and maintain system efficiency.
Winterizing Your Drip System
If you live in an area where temperatures drop below freezing, winterizing your drip irrigation system is absolutely essential to prevent costly damage. Trust me, I learned this the hard way after my first winter when expanding ice cracked several of my drip lines!
Start by turning off your water supply and opening any drain valves to remove standing water. For systems without built-in drainage, you’ll need to blow out the lines using compressed air set to no more than 50 PSI for drip systems, as higher pressure can damage the delicate emitters. Work systematically from the farthest point back toward the water source.
Remove any battery-operated timers and store them indoors where they won’t be exposed to temperature extremes. Above-ground components like pressure regulators, filters, and backflow preventers should either be removed and stored or wrapped with insulating foam covers designed for outdoor use.
Don’t forget about your drip tape if you’re using it in vegetable beds. This thin-walled tubing is particularly vulnerable to freeze damage, so I recommend rolling it up and storing it in a shed or garage. Standard drip tubing can usually stay in place once drained, but burying it under a layer of mulch provides extra protection and supports soil health throughout winter.
Sprinkler System Care: Keep Every Zone Running Perfectly
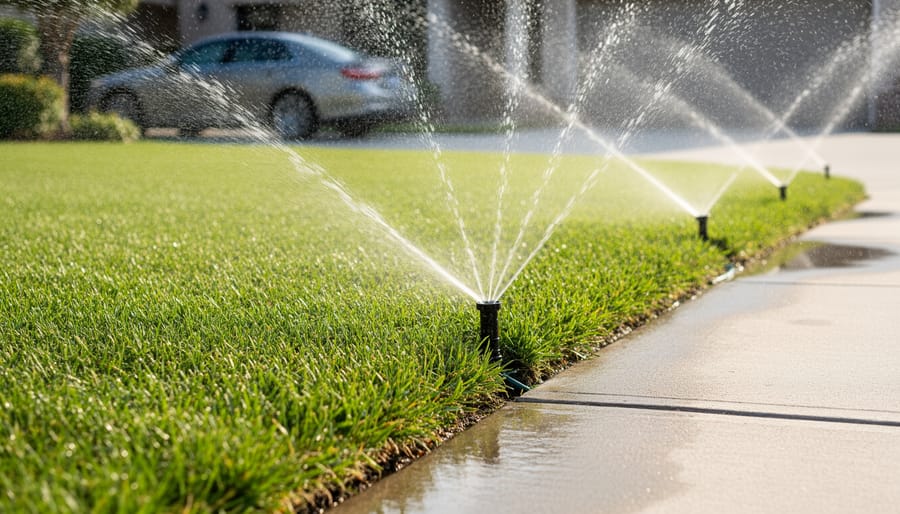
Adjusting Spray Patterns for Maximum Coverage
Properly adjusted sprinkler heads can make the difference between a patchy lawn and a lush, healthy yard while cutting water waste significantly. Start by running your system during daylight hours so you can actually see what’s happening. Watch for misdirected spray hitting sidewalks, driveways, or buildings rather than your grass.
Most sprinkler heads have adjustment screws that control spray distance and arc. For rotary heads, you’ll typically find a screw on top that adjusts the spray pattern. Turn it clockwise to reduce the arc or counterclockwise to expand it. Fixed spray heads often have a slot where you can insert a small key or screwdriver to adjust the radius. Don’t be afraid to experiment, but make small adjustments and test between changes.
Pay special attention to corners and edges where overlap matters most. Ideally, you want each sprinkler’s spray to reach the next head for complete coverage. This head-to-head coverage prevents those frustrating dry spots that always seem to appear in the same places.
If you notice persistent overspray despite adjustments, consider swapping out nozzles for ones with different spray patterns. Many manufacturers offer various nozzle options designed for specific situations, and this simple swap can dramatically improve efficiency while protecting our precious water resources.
Fixing the Most Common Sprinkler Problems
Even the best-maintained systems occasionally act up, but the good news is that most sprinkler problems have surprisingly simple fixes. Let’s walk through the most common issues you’ll encounter.
Leaks are probably the most noticeable problem, and they’re often just loose connections. Check where your sprinkler heads connect to the risers—sometimes they just need tightening by hand. If water’s pooling around a head, unscrew it and inspect the seal or washer. These inexpensive parts wear out over time and replacing them takes just minutes. For leaking valves, listen for that telltale hissing sound and tighten the solenoid on top. If that doesn’t work, you might need a new diaphragm inside, which is a straightforward swap.
Low pressure usually means clogged heads or filters. Pop off the sprinkler head and rinse away any dirt or grass clippings blocking the nozzle. It’s amazing how much a tiny pebble can disrupt water flow! Also check your system’s filter—cleaning it quarterly prevents this issue altogether.
Uneven coverage often results from misaligned heads. Simply grab the top of each sprinkler and rotate it to redirect the spray pattern where you need it. If certain areas still aren’t getting watered, you may have heads sinking into the ground. Add soil around the base or raise the riser to bring them level with your lawn.
Stuck heads that won’t pop up or retract typically just need cleaning. Remove built-up debris and work the mechanism back and forth until it moves freely again.
When to Replace vs. Repair Sprinkler Components
Deciding whether to repair or replace sprinkler components can feel like a puzzle, but the answer usually comes down to three factors: the age of the part, the cost of repair versus replacement, and the overall efficiency you’ll gain.
As a general rule, if a component is more than halfway through its expected lifespan and the repair cost exceeds 50% of replacement cost, go ahead and replace it. For example, sprinkler heads typically last 10-15 years. If your 8-year-old heads need significant repairs, replacement makes more sense both financially and from a water conservation standpoint. Newer models are often more efficient, potentially saving you money on water bills while better supporting your garden’s health.
For smaller issues like clogged nozzles or worn seals, repair is usually the sustainable choice. These quick fixes cost just a few dollars and extend the life of perfectly good equipment. However, if you’re constantly tinkering with the same valve or dealing with repeated leaks from cracked sprinkler bodies, that’s your system telling you it’s time for an upgrade.
Consider the bigger picture too. Replacing an entire zone of mismatched, aging heads with uniform, water-efficient models can dramatically improve coverage and reduce waste. You’ll spend more upfront but gain consistent performance and lower operating costs.
Think of it like maintaining a car. Regular oil changes keep it running, but eventually, continued repairs on an aging vehicle don’t make financial sense. Your irrigation system works the same way. Trust your observations, do the math, and choose the option that best serves both your garden and your wallet long-term.
Irrigation Hose Maintenance: Extend Life and Prevent Leaks
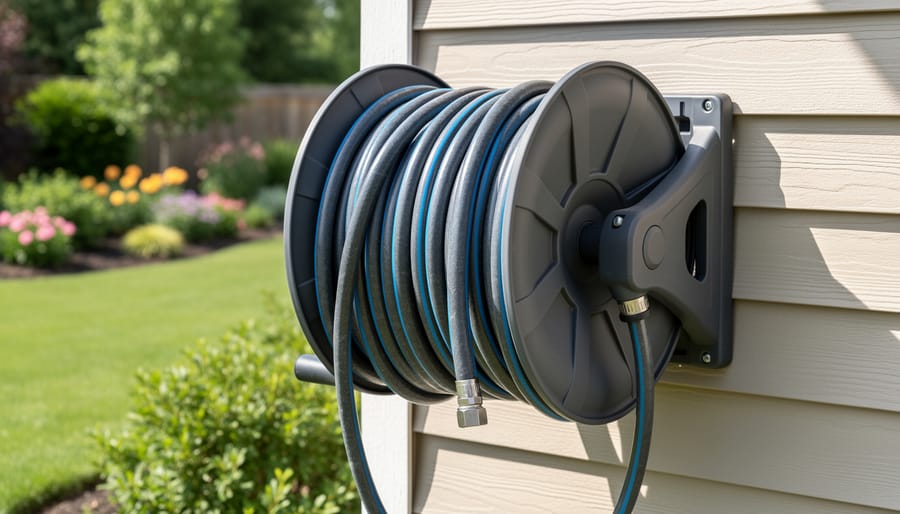
Proper Storage Prevents Most Hose Damage
Most garden hoses fail prematurely not from use, but from improper storage. I learned this the hard way after replacing three hoses in two years before discovering the simple habits that make hoses last a decade or more.
The biggest enemy of hose longevity is UV radiation. Leaving hoses exposed to direct sunlight breaks down the materials, creating brittle spots that eventually crack and leak. When not in use, store hoses in a shaded area, garage, or shed. If you must leave them outside, invest in a hose reel with a cover or at least position it on the north side of your home where sun exposure is minimal.
Kinks are another silent killer. Each sharp bend creates a weak point where the hose will eventually split. Drain hoses completely before coiling them loosely in large loops, never tight spirals. Similar to tool storage practices that extend equipment life, proper hose storage pays dividends.
During winter, disconnect hoses from spigots and store them indoors if temperatures drop below freezing. Any remaining water can freeze and expand, causing internal damage you won’t notice until spring brings frustrating leaks. A few minutes of proper storage saves money and reduces the environmental impact of frequently replacing equipment.
Repairing Hose Leaks and Splits
Finding a leak in your garden hose doesn’t mean it’s destined for the landfill. Most splits and punctures are surprisingly easy to fix, saving you money and keeping perfectly functional hoses out of waste streams.
For small holes or cracks, hose repair kits are your best friend. These typically include a coupling device that you insert after cutting out the damaged section. Simply cut cleanly through the hose on either side of the leak, insert the barbed ends of the coupling into each hose end, and secure with the provided clamps. The whole repair takes about five minutes and costs just a few dollars.
Larger splits near hose ends are even simpler to address. Just trim off the damaged portion and attach a new end fitting. Most hardware stores sell replacement male and female connectors that clamp or screw onto the hose.
However, some hoses aren’t worth saving. If your hose has become brittle with multiple cracks, has significant dry rot, or needs more than three repairs, it’s time to replace it. A hose requiring constant patches will frustrate you more than it’s worth. When shopping for a replacement, choose a quality hose with brass fittings and UV-resistant materials for longevity.
Maintaining Hose Connections and Fittings
Leaky connections are one of the most common (and frustrating!) issues in any watering system, but the good news is they’re usually easy to fix. Start by checking all connection points where hoses attach to faucets, splitters, or nozzles. That little drip you’re ignoring? It can waste gallons of water over a season, which isn’t great for your water bill or our planet.
Most leaks happen because the rubber washers inside fittings have worn out or gone missing. These inexpensive washers create the seal between metal threads, so replacing them annually is smart preventive care. Simply unscrew the fitting, pop out the old washer with a screwdriver if needed, and press in a new one. Keep a few spares in your garden shed.
Thread care matters too. Before connecting fittings, wipe away dirt and debris from the threads. Cross-threading damages the metal and creates persistent leaks no amount of tightening will fix. Hand-tighten connections firmly but don’t overdo it with pliers, which can strip threads or crack plastic fittings. A snug, hand-tight connection usually does the job perfectly and makes seasonal disconnection much easier.
Creating Your Seasonal Maintenance Schedule
Think of your irrigation maintenance schedule like the changing seasons themselves—each one brings specific tasks that keep your system running smoothly year-round. Just as you wouldn’t plant tomatoes in December, you shouldn’t tackle all your irrigation maintenance in one marathon session. Instead, breaking it into seasonal chunks makes the work manageable and ensures nothing gets overlooked.
Spring is your system’s wake-up call. As temperatures rise above freezing consistently, it’s time for startup mode. Begin by slowly turning on your water supply to avoid pressure surges that can damage pipes and fittings. Walk through your entire system, checking for winter damage like cracked pipes or shifted sprinkler heads. Test each zone individually, watching for leaks, uneven coverage, or sputtering heads that indicate air in the lines. Clean or replace filters, flush drip lines, and adjust spray patterns as your plants begin their growing season. This approach mirrors other seasonal equipment maintenance—preventive care now saves headaches later.
Summer calls for vigilant monitoring rather than major interventions. Check your system weekly during peak heat, looking for dry spots that signal clogged emitters or misaligned sprinklers. Adjust watering schedules as temperatures climb, and keep an eye on your water bill for unexpected spikes that might indicate hidden leaks. Clear vegetation that’s grown around sprinkler heads, and ensure drip emitters haven’t been buried by mulch.
Fall is preparation time. Before the first hard freeze, gradually reduce watering as plants enter dormancy. Clean filters thoroughly, remove debris from valve boxes, and document any repairs needed for next spring. In cold climates, winterization is essential—drain all water from pipes, blow out lines with compressed air, and insulate above-ground components.
Winter in mild climates means occasional system checks and adjusting for rainfall. In freezing regions, it’s hands-off time—your properly winterized system rests until spring returns. Keep records of what worked and what didn’t this year, creating a personalized maintenance roadmap that gets smarter with each season.
Sustainable Maintenance Practices That Save Water
Keeping your irrigation system well-maintained isn’t just about protecting your investment—it’s one of the most impactful ways you can conserve water in your garden. Let me share some earth-friendly maintenance practices that’ll shrink your water bill while keeping your lawn healthy.
Start by upgrading to a smart irrigation controller if you haven’t already. These clever devices adjust watering schedules based on real-time weather data, soil moisture levels, and plant needs. During my first season using one, I saved nearly 30% on water compared to my old timer-based system. The controller automatically skipped watering after rainstorms, something I used to forget to do manually.
Rain sensors are another game-changer and relatively inexpensive to install. They temporarily shut off your system when rainfall provides adequate moisture, preventing unnecessary watering. Think of them as your irrigation system’s common sense—they stop you from watering during a downpour.
Pressure regulation deserves serious attention too. When water pressure runs too high, it creates misting and fine spray that evaporates before reaching plant roots. Installing pressure regulators and ensuring proper calibration keeps water flowing at optimal levels, typically between 25-30 PSI for drip systems and 30-40 PSI for sprinklers.
Regular maintenance checks connect directly to conservation goals. Fixing leaks promptly, adjusting spray patterns seasonally, and replacing worn components prevent water waste. A single broken sprinkler head can waste hundreds of gallons monthly.
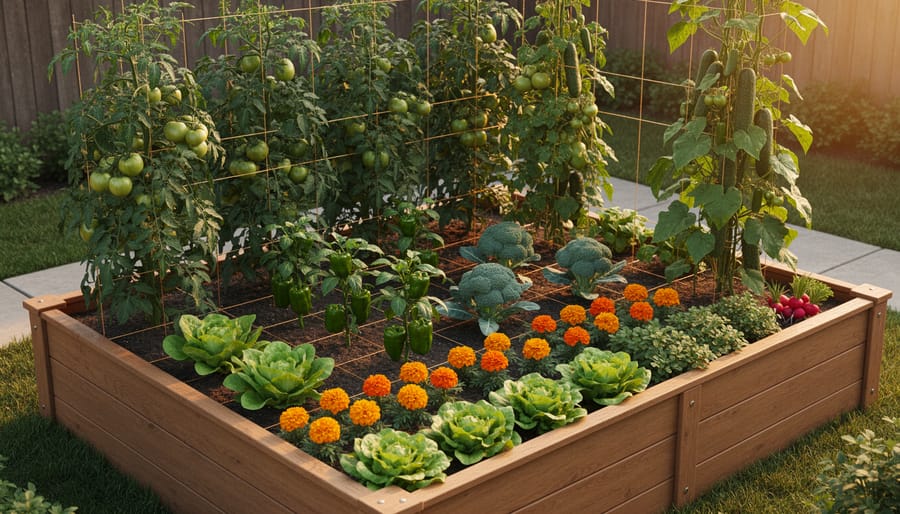
Consider adding drip irrigation zones for garden beds and trees. They deliver water directly to root zones with minimal evaporation. Combined with mulching around plants, drip systems represent the gold standard for water-efficient gardening.
Here’s the truth: maintaining your irrigation system doesn’t have to be complicated or time-consuming. You’ve just learned that a few simple checks throughout the season can save you money, conserve precious water, and keep your garden thriving. The beauty of irrigation maintenance is that it builds on itself—each small habit you develop makes the next one easier.
If you’re feeling overwhelmed, start with just one thing. Maybe it’s scheduling a monthly walkthrough to check for leaks, or perhaps it’s finally cleaning those clogged emitters you’ve been noticing. Pick the improvement that will make the biggest difference in your garden right now, and commit to it for the next month. Once that becomes routine, add another practice to your maintenance schedule.
Remember, every drip line you repair, every sprinkler head you adjust, and every filter you clean is a step toward a more sustainable and efficient garden. You’re not just maintaining equipment—you’re stewarding water resources and creating healthier growing conditions for your plants.
So grab your notebook, mark your calendar with those seasonal maintenance reminders, and take a walk around your garden this week. Look at your system with fresh eyes, and tackle that one improvement you’ve been putting off. Your garden, your water bill, and the environment will thank you. You’ve got this, and your irrigation system is about to run better than ever.