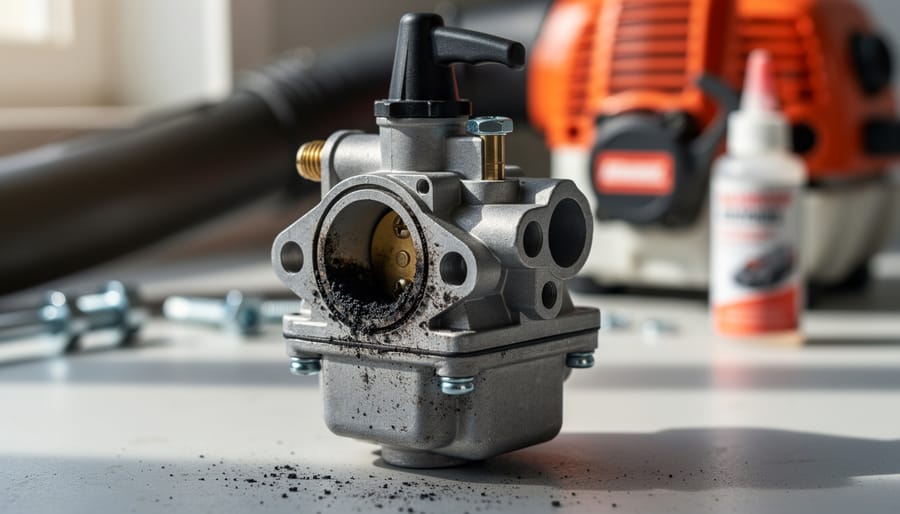
Drain old fuel from your leaf blower’s tank and carburetor before attempting any cleaning, as stale gasoline is the primary culprit behind carburetor clogs and performance issues. Remove the air filter cover and carburetor assembly, then soak the carburetor in a commercial cleaning solution for 30 minutes to dissolve varnish buildup that blocks tiny fuel passages.
Use compressed air to blow through all jets and openings after soaking, ensuring every channel is completely clear. Pay special attention to the idle and main jets, as these tiny openings control fuel flow and are most susceptible to blockages from ethanol-contaminated fuel.
Replace the fuel filter and inspect fuel lines for cracks during reassembly, since debris traveling through damaged components will quickly re-clog your freshly cleaned carburetor. This prevention step saves you from repeating this process in a few weeks.
A clean carburetor restores your leaf blower’s starting reliability and power output, but the fix only lasts when paired with proper fuel management. Using ethanol-free fuel and adding a fuel stabilizer extends the time between cleanings from months to years. Empty your tank before long-term storage, or run the engine until it dies to prevent fuel from deteriorating inside the carburetor over winter. These simple habits transform carburetor cleaning from a recurring frustration into an occasional maintenance task, keeping your equipment ready when fallen leaves demand attention.
Understanding Your Leaf Blower’s Carburetor (And Why It Gets Dirty)
Signs Your Carburetor Needs Cleaning
Your leaf blower will usually tell you loud and clear when its carburetor needs attention. The most common sign is hard starting—you’re pulling that cord repeatedly, maybe offering a few choice words to your stubborn machine. Once it finally fires up, you might notice sputtering or rough idling, like it’s clearing its throat constantly. Poor acceleration is another telltale symptom; when you squeeze the throttle, the engine hesitates or bogs down instead of revving smoothly.
Stalling is perhaps the most frustrating indicator, especially when it happens mid-job. Your blower might start fine but then die after a minute or two of use. Sometimes it’ll run at high throttle but stall at idle. These issues often stem from fuel residue and varnish buildup clogging those tiny carburetor passages—a natural consequence of seasonal storage with old fuel sitting inside.
Black smoke from the exhaust or a noticeable increase in fuel consumption also point to carburetor troubles. Proper small gas engine maintenance can prevent many of these headaches. Recognizing these symptoms early means you can tackle cleaning before small problems become expensive repairs, keeping your equipment running efficiently and your yard work on schedule.
Step-by-Step: Cleaning Your Leaf Blower Carburetor
Tools and Materials You’ll Need
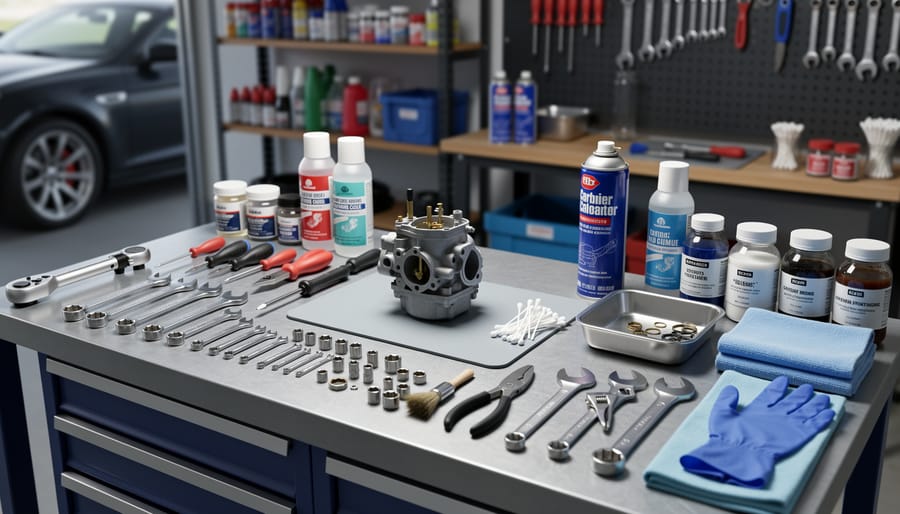
Before you dive into cleaning your carburetor, let’s gather everything you’ll need. Trust me, having all your supplies ready makes this task much smoother and keeps you from running to the hardware store mid-project.
For tools, you’ll need a socket wrench set or screwdriver set (depending on your model), needle-nose pliers, a small wire brush, and a soft-bristled toothbrush. A carburetor cleaning kit with tiny brushes and picks is incredibly helpful for reaching those tight spaces.
When choosing cleaning solutions, I recommend opting for eco-friendly carburetor cleaners that break down harmful deposits without toxic fumes. Look for biodegradable options or consider a simple solution of white vinegar for light cleaning. You’ll also want clean rags, a shallow pan for soaking parts, and compressed air or a hand-pump air duster.
Safety comes first, so grab protective gloves (nitrile works well), safety glasses, and work in a well-ventilated area. Keep a small container handy for organizing screws and small parts so nothing gets lost.
Finally, have your owner’s manual nearby. It’s your best friend for identifying carburetor components specific to your leaf blower model. With these sustainable, practical supplies ready, you’re set to restore your equipment’s performance efficiently.
The Cleaning Process
Now that you’ve gathered your supplies and prepped your workspace, let’s dive into the actual cleaning process. Don’t worry if this is your first time tackling a carburetor – I’ll walk you through each step, and you’ll be surprised at how straightforward it really is.
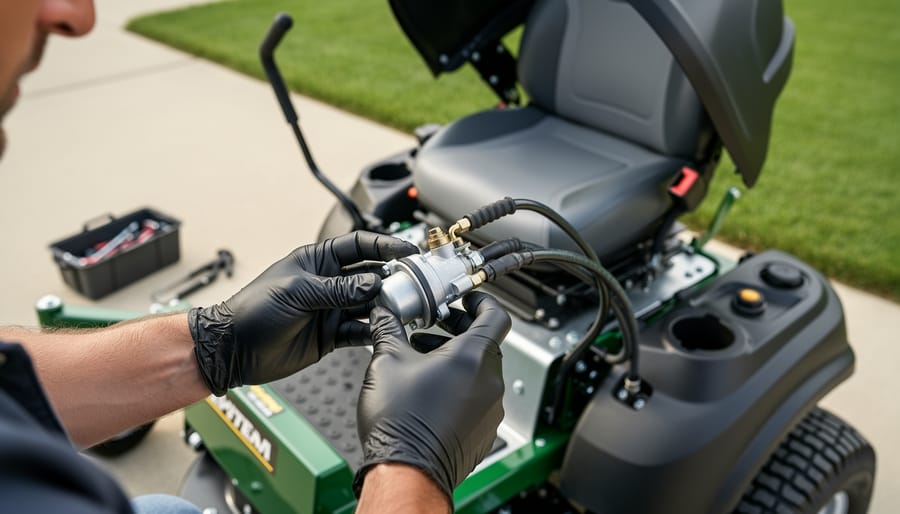
Start by carefully removing the air filter cover and air filter to access the carburetor. Take a quick photo with your phone before disconnecting anything – trust me, this little trick has saved countless reassembly headaches! Disconnect the fuel line (remember that container underneath?) and any throttle linkages. Most carburetors are held in place by just two or three bolts or nuts. Remove these and gently wiggle the carburetor free.
Once you have the carburetor in hand, it’s time for disassembly. Remove the float bowl first – this is usually held by a single screw or a few small bolts around the perimeter. Inside, you’ll find the float and needle valve. Carefully remove these components and set them on your clean workspace. Next, locate the main jet and idle jet – these tiny brass pieces are the usual culprits when your blower starts acting up. Use your small screwdriver or jet removal tool to unscrew them gently.
Here’s where the real cleaning begins. Spray carburetor cleaner liberally through all the passages and holes you can find. Those jets you removed? Hold them up to the light – you should be able to see clear through them. If not, use a single strand from your wire brush or a specialized jet cleaning wire to clear any stubborn debris. Never use drill bits or anything that might enlarge the precisely-sized openings.
For two-stroke engines, which most leaf blowers use, pay special attention to the fuel-oil mixture passages. These can get gummy from the oil in the fuel mixture. Four-stroke engines, while less common in leaf blowers, tend to accumulate varnish deposits differently, so spend extra time soaking components in cleaner if needed.
Spray the float bowl and carburetor body thoroughly, using compressed air to blow out all passages. Check the needle valve and seat for wear – if they’re damaged, replacement is better than cleaning. The diaphragms, if your carburetor has them, should be flexible and free of cracks.
Reassembly is simply the reverse process. Install the cleaned jets finger-tight, then give them just a quarter turn with your screwdriver. Replace the float, needle valve, and bowl, ensuring any gaskets are properly seated. Reattach the carburetor to the engine, reconnect fuel lines and linkages, and replace the air filter.
Before declaring victory, run a quick test. Prime the bulb if your blower has one, and start the engine. It might take a few pulls as the fuel system refills. Listen for smooth operation and consistent power delivery – that’s the sound of success!
Troubleshooting Common Issues
Even after a thorough cleaning, you might encounter a few hiccups. If your leaf blower still won’t start, double-check that you’ve reassembled everything correctly and that all gaskets are properly seated. A common mistake is overtightening screws, which can crack delicate carburetor housings. If the engine starts but runs rough, you may have missed a small passage during cleaning, so a second gentle cleaning with carburetor cleaner often does the trick.
Similar to troubleshooting power equipment, knowing when to replace versus clean is crucial. Diaphragms and gaskets become brittle over time, especially if you use ethanol-blended fuel. If they show cracks or have lost flexibility, replacement kits are inexpensive and readily available. However, if the carburetor body itself is corroded or warped, investing in a new carburetor makes more sense than repeated cleaning attempts.
Remember, preventive maintenance beats reactive repairs every time. Using fresh fuel with stabilizer and running your blower dry before storage will keep you from facing these issues season after season.
Don’t Forget the Impeller: Keeping Airflow at Maximum

How to Clean Your Impeller Safely
While you’re already caring for your carburetor, don’t overlook the impeller—it’s what actually creates that powerful airflow! A clogged impeller can make even a perfectly tuned carburetor struggle, so let’s walk through this simple maintenance step together.
First, disconnect the spark plug wire for safety. This might seem overly cautious, but trust me, it’s a habit worth building. Next, remove the blower tube and locate the impeller housing, typically secured by several screws on the unit’s side. Keep track of these fasteners—I like using a small magnetic tray to avoid the dreaded “where did that screw go?” moment.
Once you’ve opened the housing, you’ll see the fan blades. Here’s where things get interesting: debris loves to wrap around the impeller shaft and wedge between blades. Use a stiff brush or old toothbrush to dislodge stuck leaves, grass clippings, and that mysterious stringy material that somehow finds its way everywhere. For stubborn buildup, a wooden or plastic scraper works wonderfully without risking blade damage.
While cleaning, carefully inspect each blade for cracks, chips, or warping. Even minor damage can create dangerous imbalances at high speeds. If you notice anything concerning, replacement is your safest bet.
Before reassembling, give everything a final wipe with a dry cloth. Moisture can promote rust and affect performance. This simple check keeps your leaf blower running efficiently while supporting your sustainable approach to equipment care—extending tool life means less waste and better garden maintenance results.
Nozzle Care: The Often-Overlooked Component
Extending Nozzle Life Through Proper Care
Your carburetor nozzle deserves the same attention you’d give your favorite gardening tools. After cleaning your carburetor, take a moment to inspect the nozzle for any corrosion or wear patterns. A soft brass brush works wonders for removing stubborn deposits without scratching delicate metal surfaces, unlike steel brushes that can cause damage.
Prevention is your best friend here. Always drain fuel before long-term storage, as old gasoline leaves varnish deposits that clog nozzle openings. When you do clean, use compressed air from the inside out to push debris away from sensitive passages rather than deeper into them. I’ve learned this the hard way after accidentally wedging debris further into a jet.
Consider upgrading to ethanol-resistant components if you’re using modern fuel blends, as they’re gentler on nozzle materials. Replace nozzles when you notice irregular spray patterns, persistent clogging despite cleaning, or visible pitting. Most nozzles are inexpensive insurance against poor performance. Remember, a well-maintained nozzle means better fuel atomization, cleaner combustion, and ultimately, a more sustainable approach to yard work with fewer emissions and better fuel efficiency.
Storage Practices That Prevent Future Problems

Fuel Stabilization and Drainage
Before tucking your leaf blower away for the season, proper fuel management is essential to prevent carburetor headaches down the road. Old fuel breaks down and leaves behind gummy residue that clogs those tiny carburetor passages we just cleaned. You have two eco-friendly options: drain the fuel completely or add a stabilizer.
If you’re draining, run the blower until it sputters out to ensure the carburetor is empty. Never pour leftover fuel down drains or onto the ground. Instead, transfer it to an approved container and take it to your local hazardous waste facility or recycling center. Many auto parts stores also accept old gas for proper disposal.
For stabilizers, look for ethanol-free or plant-based options that are kinder to the environment. Products containing enzymes naturally prevent fuel degradation without harsh chemicals. Add the stabilizer to a full tank, run the engine for a few minutes to circulate it through the system, and you’re set for months of storage. Understanding fuel quality and storage practices will save you from frustrating spring startups and extend your equipment’s lifespan significantly.
Creating the Ideal Storage Environment
Once you’ve cleaned your carburetor, where and how you store your leaf blower makes all the difference in keeping it running smoothly. Think of storage as an extension of your maintenance routine, not just an afterthought.
Choose a clean, dry location away from temperature extremes. A garage or shed works perfectly, but avoid placing your leaf blower directly on concrete floors where moisture can accumulate. Instead, use a shelf or hang it on wall hooks to promote air circulation. If you’re serious about proper equipment storage, consider a dedicated cabinet or storage area for all your tools.
Position your leaf blower upright or according to the manufacturer’s recommendations to prevent fuel or oil from seeping into the carburetor. A breathable cover protects against dust while allowing moisture to escape, unlike plastic tarps that trap humidity and encourage corrosion.
Humidity is the silent enemy of carburetors. In damp climates, consider using silica gel packets or a small dehumidifier in your storage space. This simple step prevents the moisture-related gunk that clogs carburetors and keeps gaskets from deteriorating. Remember, preventing problems through smart storage is far easier than repeated cleanings.
Preventive Maintenance Schedule for Peak Performance
Creating a maintenance calendar for your leaf blower might sound like overkill, but trust me, it’s one of those preventive maintenance practices that saves you time, money, and frustration in the long run. Think of it as giving your equipment the same attention you’d give your garden—consistent care yields better results.
Start each season with a spring tune-up in March or April. This is when you’ll want to give your carburetor a thorough cleaning, especially if your leaf blower sat idle through winter. Check the fuel lines, replace old gasoline with fresh, ethanol-free fuel when possible, and inspect the air filter. Speaking of fuel quality, always use stabilized fuel or add a quality fuel stabilizer to prevent gumming and varnish buildup that plagues carburetors.
Mid-season in July, perform a lighter check-up. Clean the impeller vents and nozzle, removing any debris or grass clippings that might restrict airflow. This quick 15-minute inspection keeps performance optimal during heavy-use months.
Before storing your equipment for winter, typically in October or November, perform another complete carburetor cleaning. Run the blower dry or use fuel stabilizer for any remaining gas. Clean the entire unit thoroughly, paying special attention to cooling fins and air intake areas.
For sustainable practice, always dispose of old fuel properly at designated hazardous waste facilities rather than pouring it down drains. Using ethanol-free fuel not only protects your carburetor but also reduces emissions and prevents the environmental issues associated with ethanol-blended fuels breaking down in small engines. This simple calendar approach transforms maintenance from an overwhelming chore into manageable, seasonal tasks.
Taking care of your leaf blower’s carburetor, impeller, and nozzle isn’t just about fixing problems when they arise—it’s about preventing them in the first place and making a meaningful difference for your wallet and the planet. When you commit to regular maintenance, you’re choosing a path that extends your equipment’s lifespan by years, sometimes even decades. Think about it: a well-maintained leaf blower consumes less fuel, runs more efficiently, and produces fewer emissions. That’s a win for your garden budget and our shared environment.
I’ve seen countless gardeners transform their relationship with power equipment simply by dedicating just thirty minutes each season to proper cleaning and care. Instead of replacing a carburetor every few years or buying a new blower altogether, you’re nurturing what you already have. This sustainable approach aligns perfectly with the mindful gardening practices many of us strive for.
Set a reminder on your calendar right now—perhaps at the start of spring and fall—to inspect and clean your carburetor, check the impeller for debris, and clear the nozzle. Keep a simple maintenance log noting what you’ve done and when. These small habits compound over time, saving you from frustrating breakdowns during peak leaf season.
Remember, every piece of equipment you maintain rather than replace is one less item in a landfill. You’re not just being a savvy gardener; you’re being a responsible steward of resources. Start today, and your future self will thank you.