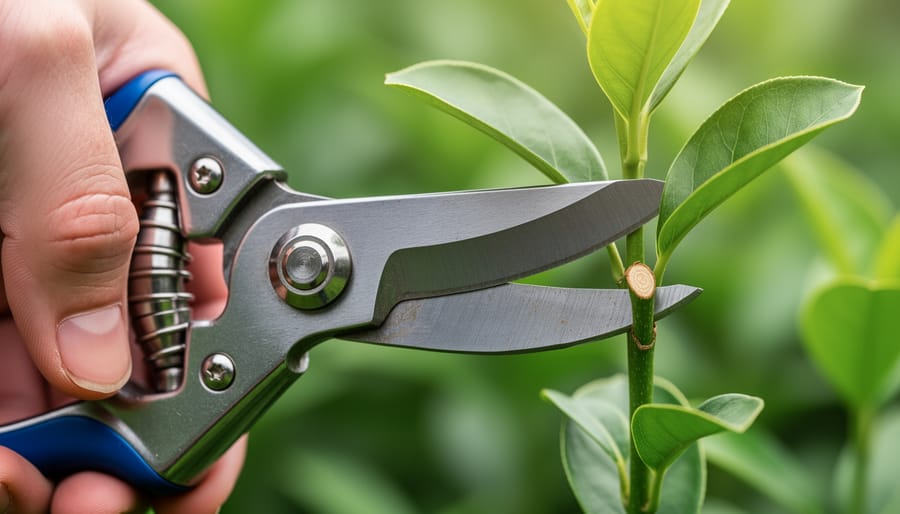
Sharpen your hedge trimmer blades every 50 hours of use or when you notice ragged cuts and torn plant tissue instead of clean slices. A dull blade doesn’t just work harder—it stresses your shrubs, invites disease, and turns a 20-minute trim job into an exhausting hour-long struggle. The good news? Restoring that factory-sharp edge takes just 15 minutes with a flat file, or even less if you have a rotary tool with a grinding stone attachment.
You’ll know it’s time to sharpen when your trimmer starts grabbing branches instead of cutting through them cleanly, or when you find yourself making multiple passes over the same area. Regular blade maintenance prevents these frustrations and extends your tool’s lifespan significantly—saving you money and keeping perfectly functional equipment out of landfills.
Whether you’re working with single-sided or double-sided reciprocating blades, the sharpening process follows the same fundamental principles: clean the blade thoroughly, maintain the original bevel angle, and work with consistent strokes along each cutting tooth. I’ll walk you through three proven methods, from the traditional hand-filing approach to faster power tool techniques, so you can choose what works best for your comfort level and available tools.
Signs Your Hedge Trimmer Blades Need Sharpening
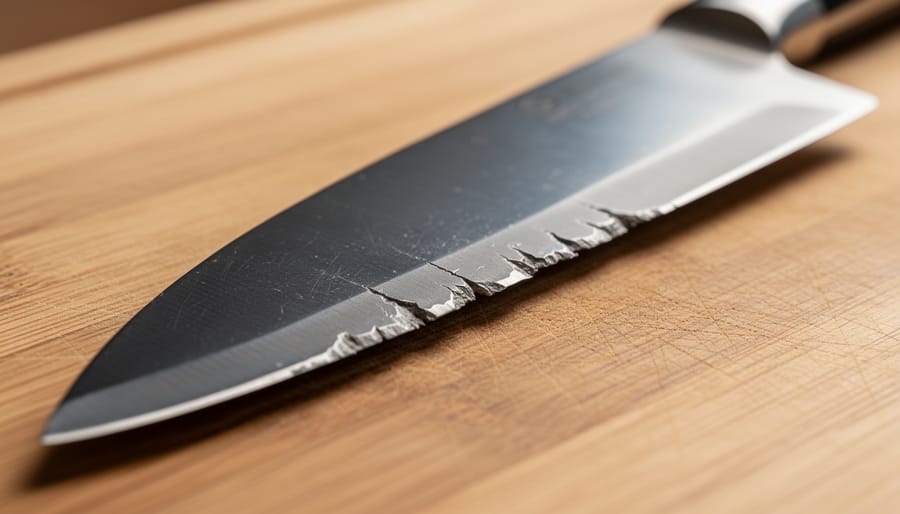
Your hedge trimmer will tell you when it needs attention if you know what to look for. The most obvious sign is when your cuts become ragged instead of clean. If you’re noticing torn or crushed leaves rather than crisp, smooth cuts, your blades have definitely lost their edge.
Pay attention to how much effort you’re putting in during trimming sessions. When blades are sharp, they glide through branches with minimal resistance. If you find yourself making multiple passes over the same area or pushing harder than usual, that’s your trimmer asking for some sharpening love.
Take a close look at your hedges after trimming. Brown or yellowing edges on the leaves a few days later indicate that the blades are tearing rather than cutting cleanly. This not only looks unsightly but can also stress your plants and make them more vulnerable to disease. From a sustainability perspective, keeping sharp blades means healthier plants that require less intervention and recovery time.
Don’t forget to inspect the blades themselves. Visible nicks, flat spots, or a dull, silvery appearance along the cutting edge are clear indicators. Run your finger carefully along the blade’s back side to check for burrs or roughness. If the blade catches branches instead of slicing through them smoothly, it’s definitely time to sharpen.
The good news is that catching these signs early makes the sharpening process easier and extends your tool’s lifespan, saving money and reducing waste.
Safety First: Preparing Your Hedge Trimmer for Sharpening
Before you sharpen those blades, let’s talk about keeping all your fingers intact—because that’s always the goal! Safety might seem like common sense, but in my years of helping gardeners maintain their tools, I’ve seen too many preventable accidents happen when someone rushes this step.
First things first: disconnect your power source completely. For electric models, unplug them from the outlet and make sure the cord is nowhere near the blade area. If you’re working with battery-powered hedge trimmers, remove the battery entirely—don’t just switch it off. For gas-powered trimmers, disconnect the spark plug wire to prevent any accidental starts. This simple step eliminates the risk of the trimmer suddenly springing to life while your hands are near the blade.
Next, slip on a pair of sturdy work gloves. Hedge trimmer blades are sharp even when dull, and you’ll be running your hands along them during inspection and cleaning. Safety glasses are smart too, as debris and metal filings can fly around during sharpening.
Now secure your trimmer properly. Clamp it in a vise if you have one, or place it firmly on a stable workbench. A wobbly work surface is asking for trouble.
Finally, clear away all the gunk. Use a stiff brush to remove dried sap, leaves, and debris from the blades. This cleaning step isn’t just about visibility—it prevents your sharpening tools from getting gummed up and ensures you’re actually sharpening metal, not just scraping off buildup.
What You’ll Need: Sharpening Tools and Materials
Before diving into the sharpening process, let’s gather everything you need. The good news? You probably already have some of these items in your garden shed or garage.
For most gardeners, a 10-inch mill file or flat file is the hero tool here. These hand files cost between $10-20 and give you excellent control over the blade edge. I prefer mill files because their single-cut teeth create a smooth, consistent edge without removing too much metal. If you’re working with particularly neglected blades, a sharpening stone can help refine the edge after filing.
A wire brush is essential for removing built-up sap and debris before you start sharpening. Pair this with some degreaser or simply warm soapy water. For stubborn residue, white vinegar works beautifully and it’s environmentally friendly.
Safety equipment isn’t optional. Grab heavy-duty work gloves to protect your hands from those sharp edges, and safety glasses to shield your eyes from metal filings. Long sleeves are smart too.
You’ll need a way to secure your trimmer while working. A sturdy workbench with a vise is ideal, but C-clamps work perfectly fine if that’s what you have available.
For lubrication after sharpening, light machine oil or a dedicated blade lubricant keeps rust at bay and maintains smooth operation. In a pinch, vegetable oil works as a sustainable alternative, though it won’t last quite as long.
Now, about bench grinders: while they speed up the process, I’d only recommend them for experienced users. They remove metal quickly and generate significant heat, which can damage blade temper if you’re not careful. For most home gardeners, stick with hand files. They’re affordable, sustainable since they last for years, and practically impossible to mess up with.
The Step-by-Step Sharpening Process
Cleaning the Blades Before Sharpening
Before you start sharpening, taking time to clean your trimmer blades thoroughly makes all the difference. Think of it like washing vegetables before cooking—you want a clean surface to work with! Sap, debris, and rust create barriers that prevent your sharpening tools from making proper contact with the metal, resulting in uneven edges and wasted effort.
Start by removing loose debris with a stiff brush or old toothbrush. For sticky sap and resin buildup, which is incredibly common after trimming evergreens, try a natural citrus-based cleaner or simple rubbing alcohol applied with a cloth. These work surprisingly well without harsh chemicals. If you spot rust, don’t panic—a paste made from baking soda and water gently scrubbed with fine steel wool usually does the trick. This eco-friendly approach is both effective and sustainable.
Once clean, wipe the blades dry completely with a lint-free cloth. You’ll notice the actual cutting edges much more clearly now, helping you identify problem areas that need extra attention during sharpening. This inspection moment is invaluable—it’s when you’ll spot nicks, chips, or particularly dull sections that require focused work. Trust me, those few extra minutes spent cleaning save considerable frustration later and deliver sharper, more precise results.
Hand Filing Method (Recommended for Most Users)
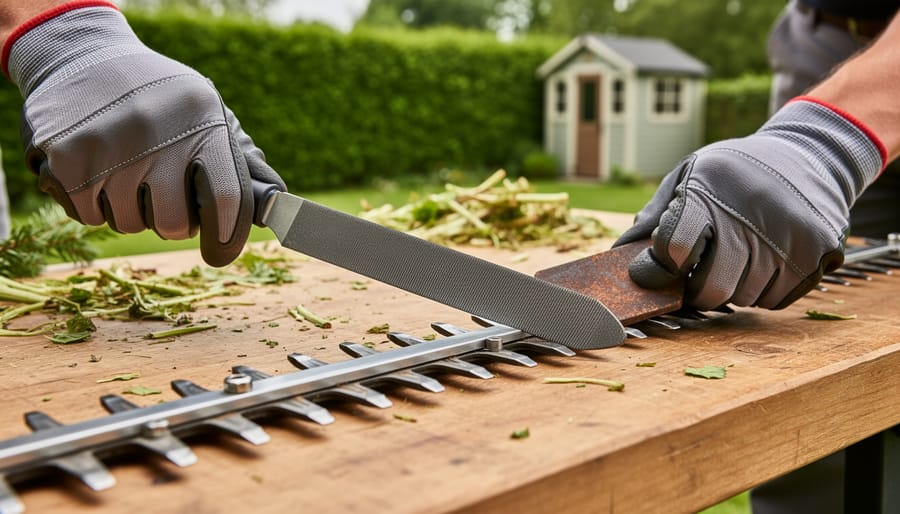
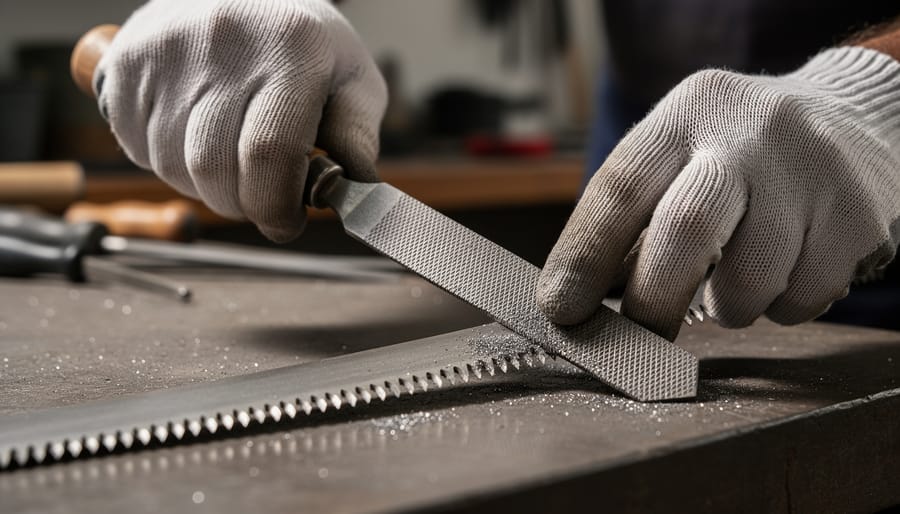
Hand filing is my go-to method for sharpening hedge trimmer blades, and I recommend it for most gardeners because it gives you excellent control while being surprisingly straightforward once you get the hang of it. You’ll need either a mill file or a flat file—I prefer an 8 to 10-inch mill file for the job.
Before you begin, secure your trimmer blade in a vise if possible. This keeps everything stable and makes the process much safer and more accurate. If you don’t have a vise, you can work with the blade still attached to the trimmer, but make absolutely certain it’s unplugged or the battery is removed.
Here’s where proper sharpening angles become crucial. Most hedge trimmer blades have a factory angle of about 45 degrees, and you’ll want to maintain this. Hold your file at this angle against the cutting edge, matching the existing bevel. I find it helpful to imagine you’re trying to slice through the metal at a consistent angle rather than scrubbing back and forth.
Use smooth, deliberate strokes moving away from your body. This is important—always push the file in one direction only, lifting it completely on the return. Dragging the file backward actually dulls it and wastes effort. Count your strokes as you go, typically 5 to 8 strokes per tooth depending on how dull the blade is. Consistency matters here because you want each tooth sharpened evenly for balanced cutting performance.
Work systematically along the blade, sharpening every tooth on one side before flipping to the other. This prevents confusion and ensures you don’t miss any teeth.
Common mistakes I see include applying too much pressure (let the file do the work), changing angles mid-stroke, and over-sharpening some teeth while neglecting others. Another sustainability win: hand filing extends blade life significantly, keeping those blades out of landfills for years longer than they’d otherwise last.
Using a Sharpening Stone for Fine Tuning
After filing your hedge trimmer blades, you’ll want to reach for a whetstone or sharpening stone to create that professional, razor-sharp finish. Think of this step as the difference between a good haircut and a great one—those final touches really matter.
Start by moistening your stone according to the manufacturer’s instructions. Some stones need water, while others work best with honing oil. Hold the blade steady and draw the stone along the beveled edge at the same angle you used while filing, typically between 30 and 45 degrees. Use smooth, consistent strokes moving away from your body, working from the base of the blade toward the tip.
You’ll feel the stone doing its magic as it polishes the edge and removes any burrs or rough spots left behind from filing. Make about 10 to 15 passes per blade, checking your progress by gently running your finger perpendicular to the edge (never along it). The blade should feel smooth without any catches or rough patches.
This finishing process not only creates a cleaner cut for your hedges but also helps the blade stay sharper longer—a win for both your garden and sustainable tool maintenance. Keep your investment performing well by maintaining your sharpening stone properly between uses.
When to Consider Professional Sharpening
While sharpening your hedge trimmer yourself is a rewarding and sustainable practice, there are situations where calling in a professional makes better sense. If your blades have deep nicks, bent teeth, or significant rust damage that goes beyond surface corrosion, a professional has the specialized equipment to restore them properly. Double-sided blades with complex tooth patterns can be tricky to balance correctly, and uneven sharpening affects cutting performance and can strain your trimmer’s motor. Similarly, if you’ve attempted sharpening but your trimmer still tears rather than cuts cleanly, a professional can diagnose whether the issue is blade alignment, tension, or damage you might have missed. There’s no shame in seeking expert help when needed. Think of it as an investment in your tool’s longevity and your garden’s health. Most professional sharpening services are reasonably priced and can extend your blade’s life significantly, making it an environmentally sound choice when DIY reaches its limits.
Testing and Adjusting Your Sharpened Blades
Before you put everything back together, let’s make sure your hard work paid off. Safety first, though—always handle those blades carefully, even when testing.
The simplest sharpness test is the paper test. Hold a piece of regular printer paper by one edge and gently draw the blade across it at a slight angle. A properly sharpened blade should slice through cleanly without tearing or requiring much pressure. If the paper tears raggedly or the blade just pushes it aside, you’ll need another pass with your sharpening tool.
For a visual check, examine the cutting edge under good light. You’re looking for a consistent, smooth bevel with no shiny flat spots—those indicate dull areas that need more attention. The edge should have a uniform appearance along its entire length.
Once you’re satisfied, carefully reassemble your trimmer, following the manufacturer’s instructions in reverse order. Double-check that all bolts are tight and guards are properly positioned.
Now for the real test. Find some sacrificial branches—maybe overgrown growth you’ve been meaning to tackle anyway. A sharp blade should cut cleanly through twigs without grabbing or crushing. You’ll feel the difference immediately: smooth, effortless cuts instead of that frustrating chewing action.
If your test cuts aren’t quite perfect, don’t worry. Sometimes blades need minor fine-tuning. A few extra strokes with your file in the problem areas usually does the trick. This hands-on approach to maintaining your tools not only saves money but reduces waste—a win for both your garden and the environment.
Post-Sharpening Care: Cleaning and Lubrication
You’ve just put in the work to sharpen those blades, and honestly, you’re almost done. But here’s the thing – skipping the cleanup and lubrication step is like washing your car and leaving it covered in soap suds. Those metal filings and exposed blade edges need attention right away.
Start by thoroughly wiping down the blades with a clean, dry cloth to remove all metal shavings and dust. I like to use an old toothbrush to get into the nooks and crannies where filings love to hide. These tiny particles can actually accelerate rust formation if left behind, so take your time with this step. A quick blast of compressed air works wonders too, especially around the bolts and pivot points.
Now for lubrication – this is where you protect your investment. Apply a thin, even coat of lubricant to both sides of the blades. Traditional options include motor oil or specialized blade oil, but if you’re committed to sustainable practices, vegetable-based bar and chain oils are excellent eco-friendly alternatives. They biodegrade naturally and won’t harm your plants if a bit drips off during trimming. Canola or soybean-based oils work beautifully and provide solid rust protection.
Here’s a pro tip: apply your lubricant before storing, not just before using. This creates a protective barrier against moisture during storage. Speaking of storage, keep your trimmer in a dry location, ideally hanging or in a protective case. Some gardeners even slip a moisture-absorbing packet near their stored tools.
For ongoing rust prevention, make it a habit to wipe down and re-oil your blades after each use, especially if you’ve been trimming in damp conditions. This simple routine keeps your freshly sharpened blades performing beautifully season after season.
How Often Should You Sharpen Your Hedge Trimmer?
The frequency of sharpening your hedge trimmer depends largely on how often you use it and what you’re cutting. For casual gardeners who trim hedges once or twice monthly during the growing season, sharpening twice a year—at the start and middle of the season—usually does the trick. This approach fits perfectly into your broader seasonal tool maintenance routine.
If you’re a frequent user tackling dense, woody shrubs or maintaining multiple properties, you’ll want to sharpen every 4-6 weeks during peak season. Pay attention to what your trimmer tells you: ragged cuts, increased vibration, or needing extra pressure all signal it’s time for sharpening.
The type of vegetation matters too. Soft, green hedges are forgiving, while cutting through thick, mature branches dulls blades faster. Some gardeners keep a simple log noting trim dates and blade performance, making it easier to establish a personal sharpening rhythm.
Here’s a practical tip: inspect your blades after every major trimming session. A quick visual check takes seconds but helps you catch damage early, preventing bigger problems down the road. Remember, regular sharpening actually extends blade life and supports sustainable tool ownership by reducing waste.
Sharpening your hedge trimmer blade might seem intimidating at first, but as you’ve seen, it’s genuinely within your reach. With just a few basic tools and a little practice, you can transform a struggling trimmer into a precision cutting machine. Beyond the immediate satisfaction of a job well done, you’re making a meaningful choice for your garden’s health and our planet’s future. Sharp blades mean cleaner cuts that help your hedges resist disease and stress, while extending your tool’s lifespan keeps equipment out of landfills. That’s sustainable gardening in action. You’re also saving money on professional sharpening services and replacement tools, putting those resources back into your garden where they belong. So next time your trimmer starts pulling instead of cutting, remember that you’ve got the knowledge and the ability to fix it yourself. Embrace this hands-on approach to equipment maintenance. Your hedges, your wallet, and the environment will all thank you for taking control of your gardening toolkit with confidence.