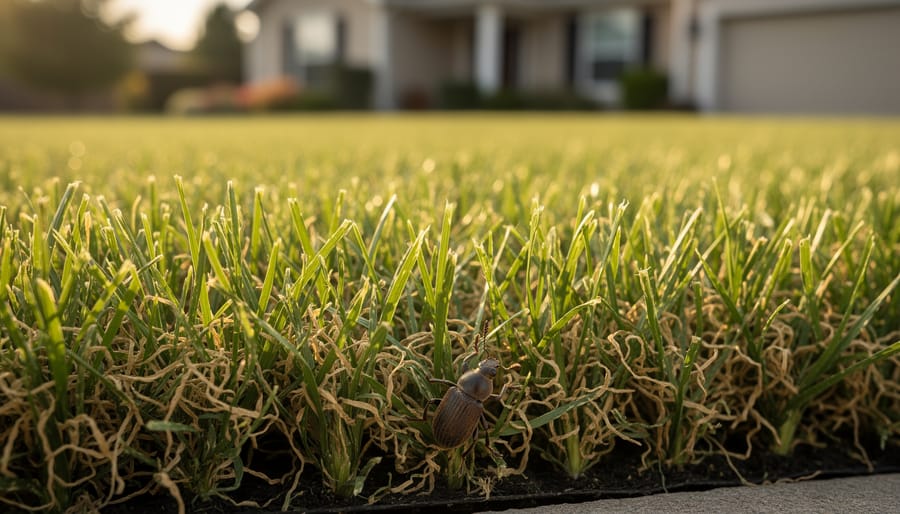
Diagnose your edger’s problem by checking three common culprits: inspect the blade for excessive wear or damage, examine the drive belt for cracks or looseness, and test the spark plug for carbon buildup or improper gap. Most edger failures stem from these components, and identifying the issue takes just five minutes with a basic visual inspection.
Clean a fouled spark plug with a wire brush and reset the gap to manufacturer specifications, typically 0.030 inches, before considering replacement. This simple fix solves roughly 40 percent of edger starting problems and costs nothing if you already own a gap tool. If your edger still won’t fire after spark plug service, move on to fuel system issues like a clogged carburetor or stale gas.
Replace damaged blades immediately rather than attempting to sharpen severely worn edges, as compromised blades create ragged cuts that stress your lawn and waste your effort. Quality replacement blades cost between fifteen and thirty dollars and install in minutes with basic hand tools. Dull blades also force your edger’s motor to work harder, accelerating wear on other components.
Extend your edger’s lifespan by cleaning the blade housing after each use, preventing grass buildup that causes corrosion and imbalance. Store your edger in a dry location, drain fuel before winter storage, and inspect all moving parts monthly during peak season. These preventive steps reduce repair frequency by up to 70 percent while supporting sustainable practices through equipment longevity rather than premature replacement.
Understanding Your Lawn Edger’s Anatomy
Before you can fix your edger, it helps to understand what’s actually happening under the hood. Think of your lawn edger like a well-choreographed team where three key players need to work in harmony: the blade, the gearbox, and the drive system.
The blade is your edger’s workhorse, spinning at high speeds to slice through grass and soil with precision. It’s constantly making contact with dirt, rocks, roots, and whatever else lurks at the edge of your lawn. This relentless contact means blades naturally dull over time, and occasionally, they’ll chip or bend when they hit something particularly stubborn. I’ve learned this the hard way after tackling a sidewalk edge hiding some unexpected gravel.
The gearbox serves as the translator between your engine’s power and the blade’s spinning action. It houses gears and bearings that adjust the speed and torque, ensuring your blade gets the power it needs. Because these parts are in constant motion and generate friction, they rely heavily on proper lubrication. When grease breaks down or leaks out, gears start grinding against each other, leading to premature wear.
The drive system is what connects your power source, whether it’s a gas engine or electric motor, to the gearbox. This includes belts, clutches, or drive shafts depending on your model. These components experience tension and stress with every use, making them susceptible to stretching, slipping, or breaking over time.
Understanding how these three components work together helps you diagnose problems more effectively. When your edger starts acting up, you’ll know whether you’re dealing with a dull blade, a struggling gearbox, or a failing drive system, which is the first step toward getting back to creating those crisp, clean lawn edges we all love.

Diagnosing Common Edger Problems
When the Blade is the Culprit
Sometimes your edger’s poor performance isn’t about the motor or wheels at all—the blade itself might be crying out for attention. I’ve learned this the hard way after blaming my edger’s engine for what turned out to be a simply dull blade!
Start by unplugging your edger or removing the spark plug (safety first, always). Look closely at the blade’s cutting edge. A sharp blade should have a clean, defined edge, while a dull one appears rounded or shiny. Run your finger carefully along the edge—if it feels smooth rather than slightly sharp, it’s time for sharpening.
Next, check for visible damage. Chips and nicks are common culprits, especially if you’ve hit rocks or concrete. These create uneven cuts and put extra stress on your motor. Inspect the blade’s overall shape too—it should be perfectly straight. Hold it up at eye level and sight down its length. Any bending or warping means replacement is likely your best bet.
Finally, reinstall the blade loosely and give it a gentle spin. Wobbling indicates the blade is bent, the mounting hole is damaged, or the shaft itself has issues. A blade that wobbles not only cuts poorly but can also damage other edger components over time. Catching these issues early saves you money and extends your edger’s life—a win for both your wallet and sustainable tool ownership.

Gearbox Warning Signs
Your edger’s gearbox is the hardworking heart of the machine, and when it starts to struggle, you’ll notice. The most common warning sign is unusual noise during operation. If you hear grinding, clicking, or rattling sounds that weren’t there before, your gearbox is likely telling you something’s wrong. These noises often indicate worn gears or damaged bearings that need attention before they cause complete failure.
Another telltale sign is leaking lubricant. Check around the gearbox housing for oil spots or grease buildup. A small amount of residue is normal over time, but active dripping or pooling means seals have failed. This is serious because running a gearbox without proper lubrication will destroy it quickly.
Pay attention to power transmission too. If your edger blade spins inconsistently, lacks cutting force, or suddenly stops while the motor runs, the gearbox isn’t transferring power properly. This loss of efficiency means internal components are slipping or stripped.
The good news? Catching these warning signs early makes repairs much more manageable and helps you avoid wasteful replacements. Regular inspections take just minutes and can save you from costly breakdowns mid-project.
Drive System Failures
When your edger feels like it’s lost its oomph, drive system problems are often the culprit. These issues can be frustrating, but the good news is that most are surprisingly straightforward to fix.
Belt slippage is probably the most common drive system issue you’ll encounter. If your edger blade spins slowly or stops under light pressure, check the drive belt. Over time, these belts stretch and wear, becoming loose or glazed. Pop off the belt cover and inspect it closely. A healthy belt should feel firm and slightly grippy, not smooth and shiny. Replacing a worn belt takes about fifteen minutes and costs less than a fancy coffee drink, making it one of the most satisfying DIY repairs you can tackle.
Loss of power during operation often points to a tensioning problem. The belt needs proper tension to transfer energy efficiently from the engine to the blade. Most edgers have an adjustment mechanism, usually a simple bolt or spring-loaded tensioner. Consult your manual for the correct tension specifications, but a good rule of thumb is that the belt should give about half an inch when pressed firmly.
Engagement issues where the blade won’t start spinning typically indicate a worn engagement cable or clutch mechanism. These components can corrode or stretch over time. A simple cable adjustment or lubrication often restores proper function, extending your edger’s life while keeping it out of the landfill.
Blade Maintenance and Repair
Sharpening Your Edger Blade
A sharp edger blade makes all the difference between clean, professional-looking edges and ragged, frustrating results. The good news? Sharpening your blade is simpler than you might think, and doing it yourself saves money while reducing waste.
Start by disconnecting the spark plug wire for safety—never skip this step! Flip your edger to access the blade underneath. You’ll need a socket wrench to remove the blade bolt. Take a quick photo with your phone before removal so you remember the blade’s orientation. This small step prevents headaches during reinstallation.
Once removed, secure the blade in a vise or clamp it firmly to your workbench. Inspect for deep nicks or cracks—damaged blades should be replaced, not sharpened. For normal wear, use a 10-inch mill bastard file or angle grinder with a grinding wheel. Always sharpen at the blade’s original angle, typically around 30 to 45 degrees. Work in smooth, consistent strokes from the center outward, maintaining even pressure.
Here’s where blade balance matters—an unbalanced blade causes vibration and premature wear. After sharpening, hang the blade on a nail through its center hole. It should rest horizontally. If one side dips, file a bit more metal from the heavier side.
Keep your tools in top condition with proper sharpening stone maintenance. Before reinstalling, clean the blade thoroughly and apply a light coat of oil to prevent rust. Tighten the bolt securely, reconnect the spark plug, and you’re ready for beautifully defined garden beds.

When to Replace Instead of Repair
Sometimes the most sustainable choice is knowing when to let go. If your edger blade has cracks, deep gouges that remove more than half the blade width, or signs of metal fatigue like warping or splitting, it’s time for a replacement. Safety should always come first—a compromised blade can break during operation, creating a dangerous projectile situation.
Consider the economics too. If you’ve sharpened your blade multiple times and it’s now noticeably thinner or shorter than when new, you’ve gotten excellent value from it. Continuing to use an overly worn blade actually wastes energy and creates ragged cuts that stress your lawn edges. A general rule of thumb: if the repair cost approaches 60-70% of a new blade’s price, opt for new.
For electric edgers with motor issues beyond basic maintenance, professional repair often exceeds replacement cost. However, before discarding any edger, explore whether parts like handles, wheels, or guards can be salvaged for future repairs—that’s practical sustainability in action. When you do replace equipment, research companies with take-back programs or recycle metal components responsibly at your local facility.
Preventing Blade Damage
The best repair is the one you never have to make! A little awareness goes a long way in protecting your edger blade from unnecessary damage.
Before you start edging, take a quick walk along your intended path. Look for rocks, branches, tree roots, or metal lawn stakes that might be lurking near the surface. These hidden hazards are the number one cause of blade damage. If you spot any, either remove them or mark the area mentally to avoid. This thirty-second survey can save you hours of repair time and the cost of replacement blades.
When edging, maintain a steady, controlled pace. Rushing increases the chance you’ll hit something unexpected before you can react. Keep the blade at the proper depth – going too deep increases contact with buried obstacles while also stressing the motor unnecessarily.
After each use, clean grass clippings and debris from your edger before storing it. Moisture trapped in plant material can lead to rust on the blade and housing. Store your edger in a dry location, ideally hanging on a wall or placed upright to prevent blade contact with concrete floors. Investing in proper tool storage protects both the blade and other components from premature wear.
Consider keeping a spare blade on hand – it’s a sustainable practice that extends your edger’s life and keeps you ready for any situation.
Gearbox Care and Troubleshooting
Checking and Changing Gearbox Lubricant
Your edger’s gearbox is like the heart of the machine, and keeping it properly lubricated is one of those simple tasks that can save you from expensive repairs down the road. I learned this lesson the hard way when my first edger ground to a halt mid-project because I’d never once checked the oil level!
Check your gearbox oil every 25 hours of use, or at least once per season if you’re a casual user. Before each use, give it a quick visual inspection through the sight glass if your model has one. You’ll want the oil level sitting between the minimum and maximum marks.
For most edgers, a high-quality SAE 30 or 80W-90 gear oil works perfectly. Always consult your owner’s manual first, as some manufacturers have specific requirements. Choose oils with minimal environmental impact when possible, and never mix different oil types.
When it’s time to change the oil, typically once per year or every 50 hours, follow these steps. First, run your edger for a few minutes to warm the oil, making it flow more easily. Position a container underneath the drain plug, usually located at the gearbox’s lowest point. Remove the drain plug and let the old oil fully drain out. Replace the drain plug securely, then locate the fill plug on the side or top of the gearbox. Add fresh lubricant slowly until it reaches the proper level on the sight glass or begins trickling from the fill hole. Wipe away any spills and you’re done! This fifteen-minute maintenance task extends your edger’s life significantly while keeping petroleum waste to a minimum.

Repairing vs. Replacing Your Gearbox
Deciding whether to repair or replace your edger’s gearbox often comes down to simple math and a bit of honest assessment. If your edger is relatively new and the gearbox issue is isolated, repair usually makes financial sense. A replacement gearbox typically costs 30-50% of a new edger, making it the more economical choice. However, if your edger is showing its age with multiple failing components, investing in a new machine might save you from becoming a regular at the repair shop.
For professional repairs, consider this route when you’re dealing with complex internal damage or if you lack the tools for proper disassembly. A skilled technician can often diagnose multiple issues simultaneously, potentially saving you from repeated breakdowns.
When sourcing replacement parts, think sustainably. Check if your manufacturer offers refurbished gearboxes, which perform like new at reduced prices and environmental impact. Local small engine repair shops sometimes stock salvaged parts from retired edgers in excellent condition. Online marketplaces and equipment-specific forums can connect you with other gardeners selling unused parts. Always verify compatibility with your edger’s model number before purchasing. Remember, keeping your existing edger running through thoughtful repair extends its lifespan and keeps another tool out of the landfill, which is a win for both your wallet and the planet.
Common Gearbox Problems and Quick Fixes
Good news—many gearbox headaches are surprisingly simple to tackle yourself! Start by checking those mounting bolts. Vibration from regular use loosens them over time, causing wobbling and poor performance. Grab your wrench and tighten them snugly, but don’t overdo it. If you spot oil pooling around the gearbox, you’re likely dealing with a worn seal. Small leaks can often be temporarily managed by cleaning the area thoroughly and applying gear oil specifically designed for outdoor equipment—a more sustainable choice than replacing the entire unit immediately. Keep an eye on the oil level through the inspection window if your edger has one. Low oil creates excessive friction and heat, shortening your gearbox’s lifespan considerably. Top it off with the manufacturer’s recommended lubricant. Strange grinding noises usually signal debris caught in the housing or low lubrication rather than catastrophic failure. Clean around the housing vents and relubricate before assuming the worst. These quick fixes extend your edger’s life and keep perfectly functional equipment out of landfills.
Drive System Maintenance
Belt-Driven Edgers
Belt-driven edgers are workhorses in the lawn care world, but their belts do need regular attention to keep everything running smoothly. Think of it like checking the fan belt in your car—a little preventive care goes a long way.
Start by inspecting your belt’s condition before each season. Look for cracks, fraying edges, or a glazed, shiny appearance that indicates excessive wear. A healthy belt should feel slightly pliable, not brittle or overly loose. If you notice the edger slipping during operation or struggling to maintain consistent power, the belt is usually the culprit.
Checking belt tension is straightforward. With the edger unplugged or the spark plug disconnected, press down on the belt midway between pulleys. It should give about half an inch—any more and it needs tightening. Most edgers have an adjustment mechanism, typically a movable motor mount or idler pulley. Consult your manual for the exact location, but the principle remains the same: loosening the mounting bolts slightly allows you to shift components and increase tension.
When replacing belts, here’s where sustainability meets practicality. While generic belts might save you a few dollars initially, investing in higher-quality, manufacturer-recommended belts often means longer life and better performance. Quality belts reduce slippage, which actually saves energy and reduces wear on other components—a win for both your wallet and the environment. Plus, they’re less likely to snap mid-job, leaving you with an unfinished edge and a trip to the hardware store.
Replace belts annually if you edge regularly, or sooner if inspection reveals significant wear.
Direct-Drive and Shaft Systems
Direct-drive edgers are wonderfully efficient machines, but they do require some attention to keep running smoothly. Think of the shaft and coupling system as the heart of your edger’s power delivery, and with a little regular care, you’ll extend its life considerably while reducing waste.
Start by inspecting the drive shaft regularly for wear, cracks, or bending. Disconnect the spark plug first for safety, then examine the entire length of the shaft. Even minor damage can cause vibration issues that worsen over time. If you notice wobbling during operation, this is your first clue something needs attention.
The coupling, which connects your motor to the cutting head, deserves special focus. Check for loose bolts or worn rubber components that can cause slippage. Tighten any fasteners you find, but don’t over-torque them. I’ve seen many well-meaning gardeners strip threads by being too enthusiastic with their wrenches. Hand-tight plus a quarter turn is usually perfect.
Lubrication is where many edger owners fall short. Look for grease fittings along the shaft housing, typically near the gearbox and coupling areas. Use a biodegradable lithium-based grease every 10-15 hours of operation. This simple step prevents metal-on-metal grinding and keeps everything moving freely. Clean away old, dirty grease before applying fresh lubricant to avoid trapping debris.
For sustainability-minded gardeners, proper maintenance means your edger lasts years longer, keeping it out of landfills and saving you money for other garden projects.
Creating Your Seasonal Maintenance Schedule
Think of seasonal edger maintenance like tending a garden—a little attention at the right times prevents big problems down the road. I learned this the hard way after neglecting my edger one winter and spending half of spring getting it running again. Let me share a maintenance calendar that’s saved me countless headaches since then.
Start each spring with a thorough inspection before your first edging session. Check the blade for damage or dullness, inspect fuel lines for cracks, and change the oil if you have a gas-powered model. This is also the perfect time to review your small gas engine maintenance routine to ensure everything’s fresh for the busy season ahead. Clean or replace the air filter and spark plug—these small tasks prevent frustrating mid-season breakdowns.
During summer, perform quick monthly check-ups. Examine the blade after every few uses, especially if you’ve hit rocks or roots. Tighten loose bolts, clear debris from vents, and keep moving parts lubricated. For battery-powered edgers, monitor charging patterns and clean battery contacts to maintain optimal performance.
Fall is your prep-for-storage season. Give everything a deep clean, sharpen or replace blades, and drain fuel from gas models or fully charge batteries for winter storage. Apply a light coating of oil to metal parts to prevent rust during dormancy.
Winter might seem like downtime, but it’s ideal for indoor maintenance tasks. Order replacement parts you’ll need, clean accumulated grime from hard-to-reach spots, and perform any repairs in your workshop. Store your edger in a dry, temperature-stable location to protect components from moisture and extreme cold.
This seasonal rhythm keeps your edger ready when you need it most and extends its lifespan significantly. Mark these tasks on your gardening calendar alongside planting schedules—your future self will thank you when edging season arrives.
Sustainable Repair Practices
When you commit to repairing your edger instead of replacing it, you’re making a choice that benefits both your wallet and the planet. Every repair extends your equipment’s life, keeping perfectly functional machinery out of landfills where it doesn’t belong.
Let’s talk about parts disposal first. When you replace a blade, spark plug, or air filter, resist the temptation to toss everything in the trash. Metal blades can be recycled at most scrap metal facilities. Used spark plugs, while small, contain metals worth reclaiming. Check with your local waste management facility about proper disposal options for filters and fuel system components, as these may contain residues that shouldn’t enter regular waste streams.
Here’s something I learned after years of equipment maintenance: investing in quality replacement parts saves money and resources long-term. That bargain-bin blade might seem appealing, but if it dulls twice as fast, you’re creating twice the waste and doing twice the work. Quality parts last longer, perform better, and often come from manufacturers with better environmental practices.
The most sustainable repair is the one you never have to make because regular maintenance prevents problems before they start. Clean your edger after each use, inspect it monthly during peak season, and address small issues immediately. That loose bolt you ignore today becomes a cracked housing tomorrow.
Consider this perspective shift: your edger isn’t disposable, it’s repairable. With proper care, a well-made edger can serve you for decades. Each season you extend its life represents resources conserved, manufacturing emissions avoided, and one less piece of equipment produced. That’s gardening with purpose that extends beyond your lawn’s edge.
Taking care of your edger doesn’t have to be intimidating or expensive. As we’ve explored throughout this guide, the majority of edger problems stem from simple issues like dull blades, worn spark plugs, or clogged air filters. The good news? Regular maintenance prevents most of these headaches before they start. By dedicating just a few minutes after each use to clean your edger and performing seasonal tune-ups, you’ll extend its lifespan significantly while avoiding costly replacements.
Think about it from a sustainability perspective too. Every time you successfully repair your edger instead of tossing it for a new one, you’re keeping metal, plastic, and other materials out of landfills. You’re also reducing the demand for manufacturing new equipment, which has its own environmental footprint. Your wallet benefits, the planet benefits, and you gain valuable skills along the way.
Now that you’ve got the knowledge, it’s time to put it into practice. Start with the basics: inspect your blade, check your spark plug, and give your edger a thorough cleaning. You’ll be amazed at how much better it performs with just a little attention. And here’s something many gardeners discover along the way—there’s genuine satisfaction in maintaining your own equipment. That moment when your edger roars to life after you’ve cleaned the carburetor or when it cuts perfectly after you’ve sharpened the blade yourself? That’s the kind of hands-on gardening victory worth celebrating.