Start by mapping your entire outdoor space on graph paper, noting existing structures, drainage patterns, sun exposure, and traffic flow—this simple sketch prevents expensive material waste and redesign headaches down the road. Walk your yard after heavy rain to identify where water pools or rushes, since proper drainage integration separates successful hardscapes from cracked, shifting disasters within two seasons.
Define your primary hardscape purpose before selecting materials: entertaining spaces need level patios with stable foundations, while pathways require different base depths and permeable options that reduce runoff and support healthier surrounding plants. Match your material choices to your climate and soil conditions—freeze-thaw cycles demand different installation techniques than stable, warm regions, and clay soils need more robust drainage solutions than sandy loam.
Calculate quantities by measuring twice and ordering 10-15% extra material to account for cuts, breakage, and future repairs that match your original installation. This upfront investment saves you from mismatched replacement materials years later when your specific stone or paver is discontinued. Create a realistic timeline that accounts for proper base preparation, which takes longer than the visible hardscape installation but determines whether your investment lasts five years or fifty.
Consider permeable pavers, decomposed granite, or strategically placed gravel sections that allow water infiltration, supporting your lawn and garden beds while reducing municipal stormwater strain. Your hardscape plan should complement your landscape, not compete with it—the best designs create functional spaces that enhance your property’s natural drainage patterns and growing conditions rather than fighting against them.
What a Hardscape Design Plan Actually Is (And Why You Can’t Skip It)
Think of a hardscape design plan as your roadmap before embarking on a landscaping journey. Just like you wouldn’t build a house without blueprints, you shouldn’t dive into installing patios, walkways, or retaining walls without a solid plan in hand.
So what exactly is hardscaping? It’s all the non-living elements in your outdoor space—the stone pathways, brick patios, concrete driveways, wooden pergolas, and decorative rock features that form the bones of your landscape. This contrasts with softscaping, which includes all the living components like plants, flowers, grass, and trees. Both work together to create a balanced, functional outdoor environment, but the hardscape provides the permanent structure that everything else builds around.
A proper hardscape design plan is essentially a detailed blueprint that maps out where each permanent feature will go, what materials you’ll use, and how water will drain across your property. It should include measurements, material specifications, grading details, and a realistic timeline for your project. Think of it as your project’s instruction manual and your insurance policy rolled into one document.
Here’s why you genuinely can’t skip this step: pre-planning saves you significant money by helping you calculate exact material quantities, avoiding those costly mid-project supply runs. It saves time by preventing the “oops, we need to tear that out and start over” moments that plague unplanned projects. Most importantly from a sustainability perspective, careful planning reduces waste—you’re not ordering excess materials that end up in landfills, and you’re not disturbing more soil than necessary.
A thoughtful plan also helps you work with your yard’s natural drainage patterns rather than against them, preventing erosion and water pooling issues that could damage your property or your neighbor’s. When you design with intention, you’re creating outdoor spaces that last decades, not just seasons.

The Foundation: Assessing Your Yard Before Planning Your Layout
Measuring and Mapping Your Space
Before you fall in love with any design ideas, let’s get down to the practical foundation: measuring your yard accurately. Trust me, I’ve seen too many homeowners excitedly order materials only to discover their measurements were off by several feet. You’ll need a 100-foot tape measure (the long kind works better than a short one for yard projects), some wooden stakes, spray paint or flour to mark boundaries, and graph paper for sketching.
Start by measuring the overall boundaries of your project area, then identify existing features like trees, downspouts, and slopes. Mark these on your sketch using a consistent scale—I recommend one square equals one foot. Take diagonal measurements too, as this helps ensure accuracy for irregular spaces.
Common mistakes? Forgetting to account for underground utilities (call 811 before digging), ignoring drainage patterns, and underestimating slopes. Walk your space in different weather conditions if possible. That perfectly flat-looking area might reveal drainage issues after a good rain, saving you from costly corrections later.
Understanding Drainage and Slope
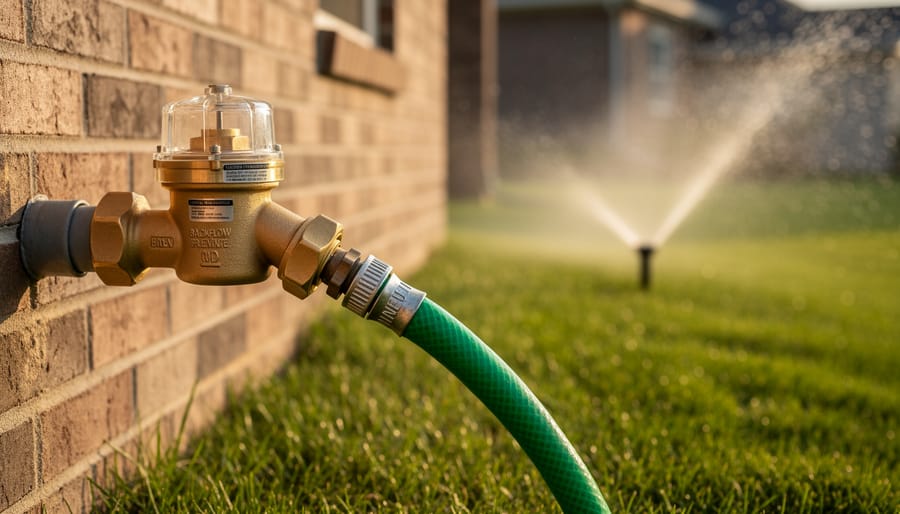
Poor drainage is the silent enemy of hardscape longevity. I learned this the hard way when my first patio developed troubling cracks and settled unevenly after just one rainy season. Water that pools around pavers, patios, or walkways creates ongoing problems—freeze-thaw damage in colder climates, erosion underneath hardscaping, and even foundation issues if water redirects toward your home.
Before placing a single stone, spend time understanding drainage patterns in your yard. Walk your property during or immediately after a heavy rain. Notice where water collects, which direction it flows, and whether existing grades naturally move water away from structures. Look for telltale signs like standing puddles, soil erosion channels, or areas where grass struggles to grow.
Your hardscape should complement natural drainage, not fight against it. Plan for a minimum slope of one to two percent away from buildings—that’s roughly one to two inches of drop per ten feet. This gentle grade is barely noticeable but incredibly effective. Consider permeable materials for eco-friendly water management, and always plan for proper base preparation with gravel layers that facilitate drainage beneath your hardscape surfaces.
Considering Your Lawn’s Traffic Patterns
Before you start placing pavers or pouring concrete, spend a week or two observing how your family actually moves through the yard. You’ll likely notice worn paths in the grass where people naturally walk—these yard traffic patterns are nature’s way of showing you where hardscape should go. Watch how kids cut corners to reach the play area, where guests tend to gather during cookouts, and which routes get muddy after rain. Take photos on your phone at different times of day to document these patterns. This observation period is invaluable for creating a hardscape plan that enhances natural flow rather than forcing everyone to adopt awkward new routes. Your hardscape should feel intuitive, guiding movement seamlessly while protecting your lawn from the wear that comes with regular foot traffic in high-use areas.
Choosing the Right Hardscape Elements for Your Needs
Functional vs. Decorative Features
When mapping out your hardscape design, it’s helpful to think of your project in two layers: what you need versus what you’d love to have. Start by identifying the functional elements that solve actual problems in your yard—perhaps you need a stable path to prevent muddy footprints, a retaining wall to manage erosion, or a patio for outdoor dining. These are your non-negotiables that improve how you actually use your space.
Once you’ve budgeted for the essentials, you can layer in decorative features that add personality and visual interest. Think fire pits, decorative stone borders, or artistic pavers in interesting patterns. Here’s a practical approach: allocate about 70% of your budget to functional features and 30% to decorative touches. This ensures your hardscape works hard for you while still looking beautiful.
If resources are tight, remember that many functional elements can be decorative too. A well-designed paver path serves a purpose while creating visual flow through your garden. Even a simple retaining wall becomes a design feature when you choose attractive stone and incorporate planting pockets. The key is making every element earn its place in your yard.
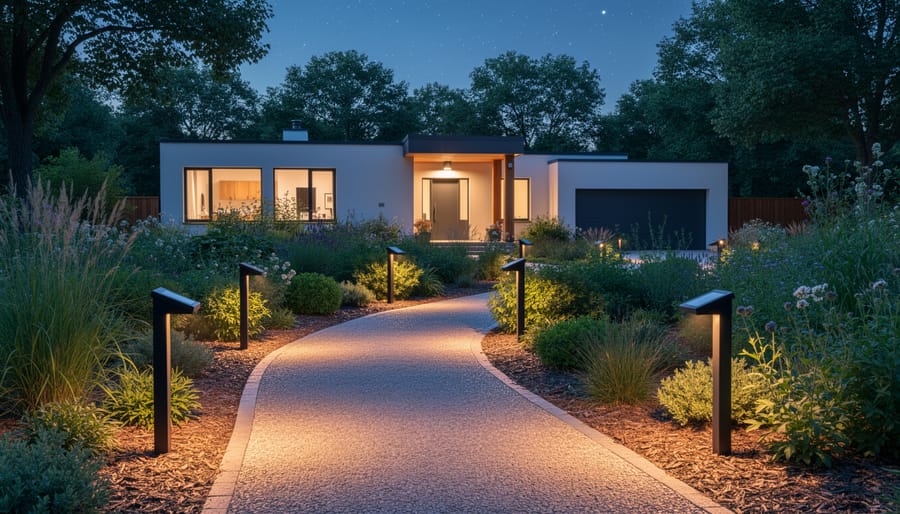
Balancing Hardscape with Green Space
Here’s the thing about hardscaping—while those beautiful patios and walkways add structure and function to your yard, they shouldn’t completely take over. Think of your hardscape design plan as a partnership between built elements and living green spaces, not a competition.
A good rule of thumb is the 60-40 ratio: aim for about 60% green space to 40% hardscape in your overall yard design. This balance helps with crucial environmental functions like water absorption, air quality, and temperature regulation. Hard surfaces create runoff and heat islands, but your lawn and garden beds naturally filter water back into the ground and keep things cooler during summer months.
Beyond the environmental benefits, that balance just looks better. Too much hardscape can make your yard feel stark and unwelcoming, while adequate green space creates softness and seasonal interest that stone and pavers simply can’t match.
When planning your project, resist the temptation to pave over problem areas just because grass won’t grow there. Instead, consider shade-loving ground covers or mulched garden beds that maintain permeability. Your local ecosystem—and your cooling bills—will thank you for keeping those green spaces intact.

Planning for Future Expansion
Here’s the reality: you don’t need to build your entire hardscape vision in one season. In fact, creating a phased approach can save you money, reduce overwhelm, and give you time to learn what works best in your space.
Start by designing your complete dream layout on paper, then prioritize projects by necessity and budget. Perhaps your patio comes first for immediate outdoor living space, while the fire pit area waits until next year. This approach lets you spread costs over time and adjust plans based on how you actually use your yard.
When implementing phases, think strategically about connections. If you’re planning pathways, install base materials for future sections even if you’re only finishing one area now. This prevents having to dig up completed work later and ensures proper drainage throughout.
Document everything as you go, including material quantities, supplier information, and installation notes. These records become invaluable for future phases and help maintain consistency across your entire hardscape. Remember, sustainable landscapes evolve naturally over time, and there’s wisdom in allowing your outdoor space to develop gradually rather than rushing to completion.

Material Selection: Matching Durability, Budget, and Style
Sustainable and Eco-Friendly Material Options
Choosing eco-friendly materials for your hardscape design isn’t just good for the planet—it can actually make your project more durable and cost-effective in the long run. Let me share some options that have worked beautifully for environmentally conscious homeowners.
Permeable pavers are absolute game-changers for sustainable hardscaping. Unlike traditional concrete or asphalt, these pavers allow rainwater to filter through the surface and back into the ground naturally. This means you’re reducing stormwater runoff, preventing erosion, and helping recharge local groundwater supplies. They come in various attractive styles, from interlocking concrete units to porous asphalt, so you won’t sacrifice aesthetics for sustainability.
Recycled materials offer another fantastic avenue for eco-friendly hardscaping. Reclaimed brick from old buildings, recycled concrete aggregate, and even recycled glass can create stunning patios, walkways, and retaining walls. These materials divert waste from landfills and typically require less energy to produce than new materials. Plus, reclaimed materials often have character and charm that brand-new products simply can’t match.
Locally sourced stone is perhaps the most straightforward sustainable choice. By selecting natural stone quarried within your region, you’re dramatically reducing transportation emissions while supporting local businesses. Native stone also tends to blend seamlessly with your landscape’s natural aesthetic, creating a more cohesive look.
When planning your hardscape, don’t hesitate to ask suppliers about the origin and composition of materials. Most reputable companies now offer detailed information about their products’ environmental impact, making it easier than ever to make responsible choices.
Climate Considerations for Material Longevity
Your regional climate plays a huge role in determining which hardscape materials will stand the test of time in your yard. Think of it like choosing the right plants for your zone—except with patios and pathways!
In areas with freeze-thaw cycles, water absorption becomes your biggest concern. When moisture seeps into porous materials and then freezes, it expands and can cause cracking or spalling. This is why concrete and certain natural stones need proper sealing in colder climates, while materials like porcelain pavers or dense granite perform better naturally. I learned this the hard way when a beautiful sandstone path in my Pennsylvania garden started flaking after just two winters.
Hot, sunny climates present different challenges. Dark-colored materials can become uncomfortably hot underfoot and may fade over time. Light-colored pavers, natural stone, or permeable options that don’t absorb as much heat work wonderfully in these regions and align with sustainable cooling practices.
High-moisture environments demand excellent drainage and mold-resistant materials. Consider adding proper base layers and slight slopes to prevent standing water, which can undermine even the most durable hardscaping.
Before committing to any material, research how it performs in your specific climate zone. Local landscape suppliers often carry materials proven to work well in your area, saving you both money and future headaches.
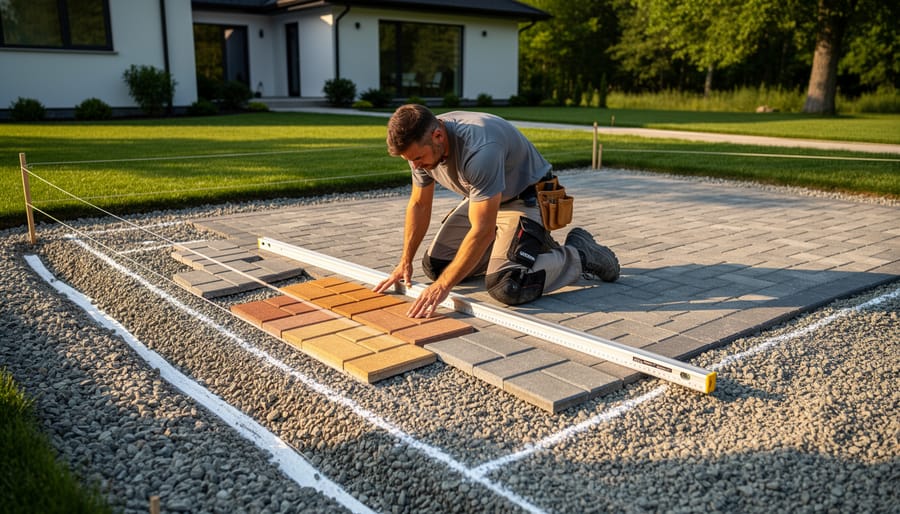
Calculating Material Quantities Accurately
Getting your material quantities right can save you significant money and headaches down the road. Here’s a practical approach that has worked well for countless gardeners tackling their first hardscape projects.
Start by measuring your project area carefully and calculating square footage or linear feet, depending on what you’re installing. For pavers and stone, always add 10-15% extra to account for cutting waste and inevitable breakage. I learned this the hard way when I ran short on my first patio and had to wait weeks for a matching batch to arrive.
For base materials like gravel and sand, calculate the cubic footage by multiplying length times width times depth (in feet), then convert to cubic yards by dividing by 27. Most suppliers sell by the cubic yard, so this conversion is essential. A typical paver patio needs about 4 inches of compacted gravel base and 1 inch of sand.
Here’s a sustainability tip: purchase an extra 5-10% beyond your waste allowance and store it properly for future repairs. This prevents landfill waste from partial bags and ensures you’ll have perfectly matched materials years later when you need to fix a settled paver or cracked stone. Wrap pavers in plastic and store in a dry location to prevent weathering.

Creating Your Layout: From Rough Sketch to Detailed Plan
Free and Low-Cost Design Tools
You don’t need expensive software to create a functional hardscape design plan. Several free and low-cost tools put professional-level planning within reach of any homeowner ready to tackle a DIY project.
SketchUp Free offers a surprisingly robust 3D modeling platform that lets you visualize patios, walkways, and retaining walls from every angle. While there’s a learning curve, their tutorial library helps beginners get comfortable quickly. For simpler projects, iScape and Home Outside provide user-friendly mobile apps where you can upload photos of your yard and digitally “place” pavers, stone, and other hardscape elements to see how they’ll look.
Garden planning apps like PRO Landscape Home also include hardscape features alongside planting tools, making them perfect if you’re coordinating both elements. Many include material calculators that help estimate quantities, reducing waste and supporting more sustainable project planning.
For those who prefer traditional methods, graph paper and colored pencils remain wonderfully effective. Draw your space to scale, experiment with different layouts, and calculate square footage without any technology at all. This hands-on approach often helps you think through practical considerations that digital tools might overlook.
Whichever tool you choose, the goal is the same: creating a clear visual plan that prevents costly mistakes and ensures your finished hardscape matches your vision.
When to Consider Professional Help
While many hardscape projects are perfect for DIY enthusiasts, some situations truly benefit from professional expertise. Consider reaching out to a landscape designer or hardscape specialist if you’re planning extensive grading changes, working with slopes exceeding 10%, or designing complex drainage systems. These scenarios involve technical calculations that, if done incorrectly, can lead to expensive water damage or structural failures down the road.
Similarly, if your project includes retaining walls over three feet high, intricate paver patterns, or structures requiring permits and engineering stamps, professional help often saves money in the long run. Experts can also be invaluable when you’re working with challenging soil conditions, integrating multiple outdoor living spaces, or trying to maximize your property’s potential in ways you hadn’t envisioned.
Think of consultation fees as insurance against costly mistakes. Many designers offer hourly consultations where they’ll review your plan, suggest improvements, and identify potential problems before you break ground. This middle-ground approach lets you maintain the DIY spirit while benefiting from professional insight on the trickiest aspects of your hardscape design.
Common Hardscape Planning Mistakes (And How to Avoid Them)
Let me share some stories from fellow gardeners who learned these lessons the hard way, so you don’t have to. One of the most costly mistakes happens when homeowners skip the crucial step of ignoring underground utilities. I remember talking to Sarah, who spent three days digging post holes for her beautiful patio only to hit a cable line. Not only did she face repair costs, but her entire design had to shift six feet over. Always call 811 before you dig—it’s free and can save you thousands in damages.
Poor drainage planning is another classic misstep that turns dream patios into backyard ponds. Tom installed a gorgeous flagstone patio right outside his back door without considering water flow. After the first heavy rain, water pooled against his foundation, creating basement moisture issues. The fix? He had to remove sections and regrade the entire area, adding a proper slope of at least one inch per eight feet away from the house.
Then there’s the over-hardscaping trap. Jessica got so excited about creating outdoor living spaces that she paved nearly 70 percent of her backyard. Within a year, she noticed her yard felt like a heat island in summer, and rainwater had nowhere to go. She ended up removing portions of the hardscape to restore green space and improve drainage. A good rule of thumb is following the 60-40 principle: keep at least 60 percent of your yard as permeable surface.
Finally, many beginners underestimate scale and proportion. Small pavers in a large space look busy and overwhelming, while oversized materials can dwarf a cozy courtyard. Always lay out samples and live with them for a few days before committing. Your eyes and your budget will thank you.
Maintaining Your Hardscape After Installation
Once your hardscape is installed, proper maintenance will keep it looking beautiful for years while supporting the health of your entire landscape. The good news? With a solid design plan already in place, you’ve likely incorporated features that make upkeep straightforward.
Start with regular sweeping of patios, walkways, and retaining walls to prevent debris buildup. This simple practice stops organic matter from breaking down in crevices, which can encourage weed growth and staining. For a sustainable approach, use collected debris as mulch around garden beds rather than sending it to the landfill.
Seasonal deep cleaning keeps surfaces fresh without harsh chemicals. Mix a solution of warm water with a biodegradable dish soap, then scrub with a stiff brush. For stubborn stains on natural stone, try a paste of baking soda and water. Pressure washing works wonders but use it sparingly, as too much force can dislodge joint sand between pavers or damage softer stone types.
Speaking of joint sand, check it twice yearly and refill as needed. This prevents pavers from shifting and keeps weeds at bay. Choose polymeric sand for better weed resistance, though traditional sand works fine with regular maintenance.
Pay attention to drainage throughout the seasons. Clear debris from gaps and channels after autumn leaves fall and spring storms pass. Proper water flow protects both your hardscape investment and surrounding lawn areas from erosion and pooling.
Winter care depends on your climate. Avoid metal shovels on stone surfaces and skip salt-based deicers that can damage both hardscape materials and nearby plants. Sand or calcium magnesium acetate provides traction without environmental harm.
Remember, healthy hardscapes and thriving lawns work together. When your pathways drain properly and stay weed-free, surrounding grass receives better air circulation and water distribution, creating a harmonious outdoor space that practically maintains itself.
Creating a thoughtful hardscape design plan might seem like a big undertaking, but remember that every beautiful outdoor space started with a single idea and a simple sketch. The time you invest in planning now will save you countless headaches and expenses down the road, while helping you create a space that truly enhances your property’s value and your outdoor enjoyment.
Don’t feel pressured to tackle everything at once. Starting with a small, manageable project like a modest patio or a simple garden path lets you learn the process without overwhelming your budget or schedule. As you gain confidence and see your vision come to life, you can gradually expand your hardscape elements. The beauty of proper planning is that it allows you to build in phases while maintaining a cohesive overall design.
By choosing sustainable materials and incorporating permeable surfaces where possible, you’re not just creating a functional space but also contributing to a healthier landscape ecosystem. Your thoughtfully designed hardscape will provide years of enjoyment, from morning coffee on your new patio to evening gatherings around a fire pit.
We’d love to hear about your hardscape journey. What projects are you planning, or what challenges have you encountered? Share your experiences in the comments below, and don’t hesitate to ask questions. Happy designing!