Check your zone valves monthly during growing season by turning each zone on manually and watching for weak pressure, uneven coverage, or complete failure to activate—these early warning signs prevent costly irrigation system failures and water waste. Clean the diaphragm and filter screen inside each valve twice yearly by shutting off water, removing the bonnet screws, and gently rinsing debris that causes slow opening or leaking. Test the solenoid with a multimeter set to 20-60 ohms resistance, replacing any that fall outside this range since faulty solenoids are the number one cause of zones that won’t turn on or off properly. Flush your system before winter and after spring startup by manually opening each valve for two minutes to clear sediment that damages internal components and clogs emitters.
Most zone valve problems stem from simple fixes you can handle yourself with basic tools and thirty minutes of focused attention. Understanding how these hardworking components control water flow to different garden areas empowers you to maintain a healthy, efficient irrigation system that conserves water while keeping your plants thriving. Whether you’re troubleshooting a stubborn valve that won’t close or establishing a preventive maintenance routine, mastering these essential tasks saves money on professional service calls and protects your landscape investment from drought stress or overwatering damage.
What Your Drip Irrigation Zone Valve Actually Does
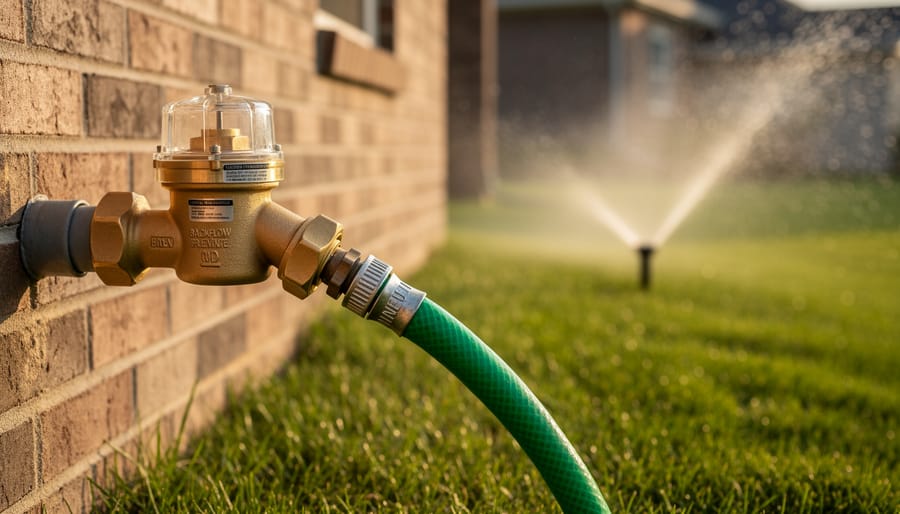
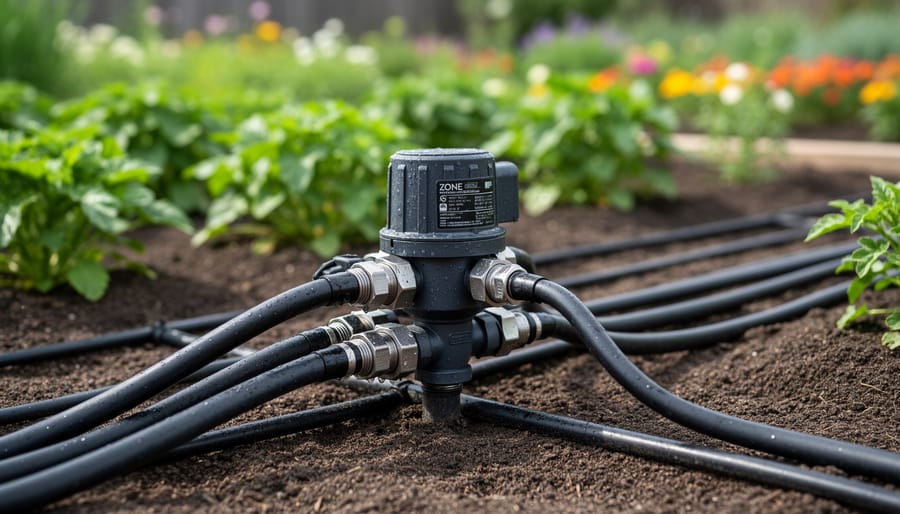
Think of your drip irrigation zone valve as the traffic controller of your watering system. Just like a conductor directs different sections of an orchestra, zone valves manage when and where water flows throughout your garden. Each valve controls a specific area or zone, allowing you to customize watering schedules based on what’s actually growing in each space.
Here’s how it works in practice. Your vegetable garden might need daily watering during hot summer months, while your established shrubs only need attention twice a week. Without zone valves, you’d have to water everything on the same schedule, which wastes water and can actually harm plants that prefer drier conditions. The valve acts as a gateway, opening to release water when that particular zone needs it and staying closed the rest of the time.
Most zone valves operate either electronically through a controller or manually with a simple turn. When activated, a diaphragm or solenoid inside the valve lifts, allowing water pressure to push through to the drip lines in that specific area. When the watering cycle completes, the valve closes, stopping water flow until the next scheduled session.
This zoned approach is critical for water conservation and plant health. You’re not just saving water by avoiding overwatering, you’re actually creating optimal growing conditions for different plant types. A well-functioning zone valve gives you the flexibility to match nature’s needs rather than forcing a one-size-fits-all solution. When these valves start acting up with leaks, failure to open, or sticking closed, your entire watering strategy falls apart, which is why understanding their role matters so much for effective irrigation maintenance.
The Warning Signs Your Zone Valve Needs Attention
When Zones Won’t Turn On or Off
When your zone valve refuses to cooperate, don’t panic! This is one of the most common issues you’ll encounter, and most have straightforward solutions.
Start by checking the controller to ensure it’s sending the signal properly. If the controller shows the zone is active but nothing happens, you’ve likely got an electrical or mechanical issue at the valve itself. First, manually test the valve by turning the solenoid clockwise about a quarter turn. Water should flow immediately if the diaphragm and downstream components are working correctly.
If water flows during manual operation, your solenoid is probably the culprit. These small electrical coils can fail over time due to moisture infiltration or simple wear. The good news? They’re inexpensive and easy to replace without special tools.
Stuck valves often result from debris in the diaphragm chamber. Turn off the water, remove the solenoid, then carefully disassemble the bonnet. Clean out any dirt, sand, or mineral deposits you find. This quick maintenance task solves about 70 percent of stuck valve problems in my experience.
Check your wiring connections too. Corroded or loose wire nuts can prevent the electrical signal from reaching the solenoid. A simple multimeter test can confirm whether voltage is reaching the valve, helping you determine if the problem lies with the controller, wiring, or valve itself.
Weak Water Flow and Pressure Problems
If you’re noticing weak water flow from your drip emitters, you’re likely dealing with one of three common culprits. First, check for partial blockages in the valve itself. Sediment and mineral deposits love to accumulate in the small passages of zone valves, gradually restricting water flow. It’s surprising how even fine particles can build up over time, especially if you’re using well water or live in an area with hard water.
Debris buildup in the valve screen is another frequent offender. That little screen protects your system, but it needs regular cleaning to do its job effectively. Simply removing and rinsing it can make a remarkable difference in water pressure.
Finally, consider diaphragm wear. The diaphragm is a flexible rubber component that controls water flow, and after several seasons of use, it naturally degrades. If you notice inconsistent pressure or the valve struggles to open fully, a worn diaphragm is often the answer. Replacing it is straightforward and costs just a few dollars, making it an easy fix that restores your system’s efficiency while conserving water.
Leaks Around the Valve Body
Water pooling around your zone valve usually signals one of three common culprits. First, check the internal seals and gaskets, which naturally deteriorate over time from constant exposure to water and pressure changes. These rubber components become brittle and cracked, especially in regions with temperature extremes. You’ll notice moisture or actual dripping where the valve bonnet meets the body.
Second, inspect the valve housing itself for hairline cracks. These often develop from accidental impacts with lawn equipment or from freeze-thaw cycles if you didn’t winterize properly. Even tiny cracks can waste hundreds of gallons over a season, undermining your water conservation efforts.
Finally, examine threaded connections and compression fittings at both inlet and outlet ports. Loose fittings or deteriorated thread tape allow water to escape. The good news? Tightening connections and replacing seals are straightforward fixes most gardeners can tackle themselves. However, cracked housings typically require complete valve replacement to restore your system’s efficiency and prevent ongoing water waste.
Your Seasonal Zone Valve Maintenance Routine
Spring Startup Checklist
Before you fire up your drip irrigation system after winter, take time to inspect each zone valve carefully. Start by turning on your water supply gradually and checking for any cracks or damage that may have occurred during freezing temperatures. Look closely at valve housings, diaphragms, and solenoids for signs of wear or deterioration.
Next, flush out each zone individually by opening the valves and letting water run for a few minutes. This simple step removes any debris or mineral buildup that accumulated during the off-season. You’ll be surprised how much sediment can collect in just a few months! While the water flows, watch for leaks around valve connections and adjust fittings as needed.
Clean the filter screens inside your zone valves, as these often trap dirt and small particles. Remove them carefully, rinse under clean water, and reinstall. This seasonal maintenance prevents clogging and ensures proper water flow throughout your growing season.
Finally, test each zone’s response to your controller. Run through a complete cycle, verifying that valves open and close properly. Listen for any unusual clicking or buzzing sounds that might indicate electrical issues. Document any problems you notice so you can address them before your plants depend on consistent watering.
Summer Monitoring
Summer is your irrigation system’s marathon season, so regular performance checks become essential. Visit each zone valve weekly during peak watering months to catch issues before they escalate. Listen for unusual sounds like hissing or grinding, which often signal pressure problems or debris buildup. Check that water flows evenly across all emitters in the zone—uneven distribution might mean your valve diaphragm needs cleaning.
Keep a small brush and clean cloth handy for quick maintenance visits. If you notice reduced flow, a simple filter screen cleaning usually does the trick. Just turn off the water, carefully remove the filter basket, rinse it thoroughly, and you’re back in business within minutes. This simple habit prevents sediment from damaging internal components and keeps your water-conserving system running efficiently.
Watch for wet spots or puddling around valve boxes, especially after extended watering cycles. These red flags often indicate leaking diaphragms or loose fittings that need immediate attention. Catching these problems early protects your plants from irregular watering while preventing water waste—a win for both your garden and sustainable practices.
Fall Preparation and Winterization
As temperatures drop, protecting your drip irrigation zone valves from freeze damage becomes essential. Water expands when it freezes, and trapped water inside valves can crack housings, damage diaphragms, and ruin seals—repairs that nobody wants to face come spring.
Start by draining your system thoroughly before the first hard freeze. Open all zone valves manually and let gravity do the work, beginning with the highest elevation zones. For complete drainage, use compressed air at no more than 50 PSI to blow out remaining water. Work zone by zone, keeping air pressure moderate to avoid damaging sensitive components.
Remove valve bonnets (the top caps) from critical valves if your area experiences severe winters. This simple step allows any remaining moisture to evaporate rather than freeze and expand. Store small removable parts like solenoids indoors in a labeled bag for safekeeping.
Consider insulating valve boxes with foam insulation or straw if you’re in a marginal freeze zone. These winterization procedures mirror those for other outdoor equipment and create a sustainable approach to system longevity. A few hours of fall preparation saves money, conserves resources by preventing replacement needs, and ensures your irrigation system springs back to life effortlessly when gardening season returns.
Year-Round Quick Checks
Making a quick visual check each month takes just a few minutes and can save you from bigger headaches down the road. During your regular garden stroll, look for wet spots or puddling around your zones, which might signal a leaky valve. Listen for unusual hissing sounds near the valve boxes, often indicating pressure issues. Check that each zone activates and shuts off completely when scheduled. Notice any plants showing signs of overwatering or drought stress despite your irrigation schedule. These simple observations help you catch small problems before they waste water or damage your garden. Think of it as a wellness check for your irrigation system, keeping everything running efficiently and sustainably throughout the year.
How to Clean and Service Your Zone Valve
What You’ll Need
Before you start working on your drip irrigation zone valve, gather these essential supplies to make the job easier. You’ll need an adjustable wrench or pliers for loosening connections, a flathead and Phillips screwdriver for accessing valve components, and Teflon tape for creating watertight seals when reassembling parts. Keep a bucket and some old towels handy to catch water during maintenance. A small wire brush helps clean debris from valve openings, while white vinegar serves as an eco-friendly solution for dissolving mineral deposits without harsh chemicals. For inspection work, grab a flashlight or headlamp to see into tight spaces. If you’re planning seasonal maintenance, consider picking up replacement diaphragms or solenoids as preventive spares. Most of these items are probably already in your toolbox, making this a budget-friendly maintenance task that saves water and keeps your irrigation system running efficiently throughout the growing season.

Safe Disassembly and Cleaning
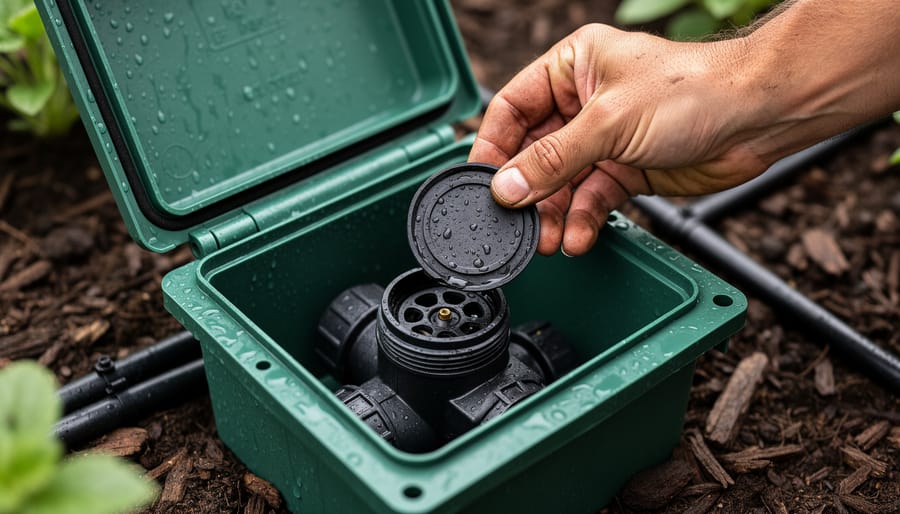
Before you start, turn off your irrigation system and release any water pressure in the lines. Trust me, I learned this the hard way when I got an unexpected shower during my first attempt! Once the system is depressurized, locate the screws or clips holding your zone valve cover in place.
Carefully remove the cover to expose the valve’s interior. You’ll typically find a solenoid on top (the electromagnetic component that opens and closes the valve) and a diaphragm or flow control mechanism inside. Take a quick photo with your phone before disassembly so you remember how everything fits together.
Gently remove the diaphragm, being mindful not to tear this rubber component. Inspect it for cracks, tears, or mineral buildup. Even small debris like sand particles or algae can prevent proper sealing, leading to leaks or flow issues. Cleaning components thoroughly is essential for restoring proper function.
Use a soft brush and warm water to clean all parts. For stubborn mineral deposits, white vinegar works wonders and is environmentally friendly. Avoid harsh chemicals that could degrade rubber seals. Rinse everything thoroughly and let components air dry completely.
During reassembly, check that the diaphragm sits perfectly flat with no wrinkles or folds. This is crucial for creating a proper seal. Hand-tighten screws in a crisscross pattern to ensure even pressure distribution. A common mistake is overtightening, which can warp the housing or damage the diaphragm.
Once reassembled, gradually restore water pressure and observe the valve during a test cycle to confirm everything operates smoothly.
When to Replace Parts vs. The Whole Valve
Making smart repair decisions helps your wallet and reduces waste—a win for both you and the environment. Here’s my rule of thumb: if you’re replacing just a diaphragm or solenoid (typically $8-20 in parts), go ahead and repair. These components wear naturally and replacement is straightforward. When you’re facing multiple failed parts—say, a cracked valve body, corroded solenoid, and worn diaphragm—replacement makes more sense financially and practically.
Consider the valve’s age too. If your zone valve has served faithfully for 7-10 years and needs repairs, replacing the whole unit gives you peace of mind and often includes improved water-saving features. Newer valves typically offer better pressure regulation and tighter seals, reducing water waste.
A leaking valve body or stripped threads? That’s replacement territory. But a single worn gasket? Definitely worth the simple fix. When in doubt, calculate the total repair cost—if it exceeds 50-60% of a new valve’s price, opt for replacement and enjoy the reliability of a fresh start.
Preventing Problems Before They Start
Filtration and Water Quality
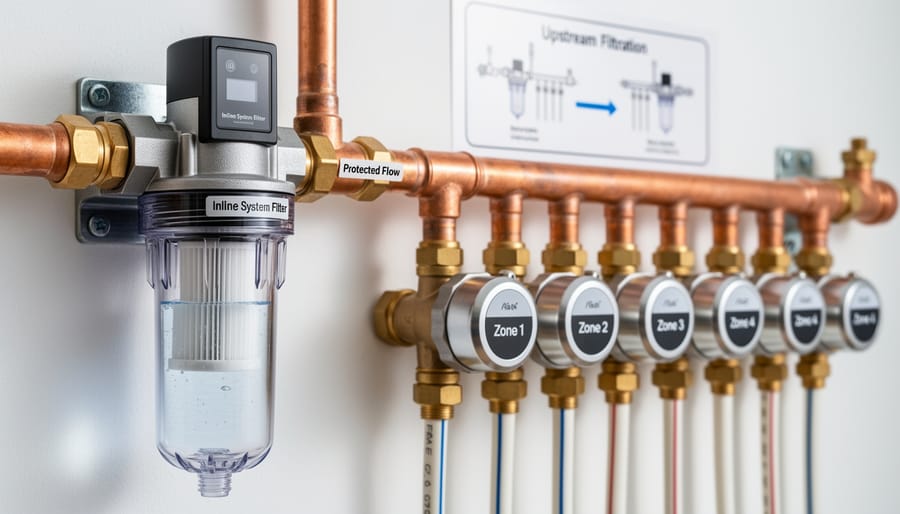
Think of filtration as your zone valve’s best friend. Debris, sand, and mineral deposits are the enemies of smooth valve operation, causing clogs and premature wear that’ll have you troubleshooting more often than you’d like. Installing a quality filter before your zone valves isn’t optional—it’s essential preventive maintenance that saves you time and money down the road.
For most home drip systems, a 150-200 mesh screen filter does the job beautifully. If you’re dealing with well water or noticing white crusty buildup (that’s mineral deposits talking), consider upgrading to a disk filter, which handles sediment more effectively. Place your filter on the main line before it splits into zones, and make checking it part of your monthly routine during growing season.
Here’s a sustainable tip: when you clean your filter, use that debris-laden water on ornamental plants rather than letting it go down the drain. Simply backflush into a bucket and dilute it for use elsewhere in your garden. Clean filters mean happy valves, consistent water pressure, and a drip system that performs reliably year after year.
Pressure Regulation Matters
Think of your zone valve as a gatekeeper that needs just the right amount of force to do its job well. Too much water pressure, and you’re essentially asking it to hold back a flood, which causes seals to blow out and diaphragms to tear prematurely. Too little pressure, and your valve won’t open fully or may struggle to close completely, leading to inconsistent watering or annoying leaks.
Most drip irrigation systems work best between 20-30 PSI, which is considerably lower than your home’s typical 40-80 PSI. Here’s the good news: checking pressure is easier than you think. Pick up an inexpensive pressure gauge from any hardware store and attach it to a hose bib near your irrigation connection. If your reading’s too high, installing a pressure regulator before your zone valves is a simple fix that can add years to your system’s life.
I learned this lesson the hard way when my valves started failing every season until I added a regulator. Now they last for years, saving money and reducing waste from replacement parts. It’s one of those small adjustments that makes sustainable gardening genuinely sustainable.
Taking care of your drip irrigation zone valves might seem like a small task, but it makes a world of difference for your garden’s health and your wallet. Regular maintenance prevents those frustrating leaks, uneven watering, and sky-high water bills that nobody wants to deal with. By following the seasonal checklist we’ve covered, you’re setting yourself up for a thriving, well-hydrated garden while conserving precious water resources. Remember, sustainability starts with simple habits like these.
The beauty of zone valve maintenance is that it doesn’t require hours of your time or expensive tools. A quick inspection every few months, some basic cleaning, and replacing worn parts when needed can prevent major headaches down the road. Think of it as an investment in your garden’s future and the planet’s wellbeing. Those few minutes you spend checking connections and testing pressure now could save you from wasting hundreds of gallons of water or dealing with dead plants later.
If you’re hungry for more practical irrigation advice, I’ve put together plenty of resources to help you master your entire watering system. Head over to Mowing.Expert where you’ll find detailed guides on everything from troubleshooting common problems to upgrading your setup for maximum efficiency. Your garden will thank you, and you’ll sleep better knowing you’re being a responsible steward of both your landscape and our shared water resources. Happy gardening, and may your zones always flow smoothly.