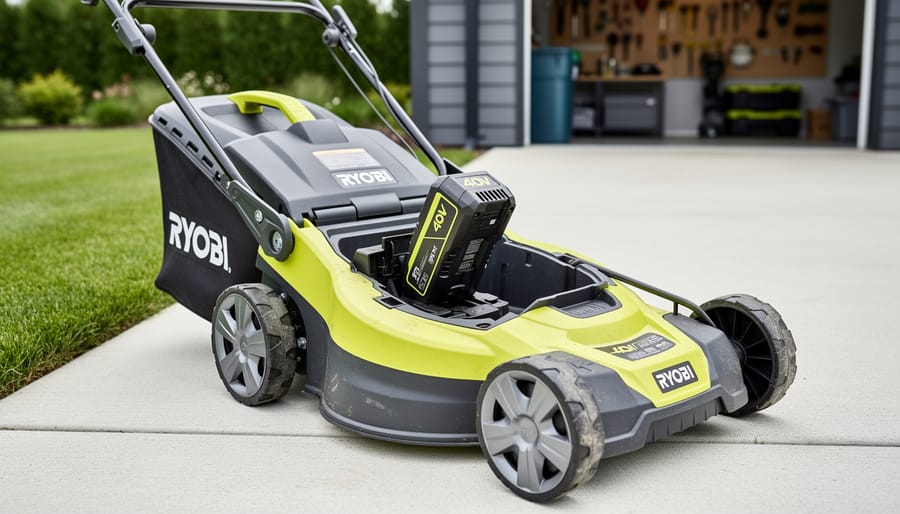
Nine times out of ten, a Ryobi 40V lawn mower that refuses to start has a battery issue. Before you panic or start dismantling parts, check whether your battery is fully seated in its slot and charged above 50%. A partially inserted battery or one that’s drained below the low-voltage cutoff won’t even attempt to crank the motor.
Here’s your quickest diagnostic: Remove the battery completely, inspect both the battery contacts and the mower’s terminals for corrosion or debris, then reinsert the battery until you hear a solid click. Press the battery’s charge indicator button. If fewer than two lights illuminate, charge it for at least an hour before trying again.
If the battery checks out but your mower still won’t start, you’re likely dealing with one of three culprits: a tripped safety interlock (the bail handle or safety key isn’t engaging properly), a jammed blade preventing motor rotation, or a failed power switch. The good news? You can fix it yourself in most cases without special tools or a service appointment.
This guide walks you through each potential cause in order of likelihood, with step-by-step fixes that take five minutes or less. You’ll also learn when to stop troubleshooting and contact Ryobi support, particularly if you suspect internal motor damage or battery cell failure under warranty.
Quick Start Troubleshooting: First Things to Check
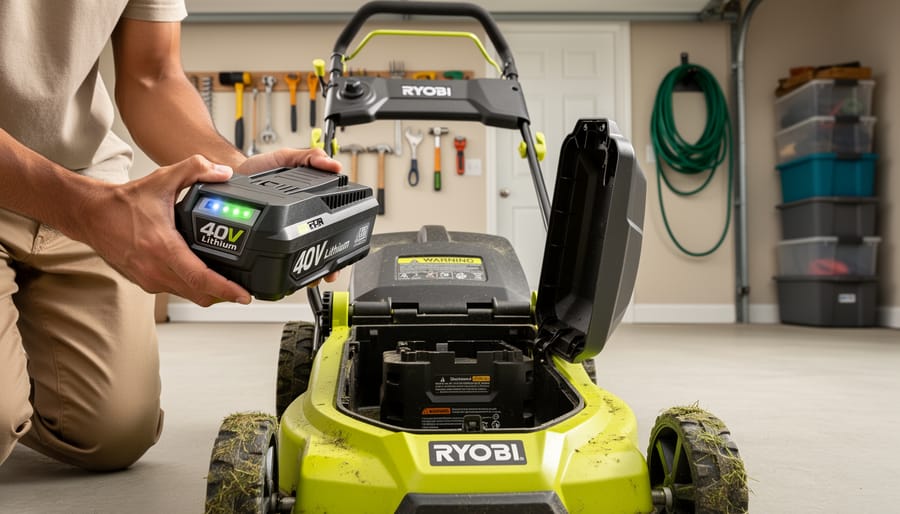
Before we dig into detailed diagnosis, let’s run through the fastest checks that solve most Ryobi 40V starting problems. These take less than two minutes and fix the issue about 70% of the time.
Start by verifying these basics in order:
- Battery is fully seated and clicks into place, push firmly until you hear it lock
- Battery shows at least two bars of charge when you press its indicator button
- Safety key is inserted completely into its slot on the mower deck
- Bail bar pulls smoothly against the handle and engages with an audible click
- Nothing is jamming the blade, tilt the mower and spin the blade by hand to confirm it rotates freely
I know it feels silly checking these obvious things when your mower worked fine last week, but these simple oversights account for the vast majority of no-start situations. The battery might have wiggled loose during storage, or you inadvertently pulled the safety key while cleaning.
Pay special attention to the battery connection. The Ryobi 40V system relies on solid contact between battery and mower terminals. Even a slight gap prevents current flow. Remove the battery completely, inspect both sets of contacts for dirt or corrosion, wipe them clean with a dry cloth, then reinstall with firm pressure until you feel and hear the locking mechanism engage.
If your mower still refuses to start after confirming all five items above, you have an actual problem that needs systematic troubleshooting. The good news is you have just eliminated the most common culprits, which narrows down what we need to investigate. The sections ahead will walk you through each remaining possibility with clear steps to identify and fix the issue.
Common Causes Why Your Ryobi 40V Won’t Start
Battery Issues
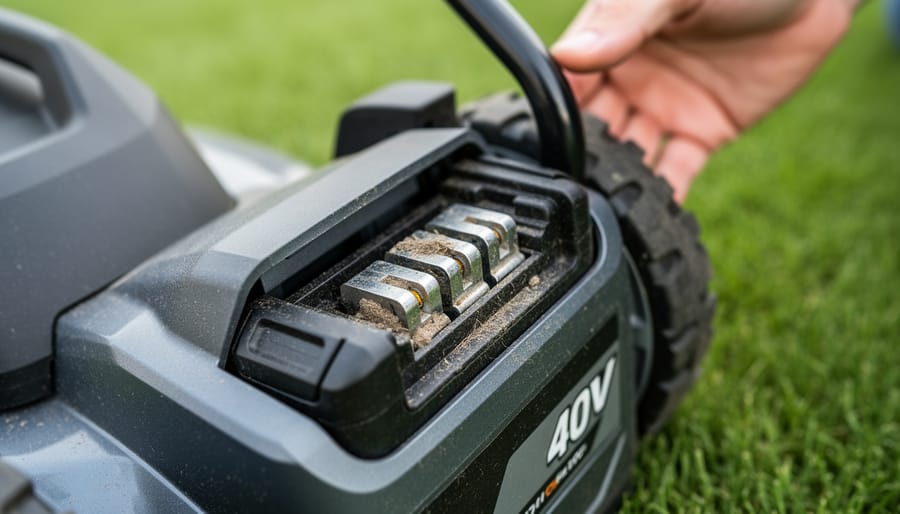
Battery problems cause the vast majority of Ryobi 40V starting failures. Let’s start with the obvious: your battery might not have enough charge. Even batteries showing green on the indicator can lack sufficient power to turn the motor, especially if they’ve been sitting unused. Pop the battery onto your charger and let it reach full capacity, don’t assume it’s good just because it showed partial charge.
Your battery’s built-in management system might have triggered protection mode. Ryobi batteries enter this safety state when they detect issues like over-discharge, overheating, or internal cell imbalance. You’ll often see unusual LED patterns or no lights at all. The fix is simple: remove the battery completely, wait two minutes, then reinstall it. This resets the system about 70% of the time.
Check your battery contacts next. Those metal terminals on both the battery and mower collect grass clippings, dirt, and moisture. Even light corrosion creates resistance that prevents proper connection. Wipe both sets of contacts with a dry cloth, or use a pencil eraser on stubborn oxidation. Never use sandpaper, you’ll damage the plating.
Battery capacity degrades over time. A three-year-old battery that originally ran 45 minutes might only manage 20 now, and weak cells struggle to deliver the startup current your motor needs. Watch for bad battery signs like rapid charge loss or reduced runtime. If your battery is showing its age, it might start the mower but fail under load when you engage the blades.
Finally, verify you’re using a compatible battery model. All Ryobi 40V batteries should work, but counterfeit or off-brand batteries often lack proper voltage regulation.
Safety System Problems
Modern electric lawn mowers like your Ryobi 40V come equipped with multiple safety systems designed to prevent accidental starts, but sometimes these protective features can stop you from starting the mower even when you want to. Understanding how they work helps you troubleshoot when something goes wrong.
The safety key is your first line of defense. This small plastic component must be fully inserted before the mower will power on. If it’s partially seated, damaged, or has dirt in the slot, the electrical circuit won’t complete. Try removing and reinserting the key firmly until you hear or feel it click into place.
The bail bar (that handle you squeeze against the main handlebar) serves as a dead-man switch. When you release it, the mower immediately stops. Inside, a spring-loaded mechanism presses a switch that completes the circuit. Over time, the spring can weaken, the plastic lever can crack, or the switch itself can fail. If the bail bar feels loose or doesn’t spring back crisply when released, it may not be engaging the switch properly.
Some models include additional safety switches near the battery compartment or deck. Corrosion, moisture, or simple wear can cause these switches to malfunction, preventing startup even when everything else checks out.
Motor and Electrical Failures
While battery and safety issues cause most starting failures, your Ryobi 40V might also refuse to start due to electrical protection systems or motor problems.
Motor Overheating Protection
Ryobi builds thermal protection into their brushless motors to prevent damage from overuse. If you’ve been mowing thick, wet grass or pushing the mower hard in hot weather, the motor may have triggered its thermal cutoff. This safety feature shuts everything down before internal components can overheat. The fix? Let your mower rest in a shaded spot for 30-45 minutes. The thermal switch will reset automatically once temperatures drop.
Internal Wiring Issues
Occasionally, connections inside the motor housing can work loose from vibration, or wires may get pinched during assembly. You’ll typically notice intermittent starting, works sometimes, fails others, rather than complete failure. Since accessing internal wiring requires disassembly that can void your warranty, contact Ryobi support if you suspect this issue.
Complete Motor Failure
Actual motor burnout is rare in Ryobi’s 40V line but does happen, especially in heavily-used commercial settings or after years of service. Signs include a burning smell during previous uses or zero response even with fully charged batteries and all safety checks passed.
Physical Obstructions
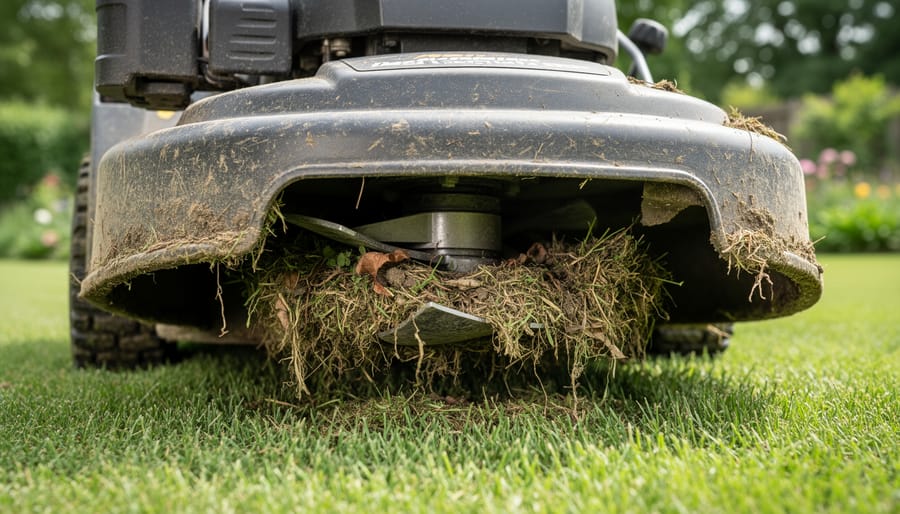
Sometimes your Ryobi 40V has full battery power and all safety systems check out, but the motor still won’t engage. Physical obstructions blocking the cutting system are often the culprit.
When debris jams the blade or clogs the deck, the motor can’t overcome the resistance to spin up. The mower’s smart system detects this excessive load and refuses to start, protecting the motor from damage. You might have hit a hidden stick, run over a thick patch of wet grass that compacted underneath, or accidentally mowed over a garden hose or toy.
Seized or stiff bearings create similar resistance. If the blade spindle hasn’t turned in months or the mower sat outside through winter, rust and corrosion can lock things up. The motor tries to start but can’t rotate the stuck components.
Even minor obstructions matter with battery mowers. Unlike gas models that muscle through with brute force, the 40V system’s computerized controls are sensitive to abnormal resistance. A wadded clump of grass or small stick wedged between blade and deck is enough to prevent startup.
The good news? Physical obstructions are usually the easiest problems to fix once you know what to look for.
Step-by-Step Fix: How to Get Your Mower Running Again
Step 1: Verify Battery Status and Connection
The battery is the power source for your entire system, so confirming it’s charged and properly connected should always be your first move. Start by removing the battery from the mower and checking the LED indicator on the battery itself. Press the charge gauge button, you should see at least three bars lit. Anything less means the battery needs charging before you troubleshoot further.
Even if the battery shows full charge, connection issues can prevent startup. Remove the battery completely, then inspect both the battery terminals and the mower’s contact points. Look for any corrosion, dirt, or debris. A light film of dust might seem harmless, but it can block electrical flow. Wwipe both surfaces with a clean, dry cloth. For stubborn corrosion, use a pencil eraser to gently clean the metal contacts, then wipe clean again.
Reinsert the battery firmly until you hear or feel it click into place. It should sit flush with no wiggle room. If you have a second compatible Ryobi 40V battery, swap it in as a test, this quickly confirms whether the original battery is the problem or if the issue lies elsewhere in the mower.
Step 2: Reset the Battery Management System
Your Ryobi 40V battery has a built-in Brain Management System that acts like a protective guardian. When the BMS detects problems like overheating, voltage irregularities, or rapid power draws, it automatically shuts the battery down to prevent damage. You’ll often notice this if the battery feels warm or if LED indicators behave strangely.
The reset procedure is simple. Pull the battery completely out of the mower and set it aside on a non-flammable surface. Wait a full three to five minutes. This pause allows the BMS to reset its internal circuits and clear any temporary faults. During this time, the battery temperature stabilizes and internal sensors recalibrate.
After waiting, firmly reinsert the battery until you hear a solid click. Press the battery’s charge indicator button to verify it shows power. If the lights blink in an unusual pattern or don’t illuminate at all, the battery may need charging or has a deeper issue requiring attention.
Step 3: Inspect Safety Mechanisms
Ryobi 40V mowers won’t start unless all safety systems confirm it’s safe to operate. Begin by checking the safety key, the small plastic insert that plugs into the control panel. Remove it completely and reinsert firmly until you hear or feel a click. If the key is damaged, cracked, or doesn’t seat properly, the mower will refuse to start.
Next, test the bail bar, the handlebar lever you squeeze to engage the mower. Press it slowly and listen for the switch click. The bar should have firm spring tension and snap back crisply when released. If it feels loose, sticks, or doesn’t fully return, the internal spring may be stretched or the safety interlock switch contacts might be worn. Try squeezing the bar while attempting to start, ensuring it’s fully depressed against the handlebar.
Finally, check that the battery is inserted completely and the deck isn’t tilted excessively, as some models include position sensors that prevent starting at unsafe angles.
Step 4: Clear Any Physical Obstructions
Even when the battery and safety systems check out, physical obstructions can prevent your Ryobi 40V from starting. Debris wrapped around the blade or lodged in the deck creates enough resistance that the motor won’t engage.
Safety first: Remove the battery completely before inspecting the blade area. Wear heavy gloves to protect your hands.
Tilt the mower on its side (air filter side up if present) and examine the underside. Look for grass clumps, sticks, or fabric wrapped around the blade spindle. Remove any debris you find using a putty knife or stiff brush.
Next, manually rotate the blade by hand. It should spin freely with slight resistance from the motor. If the blade feels stuck or binds at certain points, you’ve found your problem. Remove any remaining debris, then check that the blade bolt hasn’t loosened and allowed the blade to shift out of position.
After clearing obstructions, clean the entire deck underside to prevent future issues. Caked-on grass buildup increases motor strain and can lead to overheating.
Step 5: Check for Thermal Protection Activation
If you’ve been mowing for an extended period or tackling thick, overgrown grass, your Ryobi 40V might have triggered its thermal protection system. This built-in safety feature prevents motor damage from overheating. When activated, the mower simply won’t respond when you press the start button, there’s no error light or warning beep.
The fix is straightforward: turn off the mower, remove the battery, and let both components cool in a shaded area for at least 30 minutes. Don’t try restarting every few minutes, as this won’t allow sufficient cooling time. If your Ryobi keeps stopping during use and you’re experiencing repeated thermal shutdowns, you may be pushing the mower too hard through dense grass or mowing during peak heat hours. After the cooling period, reinsert the battery and try starting again, the thermal protection should automatically reset once temperatures return to safe operating levels.
Step 6: When to Contact Support or Service
If you’ve worked through the previous troubleshooting steps without success, it’s likely time to seek professional help. Some issues simply aren’t DIY-friendly, and attempting repairs beyond your skill level could void your warranty or create safety hazards.
Clear signs you need professional service:
– The motor makes unusual grinding, clicking, or buzzing noises when you attempt to start it
– You smell burning plastic or notice visible damage to the motor housing
– Multiple fully charged batteries fail to start the mower
– The power button or bail bar mechanism feels physically broken or detached
– You’ve ruled out all battery, safety, and obstruction issues but still get no response
Before paying for repairs, check your warranty status. Ryobi 40V mowers typically come with a three-year limited warranty covering defects in materials and workmanship. If you’re within that window, you may qualify for free repair or replacement.
Contact Ryobi customer service at 1-800-525-2579 or visit their support website to initiate a warranty claim or find an authorized service center. Have your model number and purchase date ready. Many starting issues covered by warranty can be resolved quickly through their service network, saving you the frustration of continued troubleshooting.
Understanding Your Ryobi 40V System
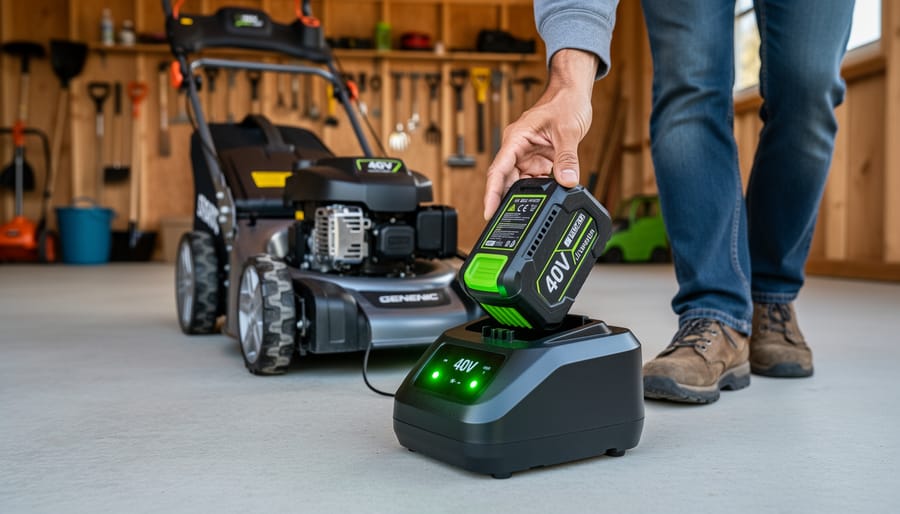
Understanding your Ryobi 40V system takes the mystery out of troubleshooting and helps you catch problems before they escalate. The heart of this system is the intelligent battery management technology that protects both your investment and your safety.
Ryobi’s 40V batteries aren’t just power packs, they’re smart devices. Each battery contains a Battery Management System (BMS) that constantly monitors cell temperature, voltage, and discharge rate. When the BMS detects something wrong (overheating, voltage drop, or excessive current draw), it automatically shuts down to prevent damage. This is why your fully charged battery might suddenly refuse to work; it’s protecting itself, not broken.
The LED indicator on your battery tells you exactly what’s happening. Here’s what those lights mean:
| LED Pattern | Meaning | Action Needed |
|---|---|---|
| Solid green | Battery fully charged and ready | None, good to go |
| Flashing green | Battery charging in progress | Wait until solid green |
| Solid red | Battery too hot or too cold | Let battery reach room temperature |
| Flashing red | Battery fault or protection mode | Remove, wait 30 seconds, reinstall |
| No lights | Battery completely depleted or defective | Charge immediately; if still dark after charging, contact support |
The safety systems work in layers. The bail bar must be held down to complete a circuit, while the safety key prevents operation when removed. These aren’t annoyances, they’re safeguards that have prevented countless injuries. Understanding that these systems are working for you, not against you, changes your whole approach to maintenance and troubleshooting.
Preventing Future Starting Problems
Battery Care Best Practices
Your Ryobi 40V battery will serve you reliably for years if you treat it right. Start by charging batteries at room temperature, extreme cold or heat during charging degrades cells faster. Don’t leave batteries on the charger for days after the green light appears; unplug them once fully charged to preserve long-term capacity.
Store batteries between 50-77°F in a dry location. If you won’t use your mower for several weeks, charge the battery to about 50-70% rather than full or empty, lithium-ion cells suffer when stored at voltage extremes. Every few months, wipe battery contacts and mower terminals with a dry cloth to remove dust and oxidation that can cause connection problems.
Avoid running batteries to complete shutdown. The low-voltage protection cuts power before true depletion, but repeatedly triggering it stresses the cells. Recharge when you notice power dropping rather than pushing through until the mower stops. These simple habits prevent the common “won’t start” scenarios we’ve covered and extend your battery investment considerably.
Seasonal Mower Maintenance
Establish a seasonal rhythm that keeps your Ryobi mower ready when you need it. Before your first spring cut, give the mower a thorough once-over. Check blade sharpness and tightness, inspect the deck for winter damage or corrosion, and verify all safety mechanisms still function smoothly. Charge your battery fully and let it run through a complete discharge cycle to recalibrate the battery management system after months of storage.
When mowing season ends, prepare properly for storage. Clean the deck completely, removing every bit of dried grass and debris that can trap moisture and cause corrosion. Wipe down the battery contacts with a dry cloth and store the battery separately in a climate-controlled space, ideally at 40-60% charge. Never store batteries fully discharged or in freezing temperatures. Give the deck underside a final inspection and apply a light coating of silicone spray to prevent rust.
Throughout the season, make deck cleaning a regular habit. Caked grass buildup forces the motor to work harder, generates excess heat, and accelerates wear. A quick scrape after every few mows prevents the stubborn buildup that eventually causes starting and performance issues.
Frequently Asked Questions
So you’ve made it through the troubleshooting steps, but maybe you still have some lingering questions about your Ryobi 40V mower’s behavior. Over the years, I’ve heard countless variations on the same concerns from fellow lawn keepers, and chances are your question has come up before. Here are the answers to the most common queries I get about these mowers won’t start after winter or throughout the season.
How long should I charge a completely dead battery?
A fully depleted Ryobi 40V battery typically needs 90 minutes to two hours on the standard charger for a full charge, though partial charging for 30 minutes often provides enough power to test if the battery was your issue. The charger LED will turn solid green when charging is complete.
Can I use any Ryobi 40V battery in my mower?
Yes, all Ryobi 40V batteries work across the entire 40V platform, but higher amp-hour batteries (like 6.0Ah vs 2.0Ah) will run your mower longer between charges. Just make sure it’s a genuine Ryobi 40V battery and not the older 36V or 18V models, which aren’t compatible.
What does a flashing red light on the battery mean?
A flashing red LED typically indicates the battery is too hot, too cold, or has entered protection mode due to over-discharge or a fault. Remove the battery, let it reach room temperature if needed, wait five minutes, then reinstall it to reset the battery management system.
Why does my mower start sometimes but not others?
Intermittent starting usually points to a loose battery connection, dirty contacts, or a battery nearing the end of its life that only holds enough charge for partial operation. Clean the contacts thoroughly and ensure the battery clicks firmly into place each time.
Beyond these common scenarios, warranty coverage is worth understanding. Most Ryobi lawn mowers come with a three-year limited warranty, while batteries typically carry their own three-year warranty. If your mower is within that window and you’ve ruled out user-fixable issues, Ryobi customer service can often arrange a replacement or repair at no cost. Keep your receipt handy.
Temperature does matter more than many people realize. Lithium batteries don’t perform well in extreme cold, and you might notice your mower is reluctant to start on chilly spring mornings even though the same battery worked fine the day before. The battery management system may prevent operation if the cells are below 32°F. Let the battery warm up indoors for 30 minutes before use, and it’ll usually work perfectly.
Key Takeaways for Ryobi 40V Starting Issues
The good news is that you can solve nearly all Ryobi 40V starting problems yourself without specialized tools or technical expertise. The battery and its connection points cause more than half of all starting failures, so your first move should always be checking charge level, reseating the battery firmly, and cleaning any corrosion from the contacts. If the battery is seated correctly and charged above 50%, the safety systems deserve your attention next, verify the safety key is fully inserted and the bail bar clicks properly when engaged.
Remember that your mower is designed with multiple protection systems working in your favor. The thermal cutoff that stops the motor after overheating, the battery management system that prevents damage from over-discharge, and the safety interlocks that prevent accidental starts are all there to extend your equipment’s life. When your mower won’t start, these systems are usually doing their job, not malfunctioning. A simple reset or cooling period often resolves the issue.
Physical obstructions like grass clumps jamming the blade or debris binding the motor shaft are straightforward fixes that require nothing more than tilting the mower and clearing the deck. These preventable issues highlight why cleaning your mower after each use matters, not just for performance, but for reliable starting every time you need it.
Keep your troubleshooting systematic. Work through the steps in order rather than jumping around, and you’ll identify the problem faster while avoiding unnecessary work. Most importantly, know when to stop: if you’ve verified the battery works in another tool, confirmed all safety systems engage properly, cleared obstructions, and allowed proper cooling time, but the motor still won’t respond, that’s your signal to contact Ryobi support or a qualified repair technician.
You now have a complete roadmap to diagnose and fix your Ryobi 40V mower when it refuses to start. Most starting issues come down to simple battery problems or safety mechanisms doing their job, both easily resolved with the systematic checks we’ve covered. By following these troubleshooting steps and maintaining your equipment properly, you’re not just getting your mower running again; you’re extending its lifespan and reducing waste, which aligns perfectly with sustainable lawn care practices.
Regular battery care and seasonal maintenance will keep your Ryobi running reliably for years. Remember that responsible equipment maintenance saves you money while minimizing your environmental impact. If you hit a snag or have questions about lawn care beyond starting issues, the community is always here to help you achieve a healthier, greener lawn.