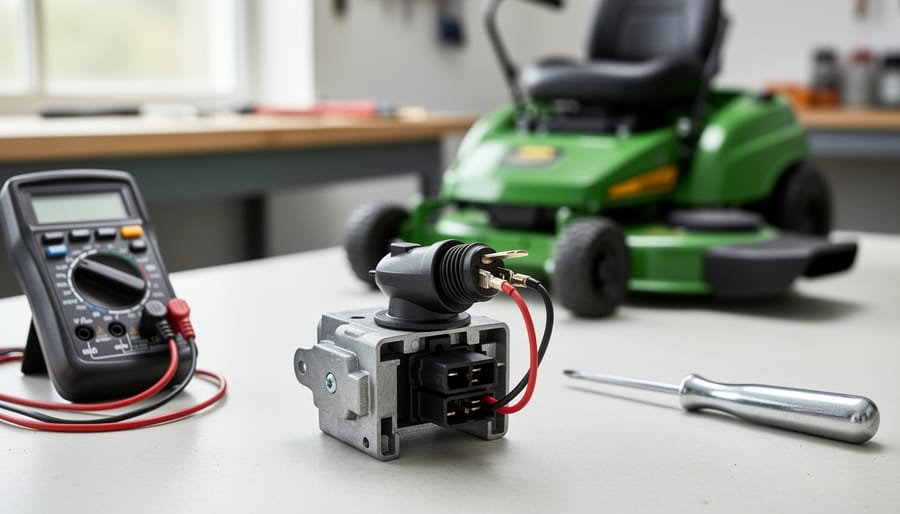
You can replace a 5-prong lawn mower ignition switch yourself in about 20 to 30 minutes using nothing more than a screwdriver, a digital multimeter, and a quick photo of the wire configuration before you disconnect anything. This repair typically costs under $25 for the part and saves you the trouble of a service call that might run $100 or more.
Most homeowners face this repair when their mower won’t turn over, won’t shut off properly, or starts randomly cutting out mid-job. The ignition switch controls power flow between your battery, starter solenoid, and safety systems, so when it fails, your entire machine goes silent. Unlike older 3-prong switches that handle basic on/off functions, the 5-prong design manages additional circuits for safety interlocks and accessory power, making correct wiring critical but entirely manageable if you follow a clear process.
The good news is that ignition switches wear out predictably. Internal contacts corrode from moisture exposure, spring tension weakens over seasons of use, and plastic housings crack from UV damage and vibration. Recognizing these failure patterns means you’re not dealing with mysterious electrical gremlins but rather a straightforward mechanical component that’s reached the end of its service life.
This guide walks you through diagnosis, safe removal, correct wire placement, and post-installation testing so you can get back to mowing with confidence. We’ll also cover what to do when the replacement doesn’t solve your starting issue, because sometimes the switch isn’t actually the culprit. Fixing your own equipment reduces waste, builds mechanical confidence, and keeps perfectly good mowers out of landfills.
Understanding the 5-Prong Ignition Switch
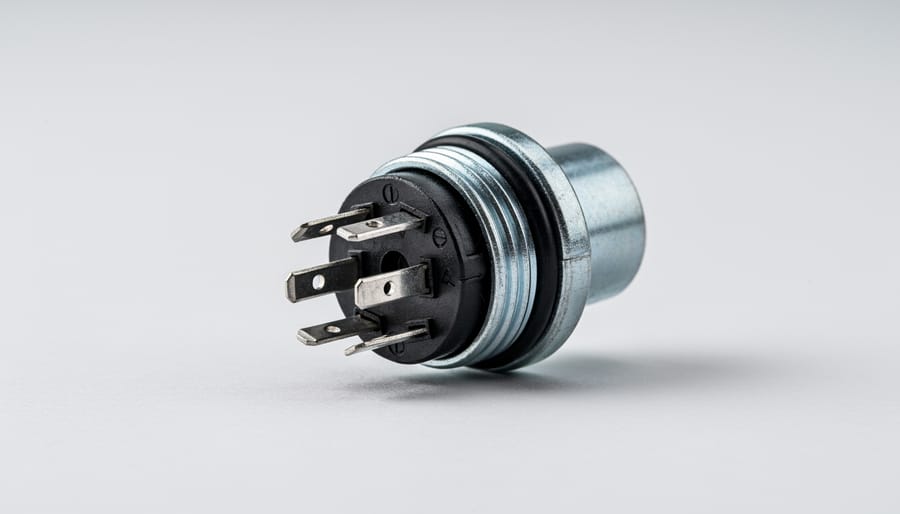
The 5-prong ignition switch serves as the command center for your lawn mower’s electrical system, controlling the flow of power from the battery to the starter motor and other critical components. When you turn the key or rotate the switch, it completes different electrical circuits that tell your mower whether to stay off, run, or start cranking the engine. Think of it as a traffic controller that directs electricity to the right places at the right time.
Each of the five terminals on the switch has a specific job in this choreographed sequence. The battery terminal receives constant power from your mower’s battery. The ground terminal completes the circuit by connecting to the mower’s frame. The starter terminal sends power to the starter solenoid when you turn the key to start position, engaging the engine’s flywheel. The accessory terminal powers lights or other accessories when the switch is in the run position. The ignition terminal keeps the engine running by maintaining power to the ignition coil after you release from the start position.
The 5-prong configuration differs from simpler switches in meaningful ways. A 3-prong switch typically handles only basic start and run functions, suitable for older or push mowers without accessories. Six-prong switches add complexity for riders with more electrical features like headlights or PTO circuits. The 5-prong design hits a sweet spot for many mid-range riding mowers and zero-turns, providing enough control points for reliable starting while keeping the wiring manageable.
Within your mower’s engine ecosystem, the ignition switch works alongside the starter solenoid, spark plug, ignition coil, and safety interlock switches. When everything functions properly, turning the key triggers a cascade: the switch energizes the solenoid, which engages the starter motor, which spins the flywheel, while the ignition coil fires the spark plug. The switch remains the gatekeeper, and a faulty one breaks this entire chain regardless of how well the other components work.
Signs Your Ignition Switch Needs Replacement
Knowing when to replace your 5-prong ignition switch saves you time, frustration, and potentially expensive misdiagnosis. A failing switch often announces itself through specific symptoms that become hard to ignore once you know what to watch for.
The most obvious sign is when you turn the key and absolutely nothing happens. No clicking, no cranking, no engine sounds at all. If your battery is charged and the spark plug is good, the ignition switch is a prime suspect. This complete silence differs from a weak battery click or a starter motor problem, where you’ll typically hear some mechanical response.
Physical damage to the switch itself is another clear indicator. If the key wobbles excessively, the switch housing has visible cracks, or the key turns too freely without any resistance, the internal contacts have likely worn out or broken. You might also notice the key sticking in one position or refusing to return to the run position after starting, forcing you to manually pull it back.
Watch for these telltale symptoms:
- Engine starts one day but not the next, with no other changes to the mower
- You have to jiggle or hold the key in a specific position to get the engine to crank
- The starter engages but immediately cuts out when you release the key
- Electrical accessories (lights, hour meter) work but the starter won’t engage
- You smell burning plastic near the control panel or see melted wire insulation
Intermittent problems are especially frustrating but highly diagnostic for switch failure. If your mower starts perfectly some days and refuses to cooperate others, and you’ve ruled out fuel and spark plug issues, the switch’s internal contacts are probably making inconsistent connections. This randomness points directly to electrical contact problems rather than mechanical engine issues, which tend to worsen progressively rather than come and go.
Tools and Materials You’ll Need
Before you start the replacement, gather everything you’ll need so you won’t have to stop mid-project. Having the right tools on hand makes this repair straightforward and helps you avoid stripped screws or damaged wires.
Essential Tools and Materials:
- Replacement 5-prong ignition switch compatible with your mower model
- Screwdriver set (both flathead and Phillips head)
- Wire cutters and strippers for any damaged wiring
- Socket set or wrench for removing panels
- Electrical tape for securing connections
- Smartphone or camera to photograph wire positions
- Masking tape and marker for labeling wires
Optional but Helpful:
- Multimeter to test the old switch and verify connections
- Wire connectors if existing terminals are corroded
- Contact cleaner spray for the terminal area
- Work gloves to protect your hands
When choosing your replacement switch, check your mower’s manual for the exact part number or bring the old switch to the parts store for matching. Generic switches work for many models, but verify the terminal layout matches before purchasing. A quality switch might cost a few dollars more but typically lasts longer than bargain alternatives.
For sustainable disposal, take the old switch to an electronics recycling center rather than tossing it in household trash. Many auto parts stores also accept small electrical components for proper recycling.
Safety Precautions Before You Begin
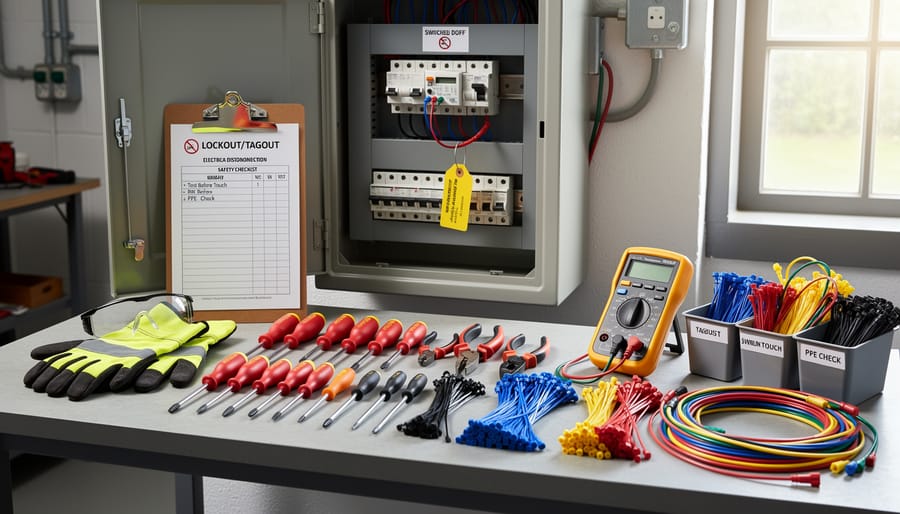
Before you start dismantling anything, take five minutes to set yourself up for a safe repair. Working with electrical components and engine parts requires respect for the machinery and clear-headed preparation.
Let the engine cool completely if you’ve been mowing recently. Hot metal burns fast, and a sweltering engine compartment makes it harder to work accurately. Thirty minutes of cooling time is a small investment compared to a trip to urgent care.
Work outdoors or in a well-ventilated garage with the door wide open. Even though you’re not running the engine, residual fuel vapors can accumulate in enclosed spaces, and you’ll be handling wires near the fuel system. Fresh air keeps you alert and reduces fire risk.
Park your mower on a flat, stable surface and engage the parking brake if applicable. A level workspace prevents the mower from rolling mid-repair and gives you better access to the control panel. Put wheel chocks behind the rear tires if you’re working on sloped ground.
Keep a clean rag and some cardboard handy to catch any fuel drips. You’ll be working near the fuel line in many mower designs, and even a small spill creates a slipping hazard and attracts dirt.
Pull out your mower’s manual before you grab the screwdriver. Every manufacturer routes wires slightly differently, and your manual might include a mower diagram showing exactly where your ignition switch sits and which wires connect to it. That two-minute read can save you an hour of guesswork.
Wear safety glasses throughout the job. Wire ends can spring back when disconnected, and dirt falls from control panels when you remove fasteners. Your eyes deserve protection from both.
Step-by-Step Replacement Process
Step 1: Prepare Your Mower and Access the Switch
Start by disconnecting the spark plug wire, this is non-negotiable. Pull the rubber boot straight off the spark plug to ensure the engine can’t accidentally fire while you’re working. If you’re unfamiliar with spark plug basics just know that this single step prevents the mower from starting, protecting you from serious injury.
Next, position your mower on a flat, stable surface. If you’re working on a riding mower, engage the parking brake and remove the key. For push mowers, make sure the fuel tank is less than half full to prevent spills when you tilt or maneuver the machine.
Now locate the ignition switch. On most mowers, it’s mounted on the dashboard or control panel, look for the keyhole or turn-knob where you normally start the engine. You’ll likely need to remove a plastic cover or panel to access the back of the switch where the wires connect. These covers usually pop off with gentle prying or require a couple of screws.
Before you proceed, double-check that you’ve disabled all safety features like blade engagement and that the mower is stable. Clear your workspace of any tools or debris that might get in your way.
Step 2: Document and Disconnect the Wiring
Before you touch any wires, grab your phone and take at least two clear photos of the switch from different angles. These photos will be your roadmap during reinstallation, and they’re far more reliable than trusting your memory after you’ve removed five different wires.
Once you have your photos, use masking tape or painter’s tape to label each wire before you disconnect it. Write directly on the tape which terminal it came from (you can use numbers 1-5 or note the wire color and position). Most 5-prong switches have terminals arranged in a specific pattern, often marked on the switch body itself, so compare your labels to these markings.
Pay attention to wire colors as you work. Common configurations use red for power, black or green for ground, and various colors for accessory functions, though this isn’t universal across all mower brands. If your wires are faded or all the same color, labeling becomes even more critical.
Gently pull each wire connector straight off its terminal. Don’t yank or twist them, as you might damage the connector or pull wires loose from their housings. If a connector feels stuck, wiggle it side to side while pulling, or use needle-nose pliers to grip the connector body (not the wire itself).
Step 3: Remove the Old Ignition Switch
With all five wires disconnected and labeled, you’re ready to remove the switch itself from the control panel. Most 5-prong ignition switches are held in place by either a mounting nut that threads onto the back of the switch housing or small clips that snap into the panel.
If your switch has a mounting nut (typically hexagonal), use an appropriate socket or wrench to turn it counterclockwise. Some switches use a retaining ring instead, these usually have small tabs you can pry gently with a flathead screwdriver. As you loosen the hardware, support the switch from the front to prevent it from falling once released.
Before pulling the switch out completely, take a close look at how it’s oriented. Notice which position faces up and whether any alignment tabs fit into slots in the panel. Snap a quick photo if needed, installing the new switch in the wrong orientation will cause the key positions to be backward.
Gently pull the old switch straight out through the front of the panel. Inspect the mounting hole for cracks, melted plastic, or corrosion. Check the wiring harness you disconnected earlier for any frayed insulation, burn marks, or brittle wires. If you spot damage beyond normal wear, you may need additional repairs before the new switch will function reliably.
Step 4: Install the New Switch
With your old switch removed and the mounting area clean, you’re ready to install the replacement. Hold the new 5-prong switch next to the empty mounting hole and match its orientation exactly to how the old one sat, the key position should face the same direction, and any alignment tabs must line up with slots in the panel.
Slide the switch into place, ensuring the back of the housing sits flush against the control panel. If there’s a gap, the switch may be misaligned or catching on wiring behind the panel. Thread the mounting screws through their holes and tighten them snugly, but don’t overtighten, plastic panels can crack, and metal ones can strip. The switch should feel solid without any wobble.
Before connecting any wires, test the switch operation. Turn the key through all positions: off, run, and start. It should click smoothly into each position and spring back from start to run when released. If it sticks or feels loose, remove and reinstall it. Getting the mounting right now prevents headaches after you’ve reconnected five wires.
Step 5: Reconnect the Wiring Correctly
With your new switch securely mounted, it’s time to reconnect the wiring, this is where your photos or diagram become invaluable. Work methodically, matching each wire to its correct terminal one at a time rather than trying to connect everything at once.
Most 5-prong ignition switches follow a standard terminal layout, though you should always verify against your documentation:
- Terminal B (Battery): Usually a red wire that supplies power from the battery or charging system
- Terminal S (Start): Typically yellow or purple, connects to the starter solenoid to engage the starter motor
- Terminal M (Magneto): Often black or brown, grounds the ignition coil to stop the engine
- Terminal L (Lights/Accessories): Commonly green or blue, powers headlights or other accessories when the key is in the run position
- Terminal G (Ground): Usually black, provides the ground connection for the switch circuit
Push each wire connector firmly onto its terminal until you hear or feel it click into place. Give each connection a gentle tug to confirm it’s secure, a loose wire here will cause starting problems or intermittent operation. If any connector feels worn or doesn’t grip tightly, replace it with a new one before proceeding. Double-check every connection against your reference photo, paying special attention that the start and magneto wires aren’t swapped, as this is a common mistake that prevents the engine from running.
Step 6: Reassemble and Prepare for Testing
With all wires secured to your new ignition switch, you’re ready to button everything up. Replace any control panels or covers you removed earlier, making sure they snap or screw into place properly. Do a quick visual sweep of the engine area, it’s surprisingly easy to leave a screwdriver or socket behind, which could cause serious damage once the engine starts.
Now for the final safety step: reconnect the spark plug wire. Push the boot firmly onto the spark plug until you feel it click or seat completely. This was the first thing you disconnected, and it’s always the last thing you reconnect. It’s your guarantee that the engine won’t accidentally fire during the work. Give the wire a gentle tug to confirm it’s secure.
Testing and Verifying Your Repair
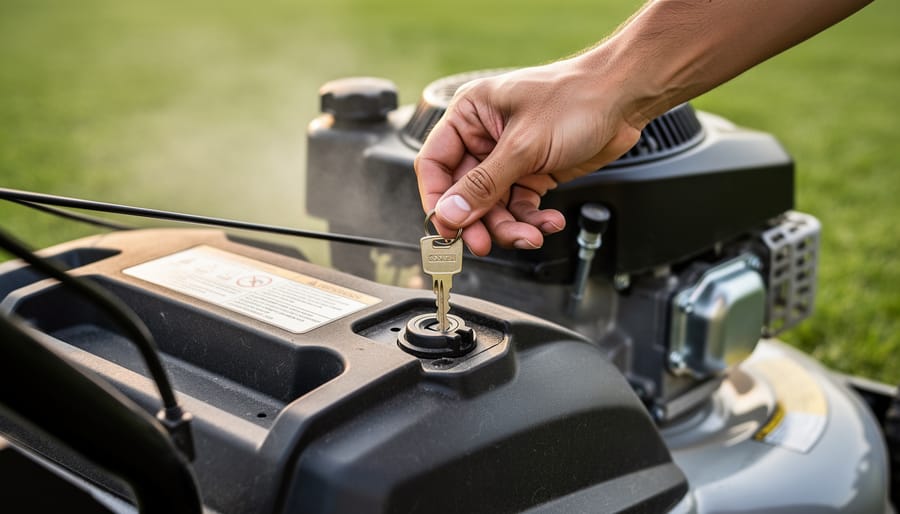
With your new ignition switch installed, it’s time to verify the repair works correctly. Start by reconnecting the spark plug wire, this should be your last connection to prevent accidental starts during installation. Sit in the operator’s seat (most mowers have a safety switch that requires this), then turn the key through each position slowly and deliberately.
In the “off” position, you should hear and see nothing, complete silence with no electrical activity. When you rotate to “run,” listen for the fuel solenoid click if your mower has one, and watch for any indicator lights on the dashboard to illuminate. The engine shouldn’t crank yet, but the electrical system is now active. Finally, turn the key to “start” and hold it there. You should hear the starter motor engage with a distinct whirring sound as it cranks the engine. If everything’s connected properly, the engine should fire up within a few seconds.
Here’s what to verify during your test:
- Key turns smoothly through all three positions without sticking
- Engine cranks immediately when key reaches “start” position
- Key springs back to “run” position when you release it from “start”
- Engine continues running in “run” position without sputtering
- Engine cuts off completely within one second of turning to “off”
If the starter cranks but the engine won’t fire, the switch wiring is correct, you’re likely dealing with a fuel or spark issue, possibly the ignition coil or carburetor. However, if nothing happens when you turn the key, immediately turn it back to “off” and recheck your wire connections against your photos. A common mistake is swapping the starter and accessory terminals, which can damage components if left energized.
Troubleshooting Common Installation Issues
Even with careful installation, you might run into a few hiccups. Here’s how to fix the most common problems.
Switch Won’t Turn or Feels Stuck
If your new ignition switch won’t rotate smoothly through its positions, don’t force it. First, check that the switch is properly aligned in its mounting bracket, sometimes it sits slightly crooked during installation. Remove the switch and reinstall it, ensuring the key slot or turn mechanism faces the correct direction. Also verify that the mounting screws aren’t overtightened, which can compress the housing and bind the internal mechanism.
Engine Cranks But Won’t Start
When the starter motor engages but the engine doesn’t fire, you’re likely dealing with a wiring issue rather than the switch itself. Double-check that you’ve reconnected the ignition wire (usually black or yellow) to the correct terminal. A common mistake is swapping the ignition and accessory terminals, which sends power to the wrong systems. Consult your wiring diagram and verify each connection matches your documentation from step 2.
Switch Gets Stuck in Start Position
If the switch won’t spring back to “run” after starting, the internal return spring may be faulty, this indicates a defective new switch that needs replacing under warranty. Don’t continue using it, as this can damage your starter motor.
Wires Keep Coming Loose
Loose connections usually mean the terminal tabs on your new switch are slightly smaller than the wire connectors. Gently squeeze each connector with needle-nose pliers to tighten it before reattaching. If wires still slip off, use appropriately-sized spade connectors from your local hardware store.
When you’ve verified all connections twice and the mower still won’t operate correctly, it’s time to consult a small engine mechanic, the issue may lie elsewhere in the electrical system.
Maintaining Your New Ignition Switch
Once you’ve installed your new ignition switch, a few simple maintenance habits will keep it working reliably for years.
Keep the control panel clean and dry. Wipe down the switch area after each mowing session to remove grass clippings, dirt, and moisture. If you store your mower outdoors, invest in a quality cover that protects the entire control panel from rain and humidity. Water infiltration is the primary enemy of electrical components.
Every month during mowing season, inspect the wire connections at the switch terminals. Look for any looseness, corrosion, or fraying. Gently wiggle each wire to ensure it’s still secure. Tighten any connections that feel loose, and replace corroded terminals before they cause problems.
Apply a small amount of dielectric grease to the terminals once or twice a season. This protects against moisture and prevents corrosion without interfering with electrical contact.
Between seasons, disconnect your mower’s battery if it has one. This prevents parasitic drain through the ignition system and extends both battery and switch life.
When your switch eventually needs replacement again, dispose of the old one at an electronics recycling center rather than tossing it in regular trash. Many auto parts stores accept small electrical components for proper recycling.
Frequently Asked Questions
Can I use a 5-prong ignition switch from one brand on a different brand’s mower?
While many 5-prong switches look similar, they’re not always universally compatible. The wire functions and terminal layouts can vary between manufacturers, so it’s best to buy a switch specifically designed for your mower’s make and model, or verify the wiring diagram matches exactly before installing a generic replacement.
Can I bypass the ignition switch temporarily to start my mower?
You can bridge the starter terminals to crank the engine in an emergency, but this bypasses all safety features and should never be a long-term solution. Without the switch’s off position, you lose the ability to safely shut down the engine, creating serious hazards.
How long should a replacement ignition switch last?
A quality 5-prong ignition switch typically lasts 5-10 years with regular use. Lifespan depends on how often you mow, exposure to weather and moisture, and how gently you operate the switch, forcing it through positions or leaving it exposed to rain shortens its life considerably.
When should I pay for professional repair instead of doing it myself?
If you’re uncomfortable working with electrical connections, can’t identify which wires go where despite documentation, or if testing reveals additional electrical problems beyond the switch itself, professional repair makes sense. The job itself costs $75-150 at most shops, which includes proper diagnosis of the entire starting system.
Will replacing the switch fix my mower if it clicks but won’t turn over?
Not necessarily. A clicking sound often indicates the switch is working but the starter solenoid, battery, or starter motor has failed. Test the switch with a multimeter first, if it shows proper continuity in all positions, your problem lies elsewhere in the starting circuit.
These questions come up regularly because ignition switch problems often present with confusing symptoms. The difference between a switch issue and a starter problem can be subtle, which is why proper testing matters before you commit to replacement.
One question that catches people off guard is compatibility. You might find a cheaper generic 5-prong switch online and assume all five-prong configurations work the same way. They don’t. Some switches have the accessory terminal in position 2, others in position 4. Installing the wrong layout means your lights might work when the engine’s off, or your mower might crank in the run position instead of start. Always cross-reference the terminal diagram, not just the prong count.
The bypass question deserves special attention because it tempts people facing an expensive repair. Yes, you can hotwire the starter by connecting the battery and starter terminals directly, but you’ve now built a mower with no off switch. That’s not just inconvenient, it’s dangerous. If the throttle sticks or you need to kill the engine quickly, you’ll be scrambling to pull the spark plug wire while the blade spins. A $15 switch beats that risk every time.
Replacing your 5-prong lawn mower ignition switch is one of those satisfying repairs that proves you’re more capable than you might think. You’ve navigated the wiring, secured the connections, and brought your mower back to life, that’s genuinely impressive work. The key takeaways? Always disconnect that spark plug before you start, document your wiring carefully, and test each position thoroughly once you’re done.
Beyond this fix, you’ve gained skills that apply to other lawn mower repairs. Understanding your machine’s electrical system means you’re not stuck calling for help every time something goes wrong. Regular maintenance, keeping connections clean, checking for worn wires, protecting components from moisture, extends the life of every part you’ve worked so hard to install.
Your mower is running again, and you made it happen. That’s the kind of hands-on knowledge that saves money, reduces waste, and keeps perfectly good equipment out of landfills. Ready for the next challenge?