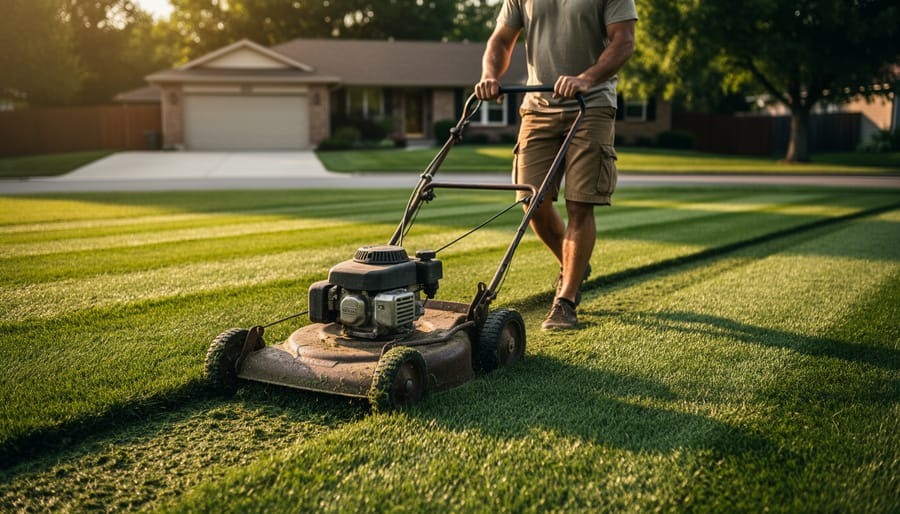
You can create professional-looking striped and patterned lawns with an ordinary push mower. The secret lies in bending grass blades in opposite directions to reflect light differently, a technique that works just as well with manual or self-propelled push mowers as it does with expensive riding equipment. Most homeowners achieve their first clean stripe pattern in 30 to 45 minutes once they understand the basic back-and-forth technique.
The good news? Your standard rotary push mower is already equipped for pattern mowing. Unlike the complex lawn mowing methods that require specialized attachments, push mower patterns rely on wheel tracking and consistent overlap. The grass doesn’t actually change color. Instead, blades bent toward you appear darker, while those bent away look lighter, creating that coveted contrast you see on baseball fields and pristine suburban lawns.
What trips up most beginners isn’t the equipment but the prep work. Tall, healthy grass shows patterns better than scalped lawns, and mowing height matters more than blade sharpness for this particular goal. You’ll need grass at least 2.5 inches tall and a clear mental map of your chosen pattern before you start.
This guide walks through everything from pre-mow preparation to troubleshooting faint stripes, with pattern options ranked by difficulty. Whether you’re aiming for simple stripes or more ambitious checkerboard designs, the fundamentals remain the same: consistent passes, deliberate direction changes, and a bit of patience while you develop your eye for alignment.
What You’ll Need: Tools and Materials for Pattern Mowing
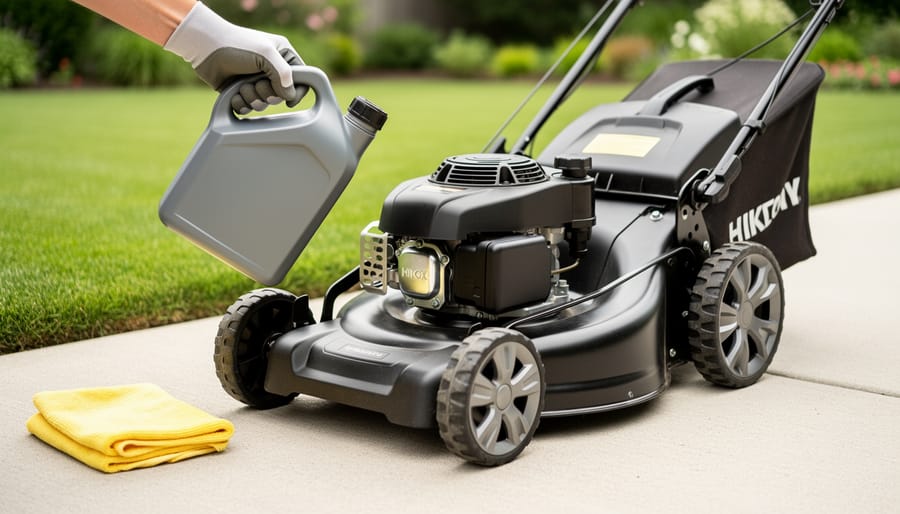
Good news: you likely already own everything you need to create professional-looking lawn patterns with your push mower. Creating stripes and other patterns doesn’t require specialized equipment or expensive upgrades. Your standard push mower, whether it’s a traditional reel mower, rotary push mower, or self-propelled model, works perfectly fine for pattern mowing as long as the blades are sharp and the cutting height is adjustable.
Here’s what you’ll need to get started:
- A push mower with a rear roller or flap (most models have this built in)
- Measuring tape or long string to establish straight reference lines
- Four wooden stakes or garden markers for corner reference points
- Rake to clear debris and smooth any uneven areas before mowing
- Spray paint or flour (optional) for marking initial guide lines on complex patterns
- Garden hose or rope (optional) for laying out curved patterns
- Lawn roller (optional) to enhance stripe definition after mowing
The rear roller or grass flap on your mower is the secret to creating visible patterns. As you mow, this component bends the grass blades in the direction you’re traveling, creating the light and dark stripes you see on professional lawns. If your current mower lacks a visible roller, check whether it has a rear flap, this achieves the same effect, just slightly less dramatically.
For your first attempt at pattern mowing, stick with what’s already in your shed. The measuring tape and stakes help you establish straight lines, which matters far more than any fancy equipment. Once you’ve mastered basic stripes, you can decide whether optional tools like marking paint or a roller are worth adding to your setup based on the results you’re getting.
Safety and Preparation Considerations
Before creating those beautiful lawn patterns, let’s cover the essentials that’ll keep you safe and set your lawn up for success. A little preparation goes a long way toward both protecting yourself and achieving crisp, healthy-looking results.
Start by walking your lawn and clearing any obstacles, branches, toys, stones, or other debris that could become projectiles or damage your mower blades. Check your grass height; ideally, you want it between 3 to 4 inches before mowing, as taller grass bends more easily to create those distinct pattern lines. Grass that’s too short won’t show patterns well and puts stress on your lawn.
Timing matters more than you might think. Avoid mowing when grass is wet from dew, rain, or irrigation, wet grass clumps together, clogs your mower, and can lead to uneven cuts and disease spread. Similarly, mowing during midday heat stresses both you and your lawn, especially when temperatures climb too hot to mow. Early evening works well, giving grass time to recover overnight while you work in cooler conditions.
For sustainable lawn health, never remove more than one-third of the grass blade height in a single mowing. If your grass has gotten away from you, mow higher first, wait a few days, then mow to your desired pattern height. This gradual approach prevents shock and keeps your lawn thriving while you create those eye-catching designs.
Popular Push Mower Lawn Patterns to Try
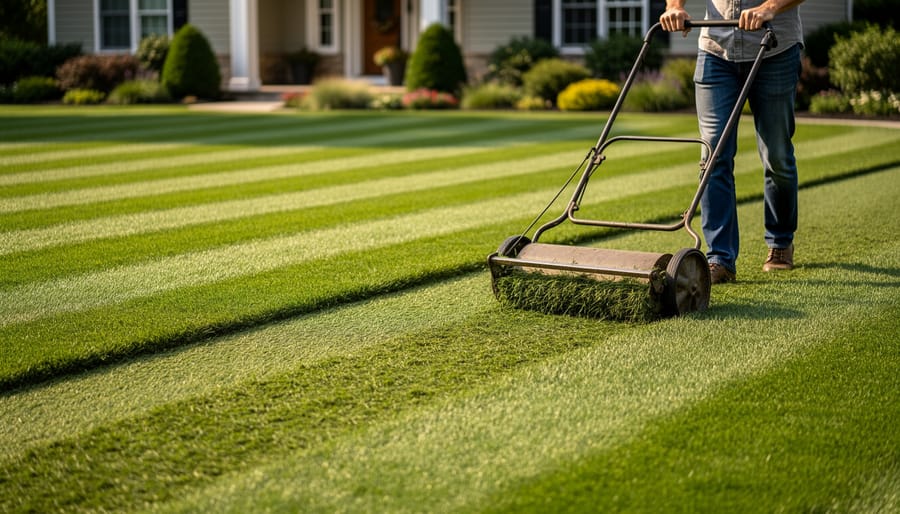
Straight Stripes (Best for Beginners)
Straight stripes are the perfect starting point because they’re remarkably forgiving. You’re simply mowing back and forth in parallel lines, which requires no complex planning or tight turns. Miss your line by a few inches? The pattern still looks crisp. Compare that to a checkerboard, where even a slight misalignment becomes glaringly obvious.
Beyond being beginner-friendly, stripes are genuinely good for your lawn. alternating mowing directions prevents grass from leaning permanently in one direction and helps avoid soil compaction along the same paths. Each time you mow perpendicular to your previous stripes (say, north-south one week, east-west the next), you’re encouraging upright growth and distributing wear more evenly across the lawn.
The technique itself is straightforward: pick a straight edge like your driveway or sidewalk as a starting reference, mow one pass along it, then turn around and mow back parallel to your first line. The secret is consistent overlap, about two to three inches of your previous pass, which prevents those telltale uncut strips between rows. Your mower’s wheels naturally bend grass in the direction you’re moving, creating the light and dark effect that makes stripes visible.
Checkerboard Pattern
Once you’ve mastered straight stripes, the checkerboard pattern is your next logical step, and it’s easier than you might think. You’re essentially mowing stripes twice, with the second pass perpendicular to the first. This creates alternating light and dark squares that really make your lawn stand out.
The technique works best on rectangular or square lawns at least 20 feet wide in each direction. Smaller spaces can look cluttered, while irregularly shaped lawns make it harder to maintain consistent square proportions. Your lawn doesn’t need to be huge, but you’ll want enough room to complete at least four full passes in each direction.
Start by mowing your usual stripe pattern in one direction, let’s say north-south. Then, without adjusting your mower height, mow perpendicular stripes east-west, crossing over your first set. The grass bent in opposite directions creates the checkerboard illusion where the stripes intersect.
This pattern offers a bonus beyond aesthetics: alternating your mowing direction every session prevents soil compaction and encourages more upright grass growth, contributing to a healthier, more resilient lawn.
Diagonal and Diamond Patterns
Diagonal patterns add immediate visual drama to your lawn while delivering real health benefits. Instead of mowing parallel to your property lines, you’ll cut at a 45-degree angle across the lawn. This creates stripes that draw the eye and make rectangular yards appear more spacious.
Start by picking a corner of your lawn as your reference point. Mow your first stripe diagonally from that corner, then work parallel to it across the entire lawn. The angled direction forces you to vary your mowing path compared to standard straight lines, which prevents soil compaction in the same tracks and encourages grass to grow more upright.
Diamond patterns build on this technique. After completing diagonal stripes in one direction, mow the lawn again at a perpendicular diagonal on your next cut. The crisscrossing creates striking diamond shapes where the light and dark stripes intersect.
This varied mowing direction is excellent for lawn health. Different cutting angles prevent grass blades from developing a “lean” and help distribute foot traffic stress more evenly across the turf. Your push mower handles these patterns just as easily as straight stripes once you establish that first reference line.
Circular and Spiral Patterns
Circular and spiral patterns work beautifully for oval or irregularly shaped lawns where straight lines feel forced. Start from the lawn’s outer edge and mow inward in concentric circles, or begin at the center and spiral outward. The challenge with push mowers is maintaining smooth curves without creating divots from tight turns.
Choose a starting point that allows the widest possible turning radius. Overlap each pass by about one-third of your mower deck width to prevent uncut strips. Push mowers require more physical effort on curves compared to riding mowers, so these patterns suit smaller lawn sections best. Practice on a quarter of your lawn first before committing to the full pattern, and avoid attempting circles when grass is wet since you will slip while turning.
Step-by-Step: Creating Your First Lawn Pattern
Creating your first lawn pattern is easier than you think. Start with a simple stripe pattern, it’s forgiving, teaches you the core techniques, and delivers impressive results even on your first attempt.
Before you begin, walk your lawn and pick up any sticks, toys, or debris. Check that your mower blade is sharp (dull blades crush grass rather than cut it, making patterns harder to see). Set your mower to a medium-high cutting height, around 3 to 3.5 inches works well for most grass types and helps the bent grass reflect light more dramatically.
Choose a reference line to keep your stripes straight. Most people use a sidewalk, driveway edge, or fence line as their guide. If your lawn lacks a straight edge, place two garden stakes at opposite ends and run a string between them.
- Mow your first stripe along your reference line at a steady walking pace. Focus on maintaining a consistent speed, rushing creates uneven cutting that weakens the pattern.
- At the end of the stripe, lift your mower deck slightly (or disengage the blade if your model allows) and turn around. Line up your mower so the wheels overlap your just-mowed stripe by about three inches.
- Lower the deck and mow your second stripe in the opposite direction, parallel to the first. The grass will bend the opposite way, creating the contrasting light and dark effect.
- Continue this back-and-forth pattern across your entire lawn, always overlapping the previous stripe slightly. The overlap prevents missed strips that break up your pattern.
- When you reach the opposite edge, mow a perimeter strip around any remaining uncut areas. Then fill in these sections with short stripes that match your main pattern’s direction.
- Finish by mowing a clean border around your lawn’s entire perimeter. This frames your pattern and gives it a polished, professional appearance.
Your first attempt won’t be perfect, and that’s expected. You might notice slight curves in your stripes or areas where the pattern looks less defined. These imperfections fade as you develop a feel for consistent speed and overlap.
The key is maintaining that steady pace and consistent overlap. Speeding up or slowing down changes how much the grass bends. Varying your overlap width creates lighter or darker sections that disrupt the uniform appearance.
If you lose your place or drift off course, don’t stop mid-stripe to correct it. Finish that stripe and adjust on the next pass. Stopping and starting creates visible lines where grass bends differently.
After you finish, stand back and view your lawn from different angles. The pattern will look most dramatic when you’re facing perpendicular to the stripes. From the side, you’ll see individual stripes blend together. This is normal, the pattern’s visibility changes throughout the day as the sun moves and light hits the grass from different angles.
Most beginners complete their first stripe pattern in about the same time it takes to mow normally, maybe adding ten minutes while they build confidence with the technique. By your third or fourth mow, you’ll match your regular mowing time while creating patterns that make your lawn stand out.
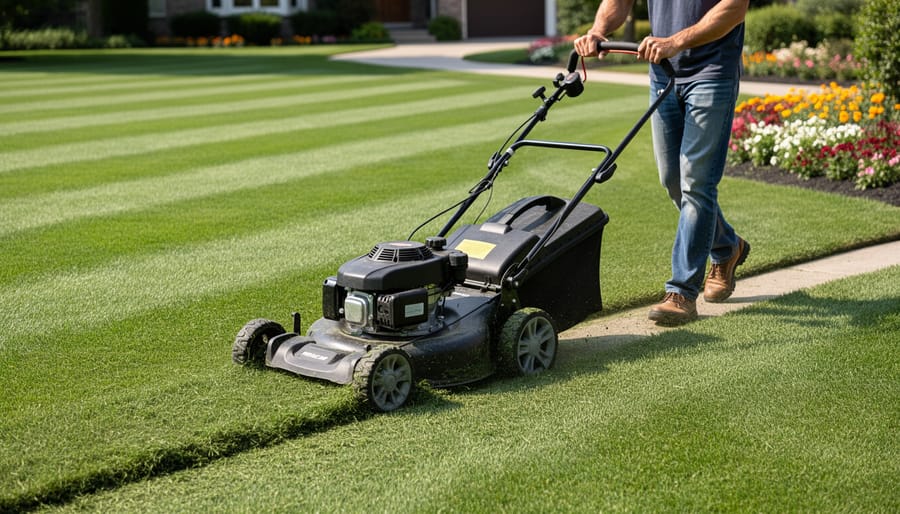
Tips for Making Your Patterns Pop

The most dramatic patterns emerge from the interplay of light and blade angle, not mower settings alone. When grass bends in opposite directions, it reflects sunlight differently, one pass catches the light while the adjacent pass appears darker. You’ll see the strongest definition when the sun sits low in the sky, typically during early morning or late afternoon hours. This natural lighting angle amplifies the contrast between your alternating passes.
Your mower’s cutting height directly affects pattern visibility. Set the deck between 2.5 and 3.5 inches for most cool-season grasses, which gives blades enough length to bend dramatically without stressing the plant. If you want to cut lower safely for crisper lines, reduce height gradually over several weeks rather than making drastic changes. Warm-season grasses like Bermuda can handle shorter cuts and often show sharper patterns at 1.5 to 2 inches.
Blade sharpness matters more than most people realize. A dull blade tears grass rather than cutting cleanly, which creates ragged edges that scatter light instead of reflecting it uniformly. Sharpen your blades every 20-25 hours of mowing, or roughly every four to six weeks during active growing season. You’ll notice immediately that freshly sharpened blades produce crisper pattern lines and healthier grass that recovers faster.
Grass type influences how well patterns show. Fine fescues and perennial ryegrass bend beautifully and hold their position, creating the most dramatic stripes. Kentucky bluegrass performs well too. Coarser grasses like tall fescue still show patterns but with less definition. Don’t fight your grass type, work with what grows naturally in your region rather than forcing aesthetic preferences that compromise lawn health.
How to Tell If You’re Doing It Right (and What to Adjust)
The easiest way to check your work is stepping back about 20 feet from your lawn and looking at the stripes from different angles. Your patterns should have clear contrast between light and dark sections, with straight lines that don’t waver or zigzag. If you see blurry stripes or barely-there definition, you’re likely not overlapping your mower wheels enough, aim to overlap the previous pass by at least two to three inches.
Walk your lawn after mowing and check for missed patches or scalped areas. Missed spots mean you’re leaving too much space between passes. Scalping usually signals you’re mowing too low or your deck isn’t level. If the pattern looks great on one side but fades on the other, your mower might have a blade upside down or dull blades creating uneven cuts.
Uneven patterns often come from inconsistent mowing speed. If you rush through some sections and slow down in others, the grass won’t bend uniformly. Keep a steady walking pace throughout.
Grass damage, yellowing tips or brown patches, means you’re mowing too short or need to sharpen your blades. Never cut more than one-third of the grass height at once, even when creating patterns.
Once you’re consistently nailing straight stripes with clean edges and no missed spots, you’re ready for checkerboards or diagonals. Master the basics first; complex patterns are just combinations of the simple techniques you’ve already learned.
Common Questions About Push Mower Lawn Patterns
Do I need a special push mower to create lawn patterns?
No, any standard push mower works perfectly fine for creating patterns. The visible stripes come from light reflecting off grass blades bent in different directions, not from specialized equipment.
How often should I change my mowing pattern?
Change your pattern every 2-3 mows to prevent soil compaction and encourage upright grass growth. Alternating between different patterns helps maintain lawn health while keeping your yard looking fresh.
Will mowing in patterns damage my grass?
Pattern mowing actually benefits your lawn by varying the direction you cut, which prevents grass from leaning permanently in one direction and promotes stronger, more upright growth. Just avoid mowing when grass is wet or stressed from heat.
How long does pattern mowing take compared to regular mowing?
Your first attempt might add 10-15 minutes as you focus on maintaining straight lines, but once you’ve established visual reference points, pattern mowing takes roughly the same time as your normal routine.
Can I maintain patterns between regular mows?
Patterns typically last 3-5 days depending on grass growth rate and weather conditions. You can’t refresh them without mowing, but proper watering and following lawn care basics will keep your grass healthy and patterns more visible for longer.
Are certain seasons better for creating visible patterns?
Spring and fall produce the most dramatic patterns because grass grows vigorously and maintains deeper green color. Summer patterns work but may fade faster during drought stress, while winter patterns are less visible in dormant grass.
The questions above reflect what most beginners wonder when they’re deciding whether pattern mowing is worth trying. The good news is that it’s far more accessible than you might think. You don’t need to invest in new equipment, and the technique itself becomes second nature after a few practice sessions.
One point worth emphasizing: changing your pattern regularly isn’t just about aesthetics. It’s one of the simplest ways to improve your lawn’s overall health. When you mow in the same direction every time, you gradually train grass blades to lean that way, and your mower wheels compact the soil along identical paths. Rotating between stripes, diagonals, and checkerboards distributes that wear evenly across your yard.
You don’t need fancy equipment or years of experience to create those stunning lawn patterns you’ve been admiring in your neighborhood. With the push mower sitting in your garage and the techniques we’ve covered, you’re completely ready to transform your lawn’s appearance.
Start with simple stripes on your next mowing session. That foundational pattern alone will make a noticeable difference in how your lawn looks, and you’ll be surprised at how quickly you pick up the rhythm. As you practice, you’ll naturally develop the consistency that makes patterns really stand out.
Remember, you’re not just creating visual appeal. Every time you change your mowing direction and create patterns, you’re promoting healthier, more upright grass growth. Your lawn benefits from this varied approach while looking better than ever.
The best part? You’ll likely finish your next mow feeling accomplished rather than like you’ve just checked off a chore. There’s something genuinely satisfying about stepping back and seeing those crisp lines you’ve created with your own effort.
Grab your push mower this weekend and give it a try. Your lawn is waiting for its makeover.