A k-line irrigation layout transforms how you water large garden beds, lawns, and orchards by delivering consistent, efficient coverage through a moving sprinkler system mounted on wheels. You’ll design the layout by mapping your property’s zones, calculating water pressure and flow requirements, then positioning a mainline with evenly spaced outlets that feed portable lateral pipes equipped with sprinklers. The entire process typically takes a weekend to plan and install for a typical residential setup, and the beauty of this system is its flexibility: you move the wheeled lateral lines to different positions as each zone receives adequate water.
Most gardeners choose k-line systems because they combine the broad coverage of traditional sprinklers with water efficiency that rivals drip irrigation when properly designed. The key lies in the layout. Unlike fixed sprinkler heads that water the same spots repeatedly, k-line systems let you rotate coverage systematically across your entire property, preventing overwatering in some areas while others stay dry. This approach conserves water, reduces runoff, and supports healthier root development across your landscape.
Getting the layout right means accounting for your property’s unique drainage patterns, slope variations, and plant water requirements. You’ll need to integrate the system thoughtfully with existing landscape features, ensuring water flows where it’s needed without creating boggy spots or erosion channels. The planning phase matters more than the physical installation. Spend time measuring, calculating, and sketching before you buy a single fitting, and you’ll avoid the frustration of inadequate pressure, dead zones, or constant repositioning that plague poorly designed systems.
What Is K-Line Irrigation and Why Consider It?
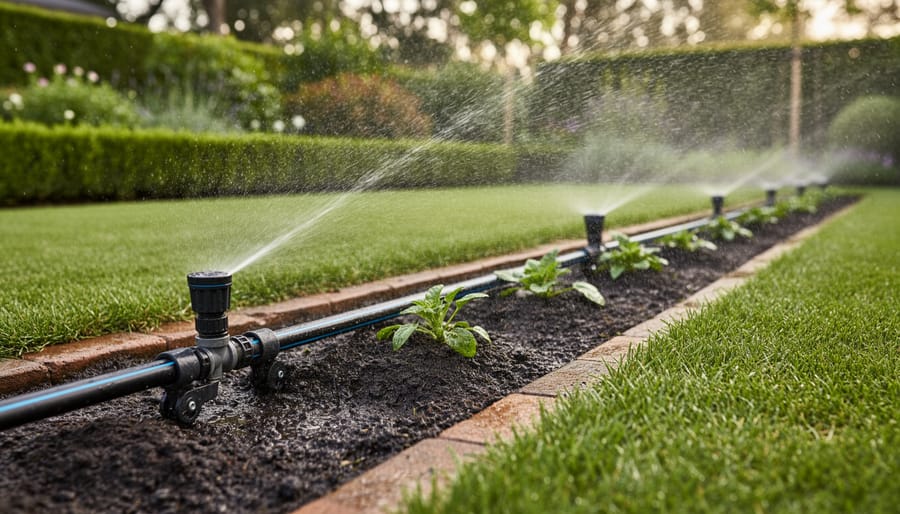
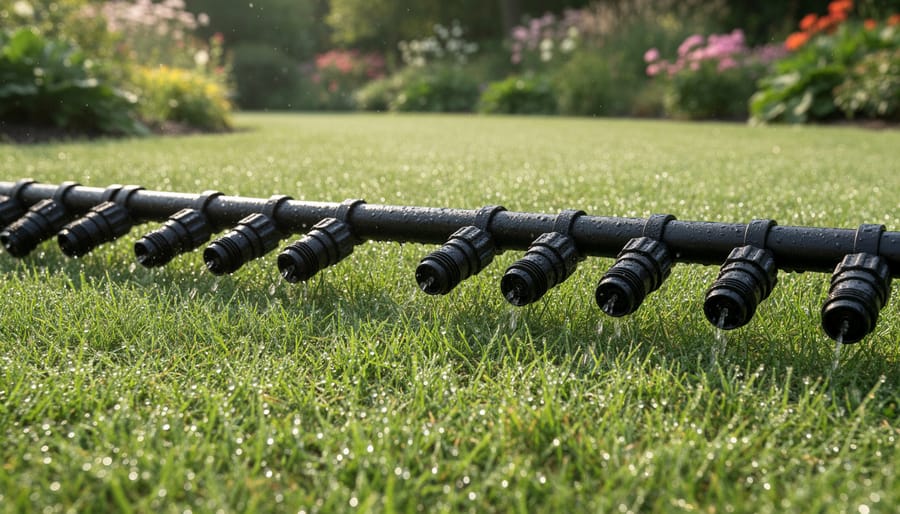
K-line irrigation is a portable, above-ground watering system that uses a series of sprinkler pods connected by flexible poly tubing laid across your lawn or garden. Unlike traditional in-ground systems that stay fixed in place, k-line systems are designed to be easily moved, you simply shift the entire line to a new position when one zone is watered. Each pod sends a gentle spray of water in an arc pattern, and by spacing them correctly along the line, you achieve even coverage without the expense or permanence of buried pipes.
The system gets its name from the New Zealand farm where it was developed, though it’s now gaining traction among residential gardeners who want efficient irrigation without major installation costs. You connect one end to a garden tap or pump, roll out the lightweight tubing across your target area, attach the pods at regular intervals, and turn on the water. When that section is done, you move the whole setup to the next zone.
Why choose k-line over a permanent sprinkler system or hand watering? The cost difference is substantial, you’re looking at hundreds rather than thousands of dollars for a basic setup. Water efficiency ranks high too, since you control exactly where and when water goes, avoiding the overspray and runoff common with fixed rotary heads. The portability means you can adapt your irrigation as your garden evolves, watering new beds without replumbing anything.
K-line also plays nicely with landscape drainage planning. Because you’re not installing permanent heads that might conflict with drainage flow, you can position lines to support healthy water movement across your property. Move the system away from naturally soggy spots during wet seasons, or direct water toward drier zones that need help. This flexibility makes k-line particularly useful for mixed landscapes, lawns, vegetable gardens, shrub beds, where water needs vary and drainage patterns shift with the seasons.
The system suits properties from modest suburban yards to larger rural blocks, though it works best where you can dedicate time to moving lines every few days rather than wanting a set-and-forget solution.
Planning Your K-Line Layout: Key Considerations
Assess Your Lawn and Garden Zones
Start by walking your entire property with a notepad, tape measure, and your phone’s camera. You’re looking to create a simple map that divides your landscape into zones based on water needs and physical characteristics. This assessment phase might take an hour or two, but it’ll save you from costly mistakes and ensure your k-line system delivers water exactly where it’s needed.
Begin by sketching your property’s basic outline, noting approximate dimensions of lawns, garden beds, and hardscaped areas. You don’t need architectural precision, just enough detail to plan your irrigation runs. As you map, mark existing water sources like outdoor faucets or hose bibs, since these are your potential connection points for the k-line system.
Pay special attention to how water naturally moves across your landscape. Walk the property after a rain and note where water pools, where it runs off quickly, and which areas dry out fast. Slopes are critical to identify because water pressure and coverage patterns change on inclines. A k-line running downhill will push more water to pods at the lower end, while uphill runs may struggle with even distribution.
Group areas with similar watering needs into zones. Your vegetable garden likely needs more frequent watering than established lawn areas. Newly planted sections require different care than mature landscapes. Shaded areas under trees stay moist longer than sun-baked lawn stretches. These natural divisions guide your k-line layout planning.
As you assess, create a checklist covering these essential elements:
- Overall property dimensions and the size of areas needing irrigation
- Location of all outdoor water sources and their accessibility
- Slope directions, drainage patterns, and areas prone to pooling or runoff
- Plant types in each zone and their specific water requirements
- Any existing irrigation infrastructure that might be repurposed or avoided
Take photos of problem areas, that boggy corner that never dries, the patch that browns out every summer, or the slope where runoff causes erosion. These visual references prove invaluable when you’re later designing your layout indoors. Also note any underground utilities you’re aware of, though k-line’s above-ground design means you won’t be digging.
Consider microclimates within your property. Southern exposures bake in full sun while northern sides stay cooler. Areas near pavement or buildings often run hotter and drier. Wind patterns matter too, since they affect both evaporation rates and where irrigation water actually lands. A windy, exposed lawn section might need different pod spacing than a sheltered garden bed.
Calculate Water Pressure and Flow Rate
Understanding your water supply’s capabilities is crucial before investing in k-line components. Start by checking your static water pressure, most municipal supplies deliver 40-60 PSI, which works well for k-line systems. You can test this with an inexpensive pressure gauge attached to an outdoor faucet. Turn off all other water sources, let the system sit for a minute, then read the gauge.
Next, measure flow rate by timing how long it takes to fill a 5-gallon bucket from your water source. If it fills in 60 seconds, you have a 5 GPM (gallons per minute) flow rate. For k-line systems, aim for at least 30 PSI and 10-15 GPM minimum to run a basic setup effectively.
As a general rule, each irrigation pod requires about 2-3 GPM to operate properly. If you have 15 GPM available, you can comfortably support 5-7 pods on a single line without compromising coverage. Lower flow rates mean fewer pods or considering ways to save with electric pumps to boost your system’s capacity. Running too many pods on insufficient pressure creates weak spray patterns and uneven coverage that defeats the purpose of careful planning.
Design Layout Considering Drainage Integration
Understanding your landscape’s natural drainage patterns is essential before positioning your k-line system. Walk your property after a heavy rain to identify where water collects, which direction it flows, and how quickly different areas drain. These observations reveal your drainage personality, the unique way your land handles water.
Position your k-line mainline perpendicular to slope directions when possible, allowing you to move it uphill or downhill as needed. Avoid running irrigation directly into low spots or areas with clay soil that already struggle with standing water. These zones need less frequent watering, not regular soaking that compounds drainage problems.
Use your k-line strategically to support healthy drainage. Well-drained areas on slopes can handle more frequent irrigation, while flat zones with slow drainage should receive shorter, less frequent watering sessions. Consider splitting your property into distinct irrigation zones based on drainage characteristics rather than just plant types.
Mark problem areas on your layout plan with special notes about reduced watering frequency. The portability of k-line systems becomes a significant advantage here, you can adjust line placement seasonally as drainage patterns shift with weather and soil conditions.
Tools and Materials You’ll Need
Before you begin installing your k-line irrigation system, gathering the right equipment makes the process significantly smoother and ensures a professional result. Quality materials upfront mean fewer headaches later and a system that serves you reliably for years.
Essential K-Line Components
- K-line irrigation pods (quantity based on your coverage area and spacing calculations)
- Poly tubing mainline (typically 25mm or 32mm diameter, length matching your irrigation zone)
- Mainline connectors and joiners for assembling sections
- Pod clips or attachment hardware for securing pods to the tubing
- Water source adapter to connect your mainline to the tap or pump
- Ground stakes (metal or heavy-duty plastic for anchoring the line)
- End cap or valve for the mainline terminus
Tools for Installation
- Measuring tape (at least 30m for accurate zone measurement)
- Water pressure gauge to verify adequate pressure at your source
- Adjustable wrench or pliers for tightening connections
- Utility knife or tubing cutter for clean cuts if sizing the mainline
- Marking flags or spray paint to mark pod positions during layout
- Bucket for initial flow rate testing
- Stopwatch or timer for measuring water output
When selecting components, prioritize durability over bargain prices. UV-resistant poly tubing lasts multiple seasons without cracking, and quality pods with replaceable parts outlive cheaper alternatives significantly. Look for pods with corrosion-resistant nozzles and thick-walled tubing that handles regular moving without developing leaks. This approach aligns with sustainable gardening practices by reducing waste and avoiding the frustration of mid-season failures.
Optional additions like inline filters protect pods from sediment, while quick-disconnect fittings make seasonal setup and takedown faster. A wheeled cart for transporting equipment saves your back when moving systems between zones.
Safety Precautions Before You Begin
Setting up your k-line system is straightforward, but taking a few safety steps first prevents headaches and ensures a smooth installation.
When working with your water source, shut off pressure before making connections and wear safety glasses when attaching fittings, sudden releases can spray debris. If you’re connecting to an outdoor spigot, ensure the connection is tight to avoid unexpected sprays or leaks that can turn your workspace into a slippery mess.
K-line tubing and coiled poly pipe can be surprisingly heavy. Lift with your legs, not your back, especially when moving multiple pods or a full reel of mainline. Get a helper for the initial layout if you’re working with more than 300 feet of tubing.
Sun protection matters more than you’d think. Installing k-line means working outdoors for extended periods, often in open areas without shade. Wear a wide-brimmed hat, apply sunscreen, and schedule your installation for early morning or late afternoon when temperatures are cooler.
Watch for tripping hazards as you unroll the mainline. The flexible tubing can catch feet, especially when under pressure. Keep your workspace organized and warn family members or pets about the installation in progress. Once pressurized, avoid stepping over or on the line, it can shift unexpectedly and throw you off balance.
Step-by-Step: Installing Your K-Line Irrigation System
Step 1: Connect to Your Water Source
Start by locating your water source, typically an outdoor spigot or hose connection. You’ll need the right adapter to connect the k-line mainline (usually poly tubing with specific fittings) to your standard garden hose thread. Most k-line systems use camlock or quick-connect fittings, so check your manufacturer’s specifications and purchase the appropriate hose-to-camlock adapter from your local irrigation supplier.
Before connecting anything, consider backflow prevention for sprinklers to protect your household water supply from contamination. Even temporary systems benefit from a simple vacuum breaker or a master valve setup, particularly if your local codes require it.
Thread the adapter onto your spigot by hand first, then tighten with a wrench just until snug, overtightening can crack fittings or damage threads. Attach the k-line mainline to the adapter, ensuring the connection clicks or seats fully. Give it a gentle tug to confirm it’s secure before turning on the water.
Step 2: Lay Out the Mainline
Start at your water source and carefully unroll the poly tubing along your planned route, letting it relax naturally on the ground. Walk the entire length first, clearing any sharp objects or debris that might damage the tubing. Position the line to follow gentle curves rather than sharp angles, which can restrict water flow and create weak points.
Keep the tubing slightly slack rather than pulled tight. This allows for thermal expansion on hot days and makes the system easier to move between zones. The line should lie flat without twisting, as kinks reduce water pressure and wear the material faster. If you’re running parallel lines, maintain consistent spacing between them to ensure even coverage across your irrigation zone.
Step 3: Install and Space the Pods
With your mainline positioned, it’s time to attach the irrigation pods, the heart of your k-line system’s water distribution.
Start by determining your pod spacing. For most residential systems operating at 40-60 PSI, space pods 40-50 feet apart along the line. If your water pressure is lower (30-40 PSI), reduce spacing to 30-40 feet to maintain overlapping coverage. Higher pressure allows wider spacing, but avoid exceeding 60 feet between pods or you’ll create dry gaps.
To install each pod, make a small puncture in the poly tubing using the insertion tool that came with your system. Push the pod barb firmly into the hole until it seats completely, you should feel it click or lock into place. Give each pod a gentle tug to confirm it’s secure and won’t pop out under pressure.
Adjust the pod angle to approximately 25-30 degrees from vertical, angled slightly away from the mainline. This angle maximizes throw distance while preventing water from hitting the line itself. You can fine-tune these angles during testing, but starting with consistent positioning saves adjustment time later.
Work methodically down the entire line, maintaining your calculated spacing for even coverage across the irrigation zone.
Step 4: Stake and Secure the System
Turn on your water briefly to see where the mainline naturally settles under pressure, then place stakes every 10-15 feet along straight sections and at each bend or curve. Use blunt-topped plastic or fiberglass stakes rather than sharp metal ones that might puncture the tubing if the line shifts. Push stakes in at a slight angle away from the line, leaving enough space, about 2-3 inches, between stake and tubing to allow the line to flex without chafing during operation or when you move the system.
Avoid driving stakes through the tubing or creating tight pinch points that restrict water flow. The goal is gentle guidance, not rigid anchoring. If wind is common in your area, add extra stakes near pods to prevent them from tipping. You should be able to easily lift the entire system for repositioning without removing all the stakes, so don’t over-secure it.
Step 5: Test Water Pressure and Coverage
Turn on your water source gradually and let the system pressurize for a minute. Watch each pod carefully, they should all start spraying at roughly the same time and with similar force. If some pods dribble while others gush, you’ve got pressure imbalance.
Walk the entire line looking for leaks at connections and along the tubing. Check that water fans out evenly from each pod, covering the intended area without massive gaps between spray patterns. Adjust pod angles by tilting them slightly if you spot dry zones or overlapping spray that wastes water.
Place empty containers at various distances to gauge coverage uniformity. After fifteen minutes, compare water levels, they should be fairly similar across your target area.
Step 6: Fine-Tune for Optimal Performance
After your initial test run, you’ll likely notice some areas performing better than others. This fine-tuning phase is where you transform a functional system into an optimized one.
Start by observing coverage patterns during different times of day. Wind can dramatically affect spray distribution, so if you notice drift pushing water off-target, adjust pod angles to compensate, angling slightly into prevailing winds often improves coverage. You can also reduce operating pressure slightly to create heavier droplets that resist wind better.
Check for overlapping coverage between adjacent pods. Ideally, you want about thirty percent overlap to ensure no dry strips form between spray zones. If gaps appear, either adjust spacing or modify pod angles to extend reach.
Consider water pressure variations throughout your property. Pods at the line’s end might show weaker performance, if so, slightly reduce the number of active pods or increase source pressure within safe limits.
Mark your final pod positions and angles with small flags or stakes. This documentation makes future setups quick and repeatable, especially valuable for systems you’ll move regularly throughout the season.
Verification: Testing and Confirming Proper Operation
After installation and initial testing, a thorough verification ensures your k-line system delivers water efficiently without creating drainage problems. Run the system during daylight hours so you can observe the full coverage pattern and identify any issues before they waste water or damage your lawn.
Follow this systematic verification checklist:
- Observe the full coverage pattern while the system runs, watching for gaps between pod spray zones or areas receiving excessive overlap
- Place catch containers (tuna cans or shallow dishes work well) at regular intervals across the irrigation zone to measure distribution uniformity
- Run the system for 30 minutes, then inspect soil moisture by walking the entire area and probing the ground to check penetration depth
- Check all connections, fittings, and pod attachment points for leaks, even small drips waste water and reduce pressure downstream
- Verify no standing water appears in drainage channels or low-lying areas, confirming your irrigation timing works with your landscape drainage capacity
After running this checklist, measure the water collected in your containers. Consistent amounts indicate even distribution, while significant variations suggest pressure issues or pipe size fixes might be needed.
Common problems you might discover include uneven pressure along the line (often caused by elevation changes or inadequate supply), pod blockages from debris (remove and flush thoroughly), and line movement during operation (add more stakes or adjust tension). If you notice wet spots that don’t dry between waterings, consider water leak detection methods to rule out hidden issues before adjusting your irrigation schedule.
Catching these problems early prevents stressed turf and wasted water, ensuring your k-line system performs as designed throughout the growing season.
Maintaining Your K-Line System for Longevity
A well-maintained k-line system can serve your lawn and garden for many seasons, but portable irrigation equipment needs regular care to stay reliable. After each use, walk the line and check for debris caught in pods or connections, small bits of leaf, grass, or mineral buildup can restrict flow and create uneven coverage over time. Clean pods by removing sprinkler heads and rinsing them under a garden hose, using an old toothbrush to gently scrub away calcium deposits or algae. If you notice inconsistent spray patterns, this simple cleaning often restores performance without needing replacement parts.
Inspect the poly tubing regularly for cracks, kinks, or UV damage, especially at connection points where stress concentrates. Before storing the system, drain all water completely to prevent freeze damage in cold climates and mold growth during storage. Roll tubing loosely rather than creating tight coils, which can cause permanent kinks that restrict water flow. Store components in a shaded, dry location away from direct sunlight, UV exposure degrades plastic over time even when the system isn’t in use. Consider adding simple pressure monitoring or flow sensors to catch leaks early, preventing water waste and potential damage to your landscape drainage system. At season’s end, take a few minutes to inventory your pods, stakes, and connectors, replacing worn parts before next spring so you’re ready when irrigation season begins.

Integrating K-Line with Landscape Drainage Design
Successful k-line irrigation works *with* your landscape’s natural drainage patterns, not against them. When you coordinate these two systems thoughtfully, you’ll avoid soggy problem areas and actually help water move through your property more effectively.
Start by understanding your drainage capacity before you irrigate. If you have clay-heavy soil or a low-lying area that already puddles after rain, don’t position your k-line to dump more water there. Instead, place pods to water zones with better drainage first, then reduce irrigation frequency or duration in those troublesome spots. You might run your k-line for 45 minutes in well-draining areas but only 20 minutes where water naturally collects.
Timing matters enormously. Water early in the day when evapotranspiration rates are lower, giving your drainage system the entire day to handle any excess. If you irrigate in the evening, saturated soil sits overnight, increasing the risk of waterlogging and disease. In areas with known drainage challenges, consider watering every third or fourth day rather than more frequently, allowing the soil profile to process moisture between sessions.
The beauty of k-line’s portability shines here. As seasons change and drainage patterns shift with rainfall, frozen ground, or vegetation growth, you can easily move your setup. That low corner that drains poorly in spring might handle more water by midsummer when plant roots have opened up the soil structure.
Use irrigation strategically to support drainage goals. Position your k-line to encourage water movement toward designed drainage swales or rain gardens rather than toward foundations or hardscaping. Think of your irrigation as reinforcing the water flow patterns you’ve intentionally created in your landscape design.
Common K-Line Layout Mistakes to Avoid
Even the best-planned k-line systems can underperform if you fall into these common traps. The good news? Most mistakes are easy to avoid once you know what to watch for.
One of the biggest pitfalls is misjudging pod spacing. Many newcomers space pods based on rough guesswork rather than actual pressure calculations and coverage tests. When pods sit too far apart, you’ll end up with dry strips between irrigation zones, frustrating when you discover them only after your lawn shows brown patches. Always verify spacing with an initial test run before committing to your layout.
Ignoring your water pressure limitations sets you up for disappointment. Adding more pods than your pressure can support means the furthest pods barely sprinkle while the nearest ones gush. If you’re tempted to extend your line “just one more pod,” resist unless you’ve confirmed your pressure can handle it.
Several layout errors create real problems:
- Spacing pods too far apart, leaving unwatered gaps between coverage zones
- Not accounting for wind drift, which shifts water away from intended areas
- Ignoring natural drainage flow, placing lines where they’ll create saturated soil
- Using undersized tubing that restricts flow and reduces system efficiency
- Failing to secure the line properly, allowing movement that disrupts coverage
- Over-irrigating poorly drained areas, turning minor drainage issues into major problems
Another mistake that crops up repeatedly: leaving your system running unattended for long periods. K-line works beautifully, but it still needs monitoring, especially during the first few uses. Wind changes direction, pods shift slightly, or unexpected drainage issues emerge. A quick check every 30-45 minutes during initial runs prevents problems.
Finally, cutting corners on component quality rarely pays off. That bargain tubing might seem like a smart save until it splits mid-season, and cheap pods often clog or break after minimal use. Investing in durable materials from the start means fewer headaches and better long-term value for your lawn care efforts.
Frequently Asked Questions About K-Line Irrigation
K-line irrigation might be new to you, or you’ve heard about it but aren’t sure if it’s the right fit for your situation. Here are answers to the questions we hear most often from gardeners considering this system.
How does the cost of k-line compare to traditional in-ground irrigation?
K-line systems typically cost 40-60% less than permanent in-ground sprinkler systems for similar coverage areas. The initial investment includes pods, poly tubing, and connectors, but you avoid trenching, professional installation fees, and underground pipe networks.
What property size works best for k-line irrigation?
K-line systems work well for properties from small urban gardens (as little as 500 square feet) up to several acres. For very large properties, you might run multiple lines from different water sources, while smaller spaces benefit from the flexibility to water precisely where needed without wasting coverage.
How often do I need to move the k-line?
Most gardeners move their k-line every 4-12 hours depending on soil type, weather conditions, and water pressure. Sandy soils need shorter watering periods with more frequent moves, while clay soils can handle longer sessions in one location.
Can k-line systems work with timers or automation?
Yes, you can attach a standard hose timer at the water source to automate start and stop times. However, you’ll still need to manually move the line to different zones, k-line isn’t fully automated like in-ground systems, but timers prevent over-watering in each position.
What winterization does k-line require?
Winterizing is simple: drain all water from the line and pods, disconnect from the water source, and store the components in a shed or garage. The system is completely portable, so there’s no risk of frozen underground pipes bursting.
Is k-line as effective as permanent in-ground sprinklers?
K-line delivers comparable water coverage and can actually be more efficient because you control exactly where water goes and can adjust placement as plant needs change throughout the season. The trade-off is convenience, in-ground systems automate zone changes, while k-line requires manual repositioning.
The beauty of k-line irrigation lies in its adaptability. If your needs change next season or you decide to redesign part of your garden, the system moves with you. Many gardeners start with a basic setup to irrigate their lawn, then expand to cover vegetable beds or flower gardens as they become comfortable with the system. There’s no locked-in layout forcing you to water areas that no longer need it.
One consideration that surprises new users is how quickly they develop an efficient routine for moving the line. What feels cumbersome during the first week becomes second nature within a month. You’ll learn the optimal spacing for your specific property, remember which zones need longer watering times, and develop strategies for rainy periods when you can skip entire irrigation cycles. This hands-on involvement actually helps you become a better gardener, more attuned to your landscape’s water needs and drainage patterns throughout the growing season.
Designing a k-line irrigation layout might seem daunting at first, but you’ve now got all the tools to create an efficient, sustainable watering system that works in harmony with your landscape’s natural drainage. The beauty of k-line is its flexibility, you’re not locked into a fixed setup from day one.
Start small. Pick one zone, test your layout, observe how water moves across your property, and fine-tune as you learn. This hands-on approach builds confidence and ensures each expansion improves on what you’ve already established. When your irrigation supports rather than fights your drainage patterns, you’ll notice healthier turf, fewer soggy spots, and significantly less water waste.
The real reward comes when you watch your lawn thrive with less effort and a lighter environmental footprint. That’s sustainable gardening at its best.