Protecting your home’s windows from hail damage comes down to three proven methods: installing impact-resistant window film, fitting permanent or temporary storm shutters, and upgrading to laminated or tempered glass. Each option varies in cost and effectiveness, but even a simple DIY window film application can reduce the risk of glass shattering during a storm, potentially saving you thousands in replacement costs and preventing dangerous shards from entering your home.
If you live in a hail-prone region, you already know the anxiety that comes with storm season. One minute you’re tending to your lawn and garden, planning which beds need mulching or which shrubs could use pruning, and the next you’re watching the sky darken with the kind of clouds that send ice chunks crashing down. Hail doesn’t discriminate. It can crack a pane in seconds, turn your carefully maintained property into a cleanup nightmare, and leave you scrambling for emergency repairs when contractors are booked solid.
The good news is that window protection doesn’t require a complete home renovation. You can start small with affordable, removable solutions and scale up to permanent installations as your budget allows. The key is understanding what each method actually protects against and how much effort you’re willing to invest. A basic polycarbonate panel might be perfect for the garage windows you rarely think about, while your front-facing picture windows might warrant the investment in impact-resistant glazing.
This guide walks you through every practical option, from materials you can pick up at the hardware store this weekend to professional-grade solutions that add long-term value to your home. We’ll cover what works, what doesn’t, and how to choose the right protection level for your specific situation and budget.
Understanding Hail Risk and Window Vulnerability
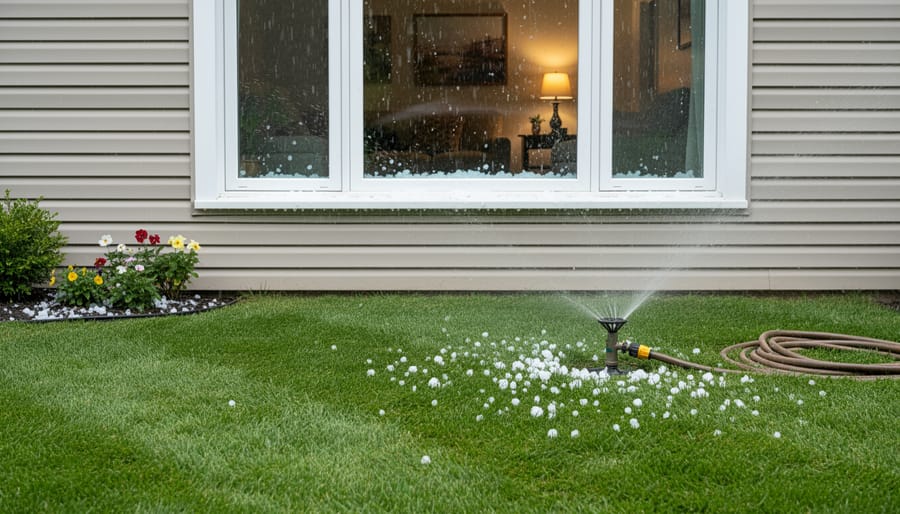
Windows rank among the most vulnerable parts of your home during hailstorms because they combine two risky factors: exposed surface area and brittle material. Unlike your roof’s textured shingles or siding’s angled profile, window glass presents a flat, rigid target that can’t flex or absorb impact energy. When a hailstone strikes at speeds reaching 50-100 mph, that energy transfers directly into the glass, creating cracks, chips, or complete shattering.
The damage threshold is surprisingly low. Hail measuring just one inch in diameter (roughly the size of a quarter) can crack window glass, especially if the stone hits at an angle or strikes an existing stress point near the frame. Once hailstones reach golf-ball size, about 1.75 inches, they commonly cause severe damage to standard residential windows. Stones measuring two inches or larger will shatter most unprotected glass on impact.
Here’s where lawn care season intersects with storm risk: the prime months for hail across most of North America run from April through July, with May and June seeing the highest activity. That’s precisely when you’re mowing weekly, fertilizing, aerating, and spending the most time maintaining your property’s exterior. This overlap isn’t coincidental, the same atmospheric conditions that fuel spring and summer thunderstorms (warm ground temperatures meeting cooler upper-air systems) also create ideal growing conditions for your lawn.
This timing creates a practical advantage. While you’re already outside inspecting your lawn for bare patches, checking irrigation systems, and trimming around the foundation, you can simultaneously assess your windows for existing damage and evaluate protection needs. Cracks you spot during a routine yard walk in April are much cheaper to address than discovering them after a June hailstorm turns a small crack into a shattered pane. The seasonal convergence of lawn maintenance and hail risk means your regular property care routine naturally positions you to catch vulnerabilities before storms arrive.
Tools and Materials You’ll Need
The materials you’ll need depend on which protection method you choose, but having the right supplies on hand before hail season hits makes installation much faster and safer. Think of this as an extension of your exterior maintenance toolkit, just like you keep durable lawn tools ready for yard work, you’ll want quality window protection materials accessible when storms are forecast.
- Temporary Protection Supplies: 3/4-inch exterior-grade plywood ($40-60 per 4×8 sheet), heavy-duty tarps with grommets ($15-40), bungee cords and tie-downs ($10-20), measuring tape, and quick-release fasteners ($8-15 per pack)
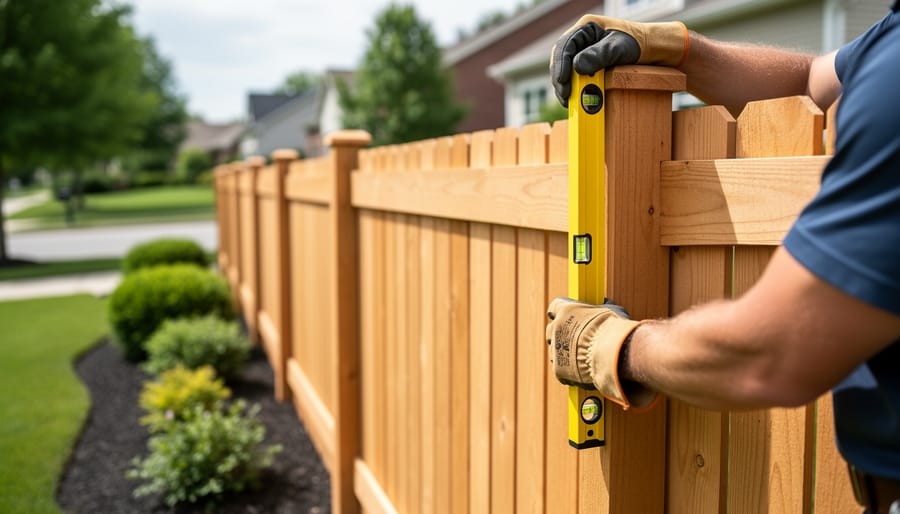
- Permanent Installation Tools: Cordless drill with masonry and wood bits ($80-150 for quality models), level ($15-30), pencil and straightedge, stainless steel screws and anchors ($12-25), silicone sealant ($6-10 per tube), and safety glasses
- Impact Film Application Kit: Window cleaning solution and microfiber cloths ($10), squeegee or application tool ($8-15), utility knife with fresh blades ($12-18), spray bottle ($3-5), and the film itself ($2-7 per square foot depending on grade)
- Inspection Equipment: Flashlight or headlamp ($15-35), ladder appropriate for your home’s height ($120-300 for fiberglass models), and a notebook for documenting window locations and protection status
- Safety Gear: Work gloves ($10-20), dust mask if cutting materials ($8 for a box), and a spotter if working above ground level
For eco-conscious homeowners, consider reclaimed or recycled plywood for temporary shields, which often costs 20-40% less than new materials while reducing waste. Several manufacturers now offer impact-resistant films with recycled content that perform comparably to conventional products. Budget $50-200 for basic temporary protection for an average home, or $500-2,000 for comprehensive semi-permanent solutions like quality film on all vulnerable windows. Storm panels and shutters run higher, typically $200-600 per window installed, while full window replacement with impact-resistant glass starts around $400-800 per standard-size window.
Safety Warnings and Precautions
Before you start any window protection project, take time to assess the risks, rushing into this work without proper precautions can lead to serious injury or property damage.
Working around windows presents unique hazards that differ from typical lawn maintenance tasks. Ladders must be placed on stable, level ground, not on freshly watered or uneven lawn areas where they can shift or sink. For upper-story windows, extension ladders should extend at least three feet above the window sill, and someone should stabilize the base while you work. If your home is taller than two stories or has difficult access points, professional installation isn’t just safer, it’s often faster and more effective.
Electrical safety deserves careful attention since many homes have outdoor outlets, landscape lighting, or security system wiring near windows. Before drilling mounting holes for permanent protection systems, locate any hidden wiring with a stud finder that includes wire detection. Keep power tools dry and use ground-fault circuit interrupter (GFCI) protected outlets when working outdoors.
Timing matters beyond just avoiding active storms. Don’t install protective measures in high winds, on icy surfaces, or when temperatures are below the minimum application range for adhesive products like window film, typically around 40°F. Early morning during lawn maintenance season offers the best conditions: cooler temperatures for physical work, calmer winds, and full daylight for visibility.
When removing old or damaged window protection materials, dispose of them responsibly. Broken glass, old film, and weathered plywood shouldn’t go in regular yard waste. Check with your local waste management facility about proper disposal or recycling options for construction materials, keeping your commitment to sustainable property care consistent across all maintenance activities.
Step-by-Step Window Protection Methods
Temporary Protection: Storm Covers and Plywood Shields
When you need quick, affordable protection and hail is on the horizon, temporary storm covers give you a reliable shield without permanent modifications to your home. This method works especially well for renters or homeowners who face hail threats only a few times per season.
Start by measuring each window’s exterior dimensions, adding four inches to both height and width for adequate overlap. For plywood shields, use half-inch exterior-grade plywood, it’s thick enough to absorb impact without being too heavy to handle. Cut your sheets to size with a circular saw, wearing safety glasses and gloves. Sand any rough edges to prevent splinters during installation.
Mark mounting points on your window frame or siding before the storm arrives. Pre-drill pilot holes to make installation faster when weather threatens. When hail is forecast, position each shield against the window and secure it with 2.5-inch deck screws through the pre-drilled holes into solid wood framing. Space screws every 12 inches around the perimeter for a tight seal.
For ground-floor windows, consider reusable plastic storm panels instead of plywood, they’re lighter, easier to store between seasons, and won’t block all light if you need to leave them up for extended periods. These snap into place with clip fasteners you mount once and reuse.
After the storm passes, remove screws carefully and store your covers flat in a garage or shed. Label each piece with its corresponding window location to speed up future installations. This system takes about 15 minutes per window to install once you’ve done the prep work.
Semi-Permanent Solution: Impact-Resistant Window Film
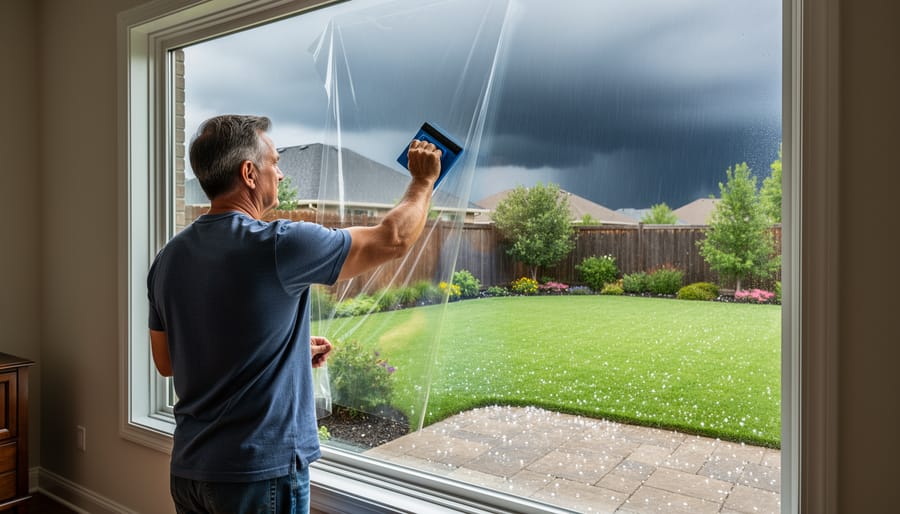
Impact-resistant window film offers a middle-ground solution that protects your windows year-round without the hassle of seasonal installation. This polyester-based film bonds directly to your glass, holding shattered fragments together if hail does strike and significantly reducing the force transfer that causes breakage.
Start by thoroughly cleaning your windows. Mix a few drops of dish soap with water in a spray bottle, then scrub away all dirt, debris, and residue with a lint-free cloth. Any particles left behind will create bubbles or weak spots in the film. Squeegee the glass completely dry and inspect it under good light, the surface needs to be spotless.
Measure each window pane carefully and cut your film to size, adding an extra inch on all sides for adjustment. You’ll trim the excess later. Fill your spray bottle with soapy water again; this slip solution lets you reposition the film during application.
Peel back about six inches of the protective liner and spray the exposed adhesive side generously. Spray the clean window glass as well. Position the film at the top of the pane, then gradually peel away more liner as you squeegee downward, pushing water and air bubbles toward the edges. Work from center to sides using firm, overlapping strokes.
Once positioned correctly, use a sharp utility knife to trim the excess film flush with the window frame. Squeegee the edges again to ensure solid adhesion.
The film requires 30 to 45 days to fully cure and bond with the glass. During this time, you can clean around windows normally while doing lawn work, just avoid direct pressure on the glass. Properly installed film lasts eight to twelve years before clarity begins to degrade, making it a cost-effective protection method that won’t interfere with your regular mowing, trimming, or landscaping activities.
Permanent Protection: Storm Panels and Shutters
Storm panels and shutters offer durable, long-lasting protection that becomes part of your home’s defense system. Unlike temporary measures you scramble to install when a storm approaches, these permanent solutions are always ready. I’ve seen homeowners in hail-prone areas reduce their window stress significantly once they invest in a quality storm protection system.
Start by measuring each window’s exterior frame precisely, adding two inches to height and width for proper overlap. Storm panels typically mount to tracks or brackets installed around the window perimeter. For track-mounted panels, mark drill points every 12 inches along the frame sides, ensuring they align perfectly with manufacturer specifications. Use corrosion-resistant anchors rated for your wall material, masonry requires different hardware than wood siding.
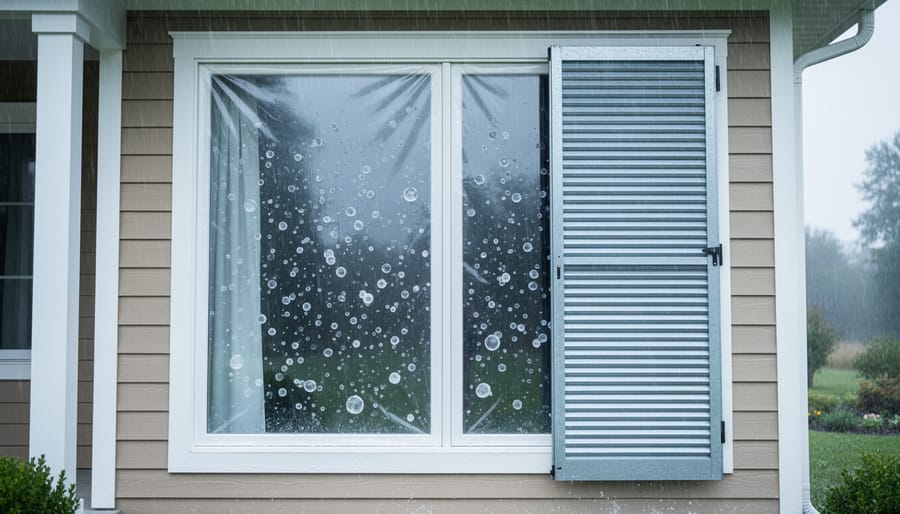
Accordion shutters fold neatly beside windows when not needed, then extend and lock across the glass when hail threatens. These work particularly well for ground-floor windows you access frequently from the yard. Colonial shutters and Bahama shutters add architectural character while providing protection. Bahama-style shutters, which prop open from the top, create attractive shade for plants below while remaining quickly deployable.
Choose colors and materials that complement your landscaping vision. Modern composite panels come in various finishes that coordinate with garden design themes. Position shutter hardware thoughtfully to avoid interference with window boxes, climbing plants, or irrigation spray patterns. Quality storm protection systems last 15-20 years with minimal maintenance, making them a worthwhile investment for serious hail risk areas.
Long-Term Upgrade: Impact-Resistant Glass Replacement
Replacing standard windows with impact-resistant glass makes financial sense if you live in a region with frequent hail storms or have already filed multiple hail damage claims. Impact-rated windows feature laminated glass with a polymer interlayer that holds shattered pieces together, preventing penetration and maintaining your home’s weather envelope.
This upgrade requires professional installation, typically two to four days for a full-home replacement, depending on window count. Installers remove existing windows, prepare openings, install new impact-rated units, and seal them properly. The process disrupts indoor spaces temporarily but delivers permanent protection.
Cost ranges from $400 to $1,200 per window installed, substantially more than temporary solutions. However, the investment pays off through eliminated recurring repair costs, reduced insurance premiums (many insurers offer 10-20% discounts), improved energy efficiency, and enhanced noise reduction. Calculate your break-even point by comparing five years of temporary protection costs against one-time impact glass installation.
For high-risk zones experiencing hail two or more times annually, impact-resistant windows often recoup costs within three to five years through avoided damage and insurance savings. They also increase home resale value and appeal to buyers seeking low-maintenance, storm-ready properties.
Integrating Window Protection into Your Lawn Maintenance Routine
Window protection works best when it becomes part of your regular yard care rhythm rather than a separate project. Each time you mow or trim, take thirty seconds to walk the perimeter and check your window protection. Look for loose edges on film installations, cracks in permanent shields, or mounting brackets that have worked free from the exterior wall.
Schedule protection checks alongside seasonal exterior maintenance tasks. Early spring is ideal for installing or inspecting window protection before peak hail season arrives. This timing lets you coordinate with other projects like gutter cleaning and trim painting, which means you only need to set up ladders and scaffolding once.
When mowing near windows with storm panels or shutters, keep your mower deck low enough to keep lawn tidy but watch for rocks or branches that could become projectiles. String trimmers are the real hazard here. Maintain a six-inch buffer zone around window protection hardware and mounting points. A pebble flung at 200 mph can crack protective film or dent aluminum panels.
Before you start yard work, remove yard debris from areas near windows. Sticks, stones, and loose mulch turn into ammunition when hit by mower blades or trimmer line. This simple step helps protect exterior surfaces beyond just the windows themselves.
Clean window protection systems while you’re already outside with the hose. Rinse film installations monthly to prevent mineral buildup that can reduce clarity. Spray down storm panels to remove pollen and grass clippings. This maintenance takes two minutes per window and extends the life of your protection investment considerably.
Verification and Testing Your Protection
Once you’ve installed your window protection, don’t assume it’s working correctly. A quick verification check now can prevent costly damage later when hail actually strikes.
Start with a visual inspection of every protected window. For film installations, look for air bubbles larger than a pinhead, lifting edges, or cloudy areas that suggest poor adhesion. Run your hand along the edges, they should feel smooth and completely sealed to the glass. With storm panels or shutters, check that mounting hardware is tight against the wall with no gaps where hail could slip through. Give each panel a firm push; it shouldn’t shift or rattle.
Test film adhesion by pressing firmly against the center of the protected glass. Quality film stays flat without creating ripples or separation. For removable covers, simulate wind pressure by pushing and pulling, they should hold position without loosening. Check that plywood shields overlap window frames by at least two inches on all sides.
Look for coverage gaps around window edges, especially at corners where protection meets at angles. Shine a flashlight behind panels at night to spot light leaks, which also admit hailstones.
Schedule checks every six weeks during spring and summer when you’re already outside for lawn work. After windstorms or when you notice loose mounting hardware, inspect immediately. Film usually lasts five to seven years before showing wear, while panel hardware needs annual tightening. Replace any protection showing cracks, tears, or deterioration before hail season peaks.
What to Do After a Hail Event
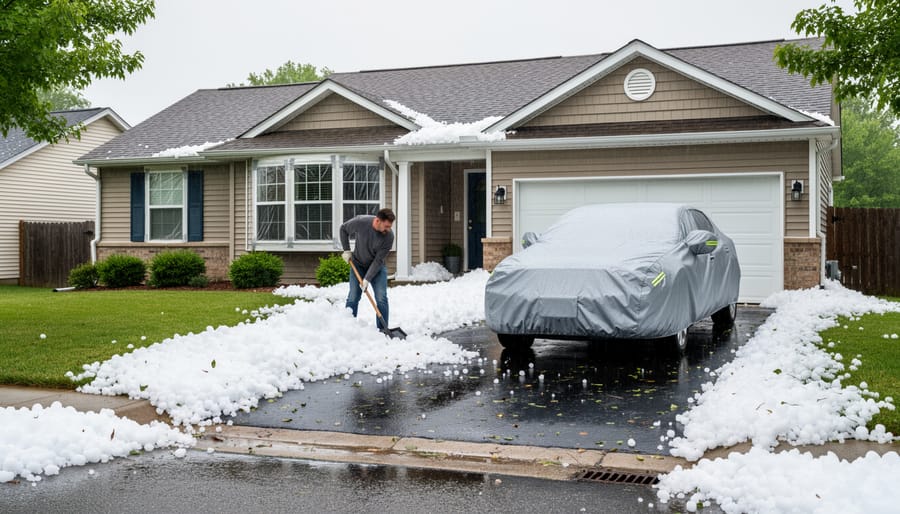
Once hail passes, wait at least 30 minutes after the last stones fall before heading outside. Ice on the ground creates slip hazards, and lingering storms can bring additional hail rounds.
Start your inspection from inside the house. Check each window for cracks, chips, or spider-web fracturing in the glass. Look for water seepage around frames and sills. Take clear, dated photos of every damaged window from multiple angles, these images are critical for insurance claims. Photograph the overall view and close-ups showing crack patterns or impact points.
Document the surrounding area next. Capture hail size by photographing stones next to a ruler or coin before they melt. Snap photos of damage to siding, gutters, and landscaping, since this establishes the storm’s severity for your claim.
For broken windows, tape heavy plastic sheeting over the opening from the inside to prevent rain intrusion. Secure all edges with duct tape. This is temporary, permanent repairs come later, but keeping water out protects your interior and prevents mold.
Contact your insurance company within 24 hours. Most policies require prompt notification, and adjusters schedule quickly after major storms.
When cleaning up hail debris, wear thick-soled shoes and work gloves. Rake gently around plants to avoid damaging stems already stressed by hail impact. Collect broken glass carefully using a broom and dustpan, never bare hands. Dispose of sharp materials in puncture-resistant containers.
Don’t pressure-wash windows immediately after hail, you might drive water into fresh cracks or dislodge loosened glass.
Common Questions About Hail Protection for Windows
Common Questions About Hail Protection for Windows
Homeowners often have similar concerns when considering hail protection for their windows, particularly those balancing this upgrade with ongoing lawn and property maintenance. Here are answers to the most common questions.
How much does window hail protection typically cost?
Protective film runs $5-15 per square foot installed, while temporary plywood covers cost $20-40 per window for materials. Permanent storm shutters range from $200-600 per window, and full impact-resistant glass replacement starts around $400-800 per window depending on size and quality.
Does window film really work against hail?
Quality impact-resistant film can prevent shattering from hail up to golf ball size by holding broken glass fragments together, though the glass itself may still crack. It’s most effective as part of a layered protection strategy rather than a standalone solution for severe hail zones.
Should I install protection myself or hire a professional?
Temporary covers and window film are manageable DIY projects for most homeowners comfortable with basic tools and ladder work. Storm shutters and impact-resistant glass replacement require professional installation to ensure proper mounting, seal integrity, and warranty coverage.
When’s the best time to install hail protection?
Install permanent or semi-permanent solutions during mild weather in early spring, before peak hail season but while you’re already planning exterior maintenance projects. Temporary measures can go up when severe weather is forecasted, ideally 24-48 hours before a storm to avoid rushing.
Will my homeowners insurance cover window protection costs?
Most policies don’t cover preventive measures, but some insurers in high-risk areas offer discounts for impact-resistant upgrades. Document your protection installations with photos and receipts, as they strengthen claims if damage does occur and may qualify you for premium reductions.
Can I still open my windows with protection installed?
Window film is permanent but doesn’t affect normal operation. Removable covers and storm panels must be taken down for ventilation, while retractable shutters allow you to open windows when protection isn’t needed, convenient during pleasant lawn maintenance days.
The protection method you choose depends on your specific climate risk, budget, and how integrated you want the solution to be with your home’s appearance and your regular maintenance routine. Start with the approach that feels manageable, knowing you can always upgrade or add layers of protection as your needs and experience grow.
Protecting your windows from hail doesn’t have to be an overwhelming project. As you’ve seen, you have options ranging from simple plywood covers you can install in under an hour to permanent upgrades like impact-resistant glass. The key is choosing a method that matches both your budget and your area’s hail risk, then integrating that protection into the seasonal maintenance routine you’re already following for your lawn and exterior spaces.
Starting with even one protection method makes a real difference. If budget is tight, begin with DIY storm covers for your most vulnerable windows, those facing the prevailing storm direction or on upper floors. If you’re in a high-risk zone and plan to stay in your home long-term, investing in impact-resistant film or replacement windows pays dividends in both damage prevention and energy efficiency.
Think of window protection as part of the same property care mindset that keeps your lawn healthy and your landscaping thriving. When you’re out mowing, trimming hedges, or checking irrigation systems during spring and summer, take those few extra minutes to inspect window seals, verify that protective film hasn’t peeled, or ensure storm panels are ready to deploy. This integrated approach to exterior maintenance protects your investment while supporting sustainable homeownership practices.
Your home’s value depends on every element working together. Protected windows mean fewer repairs, lower insurance claims, and a more resilient property that weathers storms as effectively as your well-maintained lawn handles summer heat.