Gather your socket wrench, tire iron, and jack before you begin—having the right tools within arm’s reach transforms what seems like an intimidating repair into a straightforward 30-minute task. Position your John Deere mower on level ground and engage the parking brake to prevent any rolling while you work, ensuring your safety throughout the process.
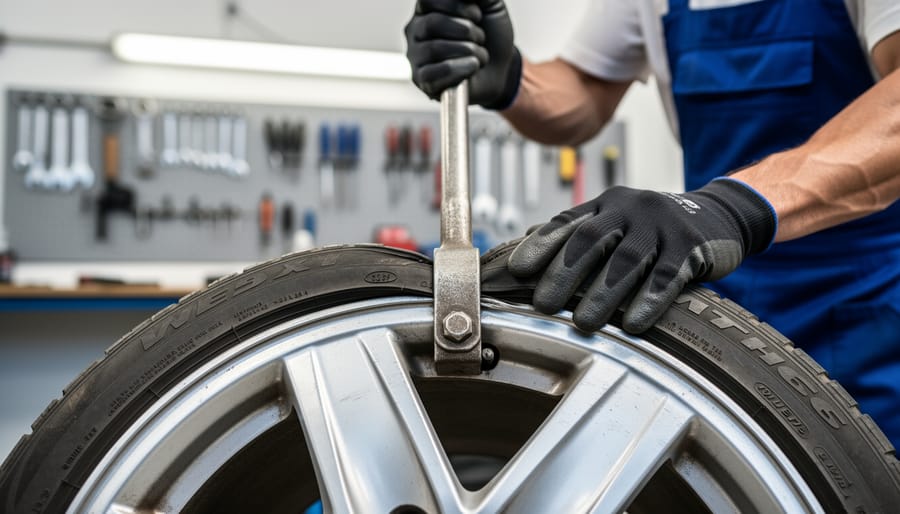
Remove the wheel by loosening the lug nuts in a star pattern rather than going around in a circle, which prevents warping the wheel mount and makes reinstallation much smoother. Once you’ve jacked up the mower and removed the wheel entirely, breaking the bead between the tire and rim requires firm pressure with tire irons on opposite sides—work gradually around the circumference rather than forcing one section, which protects both your tire and rim from unnecessary damage.
Installing your new tire becomes remarkably easier when you lubricate the bead with soapy water, allowing it to slide into position without excessive force that could tear the rubber or bend the rim. Inflate gradually while checking that the tire seats evenly on both sides, stopping at your John Deere’s recommended PSI listed in your owner’s manual or on the tire sidewall itself.
This repair saves you the cost and hassle of professional service while giving you valuable knowledge about your mower’s mechanics—understanding how your equipment works empowers you to maintain it more sustainably and catch potential problems before they become expensive emergencies. Whether you’re dealing with a puncture, worn tread, or simply upgrading to more durable tires for challenging terrain, mastering this essential skill keeps your lawn care schedule on track.
Why John Deere Tires Need Special Attention
Common John Deere Tire Sizes and Types
Understanding your tire options helps you make smart, sustainable choices that’ll keep your mower running smoothly for years. John Deere mowers typically use tire sizes marked with measurements like 15×6.00-6 or 20×8.00-8, where the first number indicates diameter, the second shows width, and the last denotes rim size.
Turf tires are the most common for residential mowers, featuring a gentle tread pattern that protects your grass from damage while providing excellent traction. They’re perfect for well-maintained lawns where you want to minimize soil compaction. All-terrain tires offer deeper, more aggressive treads that handle slopes, wet conditions, and rougher terrain beautifully, making them ideal for larger properties or commercial applications.
The pneumatic versus solid tire decision matters for both performance and sustainability. Pneumatic (air-filled) tires provide a cushioned ride that’s easier on your lawn and machinery, though they require occasional pressure checks. Solid tires eliminate flat tire worries entirely but transfer more vibration to the mower’s components. If you’re experiencing recurring tire troubles like those seen with John Deere 4100 problems or John Deere X540 issues, choosing the right tire type can prevent future headaches while supporting your equipment’s longevity.
Signs Your Tire Needs Changing vs. Repairing
Knowing whether to patch or replace your John Deere lawn mower tire can save you time and money while keeping your mower safe to operate. Start by checking the tread depth—if it’s worn down to less than 1/8 inch or shows uneven wear patterns, it’s time for a replacement. Healthy treads grip your lawn effectively and prevent slipping on slopes.
Inspect the sidewalls carefully for cracks, bulges, or dry rot. These structural issues can’t be repaired and indicate the tire has reached its end. Small punctures in the tread area, typically under 1/4 inch, are usually good candidates for patching, especially if the tire otherwise has plenty of life left. This sustainable approach extends your tire’s usefulness and keeps rubber out of landfills.
However, if you find multiple punctures, damage near the sidewall, or any tears rather than clean holes, replacement is your safest bet. A leaking valve stem is repairable, but if the tire keeps losing air after you’ve checked for obvious punctures, internal damage likely means you need a new tire. When in doubt, remember that your safety while mowing hills or uneven terrain depends on reliable tires—sometimes spending a bit more upfront prevents costly accidents down the road.

Essential Tools and Materials for the Job
Basic Tool Checklist
Before tackling your tire change, gather these essential tools to make the job smoother. You’ll need a floor jack or hydraulic lift capable of supporting your mower’s weight, though sturdy wooden blocks or ramps work in a pinch for smaller models. Keep tire irons or pry bars handy for stubborn tires, along with an adjustable wrench or socket set for removing wheel bolts. Don’t forget safety equipment like work gloves to protect your hands and safety glasses for debris protection.
If you’re improvising, a sturdy car jack can substitute for specialized equipment, and two flat-head screwdrivers can sometimes replace tire irons for loosening beads. A bucket or storage bin makes organizing bolts easier, preventing those frustrating moments when small parts disappear into the grass. Consider having a tire pressure gauge and pump ready for after installation. For eco-conscious gardeners, maintaining proper tire pressure not only extends tire life but also reduces fuel consumption and protects your lawn from unnecessary compaction, making this simple maintenance task part of your sustainable lawn care routine.

Choosing the Right Replacement Tire
Finding the right replacement tire for your John Deere mower doesn’t have to be overwhelming. Start by checking your owner’s manual or the sidewall of your current tire for specifications like size, ply rating, and tread pattern. John Deere dealerships offer genuine OEM tires designed specifically for your model, ensuring perfect fit and performance. However, you’ll often find quality aftermarket options at farm supply stores, tire shops, or online retailers at more budget-friendly prices.
When shopping, consider eco-conscious choices like tires made from recycled rubber or those designed for longer wear to reduce waste. Look for puncture-resistant models if you frequently mow over rough terrain. Turf-friendly tread patterns minimize lawn damage while providing excellent traction. I’ve had great success with brands that prioritize durability over the cheapest option—they last longer and save money in the long run. Always compare prices across multiple sources, and don’t forget to check customer reviews. A tire that performs well for other gardeners facing similar conditions will likely serve you well too.
Step-by-Step: Removing the Old Tire
Preparing Your Mower Safely
Before you dive into changing your John Deere mower tire, let’s talk safety—because a successful repair is one where you and your mower both come out unscathed. Trust me, taking a few extra minutes for these precautions beats an emergency room visit any day.
First things first: disconnect the spark plug wire. This simple step prevents accidental engine starts while you’re working. Just pull the boot off the spark plug and tuck it away from the plug itself. It’s a small action that makes a huge difference in preventing injuries.
Next, find a flat, level surface for your work area. Uneven ground can cause your mower to shift unexpectedly, creating dangerous situations. A garage floor or driveway works perfectly. If you’re working outdoors, ensure the ground is firm—soggy grass is a recipe for instability.
When it comes to lifting your mower, proper technique matters. For smaller push mowers, you can often tip them onto their side (check your manual for the correct side to prevent oil leaks). For riding mowers, you’ll need a quality floor jack and jack stands rated for the weight. Never rely solely on a jack for support—always use jack stands once the mower is elevated. Position wheel chocks behind the tires that remain on the ground for added security.
Breaking the Bead and Removing the Tire
Now for the part that intimidates many folks: breaking the tire bead. This is where the tire’s edge seals against the rim, and it can feel like they’ve become permanent friends over time. Don’t worry—with the right approach, you’ll have them separated in no time.
Start by laying the wheel flat on a stable surface. Apply a lubricant like dish soap mixed with water around the bead area—this helps everything slide apart more easily and is much friendlier to your lawn than petroleum-based products. For stubborn beads, try standing on the tire sidewall near the rim while someone else pulls upward on the opposite side. Your body weight provides the pressure needed to pop that seal.
If that doesn’t work, use a couple of sturdy tire irons or large flat-head screwdrivers. Insert them between the tire and rim at different points, working your way around gradually rather than forcing one spot. Patience is key here—rushing risks damaging the rim.
Once the bead breaks on one side, flip the wheel and repeat for the other side. With both beads loosened, you can work the tire over the rim edge. Start at one point and use your tire irons to lever the tire up and over, moving incrementally around the wheel. If the tire absolutely refuses to budge, a few drops of soapy water along the rim edge works wonders. Remember, sustainable lawn care includes preserving your equipment, so take your time to avoid unnecessary damage.
Inspecting the Rim and Valve Stem
Before mounting your new tire, take a moment to inspect the rim thoroughly—it’s a simple step that prevents frustrating problems down the road. Run your fingers along both the inner and outer edges of the rim, checking for any sharp bends, cracks, or significant rust. Minor surface rust can be cleaned with a wire brush, but deep rust pitting or visible cracks mean it’s time for a replacement rim. This isn’t just about tire longevity; a damaged rim can cause dangerous air leaks.
Next, examine the valve stem carefully. If it looks cracked, brittle, or has been in service for several years, replace it now rather than risk a slow leak after you’ve done all this work. Valve stems are inexpensive and easy to install, making this a practical preventive measure.
Clean the rim thoroughly with a rag and mild soap solution, removing any dirt, old sealant, or debris. This ensures proper tire seating and helps you spot any issues you might have missed initially. A clean surface also promotes better adhesion if you’re using tire sealant for added puncture protection—an eco-friendly way to extend tire life and reduce waste.
Installing Your New John Deere Tire
Mounting the Tire on the Rim
Now for the part that requires a bit of patience—getting that new tire back onto the rim. Don’t worry, you absolutely can do this without fancy tire-mounting machines. The key is working smart, not hard.
Start by applying a generous amount of soapy water solution around both beads of the tire. Mix a few drops of dish soap with water in a spray bottle or bucket—this eco-friendly lubricant makes everything slide into place much easier and won’t harm your lawn when you’re back to mowing. If you’re working with a tube-type tire, insert the tube partially inflated (just enough to give it shape) into the tire before mounting.
Begin by pushing one side of the tire bead over the rim edge. Work your way around gradually, using your hands and body weight rather than screwdrivers or other tools that might damage the tire or pinch the tube. If you encounter resistance, apply more soapy water and work from the opposite side.
Once the first bead is on, tackle the second side. This part’s trickier, but stay patient. Start opposite the valve stem and work toward it from both directions. For tube-type tires, make sure the tube isn’t twisted or pinched between the tire bead and rim—this is crucial for preventing future flats.
After mounting, inflate slowly and watch the tire carefully. You should see the beads “pop” into their proper seats on the rim. If the tire looks uneven, deflate slightly, adjust, and reinflate. This attention to proper seating ensures safe operation and extends your tire’s life, keeping your John Deere running reliably for years to come.
Inflating to Proper Pressure
Once you’ve got that new tire mounted, proper inflation is crucial for both your mower’s performance and your lawn’s health. Under-inflated tires can scalp your grass, leaving unsightly brown patches and stressing your turf, while over-inflation leads to a bouncy ride and uneven cutting patterns.
Most John Deere residential mowers require between 10-14 PSI in the rear tires and 14-20 PSI in the front, but always check your owner’s manual or the sidewall of your specific tire for exact specifications. Zero-turn models often need precise pressure on both sides to maintain straight tracking, so consistency matters.
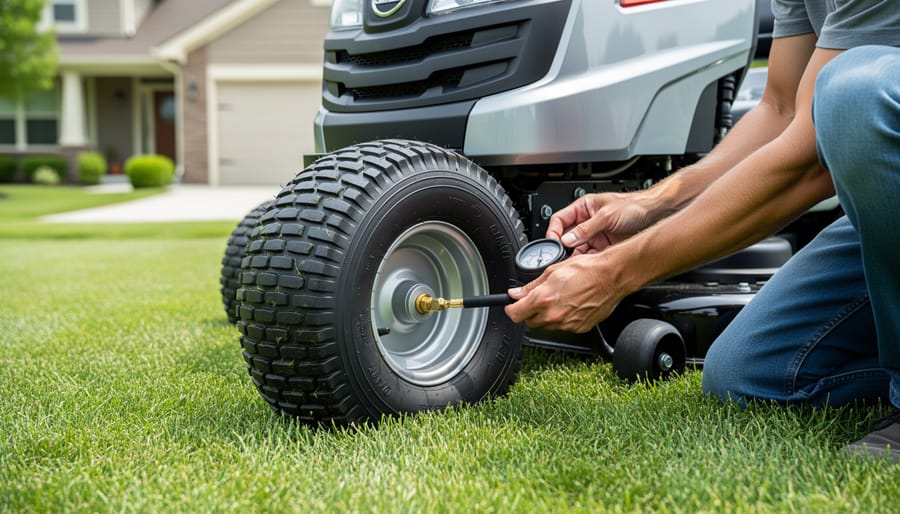
Use a reliable tire pressure gauge rather than eyeballing it. I learned this lesson the hard way when my mower kept veering left because one tire was 3 PSI lower than the other! Inflate gradually, checking pressure frequently. If you’re using a standard air compressor, work in short bursts to avoid over-inflation.
Having trouble getting a seal on a newly mounted tire? Try laying the wheel flat and bouncing it gently while adding air. This helps the bead seat properly against the rim. If the tire won’t hold air after inflation, you might have a faulty valve stem or improper bead seating that needs addressing before you tackle your next mowing session.
Reinstalling the Wheel Assembly
Now for the satisfying part – putting it all back together! Slide the wheel assembly back onto the axle, lining up any keyways or notches. If you’re working with a wheel that has a locking collar, make sure it’s properly seated before tightening.
Hand-thread the axle nut or bolt clockwise until it’s snug. Here’s where your torque wrench comes in handy. John Deere typically recommends 45-65 foot-pounds for most residential mower wheel nuts, but always check your owner’s manual for your specific model. Over-tightening can damage the axle or wheel bearing, while under-tightening creates a safety hazard.
Once torqued to spec, give the wheel a good spin to ensure it rotates freely without wobbling. Check that any dust caps or washers are reinstalled properly – these small parts prevent dirt from entering the bearing assembly, extending its life sustainably rather than requiring premature replacement.
Lower your mower off the jack stands and perform a final walk-around inspection. Before you fire up the engine, push the mower forward a few feet to verify everything feels solid. This quick safety check ensures you’ll be back to mowing with confidence, knowing your repair will last season after season.
Preventive Maintenance to Extend Tire Life
Regular Pressure Checks and Adjustments
Think of tire pressure like your morning coffee routine—consistency is key! I recommend checking your John Deere mower’s tire pressure monthly during mowing season, and before storing it for winter. It takes just five minutes but makes a world of difference.
Here’s something many folks don’t realize: tire pressure fluctuates with temperature changes. During spring and fall transitions, check more frequently as a 10-degree temperature drop can reduce pressure by 1-2 PSI. Properly inflated tires are part of your regular maintenance schedule and contribute significantly to both performance and sustainability.
The benefits extend beyond just smoother operation. Correct tire pressure improves fuel efficiency by reducing rolling resistance—meaning less gas consumption and lower emissions. Equally important, properly inflated tires distribute weight evenly, preventing soil compaction and those unsightly ruts that damage your lawn’s root system. Under-inflated tires can compact soil by up to 30 percent, restricting oxygen and water flow to grass roots. By maintaining proper pressure, you’re not just protecting your investment—you’re nurturing healthier, more resilient turf.
Storage and Seasonal Care
Proper off-season storage can significantly extend your tire lifespan and prevent frustrating spring surprises. When storing your John Deere mower for winter, park it on plywood sheets or cardboard rather than directly on concrete, which can wick moisture and accelerate rubber deterioration. If possible, slightly overinflate tires by 2-3 PSI to compensate for natural air loss during storage.
UV rays are a tire’s silent enemy, causing cracking and premature aging. Store your mower in a garage or shed away from direct sunlight. If outdoor storage is your only option, invest in a quality UV-resistant cover that breathes to prevent moisture buildup underneath.
To prevent flat-spotting during long storage periods, move your mower slightly every 4-6 weeks if accessible. This simple practice redistributes weight and maintains tire shape. Before your first spring mowing, inspect tires thoroughly for cracks, check air pressure, and clean off any debris. A little winter care means reliable performance when growing season arrives, keeping both your mower and your sustainable lawn care routine running smoothly.
Mowing Habits That Protect Your Tires
Your mowing technique makes a bigger difference than you might think when it comes to tire longevity. Start by avoiding sharp turns at full speed, which twist tires and stress sidewalls unnecessarily. Instead, slow down before turning and make wider arcs around flower beds and trees. This gentle approach reduces wear while making your lawn look professionally manicured with smooth, sweeping stripes.
Navigate obstacles thoughtfully by planning your route before you start. Rather than repeatedly backing up and spinning tires over the same spots, map out an efficient pattern that minimizes direction changes. When crossing driveways or pathways, approach at right angles instead of sharp diagonals to distribute weight evenly across the tire surface.
Consider alternating your mowing pattern each week, switching between vertical, horizontal, and diagonal passes. This practice prevents ruts from forming in both your lawn and tire treads, extending tire life while encouraging healthier grass growth. Your tires and your lawn will both thank you for this sustainable habit.
Troubleshooting Common Tire Change Problems
When the Bead Won’t Seat Properly
Sometimes, even after inflating, your new tire just won’t pop into place against the rim properly. Don’t worry—this happens to the best of us, and there are safe ways to handle it.
First, try the soap and water method. Mix dish soap with water and thoroughly coat the bead area while adding air in short bursts. The lubrication often helps the tire slide into position. You can also try removing the valve core temporarily to allow faster air entry, which creates the quick pressure needed to seat stubborn beads.
Now, you’ve probably heard about the starting fluid method—spraying a small amount of ether-based fluid inside the tire and igniting it to create an explosive expansion. While this technique works, I’ll be honest: it’s risky. If you’re not experienced with this method, the explosive force can cause serious injury or damage your tire and rim. It’s definitely not the most environmentally friendly approach either.
If you’ve tried gentle methods without success, there’s no shame in taking your mower to a professional tire shop. They have specialized equipment designed for seating beads safely and efficiently. Sometimes the most sustainable choice is letting experts handle tricky situations rather than potentially damaging equipment or risking injury.
Dealing with Persistent Air Leaks
After installing your new John Deere tire, discovering a persistent air leak can be frustrating, but most leaks are fixable with a little detective work. Start by inflating the tire to the recommended pressure and listening carefully for hissing sounds. If nothing’s obvious, mix a small amount of dish soap with water in a spray bottle and apply it liberally around the valve stem, bead area where the tire meets the rim, and the tire surface itself. Bubbles will reveal exactly where air is escaping.
Valve stem issues are surprisingly common culprits. Even a slightly loose valve core can cause slow leaks. Use a valve core tool to tighten it, or replace the entire valve stem if it’s damaged or corroded. This inexpensive fix takes just minutes and saves countless hours of reinflating.
Rim seal problems occur when the tire bead doesn’t seat properly against the rim. Deflate the tire completely, apply a bead sealant around the rim edge, then reinflate. Sometimes breaking the bead loose and reseating it with soapy water as lubricant does the trick. For persistent leaks, check that the rim itself isn’t bent or corroded, which prevents proper sealing. These practical solutions keep your mower running sustainably without unnecessary tire replacements.
Congratulations! You’ve just learned a valuable skill that will save you money and extend the life of your John Deere mower. Changing your own tires might have seemed intimidating at first, but with the right tools and a little patience, it’s absolutely manageable. By taking this DIY approach, you’re not only keeping cash in your pocket but also reducing waste by repairing rather than replacing equipment unnecessarily. That’s a win for both your wallet and the environment.
Remember, every expert gardener started as a beginner, and hands-on maintenance like this builds confidence for tackling future repairs. Your mower is an investment in your lawn’s health, and knowing how to care for it properly ensures years of reliable service.
We’d love to hear how your tire change went! Did you discover any helpful tips along the way? Run into unexpected challenges? Share your experience in the comments below and help fellow lawn care enthusiasts learn from your journey. Your questions and insights create a stronger community for everyone.