You can lower your lawn mower’s cutting height beyond factory settings by adjusting the deck position, replacing blades with low-profile designs, or modifying anti-scalp wheels. Most mowers offer a range of cutting heights from about 1 to 4 inches straight from the manufacturer, but achieving that pristine half-inch fairway look requires deliberate mechanical changes and, often, specific replacement parts.
The frustration is real when you’ve got your mower set to its lowest factory setting and the grass still isn’t as tight as you want. Many homeowners assume they’re stuck with what came out of the box, but the truth is that cutting height is one of the most customizable aspects of any push or riding mower. The trick lies in understanding which components control deck clearance and knowing which parts you can safely adjust or replace without damaging your mower or your lawn.
Before you grab your wrench, though, you need to balance ambition with lawn health. Cutting grass below the recommended height for your turf type stresses the plants, invites weeds, and can leave bare patches that take months to recover. Cool-season grasses like fescue and bluegrass tolerate cuts down to about 1.5 inches, while warm-season varieties like Bermuda can handle the ultra-low half-inch cuts you see on golf courses. Know your grass species before you start turning bolts, because a scalped lawn is far harder to fix than a mower deck is to lower.
The methods that follow range from simple ten-minute adjustments to weekend projects involving part swaps and precision measurements. Each step builds your control over cutting height while keeping both your equipment and your lawn in top shape.
Understanding Your Mower’s Height Adjustment System
Types of Height Adjustment Mechanisms
Most lawn mowers use one of three basic height-adjustment systems, and knowing which one you have determines both how you lower the deck and which parts you might need to replace. The simplest way to identify your system is to consult your owner’s manual or a mower diagram though a quick visual inspection usually reveals the mechanism.
- Single-lever deck adjustment: One lever near the operator’s position raises or lowers the entire deck via a cable or linkage system; look for a lever with multiple height notches
- Individual wheel height adjustment: Each wheel has its own lever or pin-and-hole system, requiring you to adjust all four corners separately; check beside each wheel for a height-adjustment lever
- Spacer and bracket systems: The deck height is fixed by metal spacers or brackets between the deck and chassis; these require tools to remove and reposition
Single-lever systems are the most common on modern walk-behind and riding mowers because they’re convenient, but they rely on cables and pivot points that can corrode or bind over time. Individual wheel adjusters give you more control over deck leveling but take longer to set, and they’re held in place by spring-loaded pins or clips that wear out. Spacer-based systems are typically found on commercial mowers and older models, they’re rock-solid once set but require wrenches and sometimes new hardware to change heights.
The parts that control each system differ significantly. Single-lever setups depend on the adjustment cable, pivot brackets, and the notched height selector, all of which can limit your lowest setting if damaged. Wheel-adjustment mechanisms use height pins, adjustment levers, and mounting brackets. Spacer systems require the physical spacers themselves, plus bolts and washers. Understanding which parts govern your mower’s range helps you troubleshoot limitations and choose the right replacements if you need to go lower than factory settings allow.
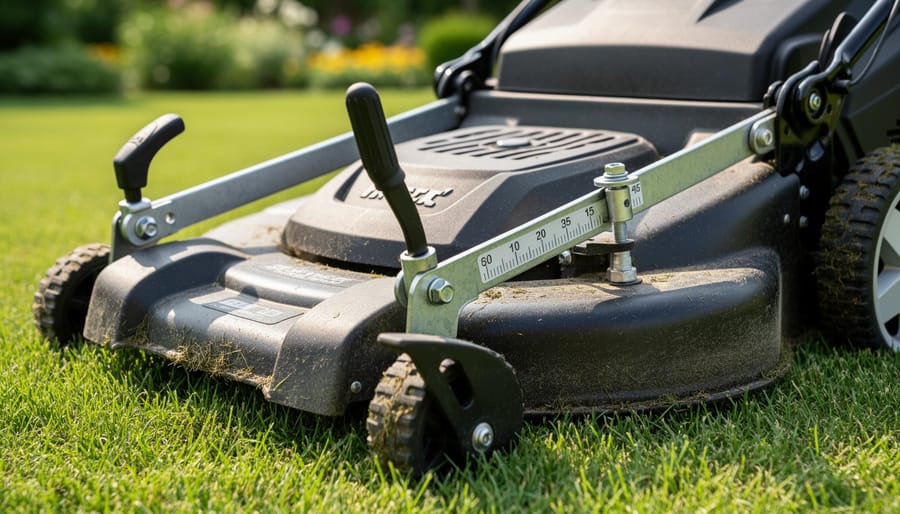
Identifying Your Mower’s Lowest Factory Setting
Before you start adjusting anything, you need to know what your mower can actually do straight from the factory. Every lawn mower has a minimum cutting height designed by the manufacturer, and this number matters more than you might think.
Check your owner’s manual first. Look for a section on “cutting height specifications” or “deck adjustment range.” You’ll typically see something like “cutting height range: 1.0″ to 4.0″.” That lowest number is your baseline, anything lower requires modifications.
If you’ve lost the manual, don’t worry. Most mower decks have the height range stamped directly on the adjustment lever or printed on a decal near the wheels. Look for numbers or height indicators marked in inches. Some show just notch positions (like 1-6), but better models label actual cutting heights at each setting.
You can also find specifications on the manufacturer’s website by searching your model number, which is usually stamped on a metal plate under the seat or on the deck housing.
Before moving forward, set your mower to what appears to be its lowest position and measure the actual blade height from a hard surface. This confirms whether your adjusters are working correctly and gives you a starting point for any modifications.
What You’ll Need: Tools and Replacement Parts
Before you start adjusting your mower, gather everything you’ll need. Having the right tools and parts on hand saves frustration and multiple trips to the hardware store. The exact items depend on which adjustment method you’ll use, but here’s what to prepare:
- Basic tools: Socket wrench set, adjustable wrench, screwdrivers (flathead and Phillips), measuring tape or ruler, and work gloves
- Safety equipment: Safety glasses, sturdy closed-toe shoes, and a spark plug removal tool to prevent accidental starts
- Cleaning supplies: Wire brush, degreaser, and shop rags for clearing debris from adjustment mechanisms
- Optional replacement parts: Low-lift or thin-kerf blades, replacement wheel spacers, anti-scalp wheel kits, or aftermarket deck lowering brackets
For basic factory adjustments, you’ll only need the tools and cleaning supplies. Most stuck adjustment levers free up with a good cleaning and some penetrating oil. If you’re planning to replace blades or modify wheel positions, measure your current setup first. Knowing your existing blade position and current cutting height helps you select compatible parts and verify improvements later.
When choosing replacement parts, prioritize quality over cheap alternatives. A well-made blade stays sharp longer and produces cleaner cuts, reducing stress on your grass. Look for blades from your mower’s manufacturer or reputable aftermarket brands with good reviews. Avoid ultra-thin blades that bend easily or mystery-metal imports with no specification markings.
Consider sustainability too. Sharpening and reusing quality blades beats constantly buying disposable ones. Stainless steel or hardened carbon steel options last years with proper maintenance. Remember that dropping below the perfect mower height for your grass type can create more lawn problems than it solves, regardless of how good your parts are.
Safety Warnings and Pre-Work Considerations
Before you start lowering your mower, you need to understand the real risks involved, both to yourself and your lawn. Working on mower decks means handling sharp blades in tight spaces, and one slip can cause serious injury. Always disconnect the spark plug wire before you touch anything near the blade or deck. This single step prevents accidental starts that send thousands of people to the emergency room every year. Wear heavy gloves when handling blades, and never work underneath a raised deck without proper support, jack stands designed for lawn equipment, not just a block of wood that can shift.
The bigger question is whether you should lower your mower at all. Cutting grass shorter than three inches stresses most cool-season varieties and exposes soil to sunlight, encouraging weed germination and increasing water evaporation. You’re essentially forcing your lawn to work harder to survive. Scalping, when the blade hits soil or cuts into the crown of the grass plant, can create dead patches that take weeks to recover. This happens more easily on uneven terrain once you’ve lowered your deck beyond the factory safety margin.
Consider your lawn’s actual needs before chasing that golf-course aesthetic. Taller grass develops deeper roots, crowds out weeds naturally, and requires less water, all more sustainable than a putting-green cut that demands constant irrigation and chemical intervention. Check your grass type’s recommended mowing height first. If you’re already within that range, lowering further will likely create more problems than it solves, no matter how carefully you’ve reviewed basic mower safety features and adjustment techniques.
How to Lower Your Mower: Step-by-Step Methods

Method 1: Maximizing Factory Deck Adjustment
Before you buy replacement parts or modify anything, start with your mower’s built-in adjustment system. Most manufacturers design their decks to reach genuinely low cutting heights, you just need to access and properly use those settings. This method costs nothing and takes about 15 minutes, yet many people skip it and jump straight to buying new blades.
Here’s how to get your mower deck to its absolute lowest factory position:
- Park your mower on a flat, level surface and engage the parking brake. For push mowers, disconnect the spark plug wire to prevent accidental starts. Wait at least 10 minutes for the engine and blade to cool completely.
- Locate your adjustment mechanism. Single-lever systems typically sit near the right wheel or under the operator’s station. Individual wheel adjusters are found at each wheel mounting point. Check your owner’s manual if you’re unsure which system you have.
- Clean around all adjustment points with a stiff brush or rag. Years of grass clippings, dirt, and moisture create a cement-like buildup that prevents mechanisms from moving through their full range. Spray penetrating oil on any pivot points or threaded adjusters, then wipe away excess.
- Move the adjustment lever or dial to the lowest marked setting, usually labeled with a number (1 or 0) or a measurement in inches. For individual wheel systems, adjust each wheel to the same lowest notch. You may need to press a release button or lift against spring tension.
- Verify that all four corners of the deck sit at equal heights by measuring from a flat surface to the blade tip at each corner (with the blade positioned front-to-back). Uneven settings cause scalping on one side and ragged cuts on the other.
If your adjustment lever feels stuck or won’t move to the lowest position, don’t force it. Apply more penetrating oil, wait 20 minutes, then work the lever back and forth through partial movements until it breaks free. Corroded cables sometimes need replacement, that’s the one part you might actually need before attempting lower settings. Test your newly adjusted height on a small lawn section before mowing the entire yard.
Method 2: Installing Low-Lift or Thin-Kerf Blades
Swapping in a low-lift or thin-kerf blade is one of the most effective ways to drop your cutting height without adjusting a single deck lever. Standard mower blades typically have a pronounced lift angle on the trailing edge, that upward curve creates airflow to stand grass up before cutting and lift clippings into the discharge chute. Low-lift blades flatten that angle considerably, which means the blade sits closer to the ground at the same deck setting. Similarly, thin-kerf blades reduce the overall thickness of the cutting edge, shaving off another eighth to quarter inch. Combined, you can gain a half-inch or more of lowering, enough to transform a mediocre suburban cut into something approaching fairway quality.
Before you start, verify your mower model’s blade bolt size and center-hole diameter. Most residential mowers use a 5/8-inch center hole with either a 9/16-inch or 15/16-inch head bolt, but confirm this in your owner’s manual or by measuring the existing blade. You’ll also want to note whether your current blade has a star-pattern center (common on newer models) or a round hole. Mismatched center-hole designs won’t mount securely, which is a safety hazard at 3,000 RPM.
Here’s the replacement process:
- Disconnect the spark plug wire and secure it away from the plug to prevent accidental starts.
- Tip the mower on its side with the air filter and carburetor facing upward to avoid oil flooding the cylinder.
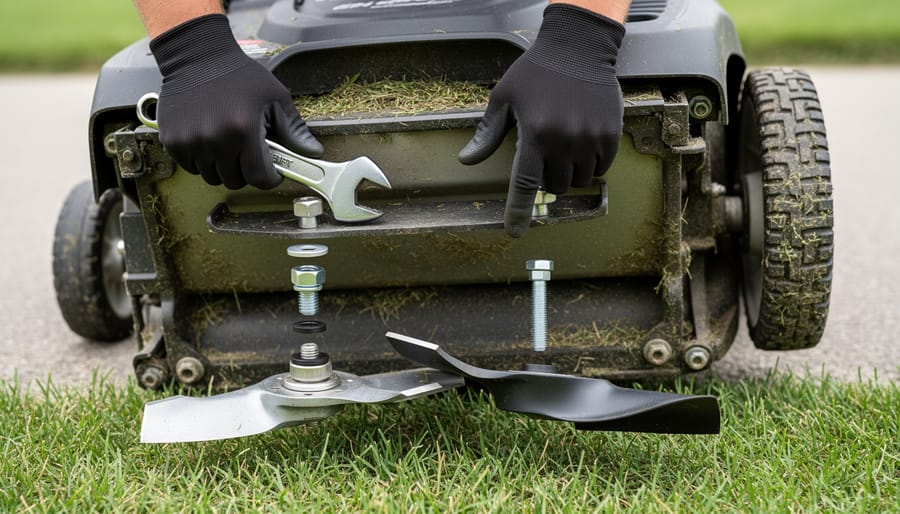
- Use a block of wood to wedge the blade in place, then loosen the retaining bolt with a socket wrench (turn counter-clockwise). Remove the old blade and any washers or spacers beneath it.
- Measure the old blade’s thickness at the cutting edge (typically 0.185 to 0.250 inches) and note the lift angle. Compare this to your replacement blade specs.
- Select a low-lift blade designed for your mower model, look for manufacturer part numbers or universal blades with confirmed fitment. Oregon and Rotary both make reliable aftermarket options that prioritize durability.
- Install the new blade with cutting edges facing the direction of rotation (usually toward the discharge side), replace all washers in their original order, and torque the bolt to manufacturer specs, commonly 35 to 50 foot-pounds for residential mowers. Hand-tight plus a quarter turn isn’t enough; under-torqued blades can come loose mid-operation.
After installation, reconnect the spark plug and make a test pass over a small section of lawn. Low-lift blades discharge clippings with less force, so you might notice them dropping closer to the mower rather than shooting out the side. That’s normal and actually reduces the mess if you’re bagging or mulching. If you see uneven cutting or excessive vibration, double-check that the blade is balanced and that you didn’t accidentally install it upside down, a surprisingly common mistake that ruins the cut quality.
One sustainability note: low-lift blades last just as long as standard blades when properly maintained, so this isn’t a disposable modification. Sharpen them at the same intervals you would any mower blade, every 20 to 25 hours of use, and they’ll keep delivering that lower cut for multiple seasons.
Method 3: Modifying Wheel Spacers and Anti-Scalp Wheels
This method ventures into modification territory and isn’t for everyone. It’s most appropriate when you’ve exhausted factory adjustments and blade swaps but still need another quarter-inch or so of height reduction. Modifying wheel spacers means physically altering how far your deck sits from the ground, effectively bypassing manufacturer limits. Before you start, understand that you’re accepting more scalping risk and potentially voiding your warranty. This approach works best on relatively flat lawns where precise height control matters more than forgiving terrain tolerance.
The process requires careful measurement and incremental testing:
- Locate all wheel spacers on your mower deck. These are typically thick washers or plastic rings between the wheel mount and the deck housing, visible once you remove the wheel itself.
- Measure the current spacer thickness with calipers or a ruler. Note which wheels have spacers and their exact dimensions, some mowers use different thicknesses front-to-back.
- Remove spacers entirely or replace them with thinner alternatives. Start by removing just the rear spacers first, which lowers the back of the deck and creates a slight forward pitch.
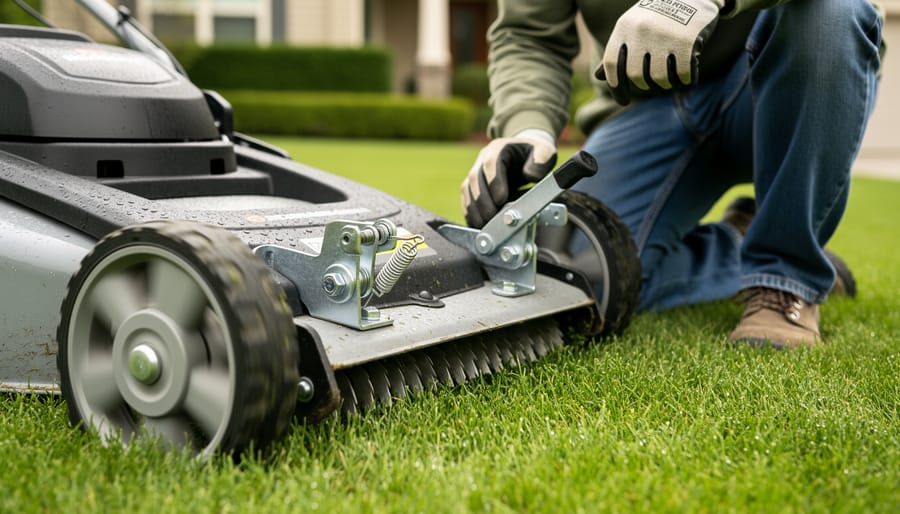
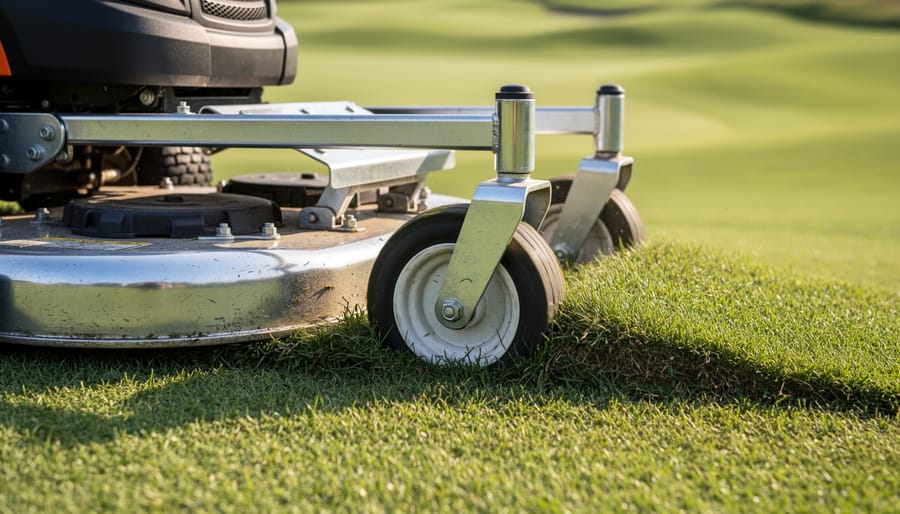
- Adjust anti-scalp wheels downward to compensate for the deck’s new lower position. These small wheels prevent the deck from digging into uneven ground, and they need repositioning or you’ll scrape on every bump.
- Test on a small, level section of lawn before mowing the entire yard. Check for any contact between the deck and ground, particularly when turning or crossing slight rises.
If you hear scraping or notice gouged turf, you’ve gone too low. Reinstall one spacer at a time until the deck clears ground obstacles comfortably. Some mowers simply can’t go lower without constant scalping, respect those limits rather than forcing a height your terrain can’t support. This modification demands ongoing vigilance during mowing and isn’t worth the lawn damage if your yard has significant contours.
Method 4: Aftermarket Deck Modification Kits (For Enthusiasts)
For serious lawn enthusiasts chasing golf-course precision, aftermarket deck lowering kits offer a permanent solution beyond simple blade swaps or spacer adjustments. These specialized kits, available for popular zero-turn and riding mower brands like John Deere, Toro, and Hustler, typically include reinforced deck brackets, custom-height spindle assemblies, and modified anti-scalp wheels designed to safely lower cutting height by an additional half-inch to full inch.
Installation complexity varies dramatically. Basic kits might require only wrench work and an afternoon, while comprehensive systems demand welding skills, precise alignment measurements, and sometimes cutting into the deck itself. If you’re not comfortable with significant mechanical modifications, professional installation runs $200-500 depending on your region and kit complexity.
Before committing, consider the environmental trade-offs. Lower cuts mean more frequent mowing, increased fuel consumption, and greater lawn stress during heat or drought. You’ll also remove spacers and components designed to prevent ground contact, raising your risk of soil compaction and root damage. These kits work best on meticulously maintained, well-irrigated lawns where you can monitor grass health closely, not typical residential yards with uneven terrain or variable watering schedules.
Selecting the Right Parts for Lower Cutting Heights
Choosing Low-Lift vs. High-Lift Blades
The blade profile you choose directly affects your effective cutting height, even if the deck position stays the same. High-lift blades feature aggressive upward curves on their edges, creating strong airflow that lifts grass stems taller before cutting, perfect for tall or wet grass, but this lifting action can add up to half an inch to your actual cut. Low-lift blades have minimal or no upward curve, slicing grass closer to where it naturally sits, which translates to a genuinely lower finished height at the same deck setting.
For a manicured, golf-green look, low-lift blades are your best choice. They excel on already-maintained lawns where grass is dry and relatively short. The reduced lift means less suction and airflow, so clippings won’t discharge as forcefully, you’ll notice this especially in thick spring growth. If you bag clippings or have a heavy-duty collection system, high-lift blades fill bags faster and cleaner, but you sacrifice that ultra-low cut.
Consider your grass type too. Fine fescues and bent grass handle low-lift blades well because they’re naturally thin-bladed. Thick St. Augustine or Bermuda in humid climates may clump under low-lift blades without adequate airflow. A sustainable middle ground is medium-lift blades, which reduce cutting height by about a quarter-inch compared to high-lift while maintaining decent discharge.
Most importantly, match blade choice to current conditions, not aspirations. You can switch blade types seasonally, low-lift in summer’s dry spells, high-lift during spring’s growth surge.
Wheel and Spacer Compatibility
When hunting for replacement spacers or wheel components to lower your mower, compatibility is everything. Start by noting your mower’s exact model and serial number, these appear on a metal tag attached to the deck or engine housing. Cross-reference these numbers against parts diagrams in your owner’s manual or the manufacturer’s online parts catalog. Most lawn mower brands maintain searchable databases that show which wheel assemblies and spacers fit your specific model year.
OEM (Original Equipment Manufacturer) parts guarantee fit but cost more. Aftermarket alternatives run 30-50% cheaper yet vary wildly in quality. When shopping aftermarket, check that the product listing explicitly states compatibility with your mower model, generic “universal fit” parts rarely work as advertised. Read customer reviews for feedback on actual fitment, not just price.
Quality red flags include lightweight plastic spacers (which crack under load), wheels with thin sidewalls, and ball bearings that feel gritty when spun. Steel or heavy-duty polymer spacers outlast cheap alternatives by years. For wheels, look for sealed bearings and thick tread profiles that won’t compress unevenly over time. Sustainable choice: prioritize durable components that reduce replacement frequency rather than disposable bargain parts.
Testing and Verifying Your New Cutting Height
After you’ve made your adjustments, resist the urge to mow the entire lawn immediately. Proper verification prevents you from scalping your yard or discovering uneven cutting only after you’ve mowed half the grass. Start by parking the mower on a flat, level surface like a driveway or garage floor. Turn off the engine and disconnect the spark plug for safety.
Grab a ruler or tape measure and position it vertically from the ground to the bottom edge of the blade’s cutting surface. Measure at multiple points across the deck, front, center, and rear, to check for consistency. Most mowers should show less than 1/8-inch variation from side to side. If one side sits noticeably higher, you may have adjusted wheels unevenly or encountered a bent deck issue that needs addressing before you proceed.
Once you’re satisfied with the measurements, reconnect the spark plug and perform a verification sequence:
- Measure blade height with a ruler on a flat surface at three points across the deck to confirm even adjustment
- Perform a small test cut on an inconspicuous area of your lawn, mowing just a 10-by-10-foot section
- Inspect the test area for scalping (exposed soil), uneven grass height, or missed patches that indicate deck problems
- Adjust height up by one notch if you see bare spots, or fine-tune individual wheels if cutting appears uneven
- Monitor the test area’s grass health over the next week, watching for browning, stress, or slow recovery
Pay special attention to how the grass responds during that first week. Healthy grass should remain green and recover quickly. If you notice widespread browning or the lawn looks stressed, you’ve likely cut too low for your grass type and soil conditions. Raise the deck back up a notch and let the lawn recover before trying again. The goal is a clean, even cut that leaves grass vibrant, not struggling to survive.
Troubleshooting Common Problems
After lowering your mower, you might encounter a few hiccups. Most are easy to fix once you understand what’s causing them, and recognizing these issues early prevents long-term damage to both your lawn and equipment.
Scalping happens when the deck bottoms out on uneven terrain, shearing grass down to bare soil. If you’re seeing brown patches after mowing, you’ve likely cut too low for your yard’s topography. The fix is raising the deck by a quarter-inch increment until scalping stops, or addressing the root cause by leveling low spots with topsoil and overseeding bare areas.
Uneven cutting with one side lower than the other usually means your deck isn’t level. Park on flat pavement, measure from the blade tips to the ground on both sides, and adjust the deck hangers or wheel heights until measurements match within an eighth of an inch. On single-lever systems, check that the adjustment mechanism engages fully on both sides.
Blade-to-deck contact produces a grinding or scraping sound and indicates you’ve gone too low or installed the wrong blade. Stop immediately. Verify you’re using the correct blade length and thickness for your model, and confirm all spacers are properly seated. If the blade still contacts the deck at the lowest setting, you’ve reached the absolute limit and need to raise the height.
Excessive grass stress shows up as widespread browning, thinning turf, or increased weed invasion. Here’s a quick troubleshooting guide:
- Scalping on uneven ground: raise deck height one notch or level lawn surface before continuing low cuts
- Blade hitting deck: check blade installation, spacer placement, and verify correct blade model for your mower
- Uneven cut side-to-side: measure and adjust deck level, ensuring both sides are equal height from ground
- Grass browning after mowing: you’ve cut below the grass’s healthy range; immediately raise height and water deeply
Remember that warm-season grasses tolerate lower heights better than cool-season varieties. If your lawn shows ongoing stress after raising the deck slightly, you may need to abandon the lower setting entirely and let the grass recover for several weeks. Sometimes the healthiest lawn isn’t the shortest one, and recognizing that limit is part of responsible lawn care. When in doubt, raise it up.
Next Steps: Maintaining Your Lower-Cut Setup
Once you’ve lowered your mower, the real work begins, keeping it cutting cleanly at that reduced height without wrecking your lawn or your equipment.
Plan to sharpen mower blades every 20-25 hours of mowing instead of the usual 40. Lower cuts mean blades hit soil, stones, and debris more often, dulling edges faster. A dull blade tears grass instead of slicing it, leaving brown tips that stress your turf and invite disease. Keep a spare blade on hand so you can swap while one’s being sharpened, it’s faster than waiting and lets you maintain your mowing schedule.
Adjust your cutting height seasonally. Raise it during hot summer months when grass struggles with heat stress, then drop back down in spring and fall when cool-season grasses thrive. This flexibility protects root systems year-round and prevents the chronic scalping that turns lawns patchy.
Watch your grass closely. If you see widespread browning, thinning patches, or weeds taking over, you’ve cut too low for your soil conditions or grass type. Raise the deck a notch and give your lawn two weeks to recover before reassessing.
Water deeply but less frequently, low-cut grass needs stronger roots to survive. Skip the daily sprinkling; soak once or twice weekly instead, encouraging roots to dig deeper rather than sitting shallow where mower damage happens.
Achieving a lower cutting height on your lawn mower isn’t just about turning a lever or swapping a blade, it’s about understanding your equipment and making informed choices about the parts you use. Whether you’ve adjusted your deck to its factory minimum, installed low-lift blades, or modified wheel spacers, the quality of your components directly affects both your results and your lawn’s health.
Take it slow. Lower your mower incrementally, give your grass time to adjust, and watch for signs of stress like browning or thinning patches. Remember that a golf-course-style lawn requires golf-course-style maintenance, and cutting too low can do more harm than good, especially during hot or dry periods.
Invest in quality replacement parts when needed. Cheap blades dull quickly and tear grass instead of cutting cleanly. Poorly manufactured spacers can throw your deck alignment off, leading to scalping and uneven results.
Most importantly, don’t sacrifice your lawn’s long-term health for a temporarily pristine appearance. A slightly higher cut often means stronger roots, better drought resistance, and a thicker, healthier lawn that naturally crowds out weeds. Sometimes the best cutting height isn’t the lowest one, it’s the one that works with your grass, not against it.
Frequently Asked Questions
What’s the lowest safe cutting height for my lawn?
For most cool-season grasses like Kentucky bluegrass and fescue, 2.5 to 3 inches is ideal; warm-season varieties like Bermuda can handle 1 to 2 inches. Cutting below your grass type’s recommended minimum stresses the plants, weakens roots, and invites weeds and disease.
Will lowering my mower damage the machine?
Lowering within factory specifications won’t harm your mower, but extreme modifications like removing too many spacers can cause the deck to scrape uneven ground, damage blade spindles, or strain the engine. Always test on level terrain first and watch for unusual vibration or scalping.
Can I lower a riding mower the same way as a push mower?
Yes, the principles are identical, you’ll use deck lever adjustments, change blades, or modify spacers, but riding mower decks are heavier and often require jack stands for safe access. Consult your owner’s manual for deck removal procedures and torque specifications.
How often should I sharpen blades when cutting lower?
Plan to sharpen every 20 to 25 hours of mowing instead of the usual 25 to 30, because lower cuts cause blades to contact dirt and debris more frequently. Dull blades tear grass rather than cut cleanly, leading to brown tips and increased disease risk.
Is it better to scalp my lawn in spring to remove dead grass?
Scalping warm-season grasses like Bermuda once in early spring can remove thatch and help the lawn green up faster, but cool-season grasses should never be scalped. If you do scalp, raise the deck back to normal height immediately after to avoid ongoing stress.
These questions reflect the most common concerns homeowners face when adjusting mower height. Remember that your lawn’s health should always guide your cutting decisions, achieving a golf-course look isn’t worth sacrificing thick, resilient turf that naturally crowds out weeds and tolerates drought. If you notice persistent brown patches, thin areas, or increased weed pressure after lowering your mower, raise the deck by half an inch and give your grass a few weeks to recover. Patience and observation beat aggressive modifications every time, and you’ll end up with a lawn that looks better and requires less water, fertilizer, and pest control over the long term.