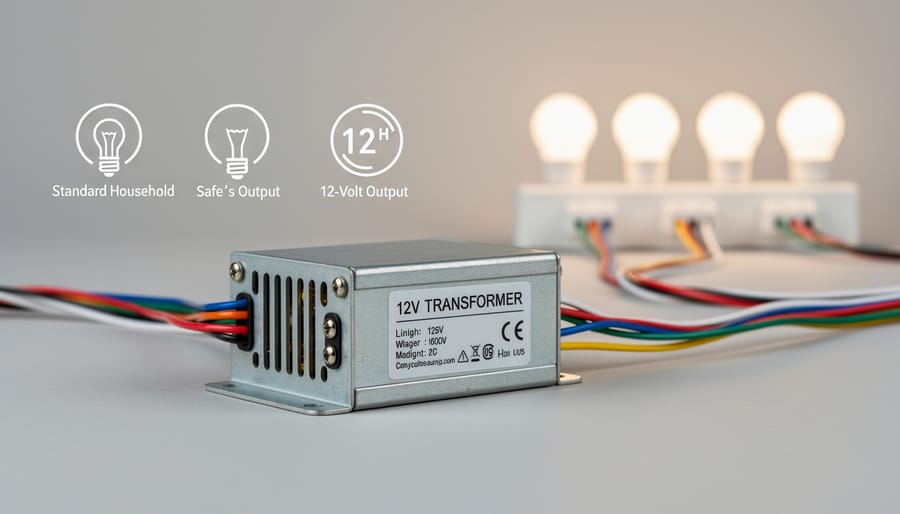
Transform your outdoor spaces into inviting evening retreats while slashing energy costs by up to 75% with low voltage lighting systems. These 12-volt powerhouses deliver the same brilliant illumination as traditional 120-volt fixtures but operate through a simple transformer that steps down your household current, making installation safer and more accessible for homeowners who love hands-on projects.
The appeal goes far beyond just lower electricity bills. Low voltage systems eliminate the shock hazards associated with standard outdoor wiring, allowing you to dig, adjust, and reconfigure your lighting layout without calling an electrician or worrying about dangerous encounters while gardening. You can literally rearrange fixtures with wet hands after a rain shower, though we wouldn’t necessarily recommend it.
For environmentally conscious gardeners, these systems align perfectly with sustainable landscape practices. The reduced power consumption means less strain on the grid, while LED low voltage bulbs can last 25,000 hours or more, dramatically cutting waste from frequent bulb replacements. Many modern systems integrate with smart home technology, letting you schedule lighting around sunset times, adjust brightness based on moon phases, or create zones that highlight your prize-winning rose garden during evening gatherings.
Whether you’re illuminating pathways for safety, accentuating architectural features, or creating ambiance around your outdoor living spaces, low voltage lighting offers a forgiving, flexible solution that grows with your landscape. The transformer does the heavy lifting, converting dangerous voltage into garden-friendly power that respects both your safety and your yard’s ecosystem.
What Makes Low-Voltage Lighting Different (And Better)
The Safety Advantage You Can’t Ignore
Here’s what really sets low voltage systems apart: they’re remarkably safe to work with, even if you’ve never tackled electrical projects before. Operating at just 12 volts instead of standard 120-volt household current, these systems essentially eliminate the risk of serious electrical shock. I’ve installed fixtures in pouring rain without worry, and you can comfortably make adjustments to your system while it’s running—something you’d never attempt with standard voltage lighting.
This safety feature is particularly valuable for families with curious kids and pets who love exploring the garden. Even if a wire gets nicked by an enthusiastic digger or a fixture gets knocked over during playtime, there’s no dangerous shock hazard. You can also install lights near water features, in pond areas, or along irrigation lines without the extensive weatherproofing requirements of high-voltage systems.
For those of us committed to sustainable gardening practices, this DIY-friendly aspect means you can expand and modify your lighting as your garden evolves without calling an electrician each time. You’ll save money on installation costs and gain the confidence to create the exact lighting design your landscape deserves, all while maintaining complete peace of mind about safety.
Energy Efficiency That Shows Up on Your Bill
Let’s talk real numbers, because that’s what matters when you’re making the switch. A typical traditional 120-volt pathway lighting setup with ten 25-watt bulbs running five hours nightly costs about $18 monthly. Compare that to a low-voltage system using LED fixtures at just 3 watts each, and you’re looking at roughly $2.25 per month. That’s over $180 in annual savings for the same lighting coverage.
I made the switch in my own garden three years ago, and my electric bill reflects it beautifully. My 15-fixture low-voltage system illuminating pathways, flower beds, and my favorite Japanese maple costs me less than what I used to spend on just six traditional spotlights. The difference funded new perennials that spring.
The sustainability angle goes beyond your wallet too. Lower energy consumption means reduced carbon footprint, which aligns perfectly with eco-conscious gardening practices. If you’re exploring even greener options, solar lighting alternatives can eliminate electricity costs entirely, though they work best in consistently sunny locations. For most gardens, low-voltage LED systems offer the sweet spot between performance, reliability, and genuine cost savings that actually show up month after month.
Smart Features That Make Your Lighting Actually Intelligent
Timers and Sensors That Think for You
Let me tell you about one of my favorite features of modern low voltage lighting—the systems practically run themselves! Gone are the days of manually flipping switches or remembering to turn off your garden lights at bedtime.
Photocell sensors are the workhorses of automated outdoor lighting. These clever devices detect ambient light levels and automatically switch your lights on at dusk and off at dawn. Think of them as having a dedicated garden assistant who never takes a day off. The beauty is that they adjust naturally with the seasons—your lights come on earlier in December and later in June, all without any programming on your part. This isn’t just convenient; it’s sustainable lighting at its finest, ensuring you’re never wasting electricity during daylight hours.
Motion detection takes things a step further. Similar to smart sensors that monitor soil moisture, motion sensors in your lighting system respond to activity in real-time. Position them along pathways or near entry points, and they’ll illuminate only when needed. This extends bulb life, reduces energy consumption, and frankly, adds a layer of security to your property. I’ve found they’re particularly handy near vegetable gardens where nighttime critters might be browsing your harvest.
Programmable timers offer the ultimate control. Set different lighting schedules for various zones—perhaps your decorative garden beds need illumination only until 10 PM, while security path lights stay on longer. Many modern timers even feature astronomical settings that automatically adjust for sunrise and sunset times in your specific location.
App Control and Voice Integration
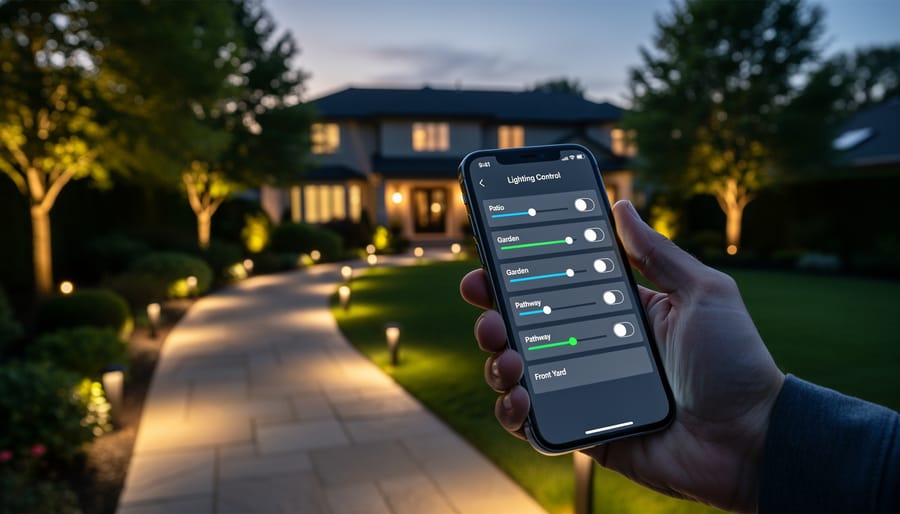
Modern low voltage lighting systems have become wonderfully smart, letting you control your outdoor ambiance right from your pocket. Through dedicated smartphone apps connected via WiFi, you can adjust brightness, set schedules, and create custom lighting scenes without ever stepping outside—perfect for those evenings when you’re already settled in but want to showcase your garden’s nighttime beauty.
The integration with voice assistants has made outdoor lighting as simple as a spoken command. Whether you prefer Amazon Alexa, Google Home, or Apple HomeKit, you can say “turn on the garden lights” or “dim the pathway to 30%” and watch the magic happen. This hands-free control is particularly handy when you’re carrying gardening supplies or have muddy hands after an evening of planting. It’s all part of the broader trend toward smart yard automation that’s making outdoor spaces more enjoyable and efficient.
When choosing a system, check compatibility with your existing smart home setup. Most quality systems work across multiple platforms, but it’s worth confirming before purchase. The apps typically offer scheduling features too, allowing your lights to turn on at sunset and off at midnight automatically—a sustainable choice that saves energy while keeping your landscape beautifully illuminated when it matters most. Many systems even let you create zones, so your vegetable garden can have different lighting than your flower beds, giving you complete creative control over your outdoor sanctuary.
Planning Your Low-Voltage Power Distribution
Choosing the Right Transformer Size
Getting your transformer size right is easier than you might think, and it’s crucial for a lighting system that works beautifully for years to come. Think of it like choosing the right-sized water pump for your garden irrigation system – too small and nothing works properly, too large and you’re wasting resources and money.
Start by adding up the wattage of all your light fixtures. Each LED bulb typically uses between 3-7 watts, which is wonderfully energy-efficient compared to older systems. For a small yard with 8-10 pathway lights at 4 watts each, you’d need about 40 watts total. Here’s the important part: always add 20-25% extra capacity to account for voltage drop and future expansion. So that small setup would need at least a 50-watt transformer.
For medium-sized yards with 15-20 lights scattered across pathways, garden beds, and accent lighting, you’re looking at around 75-100 watts of actual use, meaning a 120-150 watt transformer gives you the breathing room you need. Large properties with 30 or more fixtures might require 300 watts or multiple transformers working different zones.
Voltage drop happens when electricity travels long distances through your wiring, like water pressure dropping through a long hose. Keep wire runs under 100 feet when possible, and use thicker 12-gauge wire for longer distances rather than standard 16-gauge. This sustainable approach ensures your lights shine brightly at the farthest points without wasting energy pushing power through inadequate wiring. Many quality transformers now include helpful load calculators and voltage meters to make sizing even more foolproof.
Cable Gauge and Distance Considerations
Understanding wire gauge might sound technical, but think of it like choosing the right garden hose. Just as a narrow hose reduces water pressure over distance, thin wires cause voltage drop that dims your lights at the far end of a cable run. For most low voltage lighting systems running on 12 volts, you’ll want 12-gauge wire for runs up to 100 feet, or upgrade to 10-gauge for longer distances up to 150 feet.
Here’s a practical tip from experience: always start by mapping out your lighting layout before buying cable. Voltage drop becomes noticeable when lights at the end of your run appear significantly dimmer than those near the transformer. To prevent this, keep individual cable runs under 100 feet when possible, or consider installing multiple transformers for larger yards.
The sustainable approach? Quality wire might cost more upfront, but prevents energy waste and ensures even illumination across your entire outdoor space. Some homeowners split their lighting into zones, using separate cables from the transformer for different garden areas. This strategy not only minimizes voltage drop but also gives you flexible control over which sections illuminate at different times, reducing unnecessary energy consumption.
Creating Lighting Zones for Better Control
Think of your yard as a series of distinct rooms, each deserving its own lighting personality. Dividing your low voltage lighting into zones gives you incredible flexibility and makes the whole system easier to manage down the road.
Start by grouping lights based on their purpose and location. Create a pathway zone for all walkway lighting, a separate zone for garden bed uplights, another for architectural accents on your home, and perhaps a special zone for water features or focal point trees. This way, you can illuminate just the front entrance when guests arrive or light up the entire backyard for evening gatherings.
Each zone connects to its own transformer channel or timer, letting you control when different areas light up. Your pathway lights might run from dusk to midnight for safety, while decorative garden accent lights could stay on until you head to bed. This targeted approach saves energy and reduces light pollution, benefiting both your wallet and the nocturnal wildlife in your garden.
From a practical standpoint, zones simplify troubleshooting too. If one section stops working, you know exactly which circuit to check rather than hunting through your entire yard. Plan for four to six zones in most residential yards, keeping each zone’s total wattage within your transformer’s capacity.
Best Applications for Smart Low-Voltage Yard Lighting
Pathway and Safety Lighting
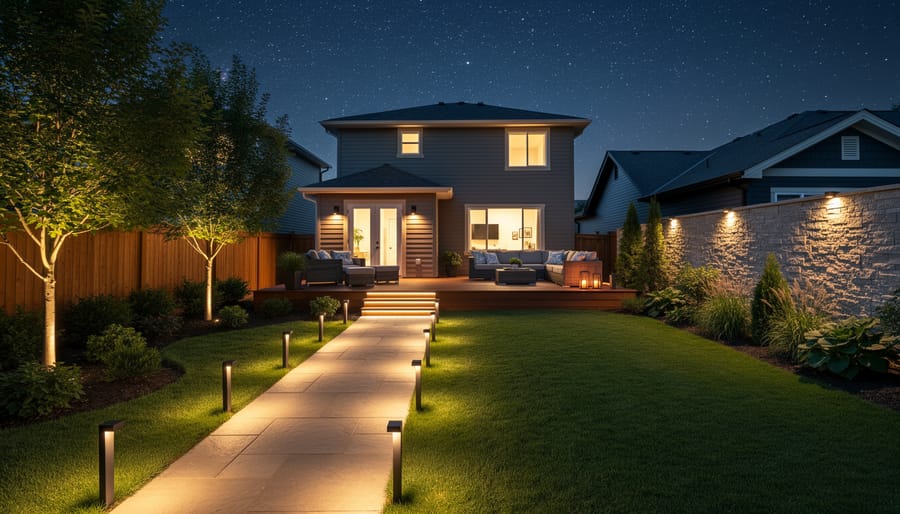
Safety should never be an afterthought when designing your outdoor lighting, and low voltage systems excel at creating secure pathways without harsh glare. Think about those evening strolls through your garden or that quick trip to the compost bin after dinner. Well-placed pathway lights create a welcoming glow while preventing trips and tumbles.
Focus on illuminating potential hazards like steps, curbs, and changes in elevation. Position fixtures to highlight edges without shining directly into eyes, which can actually reduce visibility. Spacing lights about six to eight feet apart along walkways provides consistent coverage, though adjust based on your specific landscape and the fixture’s output.
High-traffic areas near entry doors, garage approaches, and frequently used garden paths deserve special attention. Consider fixtures with ground stakes for easy repositioning as your garden evolves. The beauty of low voltage lighting is its flexibility – if you find a dark spot after installation, adding another fixture is straightforward and safe. These energy-efficient solutions keep your property secure while supporting sustainable practices, using minimal power to provide maximum safety throughout your outdoor spaces.
Garden Bed and Landscape Accent Lighting
Garden beds truly come alive after dark with thoughtfully placed low voltage lighting. I’ve found that uplighting creates magical effects—position fixtures at the base of trees to cast dramatic shadows through branches, instantly transforming your evening landscape. For specimen plants like ornamental grasses, Japanese maples, or architectural shrubs, angling lights from below highlights their unique textures and forms in ways daylight never reveals.
The beauty of low voltage systems here is their flexibility. You can easily reposition lights as plants grow or seasonal displays change. Try placing fixtures behind layered plantings to create depth—front-lit elements appear flat, but backlighting adds dimension and mystery to your garden beds.
Consider path lights along garden borders to define spaces while showcasing border plantings. Energy-efficient LED fixtures use minimal electricity, aligning perfectly with sustainable gardening practices while extending your enjoyment of the garden you’ve worked so hard to cultivate. The right lighting transforms your landscape from a daytime-only feature into an enchanting evening retreat.
Deck, Patio, and Entertainment Areas
Your deck and patio deserve lighting that transforms them into inviting evening retreats while keeping energy use minimal. Low voltage systems excel here, creating layers of ambient light that make outdoor entertaining both safe and magical.
Start with post cap lights on railings and fence posts. These fixtures cast gentle downward light that defines boundaries without harsh glare, perfect for navigating spaces safely while maintaining that warm, welcoming atmosphere. For steps and level changes, integrated step lights are essential safety features that also add sophisticated visual appeal.
Consider wash lighting along planter boxes or beneath built-in seating to create depth and interest. These subtle touches make your outdoor living space feel intentional and professionally designed. Perimeter lighting along garden beds that border your entertainment area beautifully blends your hardscape with surrounding landscape.
The beauty of low voltage lighting in these spaces is flexibility. You can easily adjust fixture placement as your outdoor furniture arrangement changes seasonally, and smart controls let you dim lights for intimate gatherings or brighten them for active entertaining. Since these systems run cool, they’re safe around wooden decking and won’t create uncomfortable heat during summer evenings, making them ideal for sustainable outdoor living.
Installation Made Simple: A Practical Approach
Tools and Materials You’ll Actually Need
Good news: installing low voltage lighting doesn’t require a professional electrician’s toolkit. You’ll need wire strippers, a voltage tester, and a screwdriver set – tools many of you already have in your garage. For materials, start with a quality transformer sized to your project (add up fixture wattage and multiply by 1.25 for headroom), direct burial low voltage cable, and your chosen fixtures. I recommend picking up some waterproof wire connectors and landscape staples to secure cables properly. A small shovel or edger helps route wiring discreetly through garden beds. Skip the expensive trenching tools unless you’re lighting a football field – a simple flat spade works perfectly for the shallow runs these systems need. One often-overlooked item: silicone sealant for protecting connections in wet areas. Remember, buying quality connectors and transformers upfront saves you from troubleshooting failures during peak garden season.
Burial Methods That Protect Your Lawn
Protecting your lawn during installation starts with proper trenching technique. Use a flat spade to cut a narrow slit about 6-8 inches deep, creating a V-shaped trench that minimizes grass disruption. This method is far gentler than wide trenches and allows your turf to recover quickly. Always use direct-burial rated cable specifically designed for outdoor lighting, as standard wire will deteriorate underground and create safety hazards.
Here’s a lawn-friendly tip: water your installation area the day before digging. Slightly moist soil cuts more cleanly and reduces root tearing. When laying cable, avoid sharp bends that can damage wiring over time. After placing your cable, firmly press the soil back into the trench and water thoroughly to eliminate air pockets that could cause settling.
For truly sustainable installation, consider timing your project for early spring or fall when grass naturally recovers faster. The disturbed turf typically fills in within 2-3 weeks, especially if you overseed the trench line and maintain consistent moisture during recovery.
Connection Best Practices
Getting your connections right is absolutely essential for a lighting system that’ll serve your garden beautifully for years to come. Think of it like planting perennials—do it right once, and you’ll enjoy the results season after season.
Always use weatherproof connectors specifically designed for outdoor low voltage systems. These typically feature silicone-filled caps that seal out moisture when you twist them onto spliced wires. I’ve seen too many DIY setups fail simply because someone used indoor wire nuts and electrical tape, which deteriorate quickly outdoors.
When splicing wires, strip just enough insulation (about half an inch) and ensure the copper strands are clean and corrosion-free. Twist connections clockwise tightly before applying your waterproof connector. For buried connections, consider using direct-burial splice kits with gel-filled capsules—they’re worth the small extra investment.
Elevate connection points whenever possible. Even with waterproof connectors, keeping splices above ground level or in valve boxes prevents them from sitting in standing water during heavy rains. This simple step aligns with electrical safety standards and dramatically extends system life. Your future self will thank you when you’re not troubleshooting mysterious outages in muddy flowerbeds!
Choosing Quality Components: What to Look For
Transformer Features Worth Paying For
When shopping for a transformer, you’ll want features that make your life easier while keeping your garden lighting efficient and reliable. Let me walk you through what actually matters.
A built-in timer is essential for automating your lighting schedule without fussing with separate devices. Look for transformers offering both dusk-to-dawn and custom timing options—the FX Luminaire PB series does this beautifully. The photocell sensor quality varies significantly between models, so choose one with adjustable sensitivity to prevent lights from cycling on and off during cloudy days.
Multi-tap voltage options are a game-changer for larger yards. These let you fine-tune voltage at 12V, 13V, 14V, or 15V depending on your cable run length, ensuring consistent brightness across all fixtures. The Kichler 15M series offers excellent multi-tap functionality at a reasonable price point.
Weatherproofing isn’t negotiable—your transformer lives outdoors year-round. Seek transformers rated NEMA 3R minimum, with powder-coated steel or composite resin housings. Stainless steel hardware prevents rust from compromising connections over time.
For sustainable operation, transformers with thermal overload protection prevent energy waste and extend lifespan. Some premium models like Malibu’s Professional Series even include wattage meters, helping you monitor energy consumption and optimize your system efficiency as your garden evolves.
LED Fixtures: Brightness, Color, and Durability
When choosing LED fixtures for your garden, understanding a few key specifications helps you make eco-friendly choices that actually work. Lumens measure brightness—think 200-400 lumens for pathway accent lighting, while feature areas might need 700+ lumens. I’ve learned through experience that more isn’t always better; softer lighting creates ambiance without disturbing nocturnal pollinators.
Color temperature, measured in Kelvin, sets the mood. Warm white (2700-3000K) feels inviting and complements flowers beautifully, while cool white (4000-5000K) works well for security purposes. For sustainability-minded gardeners, warm tones also minimize light pollution that affects wildlife.
IP ratings indicate weather resistance—IP65 or higher ensures your fixtures handle rain and garden irrigation. Look for fixtures made from recycled aluminum or sustainably-sourced materials rather than cheap plastics that’ll end up in landfills. Quality construction means fewer replacements, reducing long-term environmental impact while saving money. Copper and brass fixtures develop lovely patinas over time, blending naturally into your garden landscape.
Smart Controllers and Hubs
Modern smart controllers transform low voltage lighting from simple timers into dynamic systems that respond to your garden’s needs. Popular options like Philips Hue outdoor hubs and Ring Smart Lighting bridges offer scheduling and smartphone control, but compatibility matters more than flashy features. Before purchasing, verify your transformer’s wattage capacity matches the controller’s requirements and check whether the system uses proprietary bulbs or works with standard fixtures.
The most practical features include zone control for different garden areas, adjustable dimming to reduce energy use, and motion sensors for pathways. Skip the expensive voice-control packages unless you already use smart home systems. Many gardeners find simple programmable controllers with photocell sensors provide excellent value, automatically adjusting to seasonal light changes while supporting your sustainable approach to outdoor living. Focus on durability and warranty over trendy apps that may become obsolete.
Maintenance and Troubleshooting
Seasonal Maintenance Checklist
Keeping your low voltage lighting system in top shape doesn’t require much effort, just a bit of quarterly attention. Every three months, I like to walk through my yard with a damp cloth and gently wipe down each fixture—you’d be surprised how much grime and pollen can accumulate and diminish that beautiful glow. While you’re at it, check all wire connections for corrosion or looseness, especially after harsh weather. This simple step prevents flickering and extends bulb life considerably.
As your garden evolves—plants grow, trees spread, new beds appear—your lighting needs will shift too. Take a moment each season to adjust fixture positions or angles to accommodate these changes. That spotlight that perfectly illuminated your young Japanese maple might now be buried in branches! Also inspect your timer settings; those long summer evenings need different lighting schedules than winter’s early darkness. This proactive approach keeps your system energy-efficient and ensures your outdoor spaces always look their best while supporting your sustainable yard goals.
Common Issues and Quick Fixes
Even the best low voltage lighting systems can develop hiccups, but most issues have simple fixes you can tackle yourself. If your lights appear dim, check the connections first—corrosion on wire connectors is surprisingly common and easily cleaned with a wire brush. Also verify that your transformer isn’t overloaded; adding too many fixtures strains the system and reduces brightness across all zones.
Flickering usually signals loose connections or a failing LED driver. Tighten all wire nuts and examine each fixture for moisture intrusion, which can disrupt the electrical flow. For non-responsive zones in smart systems, try resetting your controller and ensuring your Wi-Fi signal reaches the affected area—sometimes adding a simple range extender solves connectivity problems instantly.
Voltage drop is another culprit behind performance issues. Measure the voltage at fixtures farthest from your transformer; if it’s below 10.8 volts, consider installing a second transformer or repositioning your existing one closer to problem areas. Remember, preventive maintenance like cleaning fixtures seasonally and inspecting wire insulation annually keeps your outdoor lighting running beautifully while supporting your yard’s sustainable ecosystem with reliable, energy-efficient illumination.
Making the switch to smart low-voltage lighting systems is one of the most rewarding upgrades you can bring to your outdoor space. Beyond the undeniable aesthetic appeal of a beautifully lit yard, you’re investing in a system that’s safer for your family, kinder to the environment, and remarkably gentle on your monthly energy bills. The 12-volt operation means you can work with confidence, knowing there’s minimal electrical risk, while the LED technology delivers brilliant illumination using a fraction of the power traditional lighting requires.
What I love most about encouraging homeowners to embrace this technology is how approachable it truly is. You don’t need to transform your entire property overnight. Start with a simple starter zone, perhaps illuminating your front walkway or highlighting a favorite garden bed. Once you experience how easy installation can be and see the immediate impact on your home’s curb appeal and nighttime usability, expansion becomes a natural next step. The modular nature of these systems means you can grow your lighting design as your budget and ambition allow.
The investment pays dividends in multiple ways. You’ll enjoy extended hours in your outdoor living spaces, enhanced security through strategic illumination, and the satisfaction of reduced energy consumption that aligns with sustainable living practices. Smart controls add convenience that quickly becomes indispensable, letting you create the perfect ambiance with simple voice commands or automated schedules.
This technology is genuinely accessible to any homeowner willing to take that first step. Your dream outdoor lighting is closer than you think.