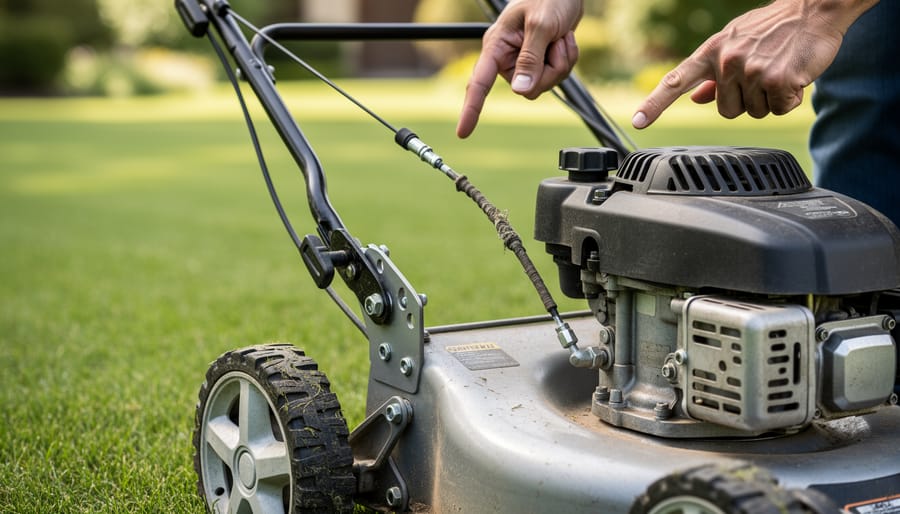
Check the drive cable first—it’s the most common culprit when your Toro self-propelled mower loses its forward motion. Locate the cable running from the handle to the transmission and inspect it for fraying, slack, or disconnection at either end. If it feels loose when you squeeze the drive bail, adjust the cable tension using the adjustment nuts near the handle or transmission housing.
Inspect your drive belt next by removing the mower deck and checking underneath for wear, cracks, or glazing. A worn belt slips instead of gripping, preventing power transfer from the engine to the wheels. Replace any belt showing these signs, and while you’re there, clear away grass clippings packed around the pulleys that reduce belt efficiency.
Test each rear wheel independently by jacking up your mower and spinning them by hand. They should rotate smoothly with slight resistance. If a wheel spins freely without engaging, the internal drive pin has likely sheared—a fixable issue that requires removing the wheel and replacing the pin assembly.
Examine the transmission if simpler fixes haven’t worked. Low transmission fluid or internal gear damage prevents proper power delivery. Most Toro transmissions are sealed units, but some models allow fluid checks. Unusual grinding noises during operation signal transmission problems requiring professional attention or replacement.
These troubleshooting steps work best when your mower runs properly otherwise. If you’re having difficulty starting your Toro, address engine issues before tackling self-propulsion problems. Regular maintenance prevents most drive system failures while extending your mower’s lifespan and reducing waste.
Understanding Your Toro Self-Propelled System
Before you can fix your Toro mower, it helps to understand what makes it move on its own. Don’t worry—the mechanics behind self-propelled mower systems are surprisingly straightforward, and you don’t need an engineering degree to grasp how they work.
Think of your Toro’s self-propelled system as a simple chain reaction. When you engage the drive control bar on the handle, you’re starting a process that connects the engine’s power to your rear wheels. Here’s how that journey happens.
The drive cable is your first key player. This steel cable runs from that control bar down to the transmission. When you squeeze the bar, the cable pulls tight and activates the transmission—much like a bicycle brake cable, but in reverse.
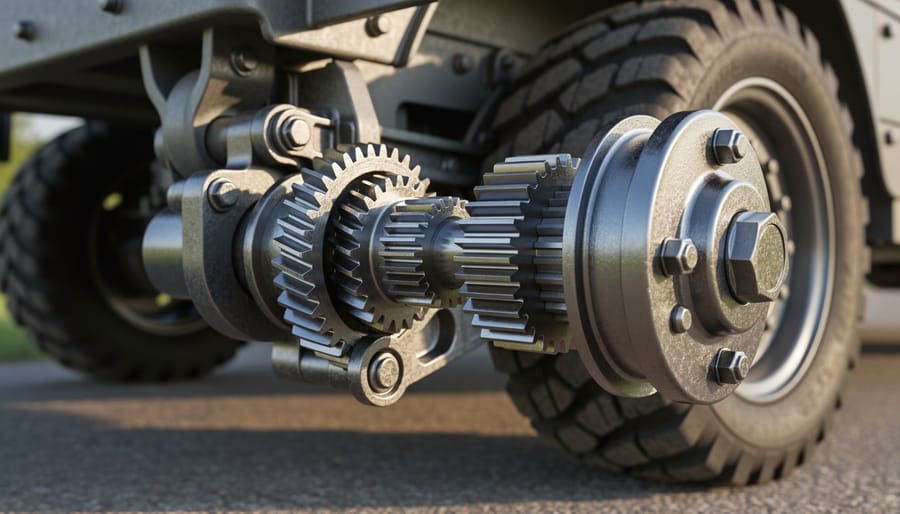
Next comes the transmission, which is essentially the brain of your propulsion system. This compact unit takes the rotating power from your engine and converts it into forward motion at a manageable speed. Most Toro models use a simple gear-driven transmission that’s designed for reliability and minimal maintenance.
The drive belt connects your engine to the transmission. This rubber belt loops around pulleys and spins continuously while your engine runs. When the transmission engages, this belt transfers the engine’s rotating energy where it needs to go.
Finally, the wheels receive all this transferred power. Your rear wheels have special drive mechanisms inside them that lock onto a shaft connected to the transmission. When everything’s working properly, these wheels pull your mower forward smoothly and consistently.
Understanding these four components—cable, transmission, belt, and wheels—gives you a roadmap for troubleshooting. When your mower stops propelling itself, the problem almost always lies with one of these parts. The good news? Most issues are fixable with basic tools and a little patience, keeping your mower running sustainably for years rather than replacing it prematurely.
Quick Checks Before You Grab Your Tools
Before you break out your toolbox, let’s spend a few minutes checking the most common culprits. I’ve lost count of how many times I’ve seen folks ready to tear apart their mower, only to discover the fix was right at their fingertips. These quick checks take less than five minutes and might just save you an afternoon of repairs.
First, take a look at your drive bail—that’s the lever on the handle that you squeeze to engage the self-propelled system. Make sure you’re holding it firmly against the handlebar. It sounds simple, but sometimes we get into a rhythm and don’t realize we’re not applying enough pressure. If the bail feels loose or doesn’t click into place, that’s your first clue something needs attention.
Next, flip your mower on its side (spark plug side up to prevent oil leaks) and inspect underneath. Grass clippings and debris love to pack themselves around the drive wheels and transmission area, especially if you’ve been mowing wet grass. A thick mat of clippings can prevent the wheels from making proper contact with the drive system. Use a stick or wear gloves to clear away any buildup you find.
Now check your drive mode selector if your model has variable speed settings. Some Toro models have a speed adjustment lever that can accidentally get knocked to the lowest setting or neutral position. Make sure it’s set where you want it.
Finally, give those rear wheels a spin by hand. They should rotate smoothly with some resistance. If one spins freely while the other doesn’t move at all, you’ve identified which side needs attention. These simple observations will guide your next troubleshooting steps and help you work smarter, not harder.
The Drive Cable: Your Most Likely Culprit
How to Tell If Your Drive Cable Is the Problem
Your drive cable connects the bail bar to the transmission, so when it fails, your mower won’t budge forward no matter how firmly you squeeze. Here’s how to check if it’s the culprit.
Start with a visual inspection. Locate the cable running from your handlebar down to the transmission housing. Look for obvious breaks, fraying, or sections where the outer casing has separated from the inner cable. These are clear signs you’ll need a replacement.
Next, perform the squeeze test. With the engine off, engage the bail bar and watch the cable move. It should pull taut immediately when you squeeze. If there’s excessive slack or the cable moves but nothing happens at the transmission end, you’ve likely got a stretched or disconnected cable.
Check both connection points carefully. At the handlebar, ensure the cable is properly attached to the bail mechanism. Follow it down to the transmission and verify it’s securely fastened there too. Sometimes cables simply pop loose from their mounting brackets, which is an easy fix that’ll save you money and keep your mower out of the repair shop.
If the cable looks intact but feels mushy when you engage it, stretching has occurred over time, a natural result of regular use. Replacing it is straightforward and much more sustainable than replacing the entire mower.
Adjusting a Loose Drive Cable
Good news! If your drive cable has simply stretched over time rather than snapped, you can often restore your mower’s self-propelled function with a straightforward adjustment. This is one of those satisfying fixes that’ll have you back to mowing in minutes.
Start by locating the cable adjustment mechanism. On most Toro models, you’ll find it near the handle where the drive control bar connects, though some models have adjusters at the transmission end near the rear wheels. Look for a barrel adjuster or a threaded rod with lock nuts.
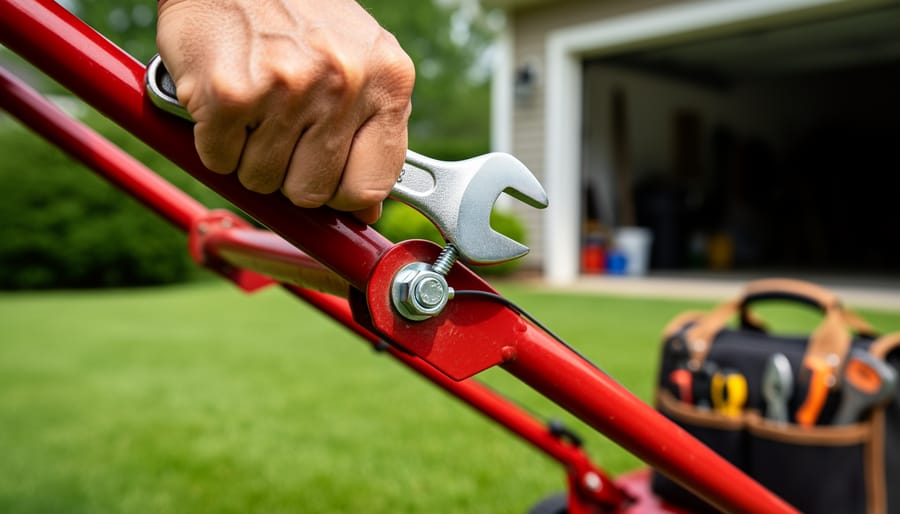
Before making adjustments, engage the drive control bar and check if there’s visible slack in the cable. Release the bar and locate the adjustment nuts. Loosen the lock nut, then turn the adjustment barrel or nut to take up the slack. A properly adjusted cable should have minimal slack but shouldn’t be overly tight, as this can cause premature wear.
Once you’ve tightened the adjuster, secure the lock nut firmly. Test the drive function by engaging the control bar on a level surface. The wheels should engage smoothly within an inch of bar movement. If the mower still doesn’t propel or feels sluggish, you may need further adjustment or the cable might need replacement after all.
This simple maintenance task extends your cable’s life and keeps your mower running efficiently without unnecessary part replacements.
Replacing a Broken Drive Cable
If your drive cable shows fraying, kinks, or has snapped completely, it’s time for a replacement. The good news is that this is a straightforward repair that can save you significant money compared to professional service.
Start by noting your mower’s model number, which you’ll find on the deck near the engine. This ensures you order the correct replacement cable. Genuine Toro parts are recommended for the best fit and longevity, though quality aftermarket options exist. You’ll typically spend between $15-30 for a replacement cable.
Before starting, disconnect the spark plug wire for safety. Remove the engine shroud or handle components to access the cable routing. Take photos with your phone as you disconnect the old cable from both the handle and transmission ends. This visual reference makes reassembly much easier, especially for first-timers.
Thread the new cable following the same path, ensuring it doesn’t rub against hot engine parts or sharp edges. Connect both ends securely and adjust the tension at the handle end until the drive engages smoothly when you squeeze the bail. Test on level ground before tackling your lawn.
This repair extends your mower’s life while keeping perfectly functional equipment out of landfills, a win for both your wallet and sustainable lawn care practices.
Drive Belt Issues: When Power Isn’t Reaching the Wheels
Accessing and Inspecting Your Drive Belt
Before diving in, safety first—disconnect the spark plug wire to prevent accidental starts. This simple step could save your fingers, and trust me, you’ll work with much more confidence knowing your mower won’t surprise you.
Most Toro self-propelled mowers have the drive belt located beneath the deck. You’ll typically need to tip your mower on its side (air filter side up to prevent oil leaks) or remove the mower deck entirely, depending on your model. Check your owner’s manual for specific instructions, as access points vary.
Once you’ve got a clear view, it’s inspection time. Look for these telltale signs of belt trouble:
Cracks running across the belt indicate age and brittleness—even small cracks mean replacement time is near. Glazing appears as shiny, hardened sections on the belt surface, which causes slipping and reduces grip. Fraying edges suggest misalignment or worn pulleys. Excessive wear shows as thinning sections or exposed cords within the belt. And of course, if your belt has completely snapped, well, there’s your culprit.
A healthy belt should feel firm yet flexible, with a matte black appearance and no visible damage. If you’re unsure whether your belt needs replacing, err on the side of caution—belts are inexpensive compared to the frustration of repeated breakdowns, and replacing a worn belt prevents damage to other drive components.
Replacing a Worn or Broken Drive Belt
Once you’ve confirmed the drive belt is worn, cracked, or broken, replacing it is a straightforward weekend project that’ll have your mower moving again. I remember the first time I tackled this—it seemed intimidating, but honestly, it’s one of those repairs that builds your confidence for future fix-it jobs.
Start by disconnecting the spark plug wire for safety. Tip your mower on its side (air filter facing up to prevent oil leaks) and remove the blade if necessary for better access. Most Toro self-propelled models have a belt cover secured by a few bolts—remove these to expose the belt system. Take a quick photo before removing anything; you’ll thank yourself later when reassembling.
Carefully slip the old belt off the pulleys, noting how it routes around each wheel. When installing the new belt, follow that same path precisely. This is crucial—improper routing causes immediate failure. The belt should sit snugly in the pulley grooves without twisting. Proper tension is key: too loose and it’ll slip; too tight and you’ll strain the transmission. The belt should have about half an inch of give when you press it between pulleys.
Rotate the wheels by hand to ensure everything moves smoothly before reassembling. Once satisfied, replace the cover and reconnect the spark plug.
Here’s where sustainability matters: don’t toss that old belt in the trash. Many tire shops and auto parts stores accept rubber belts for recycling. Some garden centers run collection programs too. Taking this extra step keeps rubber out of landfills while supporting circular economy practices—a small action with meaningful environmental impact.
Transmission and Gear Problems
When you’ve checked the drive cable and belt but your Toro still won’t self-propel, you’re likely dealing with transmission issues—and I’ll be honest with you, this is where things get a bit more serious. Let me walk you through what to look for and help you decide whether this is a DIY fix or time to call in the pros.
The transmission is the heart of your mower’s self-propelled system, and diagnosing problems starts with a simple test. With the mower off and spark plug disconnected for safety, try pushing it forward. If it rolls smoothly but won’t engage when running, the transmission may have internal gear wear or fluid loss. If it’s extremely difficult to push even when disengaged, something inside has likely seized or broken.
For most homeowners, opening up a transmission isn’t practical. These sealed units contain gears, bearings, and lubricant that require specialized knowledge to service properly. However, you can check for obvious external problems. Look for cracks in the transmission housing or oil leaks, which indicate internal damage. Listen for grinding noises when the self-propel is engaged—that’s usually stripped gears talking to you.
Here’s where the sustainability angle comes in: before assuming you need a replacement, check your model’s age and overall condition. If your Toro is relatively new and well-maintained otherwise, a transmission replacement might make sense. Quality transmissions run between $80-150, plus installation if you’re not comfortable doing it yourself. But if your mower is older with other mounting issues, replacing the entire unit might be throwing good money after bad.
Professional repair typically costs $150-300 depending on your area. Compare this against a new mower’s price, factoring in that keeping your current mower running is generally the more environmentally friendly choice—you’re avoiding landfill waste and the manufacturing impact of new equipment.
If you’re handy and want to attempt transmission replacement yourself, you’ll find model-specific videos online, but honestly assess your skill level first. This job involves working with multiple components simultaneously and precise reassembly.
Wheel and Axle Troubleshooting
Sometimes your Toro’s drive system is working perfectly, but the wheels themselves are causing the problem. Think of it like having a car with a great engine but flat tires—you’re not going anywhere! Let’s explore the wheel-related issues that might be holding you back.
Start by flipping your mower on its side (spark plug facing up to prevent oil leaks) and give each wheel a spin by hand. They should rotate freely and smoothly. If a wheel feels stuck or grinds when you turn it, you’ve likely found your culprit. Grass clippings, mud, and debris love to pack themselves into wheel assemblies over time, especially if you mow damp grass regularly. Remove the wheels—usually they’re held on by a simple bolt or clip—and clean out any buildup thoroughly. A wire brush works wonders here, and it’s a good opportunity to practice sustainable maintenance by avoiding harsh chemical cleaners.
While you have the wheels off, inspect the drive gears. These plastic or metal gears on the wheel’s inner hub engage with your mower’s transmission system. Look for stripped teeth, cracks, or excessive wear. Damaged gears won’t grip properly, causing that frustrating slip you’re experiencing. If the gears look worn, replacement wheels or gear inserts are relatively inexpensive and straightforward to install.
Don’t forget to check the drive pins that connect wheels to the axle shaft. These small metal pins can shear off or wear down over time, especially if you frequently mow over rough terrain or obstacles. Missing or damaged pins mean the wheel spins freely without engaging the drive system. Replacing them is an easy fix that can save you from assuming you need more complex repairs. Remember, addressing these small issues promptly prevents bigger problems down the road and keeps your mower running efficiently for years.
Preventive Maintenance to Avoid Future Problems
The best way to avoid self-propelled system headaches is staying ahead of problems with a simple maintenance routine. Think of it like brushing your teeth—a few minutes of regular care saves you from major issues down the road.
After every few mowing sessions, take five minutes for proper cleaning. Grass clippings and debris love to cake around wheels and transmission housing, which gradually puts strain on your drive system. A quick brush-down and occasional rinse with your garden hose (avoiding electrical components) keeps everything moving freely. This simple habit also lets you spot worn parts before they fail completely.
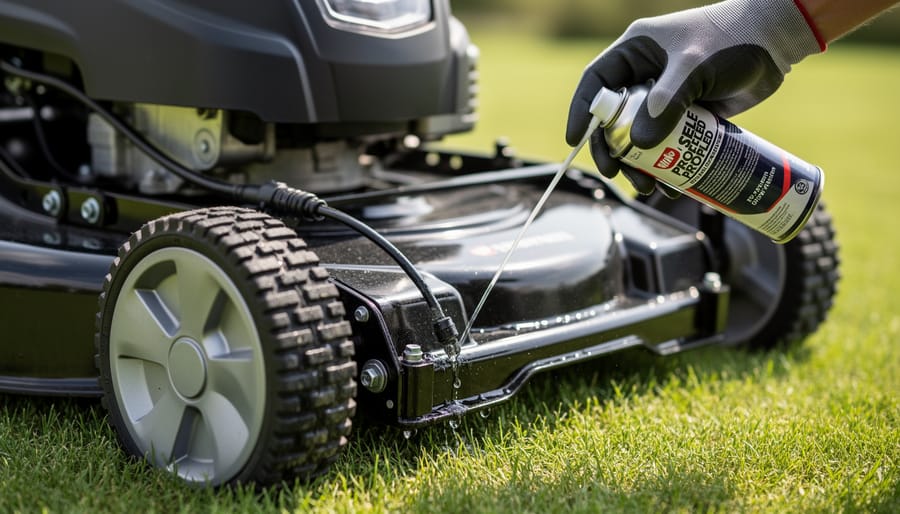
Lubrication is your self-propelled system’s best friend. Every month during mowing season, apply a light machine oil to wheel axles and any pivot points on the drive control assembly. The drive cable benefits from this attention too—disconnect it once per season and work a few drops of oil along its length. This prevents the binding that leads to premature cable replacement.
Seasonally, give your mower a thorough checkup. Spring is perfect for inspecting the drive belt for cracks or glazing, testing cable tension, and checking tire pressure. Don’t forget blade maintenance during this inspection—a balanced, sharp blade reduces engine strain that can affect your entire drive system.
Before winter storage, clean everything thoroughly and consider running the fuel tank dry or adding stabilizer. Moisture and old fuel create problems that affect more than just starting—they can lead to corrosion in transmission components.
Keep a simple log noting when you last serviced key components. This proactive approach means fewer breakdowns and more years from your Toro, which is better for your wallet and the environment.
Troubleshooting your Toro self-propelled mower might seem daunting at first, but here’s the good news: most issues you’ll encounter are completely fixable right in your own garage. By starting with the simplest solutions—checking your drive cable, inspecting the belt, and ensuring wheels aren’t clogged—you can often resolve the problem in under an hour without spending much money. This approach not only saves you the cost of a service call but also reduces waste and keeps your trusty mower out of the landfill.
Remember, there’s no shame in starting with basic checks, even if you’re an experienced DIYer. Sometimes the solution really is as simple as cleaning grass clippings from around the transmission or adjusting a cable. These small fixes add years to your equipment’s life and align perfectly with sustainable lawn care practices.
That said, if you’ve worked through these troubleshooting steps and your mower still isn’t cooperating, or if you’ve discovered significant transmission damage, it might be time to consult a professional. Get a repair estimate and weigh it against your mower lifespan expectations. A mower that’s only a few years old is almost always worth repairing, while a decade-old model with major issues might be better replaced with a more efficient model. Either way, you’ve gained valuable knowledge about how your equipment works, empowering you to maintain it better going forward.