When your zero turn mower refuses to start, you’re likely facing one of four common culprits that you can diagnose and fix yourself in most cases.
Check your battery connections first. Corroded or loose terminals prevent electrical flow even when your battery holds a charge. Clean any white or green buildup with a wire brush and baking soda solution, then tighten connections firmly. If your mower has been sitting unused, the battery may simply need charging or replacement after three to four years of service.
Test all safety switches next. Zero turn mowers won’t engage if you’re not seated properly, if the parking brake isn’t set, or if the steering levers aren’t in the correct neutral position. These protective features save lives but can malfunction over time. Manually check each switch by pressing and releasing it several times, listening for clicking sounds that indicate proper function.
Examine your fuel system for stale gasoline, which breaks down after just 30 days and clogs carburetors. Drain old fuel completely and replace it with fresh gas, adding a fuel stabilizer to prevent future degradation. This sustainable practice reduces waste and extends your mower’s life while avoiding harsh chemical cleaners.
Inspect the starter solenoid by listening for a clicking sound when you turn the key. A click without engine turnover means the solenoid works but the starter motor may have failed. No click at all points to solenoid replacement, a straightforward fix that costs significantly less than professional service calls.
Understanding Why Your Zero-Turn Won’t Turn Over
When your zero-turn mower won’t turn over, it’s helpful to understand exactly what that means before you start troubleshooting. In simple terms, “won’t turn over” typically describes a situation where you turn the key and nothing happens, or you hear just a click. The engine doesn’t even attempt to crank. This is different from a situation where the engine cranks but won’t start, where you hear the engine spinning but it never fires up and runs.
Think of it like this: turning over is the first step in the starting process, similar to waking someone up versus getting them out of bed. Your mower needs to wake up first before it can actually get moving.
So what’s involved in getting your zero-turn to turn over? There are four main players in this starting symphony. First, there’s your battery, which provides the electrical power to get everything going. Without adequate juice, nothing else matters. Second is the starter motor, which is the muscle that physically turns the engine over when you turn the key. Third, you have safety switches scattered throughout your mower, designed to prevent starting in unsafe conditions like when you’re still sitting in the seat wrong or the blades are engaged. Finally, there’s the ignition system that receives the signal from your key and tells everything else to spring into action.
Understanding this distinction between won’t turn over and won’t start saves you time and frustration. If your mower won’t turn over, you’ll focus on electrical components and safety systems. If it cranks but won’t start, you’re looking at fuel delivery and spark issues instead. Getting this diagnosis right from the start means you’ll head straight toward the solution rather than checking parts that are working just fine.
The Quick Safety Check Before You Start
Before we dive into troubleshooting, let’s take a moment to talk about safety. I know you’re eager to get that mower running, but a few simple precautions now can prevent serious injuries later. Trust me, I’ve learned this lesson the hard way after a close call early in my lawn care journey.
First things first: park your zero-turn mower on level, stable ground. This prevents any unexpected rolling while you’re working. Engage the parking brake firmly and make sure the PTO (power take-off) switch is disengaged. The PTO controls your mower blades, and you definitely want those inactive during troubleshooting. Remove the ignition key and pocket it to ensure the engine can’t accidentally start.
If you’ll be working near the engine or electrical components, consider disconnecting the spark plug wire. Simply pull the rubber boot off the spark plug tip and move it away from the metal electrode. This extra step guarantees the engine won’t fire up unexpectedly.
Here’s something interesting about your zero-turn mower: it’s equipped with multiple safety switches that work together to protect you. These include seat switches, brake switches, and PTO sensors. While they might seem like a nuisance when troubleshooting, they’re designed to prevent the mower from starting in unsafe conditions, like when you’re not seated or the blades are engaged. Understanding this system helps you appreciate why your mower might refuse to turn over, and it reminds us that these machines prioritize your safety above convenience.
Most Common Culprits (Start Here)
Dead or Weak Battery
A dead or weak battery is hands-down the most common culprit when your zero turn mower refuses to turn over. The good news? It’s also one of the easiest problems to diagnose and fix yourself.
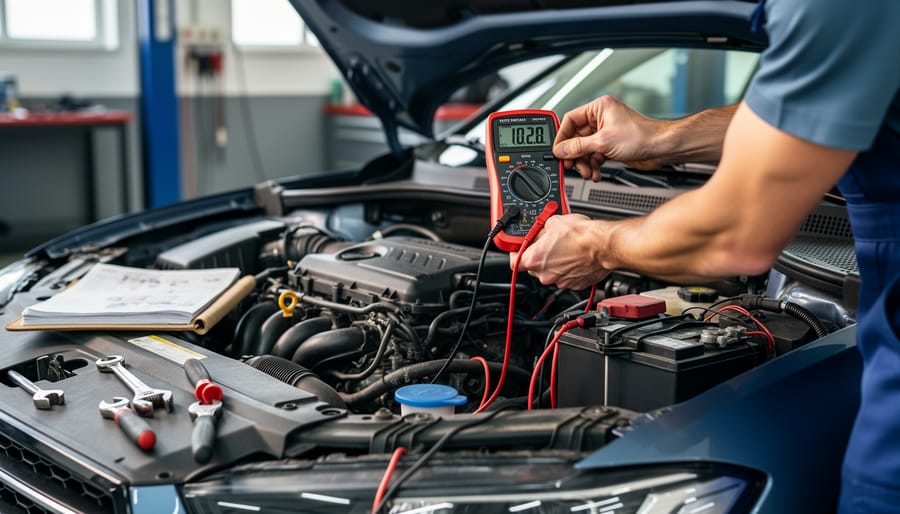
Start by testing your battery voltage with a multimeter. Set it to DC voltage and touch the red probe to the positive terminal and the black probe to the negative terminal. A healthy 12-volt battery should read between 12.4 and 12.7 volts when fully charged. Anything below 12 volts means your battery needs attention. Don’t have a multimeter? Try the headlight test: turn your key to the “on” position without engaging the starter. If your mower has headlights and they appear dim or don’t light up at all, that’s a clear indicator of battery trouble.
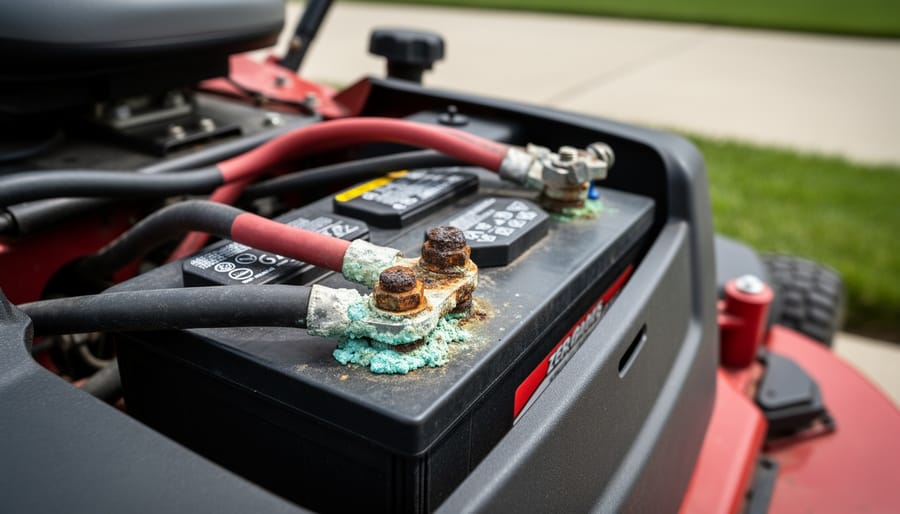
While you’re checking the battery, inspect the terminals for those telltale white or blue-green crusty deposits. Corrosion prevents proper electrical connection and can create all sorts of signs of battery problems. Clean corroded terminals by disconnecting the negative cable first, then the positive. Mix a tablespoon of baking soda with a cup of water and scrub the terminals with an old toothbrush. Rinse with clean water and dry thoroughly before reconnecting.
If your battery just needs a charge, a standard automotive battery charger works perfectly. However, batteries older than three to four years often lose their ability to hold a charge and need replacement. Jump-starting can get you through an emergency mowing session, but it’s not a long-term solution.
When it’s time for a new battery, please take the old one to a recycling center or auto parts store. Lead-acid batteries contain toxic materials that harm soil and groundwater, making proper disposal essential for protecting the environment we’re working so hard to beautify.
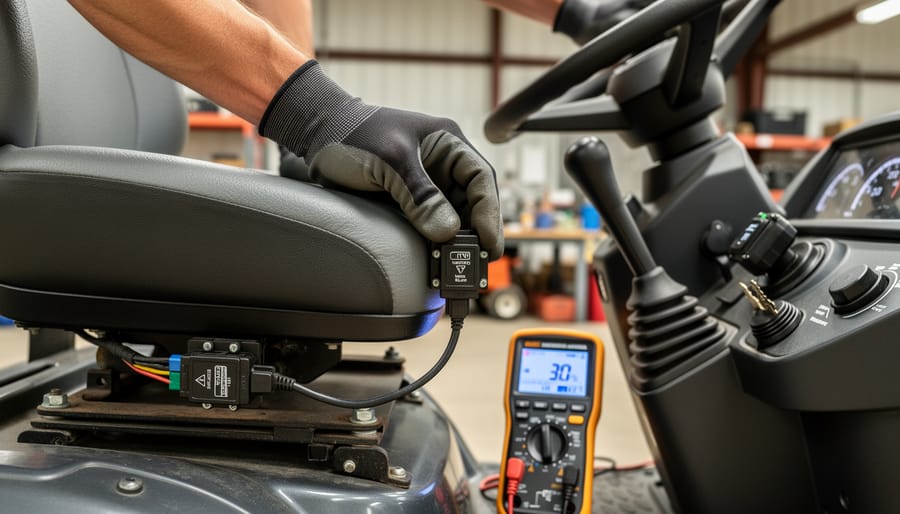
Faulty Safety Switches
Zero turn mowers come equipped with several safety switches designed to protect you from injury, but when these switches malfunction or become misaligned, they can prevent your mower from starting altogether. Think of them as vigilant guardians that sometimes get a bit overzealous. Let’s walk through each one and how to test them systematically.
The seat switch is your first checkpoint. This clever safety feature ensures the engine cuts off if you leave the seat while the blades are engaged. Over time, seats can shift or the switch underneath can wear out. To test it, locate the switch beneath your seat and press it manually while turning the key. If the mower starts, you’ve found your culprit. Sometimes simply adjusting your seat position forward or backward can realign everything properly.
Next up is the parking brake switch, which prevents starting unless the brake is engaged. This switch can become sticky or corroded, especially if your mower lives outdoors. Try pumping the brake pedal several times, then hold it firmly while starting. A quick cleaning with electrical contact cleaner often works wonders here.
The PTO switch controls blade engagement and is another common troublemaker. When dealing with PTO engagement issues, ensure the switch is fully in the off position before starting. These switches can wear internally, sending false signals that the blades are engaged even when they’re not.
Finally, check the blade engagement lever or switch. Many mowers require this to be disengaged during starting. A worn or misaligned switch here can fool your mower into thinking it’s unsafe to start.
To test any switch systematically, use a multimeter set to continuity mode. Disconnect the switch, touch the probes to its terminals, and activate it. You should hear a beep indicating electrical flow.
Here’s an important safety reminder: while you might be tempted to bypass these switches temporarily to get your lawn mowed, never make this a permanent solution. These switches exist to prevent serious injuries. A properly functioning safety system protects you, your family, and anyone else who might operate your mower. Instead, invest in quality replacement switches, which are typically affordable and straightforward to install, keeping both your mower and your well-being in good shape.
Fuel System Issues
Before you start troubleshooting anything complex, let’s talk about something that happens more often than you’d think: fuel issues. I’ve lost count of how many times I’ve watched someone panic over a mower that won’t start, only to discover the simplest of fuel-related problems.
First things first, check your fuel tank. Yes, I know it sounds almost too obvious, but running out of gas is surprisingly common, especially at the start of mowing season when you might not remember how much fuel was left from last year. Give the tank a good look.
Now, here’s where things get interesting. Even if you have fuel, it might be the problem rather than the solution. Gasoline doesn’t age well, and if your mower has been sitting idle for months with old fuel inside, you’re likely dealing with stale or contaminated gas. Fresh fuel should be clear or slightly amber. If it looks darker, cloudy, or smells like varnish rather than gasoline, it’s gone bad. Old fuel can gum up your entire system and prevent the engine from turning over.
The fix? Drain the old fuel completely and refill with fresh gas. Consider switching to ethanol-free fuel if it’s available in your area. While it costs a bit more upfront, ethanol-free fuel lasts significantly longer in storage and is much gentler on your mower’s fuel system. This small investment pays off in equipment longevity and fewer headaches down the road.
While you’re addressing fuel quality, check your fuel filter for clogs. A blocked filter starves the engine of fuel. Also, locate your fuel shut-off valve and make sure it’s in the open position. These valves can stick, especially after long periods of storage, creating an instant no-start situation that’s easily resolved.
Blown Fuse
A blown fuse is often overlooked but can quickly stop your zero-turn mower in its tracks. Most models house the fuse box under the seat or near the battery compartment, though checking your owner’s manual will give you the exact location. Look for a small plastic box containing one or more blade-style fuses.
To inspect a fuse, gently pull it out and hold it up to the light. A blown fuse will have a broken metal strip inside or appear visibly blackened. You can also use a multimeter set to continuity mode for a more precise test. Fuses typically blow due to electrical shorts, faulty wiring, or attempting to draw too much power through the system. Before replacing a blown fuse, investigate what caused the failure to prevent it from happening again.
Here’s something important: always replace fuses with the exact amperage rating specified by your manufacturer. Using a higher-rated fuse might seem like a quick fix, but it can lead to serious damage or even fire hazards since the fuse won’t protect your electrical system properly. Keep a few spare fuses in your maintenance kit as an eco-friendly alternative to emergency service calls.
Deeper Troubleshooting When the Basics Don’t Work
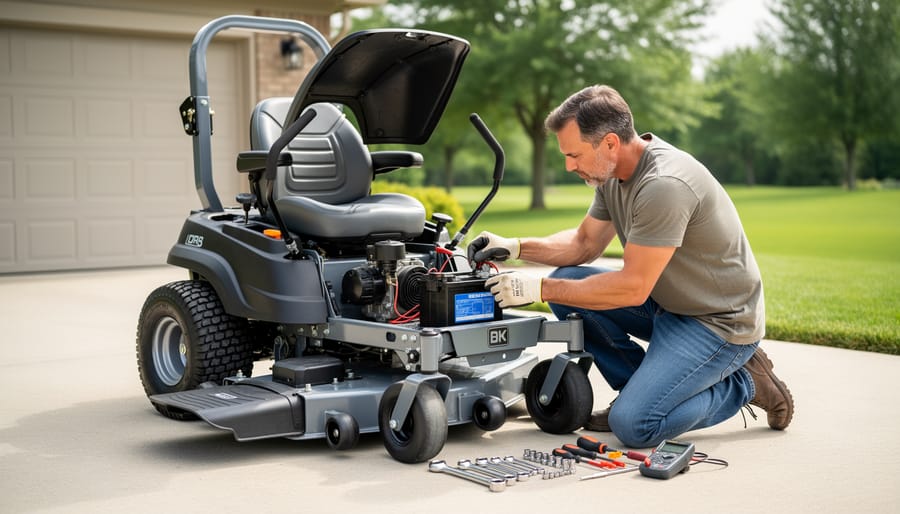
Testing the Starter Motor and Solenoid
Let’s find that starter motor and solenoid so we can diagnose what’s happening when you turn the key. The starter motor is typically located near the bottom of your engine, often on the side, while the solenoid is usually mounted nearby or on the starter itself. Look for a cylindrical component (the motor) with electrical wires attached.
Here’s a simple test to start: Turn your ignition key and listen carefully. A single click or repeated clicking often means your solenoid is trying to engage but lacks sufficient power, usually pointing back to battery issues. If you hear grinding noises, the starter gear might be damaged or not meshing properly with the flywheel. Complete silence when your mower won’t click could indicate a faulty solenoid, broken connections, or electrical problems.
You can test the solenoid directly by carefully bridging its terminals with an insulated screwdriver while the key is in the on position (safety switches bypassed). If the engine cranks, your solenoid needs replacement. This is actually a straightforward DIY job for most gardening enthusiasts, and replacing these components yourself saves money while reducing waste by keeping your mower running longer.
However, if you’re uncomfortable working with electrical components, hear unusual grinding that suggests internal starter damage, or the problem persists after replacement, it’s time to consult a professional. There’s no shame in getting expert help, especially when it means avoiding further damage to your sustainable lawn care investment.
Ignition Switch Problems
The ignition switch is your mower’s control center, and when it fails, nothing happens when you turn the key. Let’s walk through testing and replacing it if needed.
To test your ignition switch, you’ll need a multimeter set to continuity mode. First, disconnect the battery for safety. Locate the wiring harness connected to the back of the switch and check for continuity between the terminals as you turn the key to different positions. You should see continuity between specific terminals in the “on” and “start” positions. No continuity means the switch has worn out internally.
Signs of a failing ignition switch include intermittent starting problems, needing to wiggle the key to get a response, or complete electrical silence when turning the key. Sometimes the key feels loose or doesn’t return to position properly.
Replacing the switch is straightforward. After disconnecting the battery, remove the dashboard panel or housing covering the switch. Take a photo of the wire connections before disconnecting them. Remove the mounting screws or clips holding the switch, pull it out, and reverse the process with your new switch. This repair typically takes 15-20 minutes and costs between $15-40 for the part, making it an economical fix that gets you back to mowing quickly.
Wiring and Connection Issues
Sometimes the culprit behind a stubborn zero turn mower is hiding in plain sight: the wiring. Think of your mower’s electrical system like the nervous system of your lawn care setup. When connections get compromised, even a perfectly healthy battery and starter can’t communicate properly.
Start your detective work by inspecting the wires around your battery terminals. Look for green or white crusty buildup, which signals corrosion. This happens naturally over time, especially if your mower lives outdoors or in a damp shed. A wire brush and some baking soda mixed with water can work wonders here, though disconnect your battery first for safety.
Next, check under the seat where wiring harnesses connect to safety switches. These areas take a beating from vibration and weather exposure. Gently wiggle connectors while watching for loose connections or frayed insulation. I’ve seen countless mowers mysteriously spring back to life after simply reseating a connector that had worked loose from all that bouncing around the yard.
Pay special attention to any wires running along the frame or near the engine. Rodents love chewing through wire insulation during winter months, treating your mower like an all-you-can-eat buffet. Even small nicks in the insulation can cause problems, especially in humid conditions.
If you own a basic multimeter, you can test wire continuity by touching the probes to each end of a suspect wire. A reading close to zero means the wire is conducting properly. No reading suggests a break somewhere along the line, meaning it’s replacement time.
Preventive Maintenance to Avoid Future Starting Problems
Seasonal Storage Best Practices
Proper winterization and storage can save you from that frustrating moment when your zero turn won’t start come spring. As mowing season winds down, add fuel stabilizer to a full tank and run the engine for five minutes to circulate it through the system. This prevents gummy deposits that can clog your fuel system over winter.
Disconnect and remove your battery, storing it in a cool, dry place above freezing. A trickle charger keeps it healthy during dormancy, ensuring reliable starts next season. Clean your mower thoroughly to remove grass clippings and debris that trap moisture and promote corrosion, especially around electrical connections.
Create a simple end-of-season checklist: stabilize fuel, maintain battery, change oil, clean deck thoroughly, inspect belts and blades, lubricate moving parts, and cover your mower if storing outdoors. Taking these preventive steps protects your investment and embraces sustainable practices by extending your equipment’s lifespan. A little preparation now means fewer headaches and repair costs later, letting you focus on what really matters when spring arrives: enjoying a beautifully maintained lawn.
Regular Maintenance Schedule
The best defense against a zero turn mower that won’t start is staying ahead of problems with a simple maintenance routine. Think of it as an investment that pays dividends in reliability and longevity, while also reducing your environmental footprint.
Monthly, take fifteen minutes to inspect your battery terminals for corrosion and ensure connections are snug. A loose connection can mean the difference between a productive Saturday and a frustrating one. Check your fuel level and quality too, especially if you’re storing your mower for more than a week or two. Fresh fuel burns cleaner and reduces emissions compared to degraded gasoline that gums up your system.
Every season, go deeper. Test your safety switches by attempting to start the mower without sitting down or with the blades engaged. These switches should prevent starting, confirming they’re working properly. Clean or replace your spark plug, inspect fuel lines for cracks, and change your oil according to manufacturer recommendations. Clean oil means better fuel efficiency and fewer harmful emissions.
Before winter storage, stabilize your fuel or run the tank dry to prevent carburetor issues come spring. This simple step can save hundreds in repair costs and keeps your mower running optimally for years longer than neglected equipment.
Well-maintained mowers use fuel more efficiently, produce fewer emissions, and avoid the environmental cost of premature replacement. You’re not just saving money, you’re making a sustainable choice that keeps equipment out of landfills while ensuring your lawn care routine stays on track when you need it most.
When to Call a Professional
Let’s be honest—some zero turn mower issues are perfect weekend DIY projects, while others are best left to the pros. Knowing the difference can save you time, money, and a whole lot of frustration.
If you’ve checked the battery connections, replaced the fuel, tested the safety switches, and verified the fuses, but your mower still won’t cooperate, it’s probably time to call in an expert. Issues involving the starter motor, alternator, or internal engine problems typically require specialized tools and diagnostic equipment that most of us don’t have sitting in the garage. Similarly, if you’re dealing with suspected electrical shorts or complex wiring problems, a professional can trace these issues much more efficiently.
Cost considerations matter too. Basic service calls typically run between $75-150, while major repairs like starter replacement might cost $200-400. Before committing to repairs, ask for an estimate and weigh it against your mower’s age and value. Sometimes, knowing when to invest in professional help actually saves money by preventing further damage from well-intentioned but misguided DIY attempts.
Finding a reputable repair shop doesn’t have to be daunting. Start by asking fellow gardeners and lawn care enthusiasts in your community for recommendations. Check online reviews, but look for patterns rather than focusing on single complaints. Local independent shops often provide more personalized service than big-box stores and may have more experience with your specific mower brand.
When you call, have your mower’s make, model, and serial number ready, along with a clear description of what’s happening. Mention what you’ve already checked—this shows you’re an informed customer and helps the technician diagnose the problem faster. Also ask about their warranty on repairs and whether they use OEM or aftermarket parts, as this impacts both cost and longevity of the fix.
Here’s the good news: most zero turn mower starting problems are completely solvable with a little patience and some basic troubleshooting. As we’ve covered, the key is taking a systematic approach. Start with the simplest fixes like checking your battery connections and fuel levels, then work your way toward more complex issues like the starter motor or ignition switch. More often than not, you’ll find the culprit somewhere in those first few steps.
Remember, there’s real satisfaction in diagnosing and fixing your own equipment. Not only does it save you time and money, but you’ll develop a better understanding of how your mower works, making future maintenance easier. Plus, getting hands-on with repairs aligns perfectly with sustainable lawn care practices by extending the life of your equipment rather than replacing it prematurely.
We’d love to hear about your experiences! Did you solve your starting problem using these tips? Run into a unique issue we didn’t cover? Drop a comment below and share your story. Your insights might help a fellow gardener get back to creating that beautiful, well-maintained lawn you both take pride in.