Choosing between a tiller and a cultivator isn’t just about understanding what each tool does—it’s about matching the right equipment to your soil conditions and maintenance capabilities. Tillers break new ground with powerful tines that dig 8-10 inches deep, making them essential for starting gardens from scratch but requiring more intensive upkeep like oil changes, belt replacements, and tine sharpening. Cultivators work the top 4-6 inches of already-established beds, demanding less maintenance but needing regular tine cleaning and occasional blade replacement to stay effective. The equipment you select directly impacts your long-term maintenance schedule and costs, with tillers requiring seasonal tune-ups and cultivators needing primarily cleaning and minor adjustments. Understanding these differences now prevents the frustration of buying a heavy-duty tiller when a lightweight cultivator would serve your existing garden beds better, or purchasing an underpowered cultivator that struggles with compacted soil you haven’t worked before. Your maintenance routine should align with your tool’s intensity—neglecting a tiller’s engine care leads to expensive repairs, while ignoring a cultivator’s tine condition reduces its effectiveness and damages your soil structure over time.
Tiller vs. Cultivator: What Makes Them Different
How Tillers Work (And Why They Work Harder)
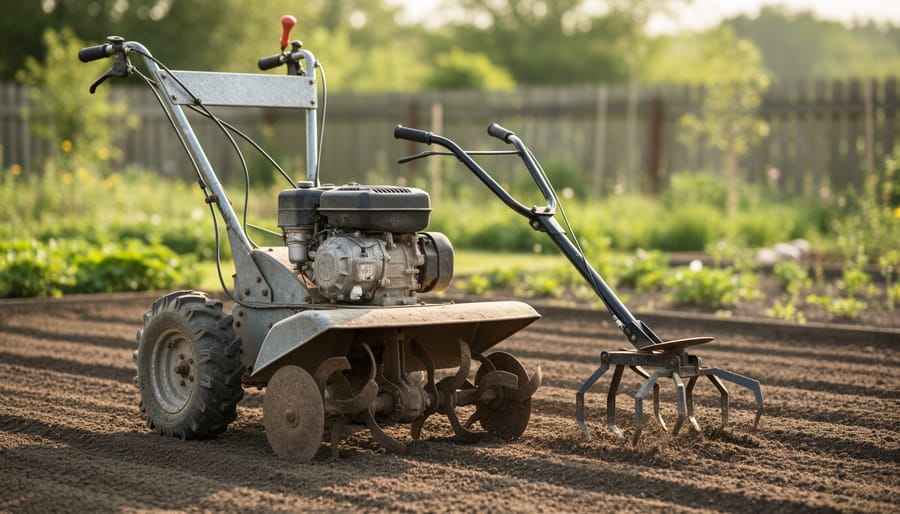
Tillers are the heavy-duty workhorses of soil preparation, designed to penetrate deeply and transform compacted or virgin ground into workable garden beds. Their powerful rotating tines, often called blades, dig down 8-10 inches or more, breaking through tough soil, cutting through roots, and incorporating organic matter throughout the soil profile.
Here’s what makes tillers work so hard: they’re tackling jobs that require serious muscle. When you’re breaking new ground for your first vegetable garden or reclaiming an overgrown area, the tiller’s engine and transmission face substantial resistance. Those tines are essentially fighting against soil that hasn’t been disturbed in years, sometimes decades. This constant battle against hard-packed earth, rocks, and thick root systems puts tremendous stress on every component—from the engine and drive belt to the tines and transmission.
Think of it this way: if a cultivator is like stirring already-mixed cake batter, a tiller is like kneading stiff bread dough from scratch. That’s why tillers need more robust construction, more powerful engines, and frankly, more frequent maintenance attention. Understanding this fundamental difference helps you appreciate why proper upkeep matters so much—you’re maintaining equipment that’s designed to handle the toughest soil preparation tasks your garden can throw at it.
What Cultivators Actually Do
Think of a cultivator as your garden’s gentle grooming tool. Unlike its heavier-duty cousin the tiller, a cultivator works the top few inches of soil—typically just 2 to 4 inches deep. This makes it perfect for those regular maintenance tasks that keep your garden beds healthy and productive.
Cultivators excel at three main jobs. First, they mix compost, fertilizer, or mulch into the surface layer without disturbing deeper soil structure—a win for soil health and beneficial microorganisms living below. Second, they’re fantastic weed warriors, chopping up small weeds before they establish deep roots. Get into the habit of running a cultivator through your beds every couple of weeks during growing season, and you’ll dramatically reduce weeding time later.
Third, cultivators break up that crusty surface layer that forms after heavy rain or watering, improving water penetration and air circulation around plant roots. Because they’re lighter and work less aggressively than tillers, cultivators experience less strain on their tines and motor. You’ll notice this translates to lower maintenance needs—though those tines still need regular sharpening and cleaning to stay effective. The gentle action means parts last longer when properly cared for, making cultivators a sustainable choice for routine garden maintenance.
Tine Maintenance: Where Most People Get It Wrong
Tiller Tines Take More Punishment (Here’s What to Watch For)
Because tillers work harder than cultivators, breaking through compacted soil and roots, their tines face significantly more stress. I learned this the hard way when I ignored a slightly bent tine and ended up with an unbalanced machine that made my whole operation miserable. Regular inspections can save you from similar frustrations.
Check your tiller tines before and after each major project. Look for obvious bending or warping, which happens when you hit rocks or buried debris. Even slight bends create uneven soil penetration and put extra strain on your tiller’s transmission. If you spot damage early, you can often replace just one or two tines rather than waiting until the whole set needs changing.
Sharpness matters more than many gardeners realize. Dull tines force your tiller to work harder, burning more fuel and potentially damaging the engine over time. Depending on your soil type, you might need to sharpen them once or twice per season. The proper sharpening techniques will extend tine life and improve performance significantly.
Don’t forget the bolts. Vibration loosens the hardware that holds tines in place, and a flying tine is dangerous. Check bolt tightness after your first hour of use each season, then periodically throughout.
Replace tines when they’ve worn down to about two-thirds of their original length. Worn tines reduce tilling depth and effectiveness, making your work harder than necessary while delivering disappointing results.
Cultivator Tines Need Love Too
Cultivator tines work differently than tiller blades, so they need their own special care routine. The good news? Maintaining them is pretty straightforward once you understand what you’re working with.
For wire tines, which are those springy, curved prongs you’ll find on many cultivators, regular inspection is your best friend. Check them before and after each use for any bends or breaks. These tines are designed to flex as they work through the soil, but they can lose their spring over time. If you notice a tine has bent permanently out of shape, it’s time to replace it. Most manufacturers sell replacement tines individually, which is both budget-friendly and sustainable.
Spring tines require a similar approach, but pay extra attention to the mounting points where they attach to the cultivator frame. These connection spots can work loose with repeated use, so give them a quick tighten every few sessions. The flexibility of spring tines is actually their superpower, allowing them to pop over rocks and roots without damage, but this also means they’re under constant stress.
After every use, remove soil and plant debris from between the tines. A stiff brush and garden hose work wonders here. This simple five-minute routine prevents rust and keeps your cultivator working efficiently. If you’re dealing with sticky clay soil, let it dry slightly before brushing it off. Store your cultivator in a dry location, and consider applying a light coating of oil to metal tines before winter storage to prevent corrosion.
The Dirt That’s Killing Your Tines
Here’s the truth about what’s happening beneath the surface: your tiller’s heavy-duty tines face a tougher battle than cultivator tines, but both need protection from their worst enemies.
Clay soil is particularly brutal on tiller tines because it clumps and creates resistance, forcing the motor to work harder and causing faster wear. Rocky soil? That’s where cultivator tines actually suffer more. Since they’re designed for lighter work and shallower depths, hitting unexpected rocks can bend or snap their thinner tines more easily than a tiller’s robust ones.
Debris like old roots, plastic, and wire are universal tine killers. They wrap around rotating tines, creating friction points that dull edges and stress connection points. I’ve seen gardeners lose entire seasons because they didn’t remove these hazards before working their soil.
After each use, spray off soil buildup immediately, especially if you’re working clay. Dried clay becomes cement-hard and accelerates rust. For cultivators, check between tines for tangled debris after every session.
Storage makes all the difference for sustainability and longevity. Coat tines lightly with vegetable oil or a rust inhibitor before storing in a dry space. This simple step extends tine life by years, reducing replacement waste. proper tine care prevents those frustrating mid-season breakdowns and keeps your equipment performing efficiently season after season.
Gearbox Maintenance: The Part You Can’t Ignore
Why Tiller Gearboxes Fail (And How to Prevent It)
Tiller gearboxes work incredibly hard, transferring engine power to those spinning tines that break through compacted soil. Unfortunately, this heavy-duty job makes them prone to failure if not properly maintained. Understanding the common failure points can save you hundreds in repair costs and keep your tiller running for years.
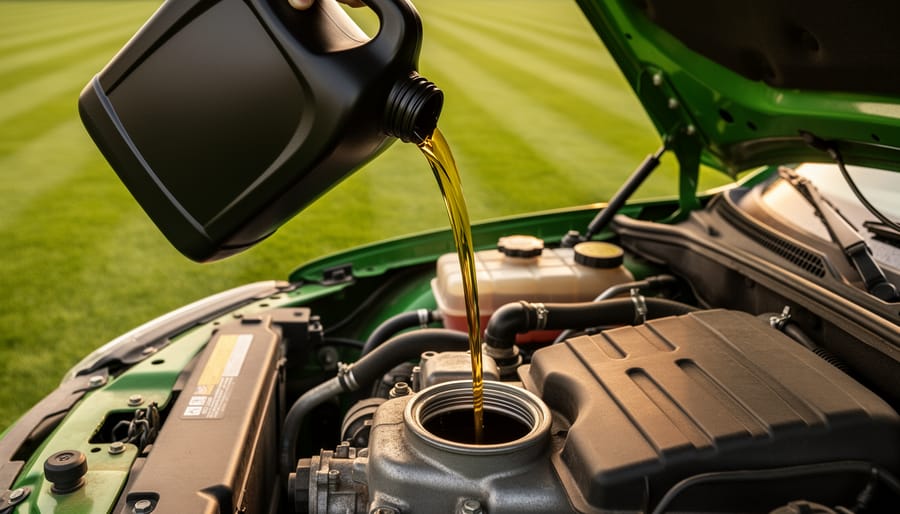
The number one culprit behind gearbox failure is inadequate lubrication. Those gears are grinding against each other under tremendous torque loads, especially when you’re breaking new ground or working clay soil. Without proper lubrication, metal-on-metal contact creates excessive heat and wear. Most manufacturers recommend checking gearbox oil levels before each use and changing the oil at least once per season, or every 50 hours of operation, whichever comes first.
Use the oil type specified in your owner’s manual, typically SAE 140 weight gear oil or an equivalent. Using automotive engine oil or the wrong viscosity can lead to premature wear because these oils don’t provide the same protection under the extreme pressure gearbox gears experience.
Regular inspections are your best defense. Before each use, look for oil leaks around seals and gaskets. Even a small leak means dirt and moisture can enter the gearbox, creating an abrasive slurry that accelerates wear. Listen for unusual grinding, whining, or clicking sounds during operation, these often signal worn bearings or damaged gears.
Check the input shaft seal where the engine connects to the gearbox. This seal commonly fails due to vibration and heat exposure. A worn seal allows oil to escape and contaminants to enter.
Just like small gas engine maintenance, gearbox care follows simple preventive principles: keep it clean, properly lubricated, and address small issues before they become expensive failures.
Cultivator Gearboxes: Simpler But Not Maintenance-Free
Good news for cultivator owners: your gearbox faces significantly less stress than its tiller counterpart, which means simpler maintenance routines. Since cultivators work shallower soil and handle lighter tasks, their gearboxes don’t endure the same punishment. That said, “simpler” doesn’t mean “skip it entirely.”
Most cultivator gearboxes need lubrication checks every 25-30 operating hours, rather than the more frequent schedule tillers demand. I’ve found that many gardeners can get through an entire growing season on a single oil change if they’re working moderately sized gardens. Check your owner’s manual for the specific oil type, but most use standard 80W-90 gear oil, which is readily available and affordable.
What should you monitor? Listen for unusual grinding sounds during operation, which often signal low lubrication levels. Before each use, give the gearbox housing a quick visual inspection for cracks or oil seepage around seals. A small oil leak now becomes a major repair bill later. Also pay attention to how smoothly the tines rotate. If they seem to catch or hesitate, your gearbox might be telling you it needs attention.
Here’s a sustainable tip: when you do change the oil, don’t pour it down the drain. Take it to a local recycling center where it can be properly processed. This small step protects your soil and groundwater while keeping your cultivator running smoothly for years to come.

The Five-Minute Check That Saves Your Gearbox
Here’s a habit I learned the hard way after replacing a gearbox that could’ve been saved: spend five minutes before each use, and you’ll avoid hours of frustration later. Whether you’re firing up a tiller or cultivator, this quick routine works for both.
Start by checking your oil level when the machine is on level ground. Low oil is the number one gearbox killer I’ve seen among fellow gardeners. Pull that dipstick, wipe it clean, reinsert it, and check again. Top off if needed with the manufacturer’s recommended oil.
Next, give your tines a visual once-over. Broken or excessively worn tines don’t just work poorly; they create unbalanced stress on the entire drive system. Replace any damaged ones before operating.
Now for the listening test: engage the tines without the engine running and slowly rotate them by hand. You’re listening for grinding, clicking, or resistance. Smooth and quiet? You’re good to go. Unusual sounds? That’s your gearbox asking for attention before a small issue becomes an expensive repair.
Finally, inspect belts and chains for proper tension and wear. A loose belt can slip and overheat, while an overtight one strains bearings unnecessarily. This sustainable approach to maintenance means your equipment lasts decades, not just seasons.
Seasonal Maintenance: Matching the Task to the Tool
Spring Prep: When to Use Which Tool
As gardening season approaches, getting your soil-working equipment ready makes all the difference in achieving a thriving garden. Your pre-season checklist looks quite different depending on which tool you’re preparing.
For tillers tackling heavy spring work, start by inspecting the tines for damage or excessive wear. Sharp, intact tines are essential for breaking through compacted winter soil effectively. Check the engine oil, air filter, and spark plug, replacing them if needed. Test the throttle and safety controls to ensure everything responds properly. Since tillers handle demanding work, verify that all bolts are tight and belts show no signs of cracking. This thorough seasonal equipment preparation prevents mid-job breakdowns when you’re wrestling with tough spring ground.
Cultivators require lighter but equally important maintenance. Clean the tines thoroughly, removing any dried soil or plant material from last season. Check the fuel system if gas-powered, or inspect battery connections for electric models. Since cultivators work closer to plant roots, ensure depth adjustment mechanisms move smoothly. Lubricate moving parts and tighten any loose hardware.
Here’s a sustainable tip: both tools benefit from using eco-friendly lubricants and properly disposing of old oil. Keep maintenance records to track part replacements and anticipate future needs. A well-maintained tool not only performs better but lasts longer, reducing waste and keeping your garden preparation efficient year after year.
End-of-Season Storage That Actually Works
When winter approaches or the growing season winds down, your tiller and cultivator need different attention to ensure they’re ready for action next spring. Understanding these differences will save you headaches and extend your equipment’s lifespan.
Start with both machines by giving them a thorough cleaning. Remove all soil, plant debris, and grass clippings from tines and housing. For tillers with their deeper-digging tines, pay special attention to packed soil that can hide moisture and cause rust. Cultivators, with their lighter build, are easier to clean but still need careful inspection of those smaller tines.
Next, drain or stabilize fuel according to your manufacturer’s recommendations. This step is crucial for preventing gummed-up carburetors and fuel system problems. Add fuel stabilizer if you’re storing with gas, or run the engine until it’s completely dry.
Check and change the oil in your tiller, as these workhorses accumulate more dirt and debris during heavy-duty operation. Cultivators typically require less frequent oil changes, but consult your manual.
Apply proper equipment storage practices by keeping both machines in a dry, covered location. Protect metal parts with a light coating of oil to prevent rust. Store them off the ground on pallets or shelving to avoid moisture exposure, ensuring they’ll start reliably when spring gardening calls.
Making Your Equipment Last: Sustainable Practices That Save Money
Here’s the truth about making garden equipment last: choosing the right tool for each job isn’t just about getting better results, it’s about protecting your investment and the planet. When you use a tiller for cultivating tasks or force a cultivator to break new ground, you’re not just making the job harder—you’re wearing out your equipment prematurely and wasting resources.
The most sustainable practice starts before you even pull the starter cord. Match your tool to the task. Need to work established beds between plants? Grab your cultivator. Breaking completely new ground or working in amendments deeply? That’s tiller territory. This simple decision can add years to your equipment’s life while reducing fuel consumption and unnecessary wear.
Speaking of fuel, proper storage makes an enormous difference. At season’s end, run your gas-powered equipment until the tank is nearly empty, then add fuel stabilizer to whatever remains. This prevents gummy deposits that corrode carburetors and fuel lines—one of the most common and frustrating equipment failures. For battery-powered models, store batteries at around 50 percent charge in a cool, dry place.
Regular cleaning isn’t just about appearances. Soil buildup traps moisture against metal parts, accelerating rust and corrosion. After each use, knock off excess dirt and wipe down tines with an oiled rag. This five-minute habit can prevent expensive replacement parts down the road.
When parts do wear out, resist the temptation to trash the entire unit. Tines, belts, and spark plugs are designed to be replaced. Many manufacturers and third-party suppliers offer refurbished parts at substantial savings. Some garden centers even run parts exchange programs, keeping materials in use longer.
When equipment finally reaches the end of its useful life, dispose of it responsibly. Many municipalities offer recycling programs for small engines and metal components. Some retailers take back old equipment when you purchase new, ensuring proper recycling. By extending equipment life and disposing thoughtfully, you’re not just saving money—you’re reducing the environmental footprint of your gardening practice.
Understanding the difference between tillers and cultivators isn’t just about choosing the right tool for the job—it’s about setting yourself up for years of successful, sustainable gardening. When you match your maintenance routine to your equipment’s specific purpose and design, you’ll avoid unnecessary breakdowns, extend the life of your investment, and save money in the long run.
Think of it this way: a well-maintained tiller can tackle new garden beds season after season, while a properly cared-for cultivator keeps your established gardens thriving with minimal effort. Both deserve attention tailored to their unique demands. Heavy-duty tillers need more intensive maintenance because they work harder, while lighter cultivators benefit from regular cleaning and simple upkeep that takes just minutes after each use.
By embracing these maintenance practices, you’re not only protecting your equipment—you’re supporting a more sustainable approach to gardening. Well-maintained tools run more efficiently, reducing fuel consumption and preventing premature disposal. They also perform better, which means healthier soil and more productive gardens. Take the time to care for your equipment properly, and it will reward you with reliable performance for many growing seasons ahead.