Check your battery voltage with a multimeter before starting the engine—it should read around 12.6 volts when fully charged. If your riding mower’s battery keeps dying, struggles to hold a charge, or your mower turns over but won’t start consistently, the voltage regulator is likely failing to convert your engine’s alternating current into the steady 14-15 volts needed to keep your battery charged during operation.
Test the charging system by measuring battery voltage while the engine runs at full throttle—healthy systems produce 13.5 to 14.5 volts, while readings above 15 volts or below 13 volts signal regulator failure. Inspect the regulator’s wire connections for corrosion, loose terminals, or melted insulation, as poor connections cause most voltage regulation problems before the component itself actually fails.
Replace a faulty voltage regulator immediately to prevent battery damage and avoid getting stranded mid-mow. Most regulators cost between fifteen and fifty dollars and mount near the engine with two to four bolts, making this a straightforward repair that saves you from repeatedly purchasing expensive replacement batteries. Understanding this small but essential component empowers you to maintain your equipment sustainably, extending both battery and mower lifespan while keeping your lawn care routine uninterrupted. The voltage regulator works silently behind the scenes, but when it fails, your entire electrical system suffers—making early detection and proper testing your best defense against costly breakdowns.
What Does a Voltage Regulator Actually Do?
Think of your riding mower’s voltage regulator as the peacekeeper between your engine and your battery. Just like you wouldn’t want to gulp water from a fire hose, your battery doesn’t want the raw, uncontrolled power that comes straight from the alternator. That’s where the voltage regulator steps in to save the day.
Here’s what’s happening under the hood: as your mower’s engine runs, the alternator generates electrical power. But there’s a catch—this power comes out as alternating current, or AC, which isn’t what your battery needs. The voltage regulator’s first job is converting that AC power into direct current, or DC power, which your battery can actually use and store.
The second part of the regulator’s job is even more critical. Without regulation, the alternator might send too much voltage to your battery, essentially overcharging it. Think of it like overwatering a plant—too much of a good thing causes damage. Overcharging creates excessive heat, causes the battery to lose water, and dramatically shortens its lifespan. On the flip side, undercharging means your battery never gets fully powered up, leaving you with that dreaded clicking sound when you try to start your mower.
Your voltage regulator maintains the sweet spot, typically keeping the charging voltage between 13.5 and 14.5 volts. This ensures your battery gets exactly what it needs—nothing more, nothing less. It’s like having a thermostat that keeps your home at the perfect temperature, automatically adjusting as conditions change.
Beyond protecting your battery, the voltage regulator ensures all your mower’s electrical components receive steady, reliable power. Your headlights stay bright, your safety switches work properly, and any electronic controls function as designed. It’s a small component doing big work, quietly maintaining the electrical harmony that keeps your mower running smoothly season after season.
Signs Your Voltage Regulator Is Failing

Dead or Constantly Draining Battery
If you’ve noticed your riding mower battery dying repeatedly even after charging or installing a brand new one, your voltage regulator might be the culprit. Here’s what’s happening: a healthy voltage regulator keeps your battery charged while the engine runs by converting the alternator’s output into steady charging power. When this component fails, it stops delivering the proper charge to your battery, leaving it to slowly drain with each use.
You might experience bad battery symptoms like slow cranking or complete failure to start, even though you just charged the battery overnight. Some folks replace their battery multiple times before realizing the real problem lies with the regulator. This cycle wastes money and creates unnecessary battery waste, which isn’t great for sustainability. Testing your voltage regulator before replacing another battery saves resources and gets your mower running reliably again.
Flickering or Dim Lights
Have you noticed your riding mower’s headlights pulsing like a heartbeat or your dashboard lights looking unusually dim during evening mowing sessions? This is one of those telltale signs that your voltage regulator might be struggling. When the voltage regulator fails to maintain steady electrical flow, the lights on your mower become the first casualties, flickering or dimming noticeably as engine speed changes.
Here’s what’s happening: a healthy voltage regulator keeps electricity flowing at a consistent rate, typically around 13.5 to 14.5 volts. When it malfunctions, voltage output fluctuates wildly—sometimes too high, sometimes too low. Your lights respond to these inconsistent voltage levels in real-time, brightening when you rev the engine and dimming at idle. This isn’t just annoying; it’s actually warning you of potential damage to other electrical components. If you’re experiencing this issue alongside other electrical problems, it’s worth checking your voltage regulator before the battery suffers permanent damage or you’re left unable to start your mower mid-season. The good news is that catching this symptom early makes for a straightforward fix that protects your mower’s entire electrical system.
Burnt Smell or Hot Battery
If your battery feels unusually hot to the touch or you notice a distinct burning smell around your riding mower, take this as a serious warning sign. A failing voltage regulator can overcharge your battery, causing the electrolyte solution inside to overheat and potentially boil. This creates hydrogen gas buildup, which is both dangerous and harmful to your battery’s lifespan. You might also notice the battery case bulging or warping from excessive heat. From a sustainability standpoint, prematurely destroying batteries through overcharging is wasteful and expensive. If you detect these symptoms, disconnect your battery immediately and let it cool in a well-ventilated area away from sparks or flames. Before reconnecting anything, test your voltage regulator to confirm it’s the culprit. Replacing a faulty regulator promptly protects your investment and prevents potential fire hazards, keeping both you and your equipment safe during lawn care season.
Mower Runs Only When Jumped
If your riding mower fires up when you give it a jump start but dies shortly after disconnecting the jumper cables, you’re looking at a classic voltage regulator issue. Here’s what’s happening: the jump gives your battery enough power to crank the engine, but once running, your mower needs the charging system to take over and maintain battery voltage while powering all electrical components.
A failing voltage regulator can’t properly convert the alternator’s output into usable charging voltage. This means your battery drains while you’re mowing, eventually leaving you stranded mid-lawn. You might notice dimming headlights or sluggish blade engagement before the engine finally cuts out—these are telltale signs the battery is depleting faster than it’s recharging.
This problem is particularly frustrating because it mimics battery failure, leading many folks to replace a perfectly good battery without addressing the real culprit. If your mower won’t start with new battery after jumping, the voltage regulator is likely preventing proper charging. Testing with a multimeter while the engine runs will confirm whether you’re getting adequate charging voltage, helping you avoid unnecessary parts replacement and keeping your mower running sustainably for years to come.
How to Test Your Voltage Regulator (Step-by-Step)
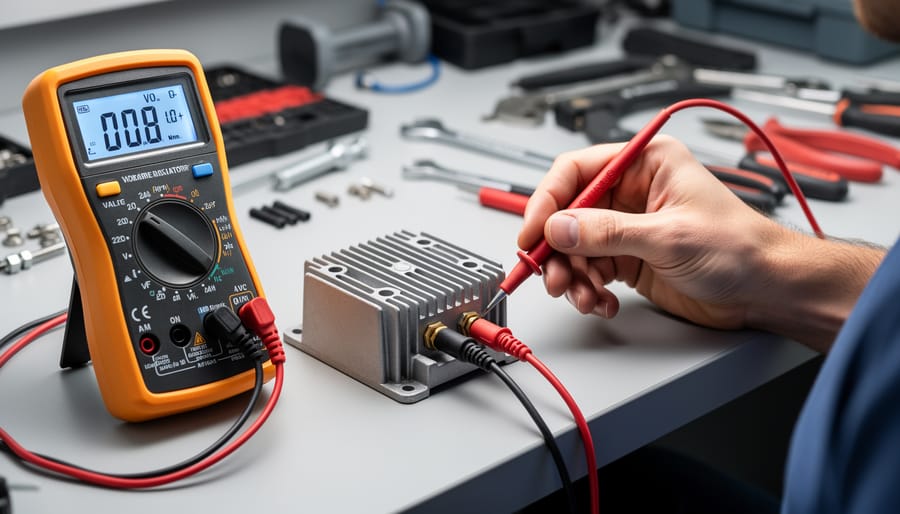
Testing your riding mower’s voltage regulator might sound intimidating, but I promise it’s something you can tackle in your own garage with just a multimeter and about fifteen minutes. Think of it as taking your mower’s electrical pulse—once you know what to look for, it becomes second nature.
Before you begin, let’s talk safety. Always disconnect the spark plug wire to prevent accidental starting, and never touch the battery terminals while the engine is running. Wear safety glasses to protect your eyes from any battery acid splashes, and work in a well-ventilated area since engines produce carbon monoxide.
Start by setting your multimeter to the DC voltage setting, usually marked as “V” with a straight line. With the engine off, touch the red probe to the positive battery terminal and the black probe to the negative terminal. A healthy battery should read between 12.4 and 12.7 volts. Write this number down—you’ll want to compare it to your running readings.
Now for the revealing part. Start your engine and let it idle for about 30 seconds to warm up. Check your voltage reading again. You should see somewhere between 13.5 and 14.5 volts. This increase tells you the charging system is working. If you’re still reading below 13 volts, your voltage regulator or alternator might be struggling.
Here’s where it gets interesting. Gradually increase the engine speed to about half throttle, then to full throttle. Watch your multimeter carefully. The voltage should remain steady within that 13.5 to 14.5-volt range regardless of engine speed. A properly functioning voltage regulator keeps this voltage consistent, protecting your battery from overcharging or undercharging.
If your voltage climbs above 15 volts at higher speeds, your regulator isn’t doing its job of limiting the charge. Conversely, if voltage drops below 13 volts at any speed, you’re likely facing a failing regulator or other charging system issues.
One tip I’ve learned over the years: check your battery connections first. Corroded or loose terminals can give you false readings that mimic a bad voltage regulator. Clean those connections with a wire brush and baking soda solution before condemning your regulator. It’s the sustainable approach—why replace parts unnecessarily when a simple cleaning might solve everything?
Record all your readings at different engine speeds. This documentation helps you spot patterns and makes explaining the problem easier if you need to order parts or consult with a repair professional.
Common Causes of Voltage Regulator Failure
Heat and Environmental Stress
Your riding mower’s voltage regulator works hard in some pretty tough conditions, and understanding these environmental stressors can help you prevent premature failure. Heat is the biggest enemy here. These components typically sit near your mower’s engine, where temperatures can soar during operation. Over time, excessive heat breaks down the internal components, causing the regulator to fail gradually or sometimes suddenly.
Debris buildup makes this heat problem even worse. Grass clippings, dust, and dirt act like an insulating blanket around the regulator, trapping heat that would normally dissipate. This is especially common if you mow frequently in dry, dusty conditions or don’t clean your mower regularly. The good news is this is entirely preventable with simple maintenance.
Take a few minutes after every few mowing sessions to blow off or brush away debris from around the regulator and nearby electrical components. This simple habit significantly extends component life and saves you money in the long run. It’s a sustainable approach that keeps your mower running efficiently while reducing the need for replacement parts.
Vibration and Mounting Issues
Your riding mower’s voltage regulator takes quite a beating during normal operation. Every time you fire up your mower and head out across the lawn, the engine creates constant vibration that rattles every component under the hood. Over time, this relentless shaking can loosen the regulator’s mounting bolts and electrical connections, creating gaps where dirt and moisture sneak in.
Think of it like a picture frame on a wall near a busy doorway—eventually, all that movement causes things to shift and loosen. When your regulator’s mounting becomes loose, the connections may intermittently lose contact, causing erratic charging behavior. The vibration can also crack solder joints inside the unit itself, leading to complete failure.
Taking a proactive approach here saves you headaches down the road. Before each mowing season, check that your regulator is firmly secured and all wire connections are tight and clean. This simple maintenance step protects your electrical system and keeps your mower running reliably season after season.
Age and Natural Wear
Like any hardworking component on your riding mower, voltage regulators don’t last forever. Most regulators will reliably serve you for about 5 to 8 years, though this varies based on how often you mow and your climate conditions. If your mower has logged hundreds of hours under the hot summer sun or endured harsh winter storage conditions, natural wear accelerates the aging process. The internal components simply break down over time, even with proper maintenance. Think of it as similar to how your garden tools eventually need replacing despite your best care efforts. Once a voltage regulator reaches the end of its lifespan, replacement becomes the most practical and sustainable solution rather than attempting repairs. Fortunately, catching the early warning signs we’ve discussed means you can replace it on your schedule instead of being caught off guard mid-season. Keeping track of your mower’s age and maintenance history helps you anticipate when replacement might be needed, letting you budget accordingly and avoid those frustrating breakdowns during peak mowing season.
Replacing Your Riding Mower Voltage Regulator
Replacing a voltage regulator might sound intimidating, but with the right tools and a bit of patience, most DIYers can handle this repair and save a trip to the repair shop. Before you begin, gather your supplies: you’ll need a socket wrench set, wire brush, dielectric grease, and safety gloves. Having your mower’s manual handy is also helpful, though the process is fairly similar across most models.
First things first: safety. Disconnect the negative battery cable before doing anything else. This prevents accidental shorts and keeps you safe while working with electrical components. I learned this the hard way years ago with a shower of sparks—not an experience I’d recommend!
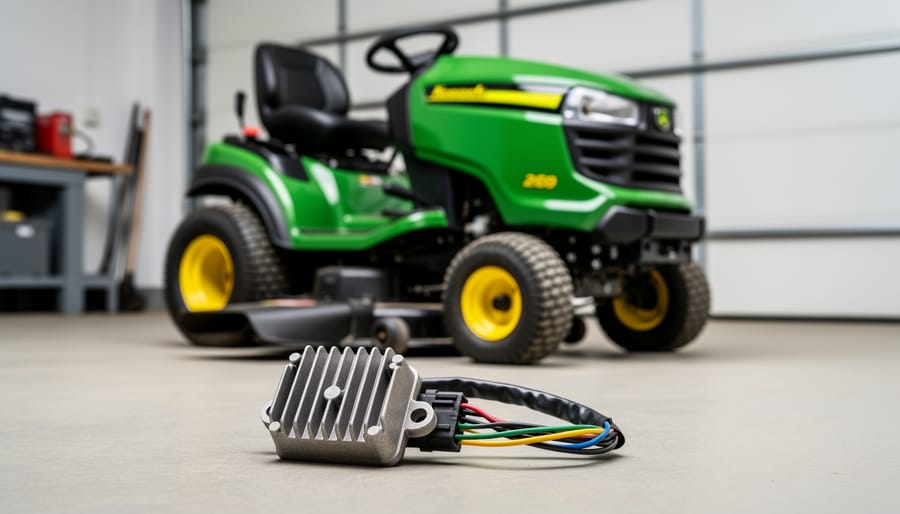
Locating the voltage regulator is your next step. On most riding mowers, you’ll find it near the battery or mounted on the engine housing. It’s typically a small rectangular box with several wires connected to it. Some models have it tucked under the hood near the alternator, while others place it along the frame. If you’re having trouble, check your owner’s manual or look for a component with multiple wire connections coming from the charging system.
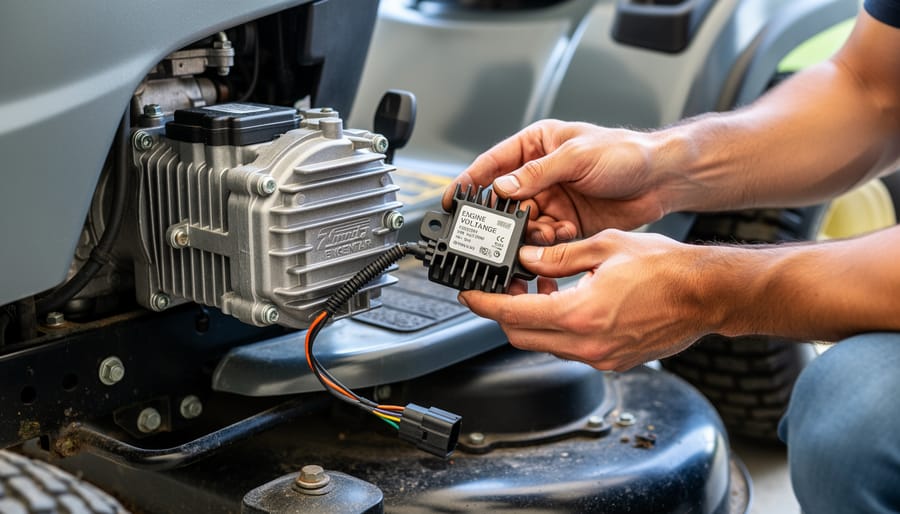
Once located, take a photo with your phone before disconnecting anything. This simple step is a lifesaver when it’s time to reconnect wires. Carefully disconnect the wire harness by pressing the release tab or removing the retaining clips. Some regulators are held in place with bolts, while others use mounting brackets. Remove these fasteners and set them aside where they won’t get lost.
Before installing the new regulator, clean the mounting surface with a wire brush to ensure good electrical contact and heat dissipation. Apply a thin layer of dielectric grease to the wire connections—this protects against moisture and corrosion, extending the life of your new part and supporting more sustainable equipment maintenance by preventing premature failure.
Install the new regulator by reversing the removal process. Secure it firmly with the original mounting hardware, reconnect the wire harness until you hear it click, and reattach the negative battery cable. Now comes the moment of truth: start your mower and use a multimeter to check the charging voltage at the battery terminals while the engine runs. You should see between 13.5 and 14.5 volts.
If you’re uncomfortable working with electrical components, notice corroded wiring that needs replacement, or the problem persists after installing a new regulator, don’t hesitate to call a professional. Some issues require specialized diagnostic equipment, and there’s wisdom in knowing your limits. A qualified technician can identify underlying problems that might damage your new regulator, ultimately saving you money and frustration.
Choosing the Right Replacement Voltage Regulator
Finding the right replacement voltage regulator doesn’t have to feel overwhelming, even if you’re new to mower maintenance. Think of it as matching puzzle pieces—get the right fit, and everything works beautifully.
Start by locating your mower’s model and serial number, typically found on a plate attached to the frame near the engine or under the seat. This information is your golden ticket to finding the correct part. Write it down along with your engine’s brand and model number, as voltage regulators are often engine-specific rather than mower-specific.
When shopping for replacements, you’ll encounter two main options: OEM (Original Equipment Manufacturer) parts and aftermarket alternatives. OEM parts are made by your mower’s manufacturer and guarantee exact specifications, though they typically cost more. Aftermarket parts, made by third-party companies, often provide excellent quality at lower prices and can be just as reliable. The key is choosing reputable brands with good reviews rather than the absolute cheapest option—think of it as an investment in your mower’s longevity, which aligns with sustainable ownership practices.
Check these critical specifications before purchasing: voltage output (usually 12-14 volts for most riding mowers), amperage rating, and connector type. The connector must match your mower’s wiring harness exactly. Many quality aftermarket regulators include multiple connector adapters for broader compatibility.
Don’t hesitate to ask parts counter staff for assistance or use online parts lookup tools provided by major retailers. These tools cross-reference your mower’s information with compatible parts. Taking a photo of your old regulator and its connections before removal also helps ensure you’re buying the right replacement. This careful selection process prevents the frustration and waste of ordering incompatible parts, saving you time, money, and keeping unnecessary returns out of the waste stream.
Preventing Future Voltage Regulator Problems
The good news is that with a little preventive care, you can significantly extend your voltage regulator’s lifespan and avoid those frustrating electrical problems altogether. Think of it as giving your mower’s electrical system the same attention you’d give your garden—a little regular maintenance goes a long way.
Start with your battery connections. These are often the unsung heroes of your electrical system, and keeping them clean and tight prevents countless problems. Every month or so, check both battery terminals and the connections leading to your voltage regulator. If you spot any white, crusty buildup (that’s corrosion), mix a tablespoon of baking soda with a cup of water and scrub it away with an old toothbrush. Rinse with clean water, dry thoroughly, and apply a thin coat of petroleum jelly or dielectric grease to prevent future corrosion. This simple five-minute task can prevent voltage fluctuations that stress your regulator.
Your battery itself deserves attention too. Keep it properly charged, especially during winter storage, and check the water levels in non-sealed batteries monthly. A weak battery forces your charging system to work overtime, putting unnecessary strain on the voltage regulator. Before storing your mower for the season, consider removing the battery and keeping it on a trickle charger in a temperature-controlled space.
Don’t underestimate the damage that grass clippings, dirt, and moisture can cause. After each mowing session, take a moment to blow off debris from around the engine compartment where your voltage regulator lives. This prevents buildup that can trap heat and moisture—two enemies of electrical components. If you wash your mower, avoid spraying water directly at electrical connections.
Make visual inspections part of your routine maintenance schedule. Every time you change your oil or sharpen your blades, peek at your voltage regulator and its wiring. Look for frayed wires, loose connections, or signs of overheating like discoloration or melted plastic. Catching these issues early means simple fixes rather than expensive replacements—better for your wallet and the environment.
Understanding your riding mower’s electrical system might seem intimidating at first, but you’ve now got the knowledge to tackle voltage regulator issues with confidence. This relatively small component plays a huge role in keeping your mower running reliably season after season, and recognizing the symptoms of failure can save you from frustrating breakdowns mid-mow.
The beauty of learning these maintenance skills is that you’re not just fixing a problem—you’re extending the life of equipment you’ve invested in, which is both economically smart and environmentally responsible. By keeping your mower running smoothly through proper electrical system care, you’re reducing waste and getting the most value from your machine.
That said, there’s no shame in calling a professional if you encounter complexities beyond your comfort level, especially when dealing with electrical systems. Sometimes the most sustainable choice is getting expert help rather than risking further damage through trial and error.
Whether you’re troubleshooting starting issues or performing routine maintenance, remember that each repair you master makes you a more capable and confident equipment owner. Your lawn care journey is about continuous learning, and tackling electrical repairs is just another step toward self-sufficiency and sustainable equipment stewardship.