Map your yard’s water zones by grouping plants with similar moisture needs—place thirsty vegetable gardens and flower beds on one circuit, drought-tolerant natives on another, and establish separate zones for shaded areas that need less frequent watering. Walk your property with a notebook during different times of day to identify sun exposure patterns, existing plumbing access points, and natural drainage paths that will determine where you can most efficiently run irrigation lines.
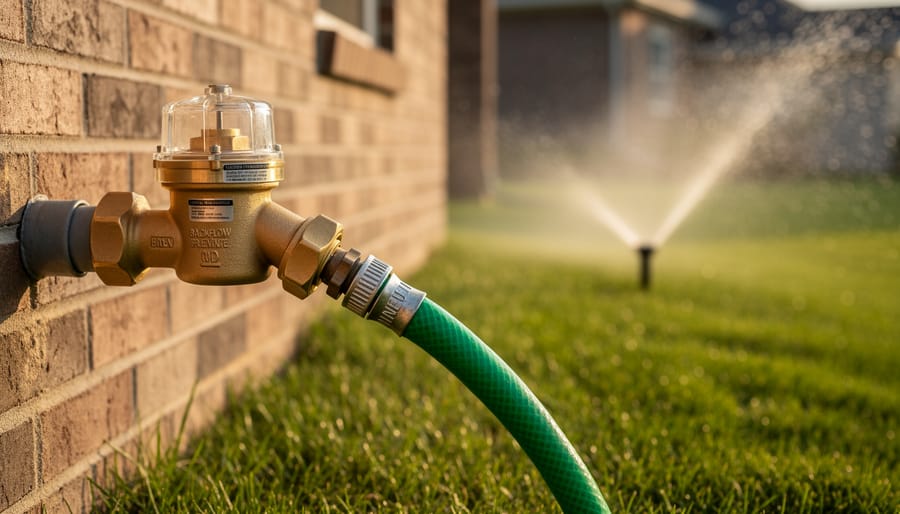
Calculate your water pressure and flow rate before selecting equipment by timing how long it takes to fill a five-gallon bucket from an outdoor spigot, then dividing 300 by that number in seconds. This measurement tells you exactly how many sprinkler heads or drip emitters each zone can support without compromising performance, preventing the common mistake of overloading circuits and creating weak, ineffective coverage.
Choose drip irrigation for garden beds, foundation plantings, and any area smaller than 15 feet wide to reduce water waste by up to 50 percent compared to traditional sprinklers. Reserve spray heads and rotors for open lawn areas where their coverage patterns make sense, and consider installing rain sensors or smart controllers that adjust watering schedules based on actual weather conditions rather than arbitrary timers.
A well-designed irrigation system transforms your yard care routine from a daily chore into an automated success, but only when it’s tailored to your specific landscape conditions. The planning phase determines whether you’ll enjoy lush, healthy plants with minimal water waste or struggle with constant adjustments and disappointing results.
Understanding Your Yard Before You Plan
Mapping Your Yard’s Zones
Creating an efficient irrigation system starts with understanding your yard’s unique personality. Think of your property as a collection of neighborhoods, each with different water requirements. Just like your garden beds drink differently than your lawn, sunny spots dry out faster than shaded corners.
Start by walking your yard with a notepad during different times of day. Notice which areas bask in full sun for six or more hours and which stay cool under trees or building shadows. Your sun-loving spots will need more frequent watering than their shaded counterparts. This exercise in functional yard zoning is essential for water efficiency and plant health.
Next, identify your landscape features. Mark grass areas separately from flower beds, vegetable gardens, and shrub borders. Each requires different watering methods and schedules. Don’t forget about slopes—water runs downhill quickly, so these areas often need slower, more frequent watering to prevent runoff and erosion.
Grab some graph paper or use a smartphone app to sketch your yard to scale. Include your house, hardscaping, existing plants, and water sources. Use different colors or symbols to mark sun exposure levels, plant types, and topography changes. Note any problem areas where water pools or soil drains too quickly.
This simple map becomes your irrigation blueprint, helping you group similar water needs together and choose the right equipment for each zone. Taking time to map thoughtfully now saves water, money, and plant stress later.

Soil Type and Water Retention
Before you can design an effective irrigation system, you need to know what type of soil you’re working with. This knowledge directly impacts how often and how long you should water. The good news? Understanding your soil type is surprisingly simple.
The easiest method is the jar test. Fill a clear jar one-third full with soil from your yard, add water until nearly full, shake vigorously, and let it settle for 24 hours. You’ll see distinct layers: sand settles first at the bottom, then silt in the middle, and clay on top. The proportion of each layer tells you your soil type.
Sandy soil drains quickly, meaning you’ll need to water more frequently but for shorter periods. Clay soil holds water longer, requiring less frequent but deeper watering sessions. Loamy soil, the gardening gold standard with balanced proportions of all three, offers the best of both worlds with moderate water retention.
You can also do a quick squeeze test. Grab a handful of moist soil and squeeze it. Sandy soil falls apart immediately, clay forms a tight ball that doesn’t crumble, and loam holds together but breaks apart with gentle pressure. These characteristics will guide your irrigation timing for healthier, more sustainable lawn care.
Sun Exposure and Microclimates
Understanding your yard’s sun exposure patterns is crucial for creating an irrigation system that truly works with nature rather than against it. Think of your yard as a collection of mini-environments, each with unique watering needs.
Start by observing how sunlight moves across your property throughout the day. Those south-facing flower beds that bake in afternoon sun will need more frequent watering than the shady north side of your house. Hot spots near driveways, patios, or light-colored walls can create heat islands that rapidly dry out soil, requiring dedicated irrigation zones.
Don’t overlook wind patterns either. That breezy corner near your fence might need extra watering since wind accelerates evaporation and dries plants faster than you’d expect. Similarly, dense shade under mature trees creates competition for moisture between grass and tree roots.
Take a simple walk around your yard at different times of day, noting which areas stay damp longer after rain and which dry out quickly. These observations will guide you in grouping plants with similar water needs together, a practice called hydrozoning. This thoughtful approach saves water, reduces plant stress, and ensures every corner of your yard gets exactly what it needs to thrive.
Choosing the Right Irrigation Method for Each Area
Sprinkler Systems for Lawns
When it comes to lawn irrigation, sprinkler systems offer different options to match your yard’s unique needs. Let’s break down the three main types you’ll encounter: pop-up spray heads, rotor heads, and what I like to call their specialty cousins.
Pop-up spray heads are the workhorses for smaller areas. They pop up when water pressure kicks in and spray in fixed patterns—quarter circles, half circles, or full circles. These are perfect for compact lawns, narrow strips along walkways, or tight corners where you need precise coverage. They deliver water quickly, typically covering 4 to 15 feet, making them ideal for areas under 400 square feet. The tradeoff? They apply water faster than soil can sometimes absorb it, so consider this if you have heavy clay soil or slopes.
Rotor heads, on the other hand, are your champions for larger lawn expanses. They rotate in sweeping arcs and can cover 20 to 50 feet or more. Because they distribute water more slowly through rotating streams, they’re generally more water-efficient and give soil time to absorb moisture without runoff. I recommend rotors for open lawn areas over 400 square feet—they’ll save you water and money in the long run.
The key to efficiency is matching the right head to each zone. Mixing spray heads and rotors on the same zone creates headaches because they have different precipitation rates. Group similar types together, and you’ll avoid overwatering some spots while leaving others thirsty.

Drip Irrigation for Gardens and Beds
If you’re looking for the most efficient way to water your gardens and flower beds, let me tell you about drip irrigation—it’s honestly a game-changer. Unlike sprinklers that spray water everywhere (including your sidewalk and driveway), drip systems deliver water directly to the root zone of your plants, right where they need it most.
Here’s why drip irrigation wins on so many levels. First, you’ll reduce water waste by up to 50% compared to traditional overhead watering. The water goes exactly where you want it, minimizing evaporation and runoff. Second, and this is something I find particularly exciting, drip irrigation encourages deeper root growth. When you water deeply and less frequently at the soil level, plants develop stronger, more drought-resistant root systems. Plus, keeping foliage dry helps prevent fungal diseases and other moisture-related problems.
The basic setup is surprisingly straightforward. You’ll need a main supply line, smaller distribution tubing, and emitters that actually release the water. Emitters come in different flow rates, so you can customize delivery based on each plant’s needs—thirsty tomatoes get more, drought-tolerant lavender gets less.
Drip systems work beautifully for vegetable gardens, raised beds, perennial borders, and even container gardens. They’re particularly ideal for plants arranged in rows or grouped plantings. The initial investment pays off through water savings, healthier plants, and the sheer convenience of automated watering that doesn’t waste this precious resource.

Soaker Hoses and Hybrid Approaches
If you’re looking for an effective irrigation solution that won’t break the bank, soaker hoses deserve serious consideration. These porous or perforated tubes lie directly on the soil surface or just beneath mulch, releasing water slowly and directly to plant roots. They’re wonderfully simple to set up, incredibly water-efficient, and perfect for vegetable gardens, flower beds, and foundation plantings where you need consistent moisture.
The beauty of soaker hoses lies in their flexibility and affordability. You can create a custom layout for under $50 in most gardens, and they work beautifully with timer systems for hands-off watering. They deliver water right where it’s needed without wasteful evaporation, making them an environmentally friendly choice that also reduces weed growth by keeping foliage dry.
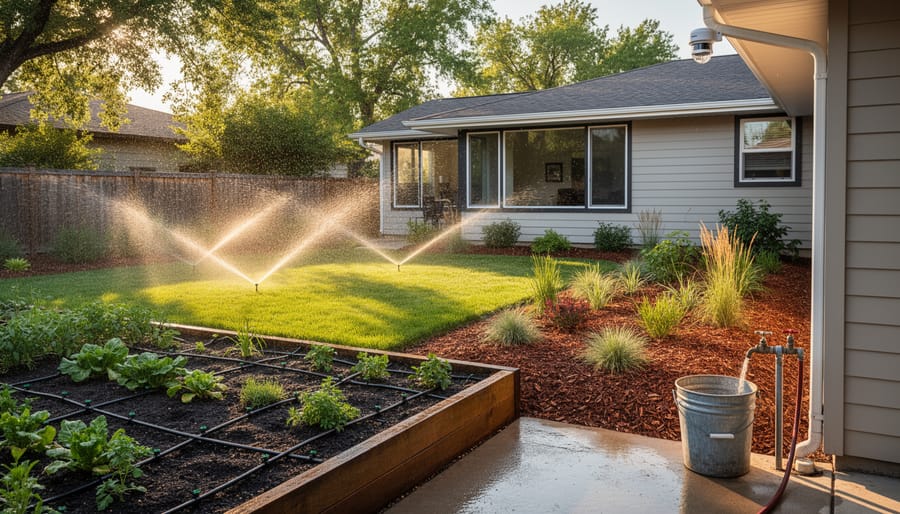
Here’s where things get really interesting: most well-designed yards benefit from hybrid irrigation approaches rather than one-size-fits-all solutions. Consider combining spray irrigation for your lawn areas with drip systems for shrub beds and soaker hoses for vegetable patches. This layered strategy lets you tailor water delivery to each plant zone’s unique needs while maximizing efficiency.
A practical example might include installing an in-ground sprinkler system for high-traffic lawn areas, running drip lines to established trees and perennial borders, and using soaker hoses in your annual beds where plantings change seasonally. This combination approach balances convenience, sustainability, and cost-effectiveness while ensuring every part of your landscape receives appropriate care. Don’t feel pressured to choose just one method—the smartest irrigation designs often blend multiple technologies.
Designing Your Irrigation Layout
Calculating Water Pressure and Flow Rate
Before you start shopping for sprinkler heads and timers, you need to know two critical numbers: your water pressure and flow rate. Think of it this way—you wouldn’t buy shoes without knowing your size, right? The same logic applies here. Installing an irrigation system without understanding your water capacity is like trying to water your entire yard through a drinking straw.
Let’s start with water pressure, measured in PSI (pounds per square inch). Most homes have between 40-70 PSI, which is perfect for irrigation. To measure yours, simply attach a pressure gauge to an outdoor spigot—you can pick one up at any hardware store for under fifteen dollars. Turn the water on full blast and read the gauge. Easy as that.
Now for flow rate, which tells you how many gallons per minute your system can deliver. Here’s where the bucket test comes in. Grab a five-gallon bucket and time how long it takes to fill from your outdoor faucet running at full capacity. If it fills in 60 seconds, you’ve got 5 GPM. If it takes 30 seconds, that’s 10 GPM.
Why does this matter? Each sprinkler head uses a specific amount of water. If you only have 10 GPM available but design a zone requiring 15 GPM, your system will underperform, leaving dry spots and sad plants. These measurements ensure you create zones that work within your water supply’s capabilities, delivering efficient, sustainable coverage without waste.
Zoning Your Irrigation System
Think of zoning your irrigation system like organizing different neighborhoods in your yard—each area has its own unique needs and deserves customized attention. Proper zoning is the secret to water efficiency and healthier plants, and it’s easier than you might think.
Start by walking your yard and grouping areas with similar characteristics. Your sun-baked lawn requires very different watering than those shady hostas under the oak tree. Likewise, your thirsty vegetable garden shouldn’t be on the same schedule as your drought-tolerant native perennials. Generally, you’ll want separate zones for lawns, shrub beds, vegetable gardens, and any areas with distinct sun exposure patterns.
Water pressure is your limiting factor here. Most residential systems can handle 3-5 zones effectively. Count your sprinkler heads per zone and check that you’re not exceeding your system’s capacity—typically 5-8 heads for average home pressure. This is where valve placement becomes important. Install valves in accessible locations near the areas they serve, preferably in valve boxes at ground level for easy maintenance.
When scheduling zones, remember that sustainability means watering deeply but less frequently. Morning watering (between 4-10 AM) reduces evaporation and disease risk. Program your sunny lawn zones for longer duration but your shaded areas for 30-50 percent less time. Slopes need shorter, repeated cycles to prevent runoff—try three 10-minute sessions instead of one 30-minute blast.
Keep a simple sketch showing which valve controls which zone. Trust me, you’ll thank yourself later when adjustments are needed.
Ensuring Complete Coverage Without Overlap Waste
Getting your sprinkler placement just right can feel like solving a puzzle, but the payoff is a uniformly green lawn without wasting a drop. The golden rule here is head-to-head spacing, where each sprinkler’s spray just reaches the next sprinkler head. This creates an overlap zone that ensures even coverage across your entire yard.
Think of it like painting with a roller. If you leave gaps between strokes, you’ll see bare patches. Too much overlap, and you’re wasting paint and creating drips. For most residential spray heads, this means spacing them at a distance equal to their maximum spray radius. If your heads spray 15 feet, position them 15 feet apart.
Walk your yard during the planning stage and mark proposed sprinkler locations with flags or stakes. Consider obstacles like trees, pathways, and garden beds that might block spray patterns. Corners and irregular shapes need special attention. Use part-circle or adjustable heads in these tricky spots rather than trying to make full-circle heads do the work.
A practical tip from experience: slightly overlapping coverage in high-traffic or sun-exposed areas isn’t waste, it’s insurance against dry spots. However, double-drenching shaded areas near your house foundation truly is wasteful. Balance is your friend, and creating zones with similar water needs makes all the difference for both your lawn’s health and water conservation goals.
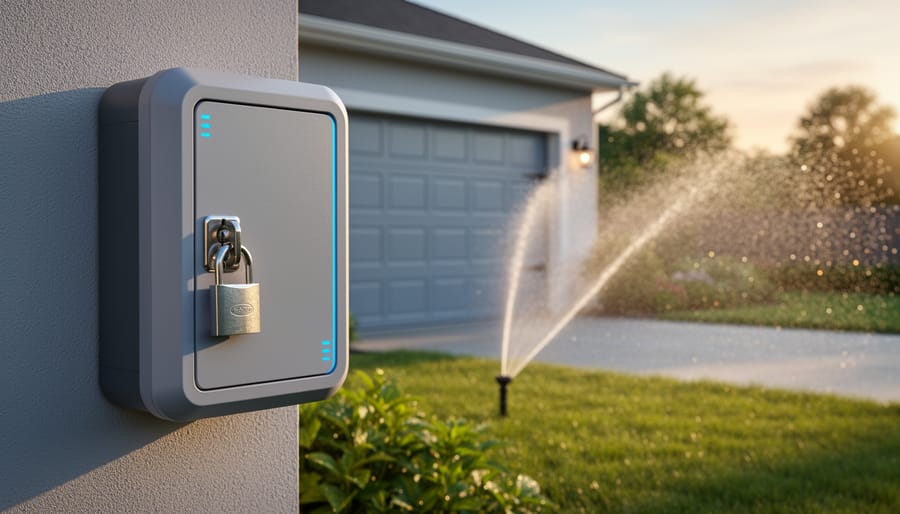
Water-Smart Technology and Controllers
Smart Controllers vs. Traditional Timers
Choosing the right controller for your irrigation system can feel a bit like picking a smartphone—you’ve got basic models that get the job done, and sophisticated options that practically think for themselves. Let’s break down your choices so you can find what works best for your yard and wallet.
Traditional timers are the tried-and-true workhorses of irrigation. They’re affordable, typically ranging from $30 to $100, and simple to program with basic on-off schedules. Perfect if you’re on a tight budget and don’t mind manually adjusting settings when weather changes. The downside? They’ll water your lawn during rainstorms unless you remember to turn them off, which isn’t exactly sustainable or economical.
Weather-based controllers take things up a notch, running about $100 to $250. These smart devices use local weather data to adjust watering schedules automatically. If rain is forecast or temperatures drop, they’ll skip or reduce watering sessions. Over time, most homeowners see 20-30% reductions in water usage, which means these controllers often pay for themselves within two years through lower water bills.
WiFi-enabled smart systems are the premium choice, costing $150 to $400. Beyond weather monitoring, they offer smartphone control, detailed water usage reports, and integration with home automation systems. You can adjust your sprinklers from vacation or receive alerts about system problems. While the upfront investment is higher, the combination of convenience and potential water savings (up to 50% compared to traditional timers) makes them increasingly popular among environmentally conscious gardeners who want maximum control with minimum effort.

Rain Sensors and Moisture Sensors
Here’s something I learned the hard way after watering my lawn during a thunderstorm: my irrigation system doesn’t know it’s raining! That’s where rain sensors and moisture sensors become absolute game-changers. These affordable add-ons can slash your water bill while keeping your plants healthier, and honestly, they should be standard equipment on every system.
Rain sensors are beautifully simple devices that tell your irrigation controller to skip watering when Mother Nature’s already doing the job. They typically mount on your roof or fence and automatically shut down your system when rainfall reaches a preset threshold, usually between a quarter-inch to three-quarters of an inch. Most models cost between $25 and $75, and installation takes about 30 minutes. Popular options include the Rain Bird RSD-BEX and the Hunter Mini-Clik, both reliable workhorses in the irrigation world.
Soil moisture sensors take things a step further by monitoring actual ground moisture levels before watering begins. They’re particularly valuable if you have areas with different water retention rates or if you’re serious about water conservation. These sensors prevent overwatering even on cloudy days when rain sensors wouldn’t activate.
Installation tip: Place rain sensors in open areas away from roof overhangs or tree canopies for accurate readings. For moisture sensors, install them in representative zones at root depth, typically 4-6 inches for lawns.
The Environmental Protection Agency estimates these sensors can reduce irrigation water use by 15-30 percent. That’s significant savings that pays for the equipment within a single season while supporting sustainable gardening practices your yard will appreciate.
Sustainable Practices and Water Conservation
Watering Schedules That Promote Deep Roots
Here’s a watering secret that changed my lawn care game: deep, infrequent watering beats shallow, daily sprinkling every time. When you water deeply but less often, grass roots are encouraged to grow downward in search of moisture, creating a robust root system that can reach 6-8 inches deep. These deep roots access water reserves that shallow-rooted lawns simply can’t reach, making your turf naturally more drought-resistant and resilient during hot summers.
Think of it this way: if you constantly offer water at the surface, roots get lazy and stay shallow. But when you train them to seek moisture deeper in the soil, you’re building a stronger, healthier lawn that requires less maintenance over time.
For most established lawns, watering 2-3 times per week works beautifully. Each session should deliver about 1 inch of water, which typically means running your sprinklers for 30-45 minutes depending on your system. You can test this by placing empty tuna cans around your lawn to measure output.
Seasonal adjustments matter too. During spring’s cooler temperatures, reduce frequency to once or twice weekly. Summer heat demands those 2-3 sessions, while fall gradually scales back again. Winter dormancy usually requires minimal to no supplemental watering in most climates.
The best time? Early morning, between 4-9 AM, when evaporation is minimal and your grass has all day to dry, reducing disease risk while maximizing water efficiency.
Rainwater Harvesting and Greywater Integration
Want to take your irrigation design to the next level while helping the environment? Consider integrating rainwater harvesting or greywater systems into your setup.
Rain barrels are the easiest starting point. These simple containers collect runoff from your roof downspouts, giving you free water for your garden during dry spells. Many modern irrigation systems can connect directly to rain barrels with a gravity-fed drip line or a small pump. A single rain barrel holds 50-80 gallons, enough to water a decent-sized garden bed several times. For larger yards, you can link multiple barrels together or invest in a cistern system that stores hundreds of gallons.
Greywater systems, which reuse water from sinks, showers, and washing machines, offer even greater water savings. However, they come with important considerations. Check your local regulations first, as greywater use is restricted or requires permits in many areas. Never use greywater on edible plants unless it’s been properly treated, and avoid water containing bleach, harsh chemicals, or anything you wouldn’t want in your soil.
Both systems significantly reduce your water bills and environmental footprint while keeping your landscape thriving. Start small with a rain barrel, and as you gain confidence, you can expand your sustainable irrigation approach over time.
Common Design Mistakes to Avoid
Overwatering and Poor Drainage Planning
Nobody wants a soggy, waterlogged yard, but overwatering is one of the most common mistakes in irrigation design. The telltale signs are pretty easy to spot: persistent puddles that stick around long after watering, perpetually squishy soil, yellowing grass despite adequate watering, and fungal growth or mushrooms popping up uninvited. These symptoms often point to drainage issues that your irrigation system might be making worse.
Start by observing your yard during and after watering. Notice where water tends to collect and how long it takes to absorb. Clay-heavy soil drains slowly and needs less frequent watering, while sandy soil drains quickly but requires more frequent sessions. To prevent water waste and plant stress, adjust your irrigation zones based on these drainage patterns. Areas with poor drainage need shorter watering cycles, while well-draining spots can handle longer sessions.
Design solutions include installing proper grading to direct water away from problem areas, adding catch basins in low spots, and incorporating rain sensors that automatically pause watering when moisture levels are adequate. Strategic plant placement also helps—position water-loving plants in naturally moist areas and drought-tolerant varieties where drainage is excellent.
Undersizing Your System
One of the most frustrating mistakes in irrigation design is building a system that simply can’t deliver enough water to keep your lawn and garden healthy. It’s tempting to trim costs by installing fewer sprinkler heads or selecting a smaller pump, but undersizing creates problems that cost far more to fix later.
The issue starts with miscalculating your water pressure and flow rate. Many homeowners assume their outdoor spigot delivers enough pressure for any system, but sprinkler heads need specific pressure ranges to function properly. Too little pressure means poor coverage, leaving dry patches and weak grass. Before buying anything, test your water pressure with an inexpensive gauge and measure your flow rate with a bucket and timer. These numbers determine how many zones you’ll need and which sprinkler heads will work efficiently.
Another common error is spacing sprinkler heads too far apart to save money. This creates gaps in coverage that become obvious brown spots by midsummer. Proper head-to-head coverage, where spray from one head reaches the next, ensures uniform watering and healthier plants while actually using less water overall.
Planning for adequate capacity from the beginning means your system works efficiently for years, supporting sustainable water use and saving you from costly redesigns. Taking time to calculate correctly pays off in a thriving, evenly watered landscape.
DIY vs. Professional Installation
Choosing between DIY and professional installation often comes down to your comfort level with hands-on projects, available time, and budget flexibility. Let me help you think through this decision.
DIY installation can save you significant money, typically 40-60% of professional installation costs. If you enjoy weekend projects and have basic handyman skills, installing a simple drip irrigation system or soaker hose setup is entirely manageable. These systems are forgiving, with fewer components and straightforward layouts. You’ll invest more time upfront learning the process, but there’s real satisfaction in creating a system tailored exactly to your needs. Plus, you’ll understand every aspect of your system for future maintenance and adjustments.
However, certain factors might tip the scales toward professional help. If your design includes underground utilities that need careful navigation, hiring pros with locating equipment becomes a smart safety choice. Complex systems with multiple irrigation zones, automatic controllers, and backflow preventers require expertise to ensure proper water pressure and coverage. Large properties or sloped terrain present challenges that professionals handle routinely but might frustrate first-timers.
Consider a hybrid approach: hire a professional for the initial design consultation and technical installation of main lines and valves, then tackle the simpler lateral lines and emitter placement yourself. This balances cost savings with professional expertise where it matters most.
From a sustainability perspective, professional installation often ensures optimal water efficiency from day one, potentially offsetting higher upfront costs through reduced water bills. Poor DIY installation might waste water for years. Honestly assess your skills and the project complexity, then choose the path that ensures a functional, water-wise system you’ll maintain confidently for seasons ahead.
Designing an effective irrigation system for your yard might seem like a big project, but remember that you’re making a genuine investment in the future health of your landscape. Every gallon of water you save through smart irrigation planning is a win for both your wallet and the environment. When you take the time to assess your yard’s unique needs, choose the right watering methods for different areas, and plan zones based on sun exposure and plant requirements, you’re setting yourself up for years of healthier grass and gardens with significantly less effort and expense.
Think back to the key steps we’ve covered: understanding your soil type and drainage patterns, mapping out zones based on water needs, selecting appropriate sprinkler types or drip systems for each area, and considering water-saving technologies like smart controllers and rain sensors. Each of these planning decisions compounds over time, reducing water waste while keeping your plants thriving.
The beauty of good irrigation design is that even small improvements make a meaningful difference. Maybe you can’t overhaul your entire system right now, and that’s perfectly okay. Start with one problem area in your yard—perhaps that dry patch that never seems to get enough water, or the section that always stays soggy. Apply these planning principles to just that zone. You’ll see results quickly, and that success will motivate you to tackle the next area when you’re ready.
Whether you’re installing a brand-new system or upgrading an existing one piece by piece, you’re taking important steps toward sustainable lawn care. Your grass will be greener, your water bills lower, and you’ll have the satisfaction of knowing you’re being a responsible steward of our precious water resources. That’s something worth celebrating.