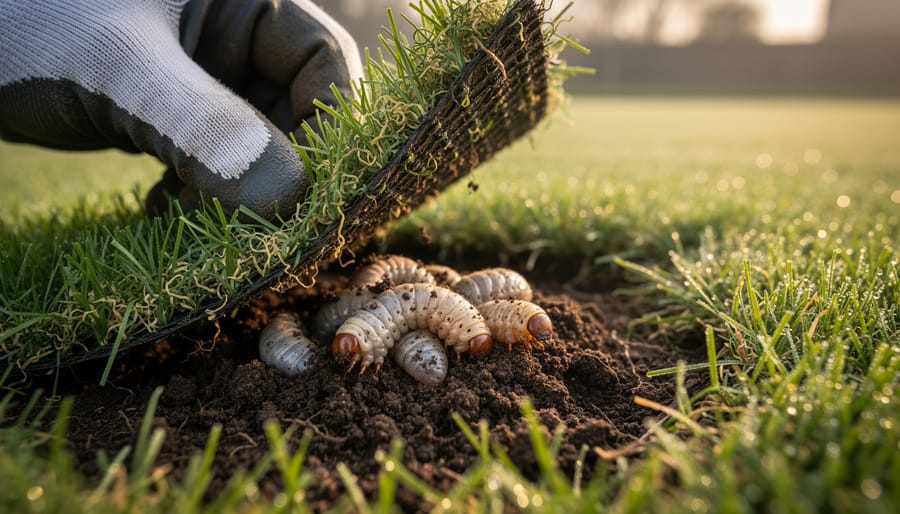
Inspect your drip line emitters every two weeks during peak growing season—if you spot white mineral deposits, brown sediment, or reduced water flow, you’re dealing with the most common enemy of drip irrigation systems: clogged emitters. The culprit isn’t your irrigation design or water pressure; it’s the invisible contaminants floating in your water supply. Sand particles, algae, mineral deposits, and organic debris smaller than a grain of salt can shut down your entire system, leaving plants stressed and your investment wasted.
Install the right filtration system upfront, and you’ll prevent 95% of clogging problems before they start. Screen filters work perfectly for well water with sand and sediment, catching particles down to 150 mesh (about the size of table salt). Disk filters handle higher flow rates and are ideal for city water with fine particles and some organic matter. Media filters, filled with sand or gravel, tackle the toughest jobs—pond water, recycled water, or supplies with heavy algae and organic loads.
Match your filter type to your water source and emitter size, then establish a simple maintenance routine: flush screen filters weekly, backwash disk filters when pressure drops 5 PSI, and clean media filters monthly during irrigation season. This proactive approach transforms filtration from a mysterious technical requirement into a straightforward practice that protects your system, conserves water, and keeps your garden thriving season after season.
Why Filtration Makes or Breaks Your Drip System
Here’s something that might surprise you: the emitter openings in your drip irrigation system are incredibly tiny, often no wider than a human hair. We’re talking about openings between 0.2 to 2 millimeters. While this precision is what makes drip irrigation so efficient at delivering water directly to plant roots, it also makes your system shockingly vulnerable to clogging.
Think about everything that might be lurking in your water supply. If you’re using municipal water, you’ve got sediment from aging pipes, rust particles, and occasional debris. Well water brings its own challenges, including sand, silt, iron deposits, and organic matter. Pond or stream water? You’re dealing with algae, leaves, bacteria, and all sorts of biological contaminants. Even rainwater collection systems can introduce dirt, pollen, and decomposing organic material into your lines.
Without proper filtration, these particles will absolutely find their way into those hair-thin emitter openings. And when they do, the consequences go beyond simple inconvenience.
The real costs of poor filtration hit you in multiple ways. First, there’s the wasted water from uneven distribution, where some areas get too much while others get too little. Your plants suffer, with some wilting from drought while others develop root rot. You’ll spend countless hours troubleshooting clogs, flushing lines, and replacing emitters. Eventually, you might face replacing entire sections of your system, which isn’t cheap.
Here’s the sustainable perspective: a properly filtered drip system operates at peak water efficiency, delivering exactly what your plants need without waste. When emitters clog, you lose that precision, often compensating by overwatering other areas or installing redundant systems. That’s the opposite of sustainable gardening.
The good news? Understanding your water source and choosing the right filtration prevents these problems entirely. It’s not complicated, just essential.


Know Your Enemy: What’s Actually in Your Water
Organic Contaminants (Algae, Bacteria, Plant Matter)
If you’re drawing water from a pond, creek, or rainwater harvesting systems, you’ll encounter organic contaminants that can wreak havoc on your drip irrigation setup. These biological troublemakers include algae, bacteria, and bits of decomposing plant matter that naturally thrive in surface water sources.
Here’s why they’re particularly problematic: unlike sand or silt that simply blocks emitters mechanically, organic materials are living and growing. Algae colonies can form slimy biofilms inside your tubing, creating sticky masses that trap other particles. Bacteria multiply rapidly in warm conditions, producing gel-like substances that squeeze through initial filtration only to clog emitters downstream. Floating plant debris might seem harmless but can compress into dense plugs.
The real challenge is that standard screen or disc filters often can’t catch these contaminants effectively because they’re soft, flexible, and sometimes microscopic. This is exactly why media filters filled with sand or gravel work so well for surface water. They trap organic matter through depth filtration rather than just surface screening. Many gardeners also find success adding a simple settling tank before filtration, letting larger organic particles drop out naturally before water enters your main system.
Inorganic Particles (Sand, Silt, Rust)
If you’re drawing water from a well or have older plumbing, you’re likely dealing with inorganic particles like sand, silt, and rust. These mineral contaminants are incredibly common but surprisingly destructive to drip irrigation systems. Think of them as tiny abrasive particles constantly grinding away at your emitters’ delicate openings.
Sand and silt enter your system from groundwater sources, while rust flakes off from aging metal pipes and fittings. When these particles reach your emitters, they act like sandpaper, wearing down the precise pathways designed for slow, controlled water release. Over time, this abrasion enlarges the openings, causing uneven watering patterns. Even worse, these particles accumulate at narrow points, creating complete blockages that starve your plants.
The good news? Inorganic particles are among the easiest contaminants to filter out. A simple sediment filter removes most of these troublemakers before they reach your drip lines. For well water systems, I always recommend checking your water periodically by letting it settle in a clear jar. If you see sediment at the bottom, filtration isn’t optional – it’s essential for protecting your investment and keeping your garden thriving sustainably.
Chemical Precipitates (Iron, Calcium, Sulfur)
Here’s the tricky part that catches many gardeners off guard: some minerals are actually dissolved in your water and pass right through standard filters initially. Iron, calcium, and sulfur compounds travel invisibly through your system until conditions change and they suddenly crystallize inside your drip lines and emitters.
If you live in a hard water area, you’ve probably seen this before on your faucets—that white crusty buildup? The same thing happens inside your irrigation system, just where you can’t see it. The minerals precipitate out when water temperature changes, pressure drops, or when they react with oxygen. These crystals gradually accumulate, creating blockages that no mesh screen can prevent because the minerals were liquid when they entered.
This is why you might notice decreasing water flow even with clean filters. The solution involves water treatment before filtration, like acidification systems or water softeners, rather than relying solely on mechanical filters. Testing your water source is the best first step to understanding if chemical precipitation will be an ongoing challenge in your system.
Choosing the Right Filter for Your Drip System

Screen Filters: Your Reliable Workhorse
Think of screen filters as the trusty pickup truck of drip irrigation—they may not be flashy, but they’ll serve you reliably for years. These cylindrical filters use fine mesh screens to catch sediment, making them perfect for residential gardeners working with relatively clean municipal water.
Screen filters are rated by micron size, which measures the tiny openings in the mesh. For context, a human hair is about 70 microns wide. Most home drip systems work beautifully with 150 to 200-micron filters, though if you have particularly clean water, you might go slightly coarser. Smaller micron ratings catch finer particles but require more frequent cleaning—it’s all about finding your sweet spot.
The beauty of screen filters lies in their simplicity. They’re affordable (typically $15-40 for quality residential models), easy to clean by simply removing and rinsing the screen, and wonderfully low-maintenance. On the downside, they’re not ideal for water with organic matter like algae, which can quickly clog those mesh openings.
For best results, install your screen filter after your pressure regulator and check it monthly during growing season. If you notice reduced water flow from your emitters, it’s cleaning time. This simple habit keeps your system running smoothly and your plants happily hydrated.
Disk Filters: Handling Heavier Loads
If you’re drawing water from a well or dealing with higher sediment levels, disk filters might become your new best friend. These clever devices use a series of thin, grooved disks stacked tightly together. Think of them like a deck of cards with tiny channels carved into each one—as water flows through, particles get trapped in the grooves while clean water passes through.
The real advantage of disk filters is their impressive dirt-holding capacity. While screen filters can handle light debris beautifully, disk filters excel when you’ve got murkier water with sand, silt, or organic matter. They’re particularly valuable for gardeners using well water or irrigation ponds where sediment levels fluctuate with rain or seasonal changes.
When should you consider upgrading from a screen to a disk filter? If you’re cleaning your screen filter more than once a week during peak growing season, that’s a clear signal. Similarly, if your water source occasionally looks cloudy or you notice sandy deposits in your system, disk filtration offers more robust protection.
The sustainability angle here matters too—disk filters use less water during cleaning compared to constantly backflushing clogged screens. Most models feature easy twist-off housings that let you rinse the disk stack quickly, making maintenance straightforward even for beginners tackling their first serious irrigation setup.
Media Filters: The Heavy-Duty Solution
When you’re dealing with large-scale gardens, agricultural operations, or water sources that could double as mud pits (think pond or creek water), media filters are your best friend. These workhorses use layers of sand, gravel, or specialized media to trap particles as water flows through, handling volumes and contamination levels that would quickly overwhelm other filter types.
Media filters excel in situations where you’re irrigating acres rather than garden beds, or when your water source contains heavy sediment, algae, or organic debris. Many farmers rely on them for filtering pond or river water, and they’re absolutely essential when your water looks more like chocolate milk than the clear stuff from your tap.
Here’s the reality for most home gardeners: media filters are probably overkill. They’re large, expensive, require significant water pressure, and need regular backwashing to clean the media. Unless you’re running a serious operation with truly challenging water conditions, a screen or disk filter will serve you better and save you money.
That said, if you’re irrigating from a natural water source or managing a small farm, media filters become worth the investment for their reliability and capacity to handle whatever nature throws at them.
Specialized Filters for Problem Water
Sometimes the challenge isn’t just about removing particles—it’s about dealing with water that needs a bit more help before it’s ready for your drip system. If you’ve noticed reddish stains on your emitters or a sulfur smell in your water, you’re dealing with problem water that requires specialized filtration.
Centrifugal separators, also called sand separators, are your first line of defense when you’re working with well water or surface water that contains heavy sand and grit. These clever devices use spinning motion to separate heavier particles before they ever reach your main filter. Think of them as a pre-filter that takes the heavy lifting off your screen or disc filter. I’ve seen gardeners extend their filter’s lifespan by months simply by adding a sand separator upstream. They’re particularly valuable if you’re drawing from a pond or stream for irrigation—sustainable water sourcing at its finest.
Iron and sulfur present different challenges. These dissolved minerals don’t get caught by regular filters until they oxidize and turn into particles inside your lines. An oxidizing filter treats the water chemically, converting dissolved iron and sulfur into solid particles that your downstream filter can catch. You’ll often see these paired with a good screen filter in a two-stage setup.
Speaking of multiple stages, don’t hesitate to combine filtration methods when conditions demand it. A typical problem-water system might include a sand separator first, then an oxidizing filter, and finally a screen filter. Yes, it’s an investment, but clogged emitters and system failures cost more in the long run—both financially and in terms of plant health.
Getting the Size and Specs Right
Here’s the thing about drip irrigation filters: getting the size wrong is like trying to water your garden through a coffee stirrer. I learned this the hard way when my first system barely dribbled water to my tomatoes because I’d picked a filter based on price rather than proper specifications.
Let’s start with flow rate, which is measured in gallons per hour (GPH) or gallons per minute (GPM). Add up the flow requirements of all your emitters and drip lines, then choose a filter rated for at least 25% more than that total. This buffer accounts for the inevitable pressure loss as your filter does its job capturing debris. If your system needs 100 GPH, look for a filter rated for 125 GPH minimum. Undersizing creates a bottleneck that starves your plants, no matter how perfect the rest of your system is.
Now for micron ratings, which tell you the size of particles your filter catches. Think of microns as the mesh size of a screen. Standard drip emitters with flow rates of 1 GPH or higher typically need 150 to 200-micron filtration. However, if you’re using micro-sprinklers or smaller emitters below 1 GPH, step up to 120-micron filters. Those tiny emitter openings clog incredibly easily, and the finer filtration is worth the small extra investment.
Pressure loss is your filter’s trade-off for clean water. Every filter creates some resistance, typically between 2 to 5 PSI when clean. As debris accumulates, pressure loss increases, which is why regular cleaning matters so much. Check your system’s pressure requirements and ensure your water source can handle both the operating pressure plus the filter’s loss. Most residential systems run between 20 to 30 PSI, so a filter adding 5 PSI is manageable.
When shopping, match the filter’s inlet and outlet size to your mainline diameter, usually three-quarters or one inch for home gardens. Adapters work in a pinch but create additional restriction points that reduce efficiency and waste water pressure you might need elsewhere in your sustainable garden setup.
Installing Your Filtration System Correctly
Getting your filtration system installed correctly from the start will save you countless headaches down the road. I learned this the hard way when I had to redo my entire setup after realizing my filter placement was causing more problems than it solved!
The golden rule of filter placement is simple: install your filter before any other components in your drip system. This means your filter should come immediately after your water source and before pressure regulators, timers, or any fertigation equipment. Why? Because pressure regulators need clean water to function properly, and debris can damage their delicate internal mechanisms. I’ve seen too many gardeners replace expensive pressure regulators that could have been protected with proper filter placement.
Accessibility is something many people overlook during installation. Sure, that spot tucked behind the shed looks neat and tidy, but will you actually remember to clean the filter when it’s out of sight? Mount your filter somewhere you can easily reach it at waist height if possible. Your future self will thank you when maintenance time rolls around every few weeks.
Here’s another consideration that might surprise you: sun exposure. UV rays can degrade plastic filter housings over time, making them brittle and prone to cracking. If you’re installing outdoors, look for a shaded location or consider using a protective cover. Some gardeners build simple wooden boxes with hinged lids to shield their filters while maintaining easy access.
Common installation mistakes to avoid include over-tightening connections, which can crack plastic housings, and installing the filter backwards. Most filters have directional arrows indicating water flow, so double-check before securing everything. Also, leave some slack in your tubing on either side of the filter to allow for easy removal during cleaning sessions.
Maintenance That Actually Works (Without Taking All Day)
How Often Should You Really Clean Your Filters?
The honest answer? It depends on your water source, and I’ve learned this the hard way in my own garden. If you’re using municipal tap water, you can usually get away with checking your filters monthly and doing a thorough cleaning every 4-6 weeks. But if you’re drawing from a pond, well, or rainwater collection system, you’ll want to inspect weekly and clean every 2-3 weeks during peak growing season.
Here’s what really matters: learning to read your system’s signals. The most reliable indicator is pressure drop. If your drippers are producing noticeably less water or you’re seeing uneven distribution across your beds, it’s cleaning time regardless of your schedule. Other red flags include visible sediment in filter housings, algae buildup on screen filters, or that telltale slow flow that makes you wonder if something’s wrong.
Think of routine maintenance as preventive care—those regular cleanings that keep everything running smoothly. Problem-solving maintenance is reactive, happening when you notice issues. Your goal is to stay firmly in the routine camp. I keep a simple log noting when I last cleaned each filter, which helps me spot patterns. During spring when pollen counts soar or after heavy rains that stir up sediment, I’ll clean more frequently. This proactive approach saves water, protects your plants, and honestly, saves you from those frustrating moments when half your garden isn’t getting watered properly.

The 5-Minute Filter Cleaning Routine
Keeping your filters clean doesn’t need to be a chore. I’ve found that dedicating just five minutes every few weeks keeps my drip system flowing beautifully and prevents those frustrating clogs that can stress your plants.
For screen filters, start by shutting off your water supply and releasing the pressure. Unscrew the filter housing and carefully remove the screen element. Here’s where it gets satisfyingly simple: rinse the screen under running water from the inside out, using an old toothbrush to gently scrub away any debris. For stubborn buildup, soak the screen in a solution of white vinegar and water for 15 minutes. This eco-friendly approach dissolves mineral deposits without harsh chemicals that could harm your garden.
Disk filters follow a similar process. Remove the disks from the housing, separate them, and rinse each one individually. The grooves in disk filters can trap tiny particles, so take a moment to wipe them clean with a soft cloth. I keep a dedicated bucket near my irrigation setup specifically for this task, making the whole process even quicker.
You’ll need minimal tools: a wrench for housing removal, that old toothbrush, white vinegar, and a bucket. Keep replacement parts on hand too.
Replace filter elements when you notice tears, permanent discoloration, or when cleaning no longer restores proper flow. Screen filters typically last 2-3 years with regular maintenance, while disk filters can last even longer. If you’re cleaning more frequently than every two weeks, it might be time for a new element or an upgrade to a more appropriate filter type for your water conditions.
Monitoring Your System for Early Warning Signs
Your best defense against major filtration problems is catching them early during your regular garden strolls. Make it a habit to observe your system while it’s running every few days. Look for uneven watering patterns, where some emitters dribble weakly while others flow normally. This often signals partial clogging before complete failure occurs.
Check your pressure gauge readings consistently, ideally at the same time of day. A gradual pressure increase of 5-10 psi above your baseline suggests filter clogging, while dropping pressure might indicate emitter blockages downstream. Keep a simple notebook or phone app with monthly readings to spot trends you’d otherwise miss.
Run your hands along drip lines and squeeze emitters gently to feel for proper flow. Any emitters that seem dry or crusty deserve closer inspection. Pop open a few emitters at different zones to check for sediment buildup inside, a clear sign your filtration needs attention.
Your maintenance log doesn’t need fancy formatting. Just jot down filter cleaning dates, pressure readings, and any issues noticed. This simple record becomes invaluable for predicting when problems arise and proving how much water and money your proactive approach saves over time.
Troubleshooting Common Filtration Problems
Even with regular maintenance, filtration problems can pop up and leave you scratching your head. Let’s walk through some common issues and get your system running smoothly again.
If your filters are clogging rapidly despite frequent cleaning, you’re likely dealing with water quality issues that exceed your current filter’s capacity. This often happens when sediment loads change seasonally or if you’re drawing from a pond or stream where organic matter fluctuates. The solution? Consider adding a pre-filter stage or upgrading to a higher mesh rating. For well water users experiencing sudden rapid clogging, it might be time to test for iron bacteria, which creates a slimy biofilm that overwhelms standard filters.
Pressure loss through your filter system is frustrating but usually fixable. First, check if your filter element is due for replacement rather than just cleaning. Screen and disc filters eventually wear out and lose effectiveness. If pressure drops immediately after cleaning, you may have reassembled the housing incorrectly or damaged an O-ring during maintenance. Always keep spare O-rings on hand since these inexpensive parts are common culprits.
Filter housing leaks typically stem from cross-threaded connections, worn gaskets, or over-tightening during installation. When tightening filter housings, snug is sufficient; gorilla-strength tightening actually damages seals faster. If leaks persist after replacing gaskets, inspect the housing threads for cracks, especially on plastic units exposed to UV radiation.
Knowing when to upgrade your system is important for long-term success. If you’re cleaning filters more than weekly, spending excessive time on maintenance, or expanding your garden significantly, it’s time for an upgrade. A system that worked beautifully for 20 tomato plants may struggle with 100. Similarly, switching from municipal to well water often requires better filtration.
Remember, the goal isn’t perfection but finding a sustainable balance between water quality, maintenance effort, and system performance. Sometimes the most environmentally responsible choice is investing in better filtration upfront rather than constantly replacing clogged emitters downstream.
Building a Complete Filtration Strategy
Think of your filtration system as part of a larger ecosystem rather than just a standalone component. The most effective drip irrigation setups integrate multiple layers of protection that work together to keep water flowing smoothly.
Start upstream whenever possible. If you’re collecting rainwater or drawing from a pond, a settling tank can be your first line of defense. These simple reservoirs allow sediment to drop out naturally before water even reaches your primary filter. I’ve seen gardeners reduce their filter cleaning frequency by half just by adding a basic settling stage. It’s like giving heavy particles a chance to bow out gracefully before the real filtration begins.
Pre-filtration doesn’t have to be fancy. A mesh bag over your intake pipe or a DIY settling barrel can work wonders. For those interested in sustainable water management, this approach naturally complements rainwater collection systems.
Regular flushing is your maintenance superpower. End each line with flush valves and open them monthly during growing season. This simple 5-minute task pushes accumulated debris out before it becomes problematic. Think of it as giving your system a quick rinse, like cleaning your coffee maker.
Winterization matters too, even in mild climates. Before frost threatens, flush your entire system thoroughly, drain filters, and remove filter elements for indoor storage. This prevents cracking and extends equipment life significantly.
Here’s a sustainability tip that reduces filtration demands: improve your water source quality. Mulching around collection areas minimizes sediment runoff. Keeping gutters clean means cleaner rainwater. Installing simple pre-screens at source points catches leaves and debris before they enter your system.
The beauty of a complete strategy is that each element supports the others. Better source water means less filter strain. Regular flushing means filters work more efficiently. Proper winterization means equipment lasts longer. It all connects into a resilient system that practically takes care of itself.
Protecting your drip irrigation investment starts with understanding that filtration isn’t just an add-on—it’s the foundation of a reliable, efficient system. Every dollar you spend on quality filters and simple maintenance saves you exponentially more in replacement emitters, water waste, and the frustration of dealing with clogged lines during peak growing season. When your system delivers water precisely where your plants need it, you’re not just conserving this precious resource; you’re creating the ideal growing conditions that make your garden thrive.
The best starting point is always water testing. Whether you contact your local extension office or use a home testing kit, knowing what’s actually in your water takes the guesswork out of choosing the right filtration solution. You’ll stop second-guessing your choices and start making confident decisions that match your specific situation.
Here’s the empowering truth: maintaining clean filters is genuinely simpler than dealing with system failures. A quick monthly rinse or backflush becomes as routine as watering itself—far easier than crawling through garden beds replacing clogged emitters or diagnosing mysterious dry spots. Combine proper filtration with smart irrigation practices, and you’ve created a sustainable system that practically runs itself.
Your next steps are straightforward: test your water, select the appropriate filter for your contaminants, install it properly, and mark your calendar for regular maintenance. Your plants, your water bill, and your future self will thank you for the effort.