Turn off and unplug your leaf vacuum immediately if you notice unusual vibrations, reduced suction power, or strange grinding noises—these are telltale signs your impeller has sustained damage and needs replacement. A damaged impeller won’t just underperform; it can destroy other components and create dangerous flying debris inside the machine.
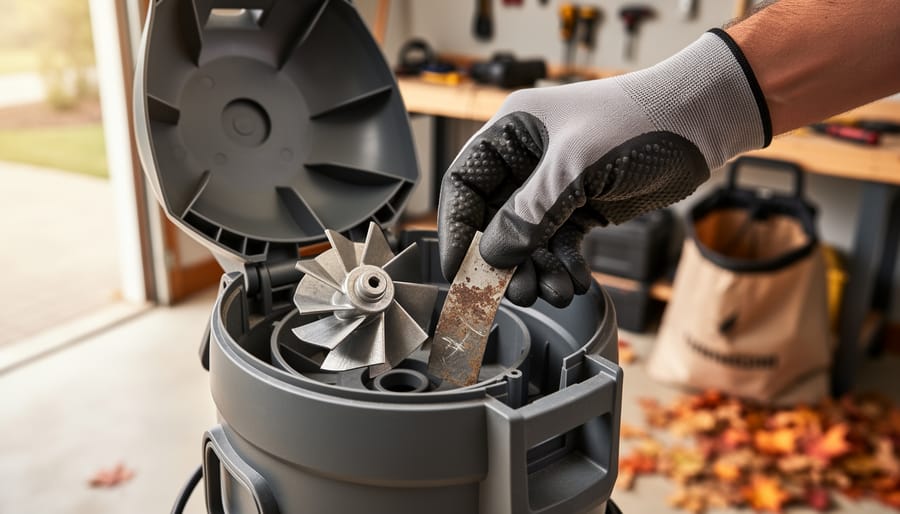
Inspect the impeller housing by removing the collection bag and inlet tube, then carefully examine the fan blades for cracks, chips, or bent sections that prevent proper airflow. Even small damage compromises efficiency by up to 70%, transforming your once-powerful yard tool into a frustrating paperweight. Most homeowners can complete this replacement in under an hour with basic tools like a socket wrench and screwdriver, saving $75-150 in repair shop fees.
Purchase the correct replacement impeller by checking your vacuum’s model number on the manufacturer’s label—using an incompatible part will cause immediate failure and potentially void your warranty. Original equipment manufacturer parts cost $25-60 and guarantee proper fit, while aftermarket options run cheaper but may require modifications.
Replace worn impellers before peak leaf season rather than waiting for complete failure during your busiest cleanup days. This proactive approach prevents the cascade effect where metal fragments from a destroyed impeller damage the motor housing, fan shaft, and internal seals—repairs that quickly escalate from a simple $40 fix to a $200+ nightmare. Understanding this maintenance cycle keeps your equipment running reliably for years while minimizing your environmental impact by extending machine lifespan rather than contributing to landfill waste.
Understanding Your Leaf Blower’s Impeller: The Engine Behind the Power
Think of your leaf blower’s impeller as the heart of the machine – it’s the hardworking component that makes everything else possible. Just like a ceiling fan moves air around your room, the impeller creates the powerful airflow that either blows leaves away or vacuums them up into your collection bag.
The impeller is essentially a fan with specially designed blades housed inside your leaf blower’s tube. When your machine’s motor spins these blades at high speed, they create a dramatic difference in air pressure. In blower mode, the impeller pushes air out forcefully through the nozzle. Flip the switch to vacuum mode, and those same blades work in reverse, creating suction that pulls leaves and debris into the machine.
Here’s where it gets particularly interesting for those of us who care about sustainable yard maintenance: many leaf vacuums include a mulching feature. As leaves enter through the vacuum tube, they pass through the spinning impeller blades, which chop them into tiny pieces. This mulching action is environmentally brilliant – it reduces leaf volume by up to 16:1, meaning you empty your collection bag far less frequently and end up with ready-to-use mulch for your garden beds.
The impeller’s dual role explains why damage to this component essentially sidelines your entire machine. A cracked or bent impeller can’t generate proper airflow, leaving you with weak suction or feeble blowing power. Understanding this connection helps you recognize when replacement becomes necessary rather than continuing to struggle with an underperforming tool that makes your yard work harder than it needs to be.
Signs Your Impeller Needs Replacement (Not Just Cleaning)
Knowing when to replace your impeller versus giving it a good cleaning can save you time, money, and frustration. Let’s walk through the telltale signs that indicate your impeller has reached the end of its useful life.
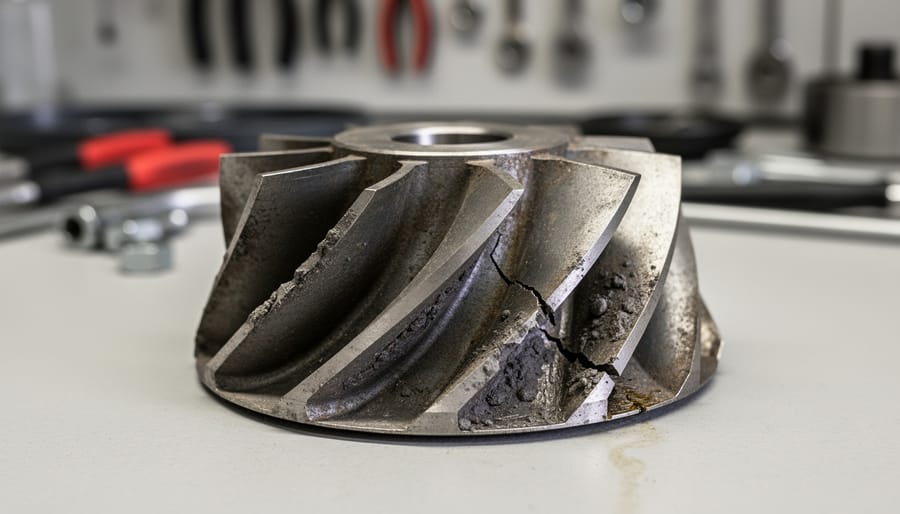
The most obvious warning sign is visible damage. If you notice cracks, chips, or chunks missing from the impeller blades, it’s time for a replacement. These imperfections don’t just reduce efficiency—they create imbalance that can damage other parts of your leaf vacuum. While a single small nick might not seem serious, it compromises the impeller’s structural integrity and will only worsen with use.
Listen carefully to what your machine is telling you. Strange noises like grinding, rattling, or a high-pitched whining sound usually mean the impeller has warped or sustained damage beyond repair. Normal operation produces a consistent whooshing sound, so anything different deserves investigation. These unusual sounds often indicate metal-on-metal contact or loose components that cleaning simply won’t fix.
Dramatic loss of suction power is another red flag. If your leaf vacuum struggles to pick up leaves it once handled effortlessly, and you’ve already ruled out carburetor issues and clogs, the impeller is likely worn down. Over time, the blade edges become rounded and less effective at creating the airflow necessary for proper suction.
Excessive vibration during operation signals an unbalanced or damaged impeller. Your hands shouldn’t feel like they’re operating a jackhammer. This vibration not only makes the tool uncomfortable to use but also stresses the motor and housing, potentially leading to more expensive repairs down the road.
Finally, if you’ve thoroughly cleaned the impeller and housing but performance issues persist, replacement is your best option. Sometimes buildup hides underlying damage, and once removed, the real problem becomes apparent. Remember, an impeller is a wear item designed for eventual replacement—there’s no shame in acknowledging when it’s served its purpose and needs retiring.
Step-by-Step: Replacing Your Leaf Vacuum Impeller
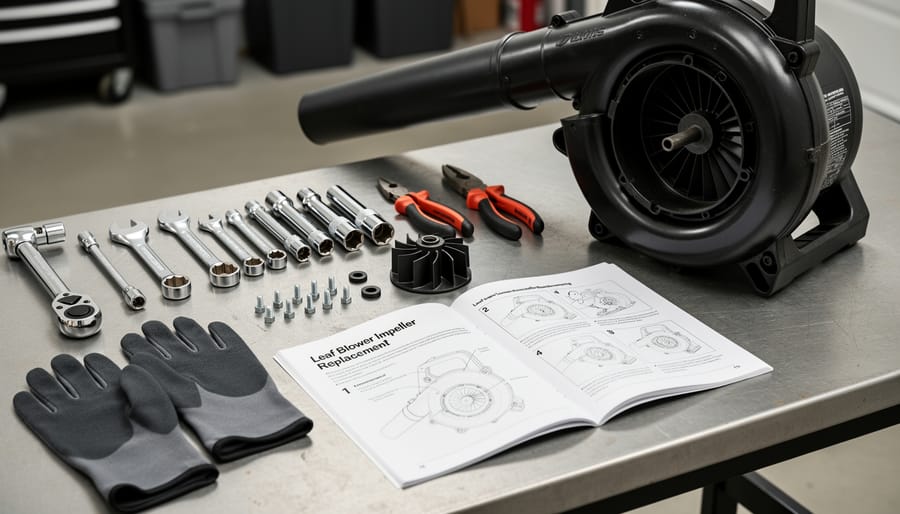
Tools and Materials You’ll Need
Before you dive into replacing your leaf vacuum impeller, let’s gather everything you’ll need. Having the right tools on hand will make this job much smoother and help you avoid those frustrating mid-project trips to the hardware store.
Start with a socket wrench set or the appropriate screwdriver for your model—most leaf vacuums use either Phillips or hex bolts. You’ll also need work gloves to protect your hands from sharp impeller edges, and safety glasses are essential when working with equipment that may have debris lodged inside. A clean workspace cloth or tarp will help keep small parts organized and prevent them from rolling away.
The most important component is, of course, your replacement impeller. Quality matters here—cheap replacement parts often wear out quickly or don’t fit properly. Check your vacuum’s model number and order an OEM (original equipment manufacturer) part or a highly-rated aftermarket option. Don’t forget to inspect the mounting hardware; if those bolts are corroded, grab replacements now.
Optional but helpful items include penetrating oil for stubborn bolts, needle-nose pliers for removing debris, and a phone or camera to photograph the assembly before disassembly—trust me, those reference photos are lifesavers when reassembling everything correctly.
Safety First: Preparing Your Work Area
Before you dive into replacing your leaf vacuum impeller, let’s make sure you’re set up for success and safety. First things first: always disconnect the power source completely. For electric models, unplug the unit from the wall outlet. If you’re working with a gas-powered vacuum, remove the spark plug wire to prevent accidental starts. Trust me, this simple step has saved many fingers over the years.
Next, gear up properly. Put on safety glasses to protect your eyes from any debris that might be lurking inside the housing, and wear heavy-duty work gloves since impeller blades can be surprisingly sharp, even when damaged. If you’re working in your garage or shed, make sure you have adequate lighting and ventilation.
Clear a comfortable workspace on a sturdy workbench or clean floor area where you can lay out parts systematically. Having a clean, organized space helps you keep track of bolts and components, making reassembly much smoother. Keep a container nearby for collecting fasteners, and consider taking photos with your phone as you disassemble things. These quick snapshots become invaluable reference guides when you’re putting everything back together.
Disassembly and Removal Process
Before you begin, grab your phone or camera—you’ll thank yourself later! Taking photos at each step creates a visual roadmap for reassembly, especially helpful if you’re tackling this for the first time. I learned this the hard way when I had a mysterious extra bolt after putting my vacuum back together (it still worked, but the mystery haunted me for weeks).
Start by disconnecting the spark plug wire to ensure the engine can’t accidentally start. Safety first, always. Next, locate the screws or bolts securing the impeller housing. Most leaf vacuums have between four and eight fasteners holding this cover in place. Place these fasteners in a small container or zippered bag—those little guys love to roll away into the grass and disappear.
Once the housing is open, you’ll see the impeller attached to the drive shaft. Note how it’s positioned before removal. Some impellers are held by a single center bolt, while others use a nut and washer system. You may need to wedge a piece of wood between the impeller blades to prevent rotation while loosening the fastener. Turn counterclockwise to remove, though occasionally manufacturers use reverse threading—check your manual if it seems stuck.
Gently wiggle the impeller off the shaft. If it’s stubborn from corrosion or debris buildup, try a penetrating lubricant and wait fifteen minutes before attempting again. Avoid using excessive force, which could damage the shaft. This sustainable repair approach saves the entire unit from premature disposal while giving you valuable mechanical experience.
Installing Your New Impeller
Now comes the rewarding part—putting everything back together! Start by carefully positioning the new impeller onto the motor shaft, ensuring the keyway slot aligns perfectly with the key on the shaft. This little detail is crucial for proper rotation, so take a moment to double-check before proceeding.
Once aligned, slide the impeller firmly into place. If your model uses a bolt to secure it, hand-tighten first, then use your wrench to snug it down. Most leaf vacuums require around 20-25 foot-pounds of torque, though checking your manual is always wise. Don’t overtighten—you want it secure, not stripped.
Next, reattach the impeller housing, making sure any gaskets sit flush to prevent air leaks that reduce suction power. Replace all bolts in a star pattern if there are multiple attachment points, which distributes pressure evenly and prevents warping.
Before fully reassembling everything, give the impeller a gentle spin by hand. It should rotate freely without wobbling or scraping sounds. This quick test can save you from reassembling only to discover an alignment issue. Finally, reconnect any electrical components you disconnected earlier, and you’re ready to reattach the collection bag and get back to making your yard pristine.
Regular Impeller Cleaning: Preventing Premature Replacement
Here’s the truth many gardening enthusiasts discover too late: most impeller replacements could have been avoided with regular cleaning. I learned this lesson myself after shelling out for a new impeller, only to have a neighbor show me how five minutes of maintenance after each use could have saved me that expense.
Think of your leaf vacuum impeller like the blade on your favorite garden trowel. You wouldn’t let soil cake on it for weeks, right? The same principle applies here. Debris buildup doesn’t just reduce suction power, it creates imbalance that wears down the impeller prematurely, sometimes cutting its lifespan in half.
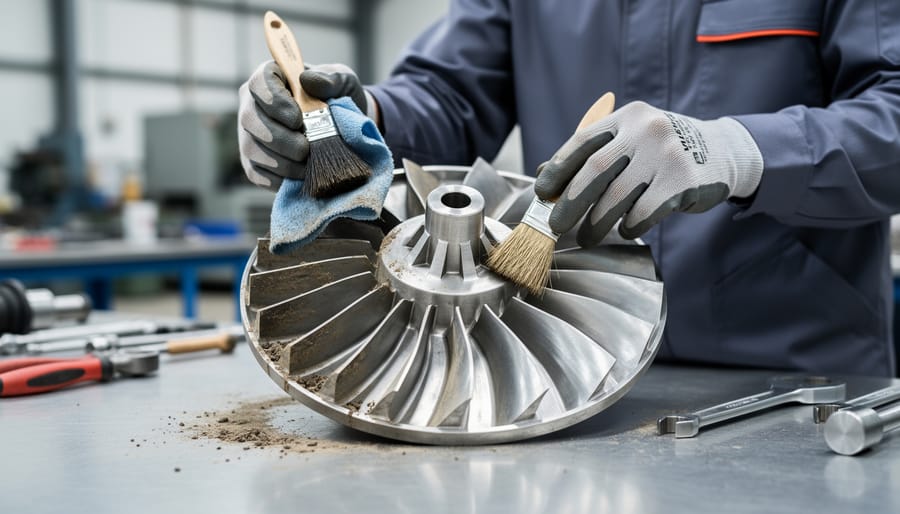
The good news is that establishing a simple cleaning routine takes minimal time and effort. After each use, disconnect the power source and allow the machine to cool completely. Remove the impeller housing according to your manufacturer’s instructions, and you’ll likely find a collection of small twigs, stringy grass, and compacted leaves clinging to the blades and housing walls.
For routine cleaning, skip the harsh chemical cleaners that can degrade plastic components and harm the environment when rinsed into your yard. Instead, use a stiff brush or old toothbrush to dislodge stuck debris. A garden hose works wonderfully for washing away remaining particles, though I’ve found that letting stubborn buildup soak in plain water for ten minutes makes removal much easier.
Every few cleaning sessions, take an extra moment to inspect while you clean. Run your fingers carefully along the impeller blades, feeling for chips, cracks, or rough spots. Check that mounting bolts remain tight and that rubber gaskets still feel pliable. These quick inspections catch small problems before they become expensive replacements.
For those dealing with wet leaves or particularly sticky debris, consider cleaning immediately after use rather than waiting. Once that material dries and hardens inside your machine, removal becomes significantly more difficult and may require scraping that risks damaging the impeller surface itself.
If you vacuum leaves weekly during fall season, plan for a thorough deep clean monthly. This involves completely disassembling accessible components, checking for hidden debris pockets, and ensuring proper reassembly. Mark it on your garden calendar alongside other maintenance tasks, treating it as preventive care rather than reactive repair. Your wallet and your equipment will thank you.
Nozzle Care: The Often-Forgotten Partner to Impeller Health
Here’s something I learned the hard way after replacing my third impeller in two seasons: the nozzle deserves just as much attention as the impeller itself. Think of them as dance partners – when one stumbles, the other inevitably suffers.
Your leaf vacuum’s nozzle acts as the gateway for debris, and when it’s clogged, cracked, or improperly attached, it forces your impeller to work overtime. That extra strain shortens its lifespan significantly, meaning more frequent replacements and unnecessary expense.
Start by inspecting your nozzle before each use. Look for cracks, especially around attachment points where stress concentrates. Even hairline fractures can disrupt airflow patterns, creating turbulence that hammers away at impeller blades. Run your fingers along the interior surface to feel for rough patches or damage you might miss visually.
Cleaning your nozzle is wonderfully straightforward. After each session, knock out loose debris by tapping it firmly against the ground. Once weekly during heavy leaf season, give it a thorough wash with a garden hose, paying special attention to any ridges or curves where wet leaves love to hide and decompose. This prevents organic buildup that restricts airflow and harbors moisture – both enemies of efficient operation.
Proper attachment makes all the difference. Never force a nozzle onto the vacuum unit. If it doesn’t slide on smoothly, debris or damage may be present. A loose connection allows air leaks that reduce suction power, making your impeller work harder to compensate. Tighten connections firmly but avoid overtightening, which can crack plastic housings.
By keeping your nozzle clean and damage-free, you’re essentially giving your impeller an easier job – and easier jobs mean longer equipment life and better performance when autumn leaves start falling.
Proper Storage Practices That Protect Your Investment
You’ve invested in quality equipment, so let’s talk about protecting that impeller when it’s not working hard for you. Think of storage as your leaf vacuum’s off-season spa treatment—it deserves a little TLC after months of pulverizing debris.
When the leaves have fallen and been collected, don’t just roll your vacuum into the corner of the garage and forget about it. Start by giving everything a thorough cleaning, removing any stuck-on debris around the impeller housing. Moisture is the enemy here, so make sure everything’s completely dry before storage. I learned this lesson the hard way when I discovered rust spots on my impeller after a damp winter in the shed.
For gas-powered models, fuel system care is absolutely critical. Either run the engine until the tank is empty or add fuel stabilizer—old fuel turns to varnish and creates headaches come spring. This simple step prevents carburetor problems that can indirectly stress your impeller when the engine runs rough.
Store your leaf vacuum in a climate-controlled space if possible. Extreme temperature swings and humidity accelerate wear on metal components. If you only have outdoor storage available, use a breathable cover rather than plastic—trapped condensation creates a rust factory. Position the vacuum off the ground on pallets or shelves to avoid moisture wicking up from concrete floors.
Battery-powered models need attention too. Remove batteries and store them according to manufacturer guidelines. Following proper storage practices for your charging system extends both battery and equipment life.
Consider using eco-friendly rust prevention methods like silica gel packets in enclosed storage areas or a light coating of vegetable-based oil on metal surfaces. These sustainable approaches protect your investment without introducing harsh chemicals into your gardening space. A well-stored impeller can last years beyond its expected lifespan, making your initial investment pay dividends season after season.
Troubleshooting Common Post-Replacement Issues
So you’ve successfully replaced your leaf vacuum impeller—congratulations! But what happens when things don’t quite sound or feel right afterward? Don’t worry, this is more common than you might think, and most post-replacement hiccups are easily fixable with a little patience.
If you’re experiencing persistent vibration after installation, the most likely culprit is an improperly seated impeller. Power down your machine and double-check that the impeller is fully tightened on the shaft. Even a slight looseness can cause wobbling. Also verify that you’ve installed the correct replacement part—using an impeller designed for a different model can create balance issues that lead to excessive shaking.
Reduced suction or performance often indicates an incomplete seal somewhere in the system. Inspect the gaskets and O-rings you installed during replacement to ensure they’re positioned correctly. Sometimes these small components can shift during assembly. Clean any debris from the impeller housing that might have accumulated during the replacement process, as buildup restricts airflow and diminishes performance.
Unusual grinding or scraping sounds typically mean something is making contact that shouldn’t be. Check for debris caught between the impeller blades and housing walls. If the noise persists, the impeller might be slightly bent—a problem that’s hard to spot visually but creates friction during operation. This is where troubleshooting equipment problems systematically really pays off.
When should you call in professional help? If you’ve rechecked all connections, confirmed proper part compatibility, and the issues continue, or if you notice smoke, burning smells, or motor struggles, it’s time to consult a repair specialist. There’s no shame in seeking expert assistance—protecting your investment and ensuring safe operation is always the sustainable choice.
Taking care of your leaf vacuum impeller isn’t just about fixing what’s broken—it’s about embracing a mindset of equipment stewardship that saves you money while reducing environmental impact. By understanding how to replace and maintain your impeller, you’re joining the ranks of garden enthusiasts who’ve discovered that equipment longevity is entirely within your control.
Think about it this way: every year you extend your leaf vacuum’s life is a year that equipment stays out of a landfill. That’s sustainable lawn care in action. The few hours you invest in learning proper maintenance techniques and performing occasional repairs can translate into hundreds of dollars saved over the lifetime of your equipment. You’re not just being handy—you’re being environmentally responsible.
Don’t let a worn impeller intimidate you. Armed with the knowledge from this guide, you have everything you need to diagnose issues, source the right replacement parts, and complete the job successfully. Start by making a habit of those simple preventive measures we discussed: regular cleaning after use, proper storage during off-seasons, and periodic inspections before problems escalate.
Your leaf vacuum is an investment in your property and your environmental values. Treat it with respect through proactive maintenance, and it will serve you faithfully for many autumn seasons to come. The power to maximize that investment is literally in your hands.