Your Kawasaki engine sputtering to life reluctantly on a Saturday morning isn’t just frustrating—it’s a signal that something needs attention, and the good news is that most issues are entirely fixable with the right approach.
Kawasaki engines power millions of lawn mowers with legendary reliability, but even the best equipment faces predictable challenges. Carburetor clogs from stale fuel, ignition system failures, oil contamination, and overheating top the list of culprits that bring mowing sessions to an abrupt halt. These problems share common warning signs: rough idling, power loss mid-cut, excessive smoke, or complete failure to start.
Understanding what’s actually happening inside your engine transforms you from helpless bystander to confident problem-solver. That knocking sound or black smoke isn’t random—it’s your engine communicating specific needs, whether that’s fresh fuel, a cleaned air filter, or a simple spark plug replacement. Most Kawasaki engine problems stem from maintenance oversights rather than catastrophic failures, which means you’re often looking at affordable, DIY-friendly solutions rather than expensive professional repairs.
This guide walks you through the most common Kawasaki lawn mower engine problems with clear diagnostic steps and practical fixes. You’ll learn to identify issues quickly, understand their root causes, and implement solutions that get you back to mowing while extending your engine’s lifespan. Whether you’re hearing strange noises, dealing with starting difficulties, or noticing performance drops, you’ll find straightforward answers that respect both your time and your commitment to maintaining equipment sustainably.
What Makes Kawasaki Engines Different (And Why It Matters)
If you’ve been around lawn care equipment for any length of time, you’ve probably noticed that Kawasaki engines have earned quite a reputation among serious homeowners and professionals alike. Understanding what sets these engines apart isn’t just interesting trivia—it’s actually the key to diagnosing and fixing problems more effectively when they arise.
Kawasaki’s design philosophy centers on durability and commercial-grade performance, even in their residential models. Unlike some manufacturers who build separate engine lines for homeowners versus professionals, Kawasaki applies many of the same engineering principles across their range. You’ll find features like heavy-duty air filtration systems, cast-iron cylinder liners in many models, and robust crankshafts designed for extended use. This commercial heritage means these engines are built to handle tough conditions, but it also means they have specific maintenance needs that differ from lighter-duty alternatives.
Here’s why this matters for troubleshooting: when a Kawasaki engine develops problems, the issue often relates to either maintenance intervals or fuel quality rather than fundamental design flaws. These engines are genuinely engineered to last, sometimes outliving the mowers they’re mounted on. Knowing this helps you approach problems with the right mindset—you’re usually dealing with something preventable or correctable rather than an inherent weakness.
The reputation Kawasaki has built in the lawn care industry also means there’s extensive documentation and a strong parts network available. When you understand that your engine shares DNA with commercial equipment powering landscaping crews, you’ll appreciate why proper care matters so much. These aren’t temperamental machines, but they do reward owners who respect their maintenance schedules and fuel requirements. That knowledge alone will guide you toward more effective solutions when problems do occur.
The Most Common Kawasaki Engine Problems You’ll Actually Face
Starting Problems and Cranking Issues
Nothing’s more frustrating than heading out to tackle your lawn care, only to have your Kawasaki engine refuse to cooperate. If you’re dealing with starting problems, you’re certainly not alone, and the good news is that most cranking issues have straightforward solutions.
When your mower turns over but won’t start, you’re already halfway to diagnosing the problem. This usually points to fuel delivery or spark issues rather than the starting system itself. However, if you hear nothing but clicking sounds or the engine cranks very slowly, you’re likely looking at an electrical problem.
Start with the basics: check your battery connections. Corrosion on battery terminals is incredibly common and can prevent proper cranking. A simple cleaning with a wire brush and baking soda solution often works wonders. If your Kawasaki engine still struggles, test the battery voltage. It should read around 12.6 volts when fully charged. Anything below 12.4 volts means it’s time for a recharge or replacement.
The starter motor itself can also wear out over time, especially if you’ve been using your mower for several seasons. Listen for grinding noises or complete silence when you turn the key, both signs of starter failure. The ignition switch and safety interlock switches (like the seat switch or blade engagement switch) can also prevent starting, so make sure all safety features are properly engaged before assuming the worst. These simple checks can save you time and money while keeping your lawn care sustainable and efficient.
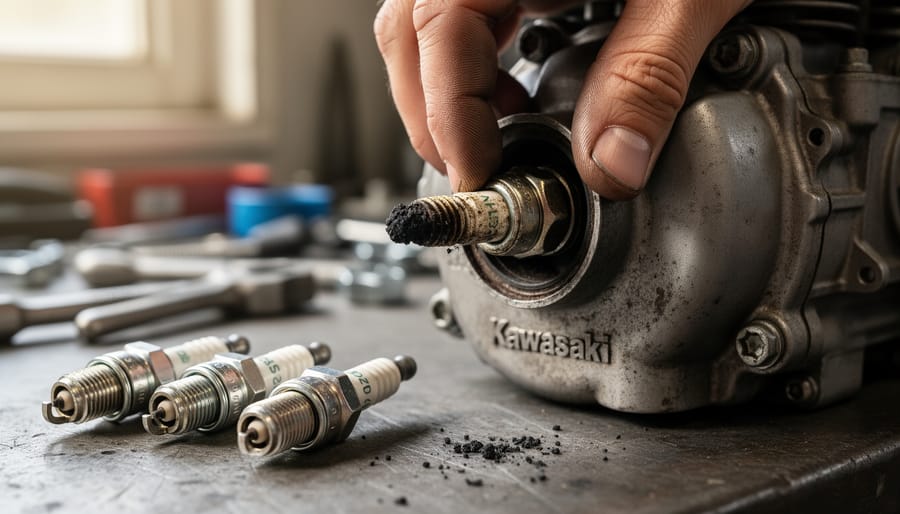
Oil Consumption and Smoking
If you’ve noticed your Kawasaki engine guzzling oil or producing clouds of blue or white smoke from exhaust, you’re dealing with oil consumption issues that need attention. This is one of those problems that can sneak up on you, starting small and gradually worsening over time.
Blue smoke typically indicates oil burning in the combustion chamber, while white smoke often points to coolant or moisture issues. The most common culprits behind excessive oil consumption include worn piston rings, deteriorated valve guides, or failed gaskets. These components naturally wear over time, especially if the engine has seen heavy use or hasn’t received regular maintenance.
Check your oil level frequently during this troubleshooting period. If you’re adding a quart between oil changes, something definitely needs addressing. Inspect the area around gaskets and seals for oil leaks, as external leaks can masquerade as consumption problems.
From an environmental standpoint, burning oil releases harmful pollutants and wastes a petroleum-based resource. Addressing these issues promptly isn’t just about engine health; it’s about being a responsible steward of your environment. Plus, replacement parts for worn rings or valve guides represent a more sustainable solution than continuing to burn excess oil or prematurely replacing your entire engine.
Overheating and Cooling System Failures
If you’ve noticed your Kawasaki engine shutting down mid-mow or running unusually hot to the touch, you’re likely dealing with an overheating issue. This common problem often stems from surprisingly simple causes that you can address yourself.
The most frequent culprit is blocked cooling fins. These metal ridges surrounding your engine need airflow to dissipate heat, but grass clippings, dirt, and debris love to pack themselves into these spaces during extended mowing sessions. Take a few minutes after each use to brush away buildup with a stiff brush or compressed air. Think of it as giving your engine room to breathe.
Low oil levels can also trigger overheating surprisingly quickly. Your oil doesn’t just lubricate; it carries heat away from critical components. Check your dipstick before every mowing session, especially during hot weather when engines work harder. This simple habit prevents costly damage and keeps your engine running cool.
Some Kawasaki models include thermal shutoff switches that protect the engine by cutting power when temperatures climb too high. While frustrating mid-job, this safety feature prevents catastrophic damage. If your engine keeps triggering this shutoff, address the underlying cooling issue rather than bypassing the protection. Regular maintenance, including seasonal oil changes and keeping cooling passages clear, transforms overheating from a recurring headache into a rare occurrence.
Carburetor and Fuel System Troubles
If your Kawasaki engine sputters, stalls, or refuses to start, the carburetor and fuel system often deserve your attention first. These components are particularly vulnerable to modern ethanol-blended fuels, which can create frustrating problems even for well-maintained equipment.
Ethanol attracts moisture and leaves behind gummy deposits that clog the tiny passages in your carburetor. You might notice your mower starting fine when cold but dying after warming up, or experiencing those telltale fuel delivery problems where it acts starved for gas. The jets inside the carburetor are incredibly small, and even minor buildup restricts fuel flow.
Fuel pumps can also fail, especially on larger riding mowers with Kawasaki engines. If your pump develops cracks or the diaphragm inside deteriorates, fuel won’t reach the carburetor consistently.
The good news? Prevention is straightforward and sustainable. Use ethanol-free fuel whenever possible, or add a quality fuel stabilizer to every tank. Never store your mower with old fuel sitting in the system. Draining the carburetor before winter storage takes just minutes and saves hours of spring repair work.
If you’re already experiencing symptoms, carburetor cleaning kits are affordable and effective. Many enthusiasts successfully restore proper function by removing the carburetor bowl and spraying cleaner through the jets, avoiding unnecessary parts replacement.
Step-by-Step Troubleshooting for Your Kawasaki Engine
The Five-Minute Safety Check Every Owner Should Do
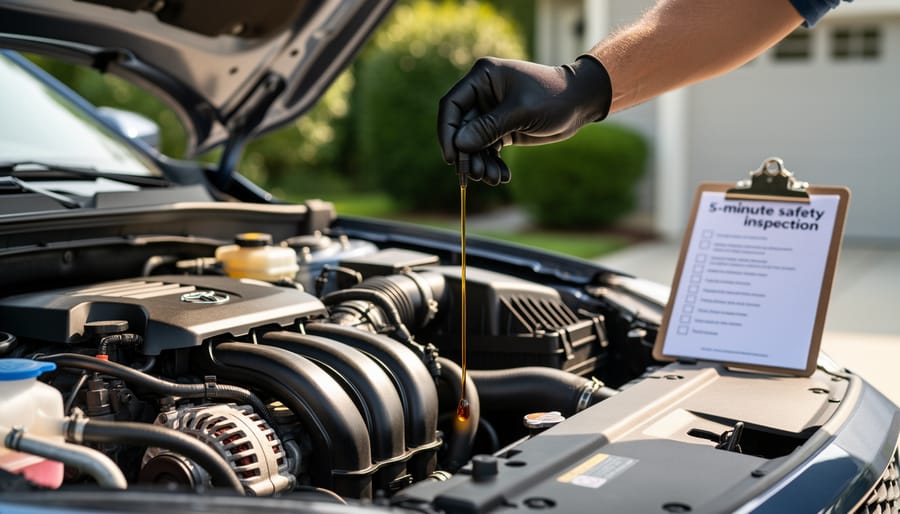
Here’s something I learned the hard way after too many preventable breakdowns: most Kawasaki engine problems announce themselves well before they leave you stranded mid-mow. A simple five-minute check before each use can catch about 70% of potential issues, saving you time, money, and frustration.
Start with your oil level. Pull that dipstick and make sure you’re between the minimum and maximum marks. Low oil is one of the fastest routes to engine damage, and it takes just seconds to check. While you’re at it, notice the oil’s color. If it looks like dark coffee instead of amber honey, you’re overdue for a change.
Next, pop open your air filter cover. A clogged air filter starves your engine of oxygen, leading to poor performance and increased fuel consumption. If it looks dusty or dirty, give it a tap to shake loose debris or replace it entirely. This simple step improves efficiency and reduces emissions, keeping your lawn care more sustainable.
Take a quick sniff of your fuel. Stale gasoline, anything older than 30 days, can gum up your carburetor and cause starting headaches. Fresh fuel makes a remarkable difference in engine performance.
Finally, do a quick visual scan for loose bolts, frayed wires, or obvious damage around the engine housing and blade assembly. Give any suspicious connections a gentle wiggle. These visible red flags often point to bigger problems brewing beneath the surface, and catching them early prevents costly repairs down the road.
When to DIY and When to Call a Professional
Knowing your limits as a DIYer can save you both money and frustration when tackling Kawasaki lawn mower engine problems. The good news is that many common issues are absolutely within reach for the average homeowner with basic tools and a little patience.
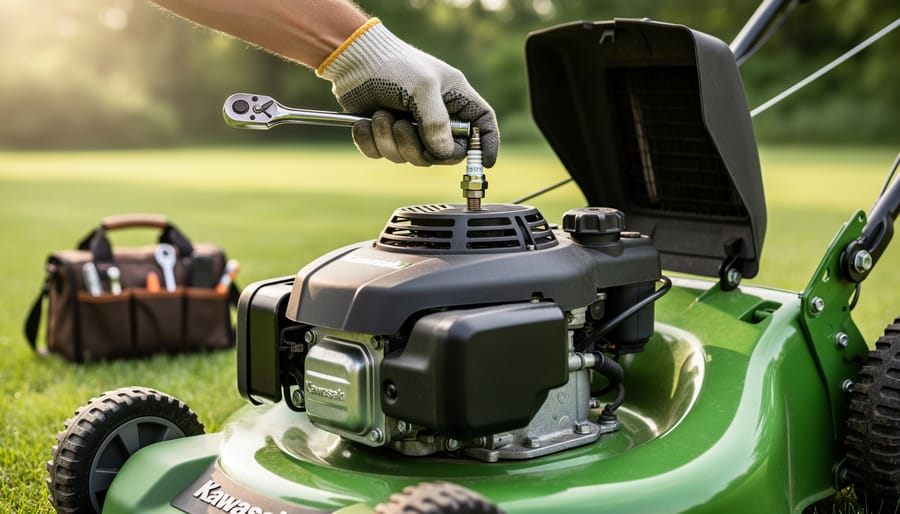
You can confidently handle tasks like changing spark plugs, replacing air filters, cleaning or replacing fuel filters, and performing routine oil changes. These maintenance items require minimal tools—usually just a socket set, screwdrivers, and fresh supplies from your local garden center. Carburetor cleaning is also manageable if you’re comfortable following step-by-step guides and taking photos as you disassemble parts. These DIY repairs typically cost between $10 and $50 in parts, compared to $75-150 in shop labor fees.
However, some repairs genuinely require professional intervention. Internal engine work like valve adjustments, piston replacement, or crankshaft repairs demands specialized tools and technical knowledge. If you suspect head gasket failure or hear concerning knocking sounds from deep within the engine block, that’s your cue to call in the experts. Electrical system troubleshooting beyond basic spark testing can also get tricky without proper diagnostic equipment.
Here’s a practical cost-benefit consideration: if repair estimates exceed 50 percent of your mower’s current value, replacement often makes more financial and environmental sense. A well-maintained used mower might serve you better than pouring money into extensive engine rebuilds. That said, Kawasaki engines are known for their durability, so investing in professional repair for a relatively new engine usually pays off.
Before committing to expensive repairs, get a written estimate and ask about labor time. A good small engine mechanic will honestly tell you when replacement makes more sense than repair. Don’t feel embarrassed asking questions—responsible technicians appreciate customers who want to understand their options. Remember, attempting repairs beyond your skill level can sometimes create bigger problems, turning a $100 fix into a $300 mess. Know your comfort zone, and don’t hesitate to seek professional help when needed.
Preventive Maintenance That Actually Prevents Problems
The Seasonal Maintenance Checklist
Keeping your Kawasaki engine healthy year-round means adapting your maintenance routine to match the seasons. Think of it as helping your mower transition through the year, just like preparing your garden beds for changing weather.
When spring arrives, start with a fresh oil change and new spark plug to shake off winter dormancy. Check your air filter for any moisture or debris that accumulated during storage, and inspect fuel lines for cracks that cold weather might have caused. Run fresh fuel through the system, adding a quality stabilizer to prevent ethanol-related issues during the mowing season. This springtime refresh sets the foundation for reliable summer performance.
During summer’s peak mowing months, stay vigilant with weekly pre-mow checks. Monitor oil levels before each use, especially during hot weather when engines work harder. Clean grass clippings from cooling fins after every few mows to prevent overheating. Replace air filters mid-season if you’re mowing in dusty conditions, and sharpen blades regularly for efficient cutting that doesn’t strain the engine.
As fall approaches, prepare your Kawasaki for its rest period. Run the fuel tank nearly empty or add stabilizer for winter storage. Change the oil while the engine’s warm so contaminants drain out completely. Clean the entire engine housing, removing all grass and debris that could trap moisture. Following proper winter storage techniques prevents most spring startup headaches.
These seasonal rituals take minimal time but dramatically reduce the engine problems that interrupt your lawn care routine, keeping your equipment running smoothly for years.
Fuel Management for Long Engine Life
Here’s something I’ve learned from years of maintaining lawn equipment: the fuel you put in your Kawasaki engine matters far more than most people realize. In fact, poor fuel quality causes nearly half of all carburetor and valve problems I’ve encountered.
Let’s talk about ethanol. Most pump gas contains 10% ethanol (E10), which attracts moisture and deteriorates quickly—sometimes in as little as 30 days. This moisture leads to corrosion inside your carburetor and fuel system. Whenever possible, use ethanol-free fuel for your lawn mower. Yes, it costs a bit more, but you’ll save considerably on carburetor cleanings and repairs. Think of it as an investment in your engine’s longevity.
If ethanol-free fuel isn’t available in your area, fuel stabilizers become your best friend. Add a quality stabilizer to every tank of gas, even during mowing season. This simple step prevents fuel degradation and keeps your carburetor jets clean. For winter storage, fill the tank completely (to prevent condensation), add double the stabilizer dose, and run the engine for five minutes to circulate the treated fuel throughout the system.
Here’s a sustainable tip: only buy what you’ll use within a month. Smaller, fresher fuel quantities prevent waste and ensure your engine always gets the best possible fuel. Some owners drain their tanks completely for storage, but I’ve found the full-tank-with-stabilizer method works better for preventing internal rust and keeping gaskets from drying out.
Remember, clean fuel equals a clean-running engine. This one simple practice prevents more problems than any other maintenance task.

Repair or Replace? Making the Smart Decision
So you’ve identified the problem with your Kawasaki engine, but now comes the big question: should you repair it or invest in a replacement? It’s a decision that affects both your wallet and the environment, so let’s walk through a practical framework to help you decide.
Start by getting a solid repair estimate from a qualified technician. A good rule of thumb is the 50-percent rule: if the repair costs more than half the price of a comparable new engine or mower, replacement usually makes better financial sense. For instance, if you’re facing an $800 repair bill on a mower that would cost $1,200 new, you’re better off replacing it. However, if that same repair costs $400, fixing makes more sense, especially if the mower has been well-maintained otherwise.
Engine age plays a crucial role too. Most Kawasaki engines deliver 1,500 to 2,000 hours of reliable service with proper maintenance. If your engine is under five years old with moderate use and this is its first major issue, repair is typically worthwhile. These engines are built to last, and you’ll likely get many more years from it. On the other hand, if you’re dealing with a 10-year-old engine that’s already had multiple repairs, you might be throwing good money after bad.
Consider the cumulative effect of repairs as well. If you’ve already invested in several fixes over the past couple years, those costs add up. Sometimes the kindest thing you can do for your budget is knowing when to let go.
If replacement wins out, please don’t just toss your old engine in the trash. Kawasaki engines contain recyclable metals and components. Many small engine repair shops will take old engines for parts or proper recycling. Some municipalities offer special collection days for small engines and outdoor equipment. You might also consider donating a barely-functioning mower to a vocational school where students can practice their repair skills, giving your equipment an educational second life while keeping it out of landfills.
Here’s the good news: most Kawasaki lawn mower engine problems are completely solvable with a bit of knowledge and some proactive care. Throughout this guide, we’ve explored the most common issues you’re likely to encounter, from starting difficulties to overheating and oil leaks. The key takeaway? Many of these problems stem from simple maintenance oversights rather than serious mechanical failures.
I’ve learned through years of lawn care that an ounce of prevention truly is worth a pound of cure. Regular maintenance—changing oil on schedule, keeping air filters clean, using fresh fuel, and checking spark plugs—can prevent most of the headaches we’ve discussed. This approach isn’t just easier on your wallet; it’s better for the environment too, extending your equipment’s lifespan and reducing waste.
If you’re still struggling with engine issues after trying these solutions, our general troubleshooting guide offers additional strategies that might help. Remember, you’re not alone in this journey. Every gardener faces equipment challenges at some point, and there’s no shame in seeking help when you need it.
By taking a proactive approach to maintenance rather than waiting for problems to arise, you’ll spend less time fixing your mower and more time enjoying the beautiful, healthy lawn you’re working so hard to create. That’s what sustainable lawn care is all about.