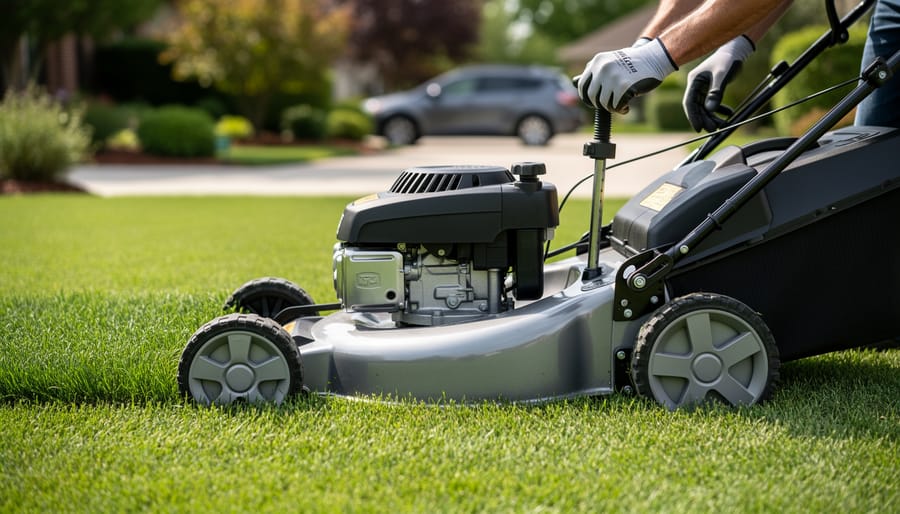
Drain the old oil completely and remove the spark plug before attempting any disassembly—this single step prevents accidental starts and messy spills that complicate the entire overhaul process. Your sputtering, smoke-belching lawn mower engine doesn’t necessarily mean you need a costly replacement or expensive repair shop visit. Most common engine failures stem from worn piston rings, carbon buildup, or valve issues that you can address yourself with basic tools and a weekend’s worth of patience.
Understanding whether your engine deserves an overhaul starts with honest assessment. If your mower is less than 10 years old, runs a reputable brand engine like Briggs & Stratton or Honda, and the replacement cost exceeds $300, rebuilding makes financial and environmental sense. You’ll spend roughly $50-150 on gasket kits, rings, and basic parts while gaining invaluable mechanical knowledge and keeping functional equipment out of landfills.
The overhaul process follows a logical sequence: documentation through photos at each disassembly stage, thorough cleaning of every component with carburetor cleaner and wire brushes, careful measurement of cylinder bore wear with calipers, replacement of worn gaskets and seals, and meticulous reassembly following torque specifications. Success hinges on cleanliness—even a speck of dirt entering the combustion chamber during rebuild can compromise your entire effort.
This comprehensive guide walks you through each phase with realistic expectations about time commitment, skill requirements, and potential complications. You’ll learn when persistence pays off and when professional help or replacement becomes the wiser choice. Whether you’re mechanically inclined or tackling your first engine rebuild, the straightforward approach here demystifies what seems intimidating while respecting the genuine challenge involved.
Signs Your Mower Engine Needs an Overhaul (Not Just a Tune-Up)
Before you invest time and money into a complete engine overhaul, it’s important to understand whether your mower truly needs one or if simpler repairs might do the trick. Think of it like this: not every headache requires brain surgery, and not every engine problem requires a full rebuild.
Let’s start with the clear signs that you’re dealing with something more serious than routine maintenance. If your mower is burning through oil faster than you can refill it, that’s a red flag. We’re not talking about normal consumption here, but needing to add oil after every mowing session or noticing your oil level drops dramatically between uses. This usually indicates worn piston rings or cylinder wall damage that can’t be fixed with fresh oil and a new filter.
Blue or gray smoke billowing from your exhaust is another telltale sign. While a little puff of smoke on startup might just mean you’ve overfilled the oil, continuous blue smoke during operation means oil is getting where it shouldn’t be, burning in the combustion chamber. This is classic piston ring or valve seal failure territory.
Hard starting combined with loss of power points to compression issues. If you’ve already ruled out simple culprits like a dirty air filter, bad spark plug, or stale fuel, and your engine still struggles to fire up or lacks the oomph it once had, you’re likely looking at valve problems or worn internal components.
Listen for knocking or rattling sounds from deep within the engine. These aren’t the normal operating noises you’re used to. Unusual knocking often signals bearing wear or loose internal parts, serious conditions that won’t improve on their own.
Here’s the key distinction: tune-ups address wear items like spark plugs, air filters, and oil. They’re preventive care. An overhaul addresses fundamental engine damage. If you’re experiencing multiple symptoms from this list, especially smoke plus oil consumption or knocking plus compression loss, you’re likely past the tune-up stage. The good news? A well-executed overhaul can give your mower years of additional sustainable service, keeping it out of the landfill.
Is Overhauling Worth It? The Cost-Benefit Reality Check
Let’s talk numbers and make an honest assessment about whether overhauling your mower engine actually makes sense for your situation.
First, the financial reality. A basic overhaul kit with rings, gaskets, and seals typically runs between $30-80. If you need valves, a piston, or cylinder work, add another $50-150. You’ll likely need some specialized tools too—a valve spring compressor, torque wrench, and ring compressor might set you back $75-150 if you don’t already own them. So you’re looking at $100-300 total for a straightforward rebuild, potentially more for extensive repairs.
Compare that to replacement costs: a new small engine runs $200-500, while an entirely new walk-behind mower costs $250-600. Suddenly, overhauling doesn’t seem like an obvious financial win, especially if you factor in 8-15 hours of your weekend time.
So when does rebuilding make sense? If your mower is a quality model that’s well-maintained otherwise and within its expected lawn mower lifespan, absolutely. You’re investing in equipment you know rather than gambling on a budget replacement. If you enjoy mechanical work and want to learn valuable skills, the time investment becomes rewarding rather than burdensome.
Here’s where sustainability tips the scales significantly. Every year, Americans discard 10 million lawn mowers into landfills. These contain oil, gas residue, metals, and plastics that take decades to decompose. By rebuilding, you’re keeping 50-100 pounds of equipment in use and avoiding the environmental cost of manufacturing a replacement. That includes mining metals, producing plastics, overseas shipping, and packaging waste.
Bottom line: overhaul if your mower is quality equipment worth saving, you have basic mechanical aptitude, and you value keeping functional items out of landfills. Replace if your mower was budget-grade to begin with or has multiple failing systems beyond the engine.
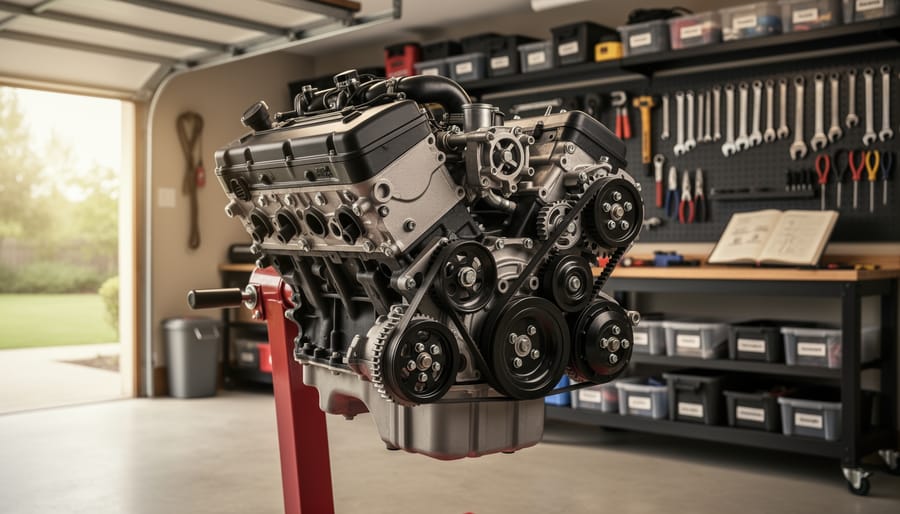
Tools and Parts You’ll Actually Need
Essential Tools for the Job
Before you dive into overhauling your lawn mower engine, let’s talk about the tools you’ll need. Having the right equipment makes this project much more manageable, and the good news is you don’t need to break the bank.
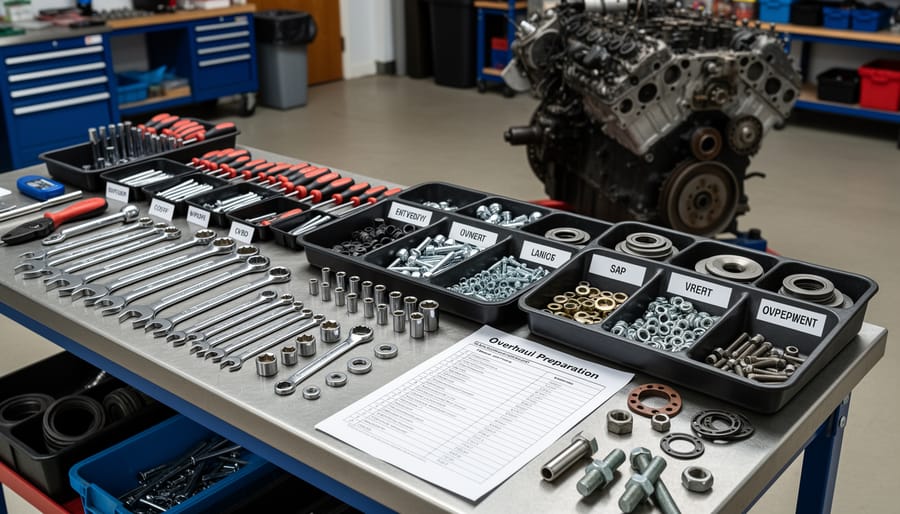
At minimum, you’ll need a quality socket set with both standard and metric sizes. A ratcheting wrench set will also prove invaluable for those tight spaces. Here’s where many DIYers stumble: invest in a torque wrench. Proper torque specifications are crucial when reassembling your engine, preventing both stripped bolts and leaks from under-tightened gaskets.
For the specialized tools, a valve spring compressor is essential for removing and installing valve springs without damaging components. If your engine has significant wear, a ridge reamer will help remove carbon buildup from the cylinder bore before removing pistons. You’ll also need a piston ring compressor to reinstall pistons without breaking those delicate new rings.
Budget-conscious? Consider borrowing or renting specialized tools from auto parts stores, which often have loaner programs. Some community tool libraries now offer these items too, supporting both your wallet and sustainable practices by sharing resources.
Other helpful items include feeler gauges for checking valve clearances, a parts tray organizer to keep track of small components, and plenty of shop rags. A digital caliper helps measure wear on critical parts, though a basic micrometer works too. Photography equipment, even just your smartphone, proves surprisingly useful for documenting disassembly steps.
Remember, quality tools last decades and tackle multiple projects beyond lawn mower repair, making them a worthwhile investment in your DIY journey.
Common Replacement Parts to Have Ready
Before you dive into your engine overhaul, gathering the right replacement parts will save you time and frustration. Think of it like prepping ingredients before cooking—having everything ready means you won’t be stuck halfway through the project waiting for a part to arrive.
The most common parts you’ll need include piston rings, which create the crucial seal between the piston and cylinder wall. Over time, these wear down and lose compression. You’ll also need a complete gasket set, including the head gasket, crankcase gaskets, and various seals. These are the unsung heroes that keep oil where it belongs and prevent leaks.
Depending on your engine’s condition, you might need valves and valve guides, especially if you’ve noticed poor performance or excessive smoke. Connecting rods and bearings are essential if there’s been knocking or significant wear. Oil seals are another must-have, as old, brittle seals are a primary cause of oil leaks.
Here’s where I encourage you to invest wisely: always choose OEM (Original Equipment Manufacturer) parts or high-quality aftermarket alternatives from reputable brands. I’ve seen well-intentioned folks try to save a few dollars on cheap gasket sets, only to face leaks and failures within a season. Quality parts might cost 20-30% more upfront, but they’ll last significantly longer and perform more reliably.
From a sustainability perspective, using quality parts means your overhauled engine will run for many more years, reducing waste and keeping your mower out of the landfill. It’s an investment in both performance and environmental responsibility.
The Step-by-Step Overhaul Process
Preparation and Engine Removal
Before diving into your engine overhaul, let’s make sure you’re set up for success and safety. First things first: disconnect the spark plug wire. This simple step prevents accidental starts while you’re working, and trust me, you’ll thank yourself for this precaution.
Now for the messy but essential part: draining fluids. Position a suitable container under the oil drain plug and remove it, letting the old oil flow out completely. Gasoline should be siphoned or drained into an approved fuel container. Here’s where sustainability matters: never pour these fluids down drains or onto the ground. Most auto parts stores and recycling centers accept used oil for free, and some even offer small incentives. It’s an easy way to keep harmful chemicals out of our soil and waterways.
Next, photograph or label each wire and cable before disconnecting them. Your future self will appreciate this roadmap when reassembly time comes. Remove the air filter housing, throttle linkage, and any remaining cables. Unbolt the engine mounting bolts, typically four securing points on the deck. With a helper if possible, lift the engine straight up and away from the mower deck. Place it on a clean, stable workbench where you’ll have plenty of elbow room for the detailed work ahead.
Disassembly and Initial Assessment
Before you start unbolting anything, grab your smartphone or camera because documentation is your best friend here. Trust me, you’ll thank yourself later when you’re staring at a pile of parts wondering where that spring actually goes. Take photos from multiple angles before removing each component, focusing especially on how wires connect, where linkages attach, and the orientation of parts.
Set up a systematic workspace with several containers or a muffin tin to organize your hardware. Label each container with masking tape noting what section the bolts came from, like “cylinder head bolts” or “carburetor screws.” This simple step prevents the frustrating hardware mix-up that can derail your entire project.
Start by removing the spark plug, then work your way through the external components: carburetor, governor linkage, muffler, and ignition system. As you disassemble, lay parts out in the order you removed them, creating a visual roadmap for reassembly.
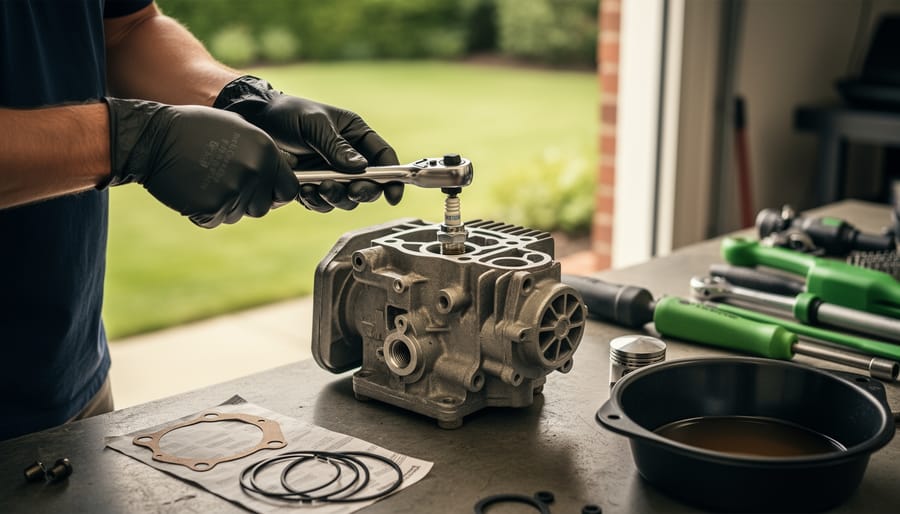
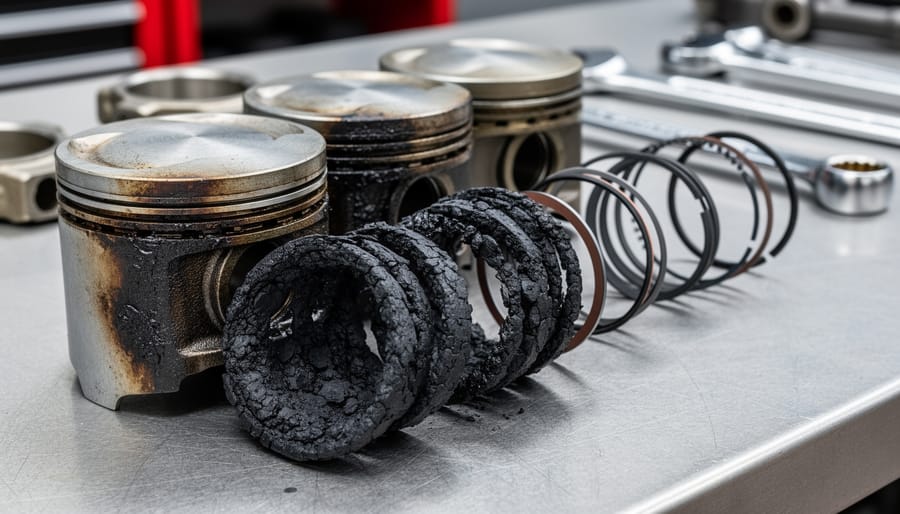
Once you’ve exposed the engine block, remove the cylinder head bolts in a crisscross pattern to prevent warping. Inspect the cylinder walls for scoring, checking for vertical scratches that indicate serious wear. Examine the piston rings for excessive carbon buildup or breaks. Look over the valves and valve seats for pitting or burning, which appear as dark spots or erosion.
The crankshaft should spin smoothly without wobble. Check all gasket surfaces for damage, as these will need replacing regardless. This initial assessment helps you decide whether to proceed with the overhaul or if replacement parts will exceed the engine’s value, keeping both your budget and sustainability goals in perspective.
Cleaning and Inspecting Components
With your engine disassembled, you’re ready for one of the most satisfying parts of the overhaul—transforming grimy components into clean, inspectable parts. Beyond cleaning your mower exterior, this deep clean reveals the true condition of each component.
Start with parts cleaner or degreaser and a wire brush for stubborn carbon deposits. For the engine block and cylinder head, pay special attention to cooling fins—clogged fins cause overheating and premature wear. A toothbrush works wonders in tight spots. Once clean, wipe everything down with shop towels and let parts dry completely before inspection.
Now comes the assessment. For the cylinder bore, use a telescoping gauge and micrometer to measure diameter at multiple points. Compare measurements to manufacturer specifications—typically found in your service manual. Minor scoring might be smoothed with a hone, but deep scratches or an out-of-round bore means you’ll need professional boring or a replacement block.
Examine the crankshaft journal surfaces where bearings ride. Run your fingernail across them—you shouldn’t feel any ridges or roughness. Even small imperfections can cause premature bearing failure. Check for any bluish discoloration indicating overheating damage.
The sustainability angle here matters: a scored cylinder doesn’t automatically mean replacement. Local machine shops can often bore cylinders and install oversize pistons for less environmental impact than buying new. However, severely damaged components with cracks or extreme wear are safety hazards best replaced. Your careful inspection now prevents frustrating failures later.
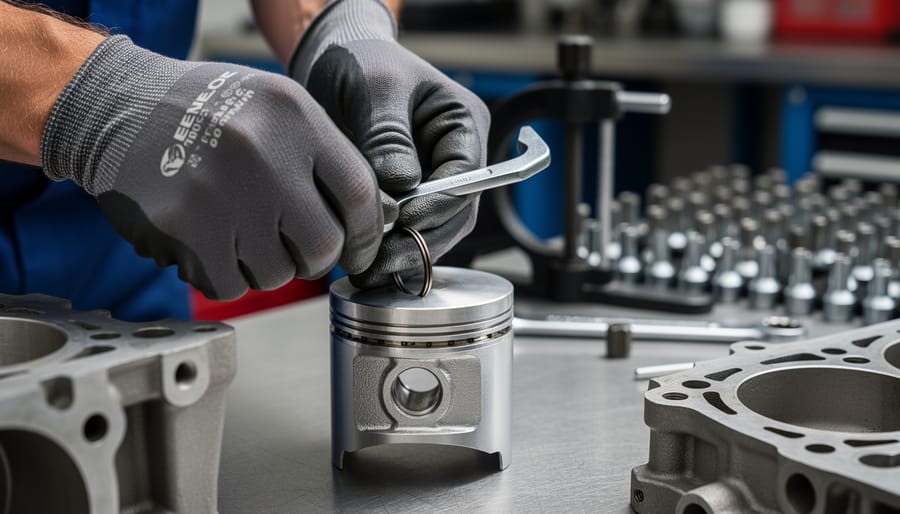
Replacing Worn Components
Now comes the rewarding part where you breathe new life into your mower’s engine. With your cleaned components laid out before you, it’s time to install fresh parts that’ll keep your mower running smoothly for years to come.
Start with the piston rings, which are critical for maintaining proper compression. Here’s where many first-timers stumble: resist the temptation to force them on. Instead, carefully expand each ring just enough to slide over the piston, using a ring expander tool if available. Notice the small markings on the rings? Those indicating “TOP” should face upward. Stagger the ring gaps around the piston at 120-degree intervals to prevent compression loss. This simple step makes a huge difference in engine performance.
When tackling valve replacement, work methodically. If you’re replacing valve guides, ensure they’re pressed in to the manufacturer’s specified depth. Too shallow or too deep affects valve operation. New valves should seat perfectly in their guides without wobbling. Use lapping compound and a valve lapping tool to create an airtight seal between valve and seat. You’ll know it’s right when you see a consistent grey ring around both surfaces.
Gaskets and seals deserve special attention since they’re your defense against oil leaks. Always use manufacturer-specified gaskets rather than generic alternatives. The head gasket, in particular, must go on dry unless specified otherwise by your engine manual. A common mistake is over-tightening bolts, which crushes gaskets and leads to future leaks. Follow the torque specifications and tightening sequence exactly. Think of it as insurance for all your hard work, ensuring your overhauled engine stays clean and efficient while reducing your environmental footprint through proper maintenance rather than premature replacement.
Reassembly with Precision
Here’s the exciting part where your engine comes back to life! Reassembly requires patience and attention to detail, but it’s incredibly satisfying. Start by consulting your manufacturer’s manual – this isn’t the time to wing it. Each engine has specific torque specifications for bolts, and overtightening can crack aluminum casings while undertightening leads to oil leaks or worse.
Begin with internal components like the crankshaft and camshaft, ensuring proper timing alignment. Most small engines have timing marks that must line up precisely – miss this step and your mower won’t run properly. Install piston rings carefully, staggering the gaps as specified to prevent oil blow-by.
As you work upward, pay special attention to valve adjustment. Proper valve clearance (measured with feeler gauges) directly affects engine performance and longevity. Too tight and valves won’t seal; too loose and you’ll hear excessive tapping.
When torquing head bolts, work in the pattern shown in your manual, typically from center outward in a crisscross sequence. This ensures even pressure and prevents warping. A basic torque wrench is essential here – they’re affordable and make the difference between a successful rebuild and a disappointing failure. Following these specifications isn’t perfectionism; it’s respecting the engineering that makes your mower run reliably for years to come.
Breaking In Your Rebuilt Engine the Right Way
Congratulations on completing your engine overhaul! Now comes a crucial step that many folks overlook: properly breaking in your rebuilt engine. Think of it like breaking in a new pair of hiking boots—you wouldn’t run a marathon in them right away, would you?
Start by filling your mower with fresh, high-quality oil. For the first five hours of operation, keep your workload light and varied. Mow for 20-minute sessions, alternating between flat terrain and gentle slopes. This varying load helps your new piston rings seat properly against the cylinder walls, creating that perfect seal you worked so hard to achieve.
Here’s the golden rule: change that initial oil after just five hours of use. This first oil change removes metal particles and debris from the break-in process—it’s completely normal and essential for long-term engine health. After that, follow your manufacturer’s regular maintenance schedule.
During break-in, listen carefully for any unusual knocking, excessive vibration, or smoking. A little smoke initially is normal, but it should diminish quickly. Keep an eye on oil levels daily, checking for leaks around your new gaskets.
When it’s time for oil changes, please dispose of used oil responsibly. Most auto parts stores and recycling centers accept used motor oil for free—never pour it down drains or onto soil. Used oil can be re-refined into new lubricants, making this simple act a meaningful contribution to environmental sustainability. Your rebuilt engine represents a commitment to reducing waste, so let’s keep that eco-friendly momentum going through proper maintenance practices.
Troubleshooting Common Post-Overhaul Issues
First, take a deep breath—if your newly overhauled engine isn’t purring perfectly right away, you’re in good company! Most first-time rebuilders experience a few hiccups, and the good news is that most issues have simple solutions.
If your engine won’t start at all, don’t panic. Check the basics first: Is fuel flowing to the carburetor? Are the spark plug wires connected properly? Sometimes we get so focused on the complex rebuild that we overlook simple connections. For comprehensive guidance on troubleshooting starting issues, there are specific diagnostic steps that can pinpoint the problem quickly.
Rough running or excessive vibration often points to valve adjustment problems. If you didn’t set the valve clearances precisely or tightened the head bolts unevenly, the engine will protest. Solution? Double-check your torque specifications and valve gaps against your manual. It’s worth the extra hour to get it right.
Seeing blue or white smoke? This typically means oil is getting where it shouldn’t. Blue smoke suggests the piston rings weren’t installed correctly or the ring gaps are aligned, allowing oil past them. White smoke usually indicates a head gasket issue. Before tearing everything apart again, run the engine for 20 minutes—sometimes new rings need a brief break-in period to seal properly.
Excessive oil consumption without visible smoke often means you’ve got a leak somewhere. Check your gasket surfaces and make sure you didn’t overtighten bolts, which can warp sealing surfaces.
Remember, even professional mechanics occasionally need to revisit their work. These troubleshooting moments are valuable learning experiences that’ll make you a more confident DIY mechanic. Most post-overhaul issues resolve with minor adjustments rather than complete disassembly.
Maintaining Your Overhauled Engine for Years of Service
Congratulations on completing your engine overhaul! Now let’s talk about protecting that investment so your mower runs beautifully for years to come.
Think of your freshly overhauled engine like a reset button—you’ve given it new life, and proper maintenance will keep it purring. Start with proper oil selection and stick to a regular change schedule. For most mowers, that means fresh oil every 25-50 hours of operation or at least once per season. Clean oil is your engine’s best friend, preventing the buildup of contaminants that caused problems before.
Regular air filter maintenance is equally crucial. A clogged filter forces your engine to work harder and can undo all your hard work. Check it monthly during mowing season and clean or replace as needed—it takes just minutes and prevents major headaches.
Fuel quality matters more than most people realize. Use fresh gasoline and consider adding a fuel stabilizer, especially if your mower sits idle between uses. Old fuel creates varnish deposits that gum up carburetors and valves. For environmental responsibility, never dump old fuel down drains—take it to your local hazardous waste facility.
When storing your mower seasonally, run the engine until the fuel tank is empty or add stabilizer to a full tank. This simple step prevents corrosion and ensures easy spring startups. Store in a dry location to prevent rust and moisture damage.
These sustainable practices not only extend your engine’s life but reduce waste and the need for future repairs.
Congratulations on making it this far! Overhauling a lawn mower engine is no small feat, and whether you’re seriously considering tackling this project or have already completed it, you should feel proud of your willingness to dive into hands-on repair work. This kind of DIY approach not only saves you money but also reduces waste by keeping perfectly good equipment out of landfills.
Remember, an engine overhaul makes the most sense when your mower’s body and deck are in good condition, replacement costs are high, and you enjoy mechanical projects. It’s also an excellent choice when you want to extend the life of a reliable machine that’s served you well over the years.
Beyond the practical benefits, there’s real satisfaction in bringing an engine back to life with your own hands. You’re choosing sustainability over convenience, learning valuable skills, and maintaining equipment that can serve your lawn for many more seasons.
Have you successfully overhauled your mower engine, or are you still weighing your options? We’d love to hear about your experience or answer any questions you might have. Share your story in the comments below and help fellow gardeners make informed decisions about their lawn care equipment.