Turn the key to the “on” position and check if your dashboard lights illuminate—if they don’t, your battery is likely dead or disconnected, which is the most common reason for a no-click, no-start condition. A completely drained battery won’t provide enough power to engage the starter solenoid, which is why you’re not hearing that telltale clicking sound.
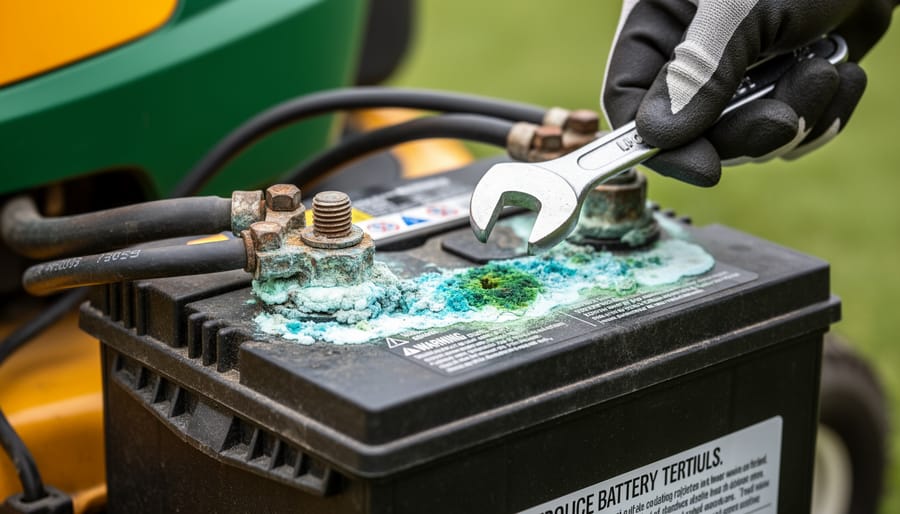
Inspect your battery terminals for corrosion, loose connections, or frayed cables. That white, crusty buildup around the posts acts as an insulator, preventing electrical flow even when your battery has a full charge. Clean terminals with a wire brush and baking soda solution, then tighten connections firmly—this simple fix resolves the issue about 40% of the time.
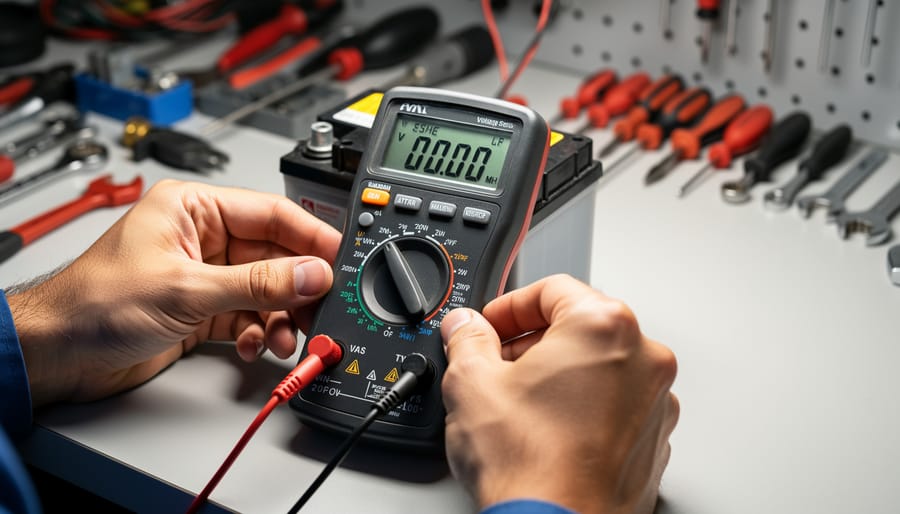
Test your battery voltage using a multimeter, looking for a reading of at least 12.4 volts. Anything below 12 volts means your battery needs charging or replacement. If you don’t have a multimeter, try jump-starting your mower with jumper cables connected to your car battery—if it starts immediately, you’ve confirmed a weak battery is your culprit.
Check that you’re properly seated in the operator’s seat and the parking brake is fully engaged. John Deere mowers include multiple safety switches that prevent starting when these conditions aren’t met, though they typically won’t trigger any clicking sounds. The silence you’re experiencing, combined with no dashboard activity, almost always points back to electrical supply issues rather than safety switch problems, making battery diagnosis your most productive starting point.
Understanding the ‘No Click’ Symptom
When you turn the key on your John Deere riding mower and hear absolutely nothing—no click, no sound whatsoever—it’s actually telling you something important about where the problem lies. Let me explain what’s happening under the hood so you can approach this issue with confidence.
Under normal circumstances, when you turn the ignition key on a riding mower, you should hear a distinct clicking sound. This click comes from the starter solenoid, a relay switch that acts as the middleman between your battery and the starter motor. Think of it like a doorbell button: when you press it, it completes a circuit that allows power to flow. The solenoid does the same thing, connecting the high current from your battery to the starter motor that cranks your engine to life.
The absence of that clicking sound is actually a valuable diagnostic clue. It means the electrical signal isn’t reaching the solenoid, or the solenoid itself has failed. This narrows down your troubleshooting considerably, which is good news for getting back to mowing your lawn quickly.
The basic electrical system in your riding mower follows a simple path: battery to safety switches (like the seat switch and brake pedal), through the ignition switch, to the solenoid, and finally to the starter motor. When starting a riding mower, each component must work in sequence. No clicking typically means the problem exists somewhere before the solenoid in this chain—often at the battery, safety switches, or connections between them.
Understanding this system helps you take a methodical approach rather than randomly replacing parts, saving both money and frustration while promoting a more sustainable repair philosophy.
The Most Common Culprits (And How to Check Them)
Dead or Weak Battery
A dead or weak battery is the most common culprit when your John Deere won’t start, especially when you’re not hearing that telltale clicking sound. The good news? This is usually one of the easiest problems to diagnose and fix yourself.
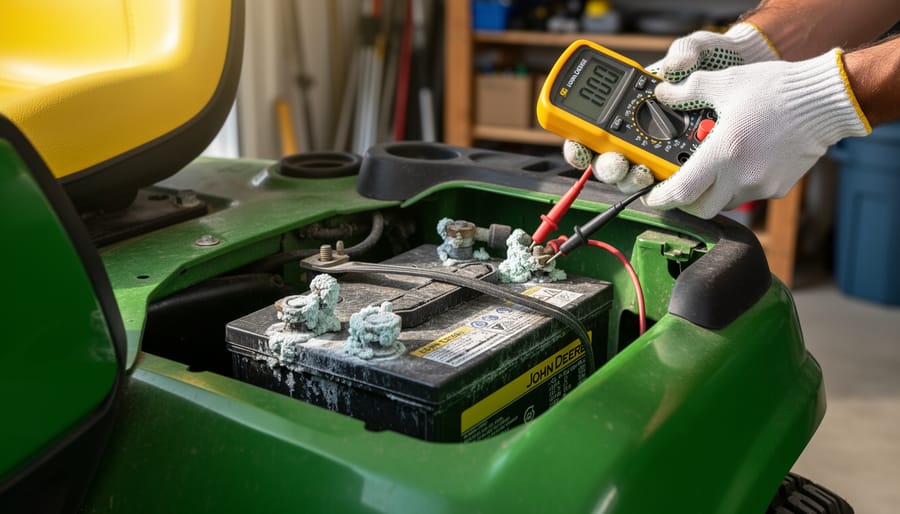
Start with a visual inspection. Pop open the hood and take a good look at your battery terminals. Do you see white, blue, or greenish crusty buildup around the connections? That’s corrosion, and it prevents proper electrical contact. If you spot corrosion, disconnect the battery cables (negative first, then positive) and clean the terminals with a wire brush and a mixture of baking soda and water. This eco-friendly solution neutralizes the acid causing the corrosion. Rinse with water, dry thoroughly, and reconnect.
Next, test the battery voltage using a multimeter, which you can pick up inexpensively at any hardware store. A fully charged 12-volt battery should read between 12.6 and 12.8 volts. Anything below 12.4 volts means your battery needs charging, and below 12 volts typically indicates it’s time for replacing the battery.
For sustainable battery maintenance, keep your battery charged during off-season by using a solar trickle charger or disconnecting it entirely and storing it in a cool, dry place. This simple practice can extend your battery’s life by several years, reducing waste and saving you money. Check connections monthly during mowing season to prevent corrosion from building up again.
Corroded or Loose Battery Connections
Here’s the thing about battery connections – they’re often the culprit when your mower won’t start, yet they’re the easiest fix that most of us overlook! I can’t tell you how many times I’ve seen fellow gardeners ready to haul their mower to the repair shop, only to discover it just needed a quick battery terminal cleaning.
Start by locating your battery, usually under the seat or hood. Look closely at both terminals for any white, blue, or green crusty buildup – that’s corrosion, and it blocks the electrical current your mower needs. Put on some gloves (corrosion can irritate skin), then disconnect the negative cable first, followed by the positive. Mix a tablespoon of baking soda with a cup of water and use an old toothbrush to scrub away the corrosion. This eco-friendly solution works wonderfully and won’t harm your lawn if any drips.
Once the terminals are clean and dry, reconnect the positive cable first, then the negative. Here’s the crucial part: make sure both connections are snug. Give each cable a firm tug – if it moves, tighten it more. Loose connections are just as problematic as corroded ones. This simple five-minute task solves the problem more often than you’d expect!
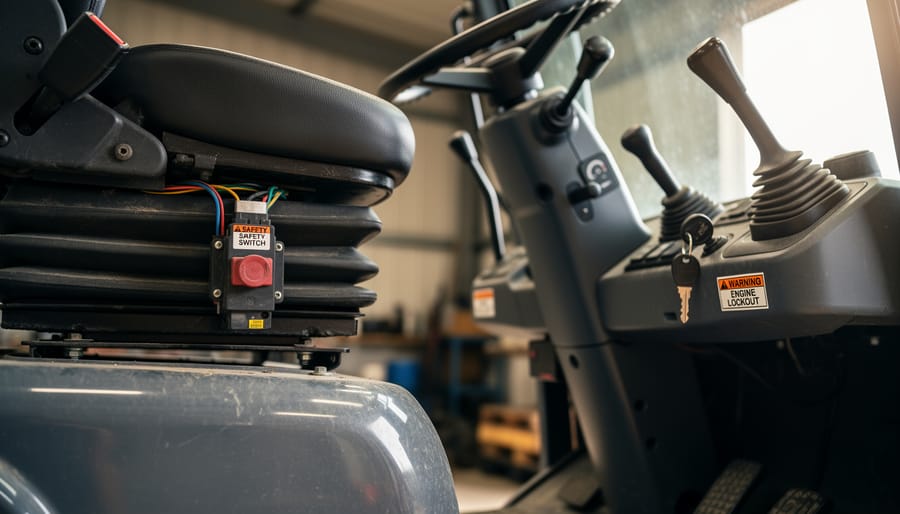
Faulty Safety Switches
Your John Deere mower is equipped with several safety switches that prevent the engine from starting under potentially dangerous conditions. While these lawn mower safety features are designed to protect you, they can sometimes malfunction and leave you with a mower that won’t start, even when everything else seems fine.
The three main safety switches to check are the seat switch, brake/clutch switch, and blade engagement switch. The seat switch ensures you’re sitting on the mower before it starts. The brake/clutch switch confirms the brake is engaged or clutch is pressed. The blade engagement switch verifies the mowing deck is disengaged during startup. When any of these switches fail, your mower simply won’t respond when you turn the key.
To test these switches, you’ll need a multimeter set to continuity mode. Start with the seat switch, located beneath your seat. Disconnect the wire connector and test for continuity while pressing the switch. It should show continuity when pressed and none when released. Follow the same process for the brake switch near the pedal and the blade engagement switch by the control lever.
If you find a faulty switch, you can temporarily bypass seat safety switch circuits for diagnostic purposes by connecting the two wires together with a jumper wire. However, I must emphasize that this should only be a temporary test to confirm the problem. Never operate your mower permanently with bypassed safety switches, as they exist to prevent serious injuries. Once you’ve identified the faulty switch, order a replacement part and restore your mower’s full safety system. This approach keeps you safe while helping you get back to maintaining your lawn sustainably and efficiently.
Blown Fuse or Tripped Circuit Breaker
A blown fuse or tripped circuit breaker is one of those surprisingly simple issues that can leave your mower completely silent. Think of fuses as the safety guards of your electrical system—they’re designed to sacrifice themselves to protect more expensive components from electrical overloads.
On most John Deere riding mowers, you’ll find the fuse holder under the hood, typically near the battery or along the main wiring harness. Some models have them tucked under the dash panel. Check your owner’s manual for the exact location, as it varies by model. The fuse itself is usually a small blade-style or glass tube fuse that you can pull out for inspection.
To check a fuse, remove it and hold it up to the light. If the metal strip inside is broken or the glass appears blackened, it’s blown and needs replacing. Always replace fuses with the exact same amperage rating—using a higher rating defeats the safety purpose and could damage your mower’s electrical system.
Fuses typically blow due to short circuits, corroded connections, or faulty components drawing too much current. If your replacement fuse blows immediately, you’ve got an underlying electrical problem that needs attention. Before replacing any fuse, disconnect the battery to work safely and prevent additional damage.
Failed Starter Solenoid
The starter solenoid acts as the electrical bridge between your battery and starter motor, and when it fails, you’ll typically hear silence instead of that reassuring click. Think of it as a relay switch that can wear out over time, especially after years of faithful service on your lawn.
To test your solenoid, you’ll need a basic multimeter. First, ensure your battery is charged. Turn the key to the start position and listen carefully near the solenoid. If you hear absolutely nothing, the solenoid likely isn’t receiving power or has failed internally. Next, use your multimeter to check for voltage at the solenoid’s small terminal when turning the key. If voltage is present but nothing happens, your solenoid has probably given up.
Here’s a practical test: carefully bypass the solenoid by touching a screwdriver across its two large terminals. If the starter engages, you’ve confirmed the solenoid needs replacing. Always disconnect the negative battery cable first for safety.
Replacement is straightforward and costs around twenty to forty dollars for a quality part. Choose solenoids designed for outdoor power equipment rather than generic automotive versions, as they better withstand vibration and weather exposure. This simple upgrade can save you from future frustrating mornings when your lawn needs attention.
Step-by-Step Troubleshooting Process
I know how frustrating it is when your trusty John Deere won’t cooperate, especially when you’ve got a lawn waiting to be mowed. The good news? A riding mower that won’t start with no clicking sound is actually giving you valuable information. Let’s walk through this together, step by step, starting with the simplest solutions first.
Start with the safety switches, because these are the most common culprits and the easiest to check. Your John Deere has built-in safety features designed to protect you. Make sure you’re sitting fully in the seat—these mowers have a seat switch that prevents starting if no one’s there. Next, check that the parking brake is firmly engaged and the mower deck is disengaged. Try wiggling the brake lever a bit while turning the key. Sometimes these switches get finicky, and a small adjustment makes all the difference.
Now let’s look at your battery connections. Pop the hood and locate your battery. You’re looking for those cable connections on the battery terminals. Are they tight? Give them a gentle tug. If they move, tighten them with a wrench. Look closely for any white, crusty buildup—that’s corrosion, and it blocks electrical flow. You can clean it off with a wire brush and a mixture of baking soda and water. This is a sustainable, non-toxic solution that works beautifully.
Next, test the battery itself. If you have a multimeter, check the voltage. You should see at least 12.4 volts. Anything under 12 volts means your battery needs charging. No multimeter? Try turning on the headlights. If they’re dim or won’t come on, your battery is likely the problem. Even if the battery looks fine, try jump-starting the mower with jumper cables connected to your car battery. If it starts right up, you’ve confirmed a weak battery.
If you’ve made it this far with no success, check the main fuse. It’s usually located near the battery or under the dashboard. Pull it out and look at the metal strip inside—if it’s broken or burned, that’s your problem. Replace it with the exact same amperage fuse.
Still nothing? It’s time to examine the ignition switch and starter solenoid, though these require a bit more mechanical comfort to tackle. Listen carefully when you turn the key—any humming or buzzing sounds can point you toward which component has failed.
Remember, working through these steps methodically saves you time and potentially expensive service calls. You’ve got this!
When to Call a Professional (And When You Don’t Need To)
Here’s the honest truth: most of the issues we’ve covered are genuinely DIY-friendly, even if you’re new to mower maintenance. Checking battery connections, testing the battery with a multimeter, cleaning terminals, and replacing a battery are all weekend-warrior territory. You’ll likely save $150-300 doing these yourself, and you’re keeping your mower out of the landfill longer – a win for both your wallet and the environment.
However, some situations call for professional expertise. If you’ve tested the battery and connections but suspect the starter motor or solenoid needs replacement, this involves more technical work. While not impossible for a confident DIYer, incorrect installation can damage your mower’s electrical system. Similarly, complex wiring issues or problems with the ignition switch mechanism often benefit from a professional’s diagnostic equipment and experience.
Here’s my rule of thumb: if the repair costs more than half your mower’s current value, it’s worth getting a professional assessment before deciding between repair and replacement. A good small engine mechanic can give you an honest evaluation for around $50-75.
From a sustainability perspective, I always advocate for repair over replacement when feasible. Even an older John Deere that needs occasional professional attention is generally better for the environment than manufacturing a new mower. That said, if you’re facing repeated expensive repairs on a mower that’s seen better days, investing in a quality replacement might be the more practical long-term choice. Trust your gut and your budget.
Preventing Future No-Start Issues
Now that you’ve got your John Deere running again, let’s talk about keeping it that way. A little preventive care goes a long way toward extending equipment lifespan and avoiding those frustrating no-start mornings.
Battery maintenance is your first line of defense. Every month during mowing season, check your battery terminals for corrosion and clean them with a wire brush and baking soda solution if needed. Keep connections snug but not overtightened. If you’re storing your mower for winter, either remove the battery and store it in a warm, dry place, or connect it to a quality trickle charger designed for lawn equipment. This simple step prevents sulfation, which destroys batteries faster than anything else.
Speaking of winter storage, proper preparation makes all the difference. Beyond battery care, stabilize your fuel to prevent gumming, change the oil while the engine is warm, and store your mower in a dry location. Cover it with a breathable tarp rather than plastic, which traps moisture and encourages rust.
During the mowing season, develop a routine of quick checks before each use. Glance at your battery terminals, listen for unusual sounds, and feel for loose connections. These thirty-second inspections catch small problems before they become big headaches.
Consider keeping a simple maintenance log noting when you charge the battery, clean connections, or notice anything unusual. This helps you spot patterns and stay ahead of potential issues. Think of it as composting for your mower care—small, consistent inputs yield healthy, reliable results. Your future self will thank you when your mower starts reliably every time, especially on those perfect mowing mornings when the grass is just right.
Good news—most no-click starting issues with your John Deere riding mower are entirely fixable, often with simple solutions you can tackle yourself! The key is working through the troubleshooting steps systematically, starting with the easiest fixes like checking your battery connections and safety switches before moving on to more complex components.
Remember, a little preventive maintenance goes a long way toward keeping your mower reliable season after season. Regular battery care, keeping connections clean, and storing your mower properly during off-seasons will save you headaches down the road. These sustainable practices not only extend your equipment’s life but also reduce waste and unnecessary replacements.
If you’ve worked through these diagnostic steps and you’re still stuck, don’t hesitate to consult your owner’s manual or reach out to a certified John Deere technician. Sometimes a fresh set of experienced eyes makes all the difference.
Have you dealt with a no-click starting problem on your mower? We’d love to hear what solution worked for you or answer any questions you might have. Share your experiences in the comments below—your insight might be exactly what another reader needs to get back to mowing!