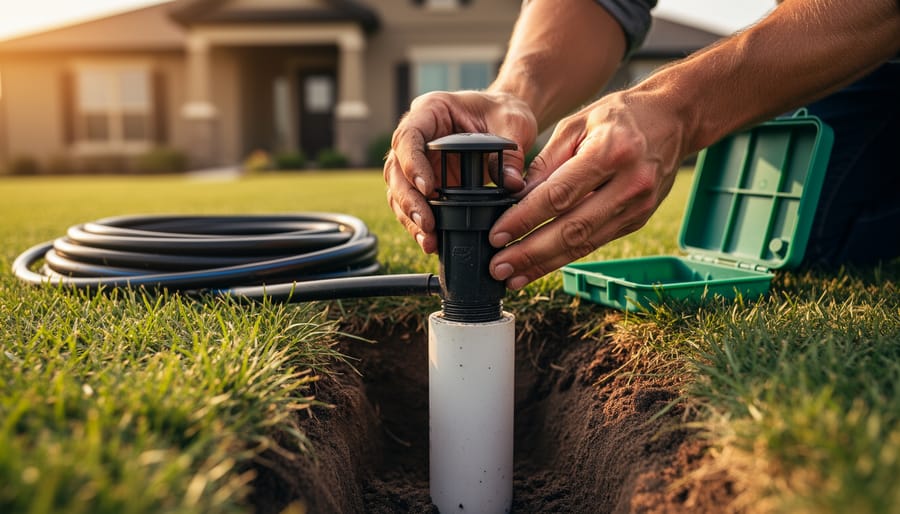
Turn off your system at the controller and inspect the valve for visible water pooling or constant dripping—this confirms whether you’re dealing with a diaphragm failure, solenoid malfunction, or debris lodged in the valve seat. Remove the bonnet screws, lift out the diaphragm, and check for tears, cracks, or mineral buildup that prevents proper sealing. Clean the valve chamber thoroughly with water, removing any dirt or small rocks, then replace the diaphragm if damaged (they’re inexpensive and widely available at hardware stores).
A leaking Hunter valve wastes hundreds of gallons monthly, damages your landscape through oversaturation, and increases water bills significantly—but the good news is that most leaks stem from simple mechanical issues you can fix yourself in under 30 minutes. Whether you’re seeing puddles around a valve box, noticing a zone that won’t shut off completely, or hearing constant water flow when the system should be idle, the problem typically involves just a few key components.
Modern irrigation management has evolved beyond reactive repairs. Flow sensors and smart controllers now detect anomalies before they become costly problems, alerting you to leaks through your smartphone. Master valves add an extra layer of protection by controlling water flow to your entire system, automatically shutting down when irregularities occur. Understanding both immediate troubleshooting and preventive technology helps you maintain an efficient, sustainable irrigation system that conserves water while keeping your lawn healthy year-round.
Understanding Your Hunter Irrigation Valve System
The Anatomy of a Hunter Valve
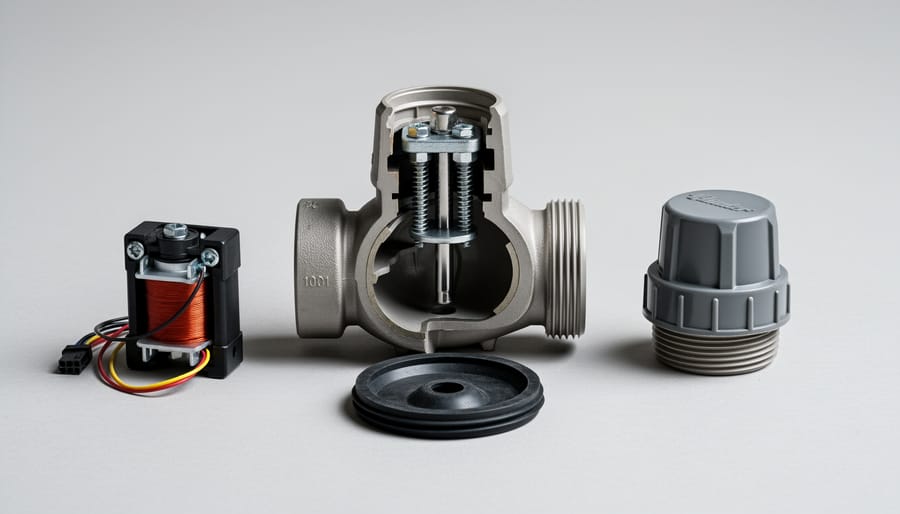
Before you can fix a leaking Hunter valve, it helps to understand what’s actually inside that green plastic housing in your yard. Think of your irrigation valve like a gatekeeper for water flow, and like any good gate, it has several parts working together to keep things running smoothly.
The diaphragm is the workhorse here. This flexible rubber disc sits inside the valve and acts like a door, opening to let water through and closing to stop the flow. Over time, dirt, debris, or simply wear and tear can cause the diaphragm to crack or develop tiny tears. When that happens, water sneaks through even when the valve should be closed, creating those frustrating leaks and puddles.
The solenoid is the electronic messenger that tells your valve when to open and close. It receives signals from your controller and creates a magnetic field that lifts a small plunger, allowing water pressure to shift and the diaphragm to open. A malfunctioning solenoid often means the valve won’t respond properly, though it’s less commonly the culprit in leak situations.
Bonnet screws hold the top cap, or bonnet, securely to the valve body. If these loosen over time from vibration or temperature changes, water can seep out around the edges. A quick tightening often solves this type of leak.
Finally, the flow control stem lets you adjust how much water passes through when the valve opens. While it doesn’t typically cause leaks itself, understanding its location helps during maintenance. These components work as a team, and knowing their roles makes troubleshooting much less intimidating.
Master Valves vs. Zone Valves: What’s Leaking?
Before you can fix a leak, you need to know what you’re dealing with. Your Hunter irrigation system likely has two types of valves working behind the scenes, and understanding the difference will save you time and frustration.
Zone valves are the workhorses of your system. Each valve controls water flow to a specific area or “zone” in your yard—maybe one for your front lawn, another for your flower beds, and so on. When a zone valve leaks, you’ll typically notice water pooling in one particular area, or a single zone that won’t shut off completely after its watering cycle ends. These valves are usually grouped together in a valve box somewhere in your yard.
Master valves are a bit different. Think of them as the gatekeeper for your entire system. The master valve function is to control water flow to all your zone valves at once, providing an extra layer of protection and water conservation. When a master valve leaks, you might see water trickling from multiple zones or notice your water bill creeping up even when the system isn’t running.
Here’s a simple test: turn off all zones at your controller. If water still appears anywhere in your system, your master valve is the likely culprit. If leaks only happen when specific zones activate, you’re dealing with zone valve issues. This distinction matters because repair approaches differ slightly between the two, though the basic troubleshooting steps remain similar.
Common Reasons Hunter Valves Start Leaking
Worn or Damaged Diaphragm
If you’ve ever wondered why your Hunter irrigation valve is leaking, there’s a good chance the culprit is hiding right inside: the rubber diaphragm. This flexible disk is the workhorse of your valve, flexing thousands of times as it opens and closes to control water flow. Over time, though, even the toughest rubber breaks down from constant exposure to water pressure, minerals, and UV rays if the valve box isn’t sealed properly.
The diaphragm’s job is to create a watertight seal, but as it ages, the rubber becomes brittle, develops cracks, or loses its flexibility. You might notice water trickling from sprinkler heads even when the zone is off, or find standing water around the valve box. Sometimes the valve simply won’t shut off completely, wasting precious water and driving up your bill—definitely not aligned with sustainable gardening practices we all aim for.
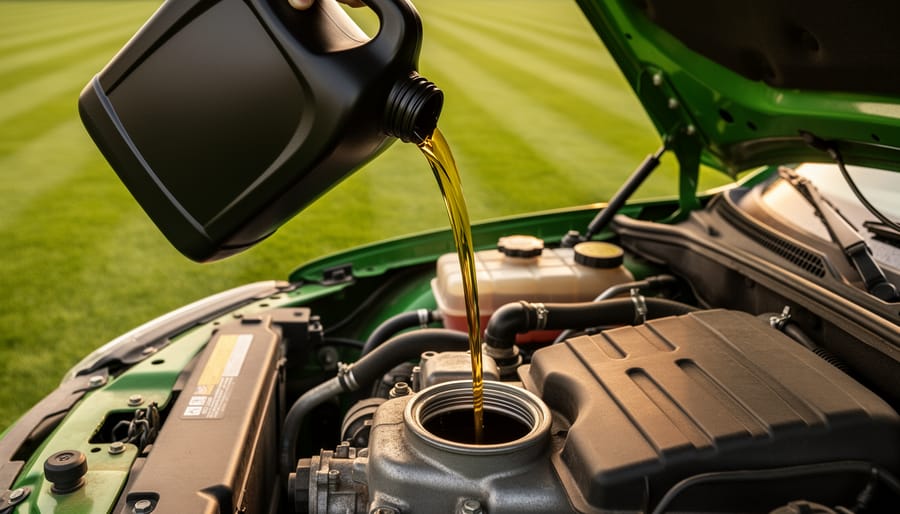
Here’s the good news: diagnosing a worn diaphragm is straightforward, and replacing it is one of the most affordable fixes you’ll encounter. Most diaphragms cost under ten dollars and can be swapped out in about fifteen minutes with basic tools. Think of it as routine maintenance, like changing your mower’s oil. By addressing this common issue promptly, you’ll conserve water and keep your irrigation system running efficiently for years to come.
Debris and Dirt in the Valve
Sometimes the culprit behind a leaking Hunter valve is surprisingly simple: tiny particles of dirt, sand, or debris lodged in the valve mechanism. Think of it like trying to close a door with a pebble stuck in the frame—no matter how hard you push, you won’t get a proper seal. These particles prevent the diaphragm from sitting flush against the valve seat, allowing water to continuously seep through even when the valve should be closed.
I’ve seen this happen countless times, especially in systems drawing water from wells or ponds. While these sustainable water sources are wonderful for reducing your municipal water usage and environmental footprint, they naturally contain more sediment than treated city water. The good news? This issue is entirely preventable.
Installing inline filters before your valves acts as a protective barrier, catching debris before it reaches your irrigation components. It’s a small investment that saves considerable headaches down the road. If you suspect debris is your problem, carefully disassemble the valve and rinse all components with clean water. Check the diaphragm and valve seat for any stuck particles, gently wiping them clean. This quick maintenance step often resolves leaking issues immediately and helps you maintain an efficient, water-conscious irrigation system.
Solenoid Problems and Electrical Issues
Sometimes the problem isn’t the valve itself, but the solenoid that controls it. Think of the solenoid as the electrical gatekeeper that tells your valve when to open and close. When it malfunctions, you might notice water seeping from around the solenoid housing or the valve staying partially open even when the zone isn’t running.
A quick test: try manually turning the solenoid about a quarter turn counterclockwise. If water stops leaking, you’ve likely found your culprit. The solenoid might need cleaning or replacement, which is actually a pretty straightforward fix that costs much less than replacing the entire valve.
Here’s another common issue I’ve seen countless times: someone accidentally leaves the manual bleed screw partially open. This small screw on top of the solenoid allows you to manually activate the valve for testing, but if it’s not fully tightened, water will continuously drip or spray from that spot. Give it a gentle clockwise turn to ensure it’s snug.
Electrical problems can also manifest as phantom leaks. Damaged wiring from lawn equipment, rodent chewing, or corroded wire connections can cause erratic valve behavior. If your valve seems to have a mind of its own, opening at random times or not closing completely, trace your irrigation wires back to the controller to check for obvious damage.
Pressure Irregularities and Backflow Issues
Sometimes the problem isn’t with the valve itself but with what’s happening upstream. Think of your irrigation system like a garden hose – if the pressure is too high, water can force its way past seals that would otherwise hold just fine. When your home’s water pressure exceeds the manufacturer’s recommended range (typically 80 PSI for Hunter valves), it can cause persistent leaking even from valves in good condition.
Here’s where things get interesting: if you have a master valve controlling your entire system, irregular pressure can create backflow situations where water pushes backward through valves that should be closed. This is especially common in sloped yards where gravity adds extra force. The solution? Installing a pressure regulator can protect all your valves and save water in the process – a win for both your wallet and the environment. If you’re experiencing leaks across multiple zones, checking your overall system pressure should be your first troubleshooting step before replacing individual components.
How to Diagnose Your Leaking Hunter Valve
Visual Inspection: What to Look For
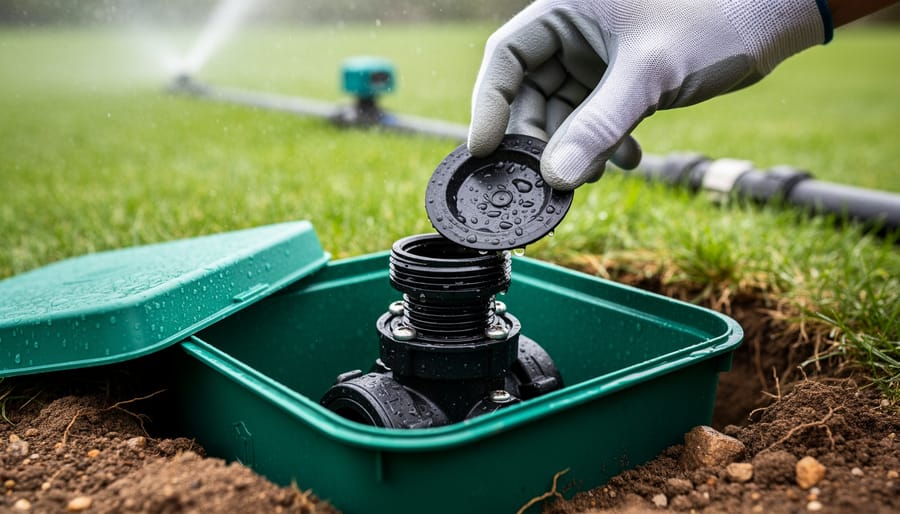
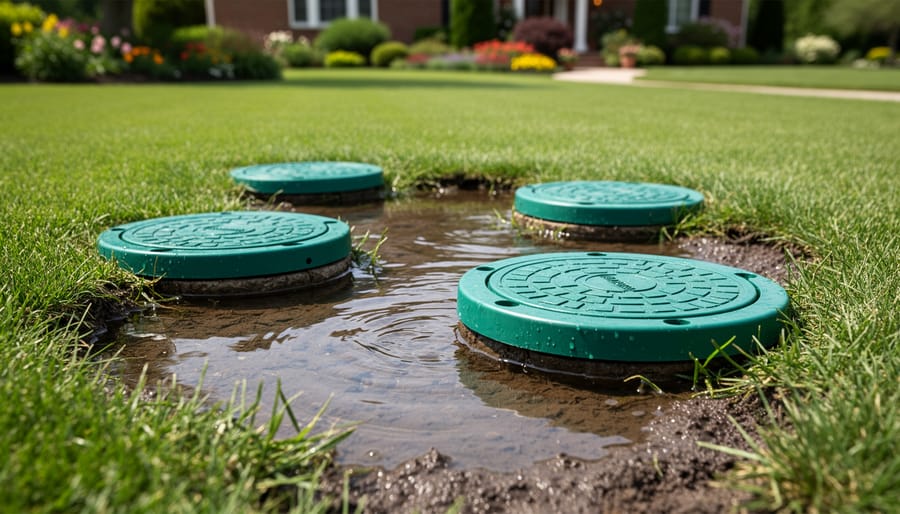
Before diving into repairs, let’s play detective and investigate what’s actually happening with your Hunter valve. Start by locating your valve box—it’s typically a green or black plastic box in your yard. Pop open the lid and take a look inside. Is there standing water? A little moisture after irrigation is normal, but if your valve box resembles a mini swimming pool, you’ve confirmed a leak.
Next, observe your lawn while the system is running. Look for soggy spots, puddles, or areas where water bubbles up from the ground. These wet zones often appear directly above problem valves. Pay special attention to areas where grass grows unusually lush and green compared to surrounding turf—persistent leaks create these telltale oases.
Now examine the valve itself. Check where pipes connect to the valve body for water dripping or spraying. Inspect the solenoid (that cylindrical component on top) for cracks or loose fittings. Run your fingers along connection points when the system is off—dampness indicates slow leaks that might not be immediately visible.
Finally, listen carefully during operation. Hissing sounds often signal pressure escaping through worn seals or damaged diaphragms. This simple visual and auditory inspection helps you pinpoint the problem before grabbing your tools, saving water and preventing further lawn damage.
Testing Valve Operation
Once you’ve inspected the internal components, it’s time to see your valve in action. Start by manually operating the valve through your controller or timer. Watch carefully as the valve activates and deactivates. A healthy valve should engage smoothly without any sputtering or unexpected water release. You might hear a satisfying click as the solenoid engages, which is perfectly normal.
Next, locate the bleed screw on top of your Hunter valve. This small screw serves an important purpose during testing. Slowly turn it counterclockwise about a quarter turn while the system is off. You should see a small amount of water release, which helps purge air from the system. If water continues flowing heavily even after you’ve closed the bleed screw, your diaphragm likely needs replacement.
During operation, observe the valve’s behavior closely. Listen for unusual sounds like hissing or gurgling, which often indicate internal leaks or pressure issues. Check around the valve body and connections for any moisture or dripping. Even minor weeping can waste significant water over time, undermining your sustainability goals. Pay attention to whether your sprinkler heads are performing evenly. Uneven pressure or sputtering heads might signal valve problems upstream. This hands-on testing gives you valuable insight into whether a simple adjustment will solve your problem or if component replacement is necessary.
Identifying Master Valve vs. Zone Valve Leaks
Before you start disassembling valves, let’s figure out which one is actually causing the trouble. This simple detective work will save you time and water.
Start by turning off all your irrigation zones at the controller. If water continues to flow or pool in your yard, you’re likely dealing with a master valve leak. The master valve controls water flow to all zones, so when it fails, water can seep through even when the system is supposedly off.
Here’s a practical test: Turn on one zone at a time and observe the problem area. If multiple zones cause leaking in the same spot, the master valve is probably your culprit. However, if only one specific zone triggers the leak, you’ve identified a faulty zone valve.
Another telltale sign? Check your water meter when the system is completely off. If it’s still moving, you’ve got a leak somewhere. This is where conservation meets troubleshooting. A constantly running valve wastes hundreds of gallons monthly, impacting both your water bill and our precious resources.
For those with Hunter systems featuring flow sensing technology, your controller might already be alerting you to unusual water usage patterns, making this diagnosis even easier.
Fixing Your Hunter Valve Leak: DIY Solutions
Replacing the Diaphragm
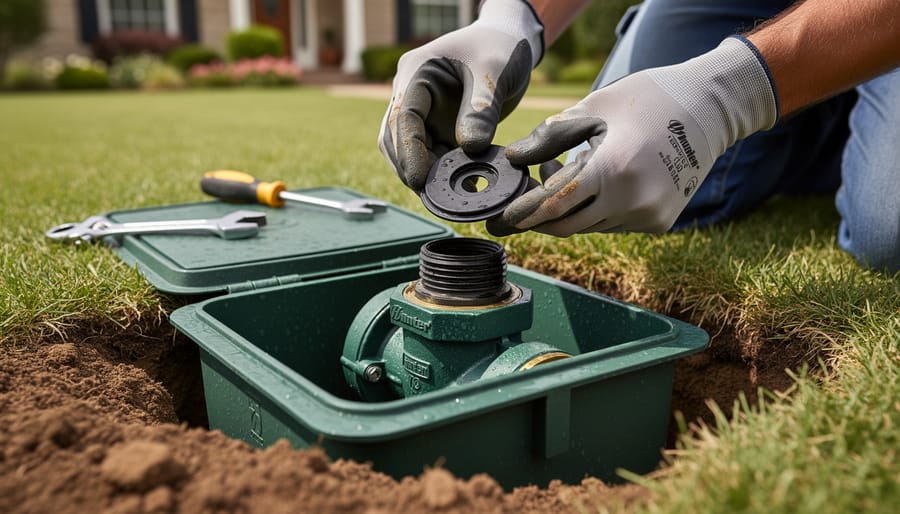
Replacing a worn diaphragm is the most common fix for a leaking Hunter valve, and the good news is that it’s a repair most gardeners can tackle themselves with just a few simple tools. You’ll need a screwdriver (usually Phillips head), a replacement diaphragm specific to your Hunter valve model, and a clean cloth.
Start by turning off the water supply to your irrigation system. Then, locate the solenoid (the cylindrical piece on top of the valve) and carefully unscrew it, turning counterclockwise. Set it aside in a safe place. Next, remove the screws holding the bonnet (the top cap) in place. Lift off the bonnet, and you’ll see the diaphragm underneath, which looks like a flexible rubber disc.
Here’s where it gets satisfying: pull out the old diaphragm and inspect it for tears, cracks, or debris buildup. Often, you’ll spot the problem immediately. Before installing the new diaphragm, wipe the interior chamber with your cloth to remove any dirt or grit that could compromise the seal. This simple cleaning step prevents future leaks and extends the life of your new part.
Place the new diaphragm exactly as the old one sat, ensuring it’s properly seated in the groove. Reassemble everything in reverse order, tightening screws evenly but not excessively. Turn the water back on and test your valve. This sustainable repair saves you from replacing the entire valve and keeps your system running efficiently for years to come.
Cleaning Your Valve Thoroughly
Once you’ve accessed the valve, it’s time for a thorough cleaning. Start by carefully disassembling the valve body. Turn the solenoid counterclockwise to remove it, then lift out the diaphragm and internal components. Take a quick photo with your phone before disassembly – trust me, this makes reassembly so much easier!
Inspect each piece for debris, mineral deposits, or damage. Even tiny particles can prevent proper sealing. Rinse all components under clean running water, gently scrubbing with an old toothbrush to remove stubborn buildup. For mineral deposits, a solution of equal parts white vinegar and water works wonders. Soak affected parts for 15-20 minutes, then rinse thoroughly. This eco-friendly approach is just as effective as harsh chemicals.
Check the diaphragm carefully for tears or wear. If it feels stiff or shows any damage, replacement is your best bet. These components are inexpensive and widely available.
When reassembling, ensure the diaphragm sits perfectly flat in its groove – any wrinkles or misalignment will cause leaks. Hand-tighten the solenoid firmly but don’t overtighten, which can crack plastic threads. This careful attention to detail during cleaning and reassembly often solves leaking issues completely, saving you both water and money while supporting sustainable irrigation practices.
Solenoid Replacement and Adjustment
Sometimes a sticky or damaged solenoid is the culprit behind those frustrating leaks. The good news? You don’t always need to replace it. Start by checking the manual bleed screw on top of the solenoid. Give it a quarter turn counterclockwise to manually open the valve. If water flows properly and stops cleanly when you close it, your solenoid mechanism is functioning correctly, and you might just need to clean the valve internals instead.
However, if the manual bleed test reveals inconsistent flow or the valve won’t close completely even with the screw tightened, it’s time for a solenoid replacement. Look for visible cracks, corrosion, or a burnt smell, all signs of electrical damage. Replacing a solenoid is straightforward and costs around fifteen to thirty dollars, making it an economical fix compared to replacing the entire valve body.
When installing a new solenoid, hand-tighten it firmly but avoid over-torquing, which can crack the plastic housing. After installation, run a test cycle through your controller to ensure proper operation. This simple component swap often resolves persistent leaks while conserving water and protecting your landscape investment, keeping your irrigation system running efficiently for seasons to come.
Irrigation Flow Sensing: Your Modern Leak Detection Partner
What Is Flow Sensing and How Does It Work?
If you’ve ever wondered how modern irrigation systems can alert you to leaks before they waste hundreds of gallons, flow sensing technology is the answer. Think of a flow sensor as a vigilant guardian for your irrigation system—it constantly monitors how much water flows through your pipes and alerts you when something doesn’t look right.
Here’s how it works in simple terms: A flow sensor installs directly in your irrigation line, typically near your water source or Hunter valve assembly. As water passes through, the sensor measures the flow rate and volume. It then compares this data to what your system should normally use based on your programming and zone settings.
When everything’s running smoothly, your irrigation system has a predictable water usage pattern. Zone one might use 15 gallons per minute for 10 minutes, zone two uses 12 gallons per minute for 15 minutes, and so on. The flow sensor learns these patterns and establishes a baseline.
The magic happens when a leak occurs. If your Hunter valve starts leaking or a pipe bursts, water flows when it shouldn’t, or flows at unexpected rates. The sensor immediately detects this anomaly—maybe water is running continuously between scheduled cycles, or a zone is using 25 gallons per minute instead of the usual 15.
Modern smart leak detection systems can send instant alerts to your smartphone, potentially saving thousands of gallons and preventing that surprise water bill. This technology represents a sustainable approach to lawn care, catching problems before they escalate.

Benefits of Adding Flow Sensors to Your Hunter System
Adding flow sensors to your Hunter irrigation system is like giving your sprinkler system a watchful eye that never blinks. These smart devices monitor water usage in real-time, making detecting water waste incredibly simple and catching problems before they become expensive headaches.
From a conservation standpoint, flow sensors are game-changers. They’ll alert you the moment water flow exceeds normal levels, indicating a leak or broken sprinkler head. This means you’re not wasting hundreds of gallons overnight or while you’re away on vacation. I’ve seen homeowners reduce their water bills by 20-30% simply by catching leaks early.
The environmental benefits align perfectly with sustainable gardening practices. Every gallon saved means less strain on local water resources and reduced energy consumption at treatment facilities. Plus, preventing overwatering protects your landscape from root rot and fungal issues.
The upfront investment in flow sensors typically pays for itself within a season or two through reduced water bills and avoided repair costs. Modern Hunter systems integrate seamlessly with flow monitoring technology, giving you peace of mind and contributing to a healthier planet.
Choosing and Installing a Flow Sensor
Installing a flow sensor on your Hunter irrigation system is like giving your garden a watchful guardian that catches leaks before they become expensive problems. Hunter systems work beautifully with several compatible flow sensors, including the Hunter Flow-Sync and HC Flow meters, which integrate seamlessly with modern controllers.
When choosing a flow sensor, consider your system’s pipe size and flow rate requirements. Most residential systems use 3/4-inch to 1-inch sensors, but double-check your main line specifications. Installation typically happens on the mainline after your backflow preventer but before your valves branch off.
The installation process is straightforward for most DIY enthusiasts. You’ll need to cut into your mainline, install appropriate fittings, and wire the sensor back to your controller. The sensor monitors water flow continuously, alerting you immediately when it detects unusual patterns that indicate leaks. This proactive approach saves water, reduces your bills, and protects your lawn from damage caused by hidden leaks. Think of it as an investment in both sustainability and peace of mind for your irrigation system.
Master Valves and Leak Detection: The First Line of Defense
Why Master Valves Matter for Leak Prevention
Think of your master valve as the main gatekeeper for your entire Hunter irrigation system. While individual zone valves control water flow to specific areas of your lawn, the master valve has a bigger job: shutting off water to the entire system when none of your zones are actively running. This is where things get interesting for leak prevention.
When a zone valve develops a leak, water can seep through continuously, wasting gallons upon gallons even when your system is supposedly off. However, properly functioning master valves act as a backup line of defense. Once your irrigation cycle completes, the master valve closes completely, cutting off water supply to all downstream components. This means even if a zone valve is leaking, water can’t flow through it when the system isn’t scheduled to run.
From a sustainability perspective, this matters tremendously. A leaking zone valve without a master valve can waste hundreds of gallons daily, driving up your water bill and straining local water resources. The master valve essentially gives you peace of mind, knowing that when your system should be off, it truly is off. It’s a simple but powerful safeguard that every environmentally conscious gardener should appreciate.
Maintaining Your Master Valve
Your master valve is the gatekeeper of your entire irrigation system, so giving it some regular TLC can save you from major headaches down the road. I recommend inspecting it at least twice during the growing season – once in early spring before you really ramp up watering, and again mid-summer when it’s working hardest.
During your inspection, check for visible water pooling around the valve box or damp spots in the turf nearby. These are telltale signs something’s amiss. Master valves face unique challenges because they’re constantly under pressure, even when zones aren’t running. This makes them particularly susceptible to diaphragm wear and debris accumulation at the ports.
Here’s a sustainable tip: clean the valve thoroughly during your seasonal maintenance. Remove the bonnet, rinse the diaphragm and screen with clean water, and check for any mineral buildup that could prevent proper sealing. Since master valves control water flow to your entire system, a small leak here wastes considerably more water than a single zone valve would.
Listen for unusual sounds too – hissing or gurgling when the system should be off often indicates your master valve isn’t closing completely. Catching these issues early prevents water waste and protects your lawn from overwatering damage, keeping your irrigation practices both effective and environmentally responsible.
Preventing Future Hunter Valve Leaks
Regular Maintenance Schedule
Preventing valve leaks is far easier than fixing them, and a simple maintenance routine can save you water, money, and frustration. I recommend inspecting your Hunter irrigation valves twice a year, ideally in early spring before you start up your system and again in fall before winterization. During these checks, look for debris around valve openings, check that diaphragms remain flexible without cracks or brittleness, and ensure solenoids are securely attached without corrosion.
Seasonal considerations matter too. Before winter, drain water from valves in freeze-prone areas to prevent damage from ice expansion. When spring arrives, turn on zones individually and watch for leaks at connections and valve bodies. Throughout the growing season, pay attention to soggy spots or zones that run longer than programmed, as these often signal developing valve problems.
Monthly visual inspections during active irrigation months help catch small issues before they become major leaks. Walk your system, listen for hissing sounds, and check valve boxes for standing water. Adopting smart irrigation practices with controllers that monitor water flow can alert you to leaks automatically, making maintenance even more sustainable and effective.
Water Quality and Filtration
Here’s something many gardeners overlook: the quality of your water plays a surprisingly big role in keeping those Hunter valves leak-free for years to come. Think of it like this – you wouldn’t run your car on dirty fuel, right? The same principle applies to your irrigation system.
If your water source contains sediment, mineral deposits, or debris, these particles can accumulate inside valve components over time. This buildup prevents diaphragms from sealing properly and can score delicate seating surfaces, leading to those frustrating leaks we’re trying to avoid. This is especially common with well water or older municipal systems.
The solution? Install inline filters before your valves. These affordable guardians catch particles before they reach critical components, significantly extending valve life. Clean or replace filters seasonally – it’s a five-minute task that saves hours of repair work later.
From a sustainability perspective, preventing leaks through proper filtration means you’re conserving water and reducing the need for replacement parts. Well water users should also consider water testing, as high mineral content might warrant additional treatment to protect your entire system. Remember, an ounce of prevention truly is worth a pound of cure, and clean water is the foundation of a reliable, eco-friendly irrigation system.
Understanding why your Hunter irrigation valve is leaking puts you in the driver’s seat when it comes to maintaining a healthy, vibrant lawn while being a good steward of our water resources. Whether you’ve just discovered a small drip or you’re dealing with a full-blown geyser in your yard, you now have the knowledge to tackle the problem head-on. Remember, fixing these leaks isn’t just about stopping annoying puddles or saving money on your water bill, though those are certainly great benefits. It’s about honoring the effort you put into creating your outdoor space and ensuring every drop of water serves its purpose.
The beauty of combining traditional maintenance skills with modern flow sensing technology is that you’re creating multiple layers of protection for your irrigation system. Regular manual checks teach you to understand your system intimately, while smart monitoring devices catch problems you might miss during your busy week. This dual approach means fewer surprises, less water waste, and more time enjoying your lawn rather than worrying about it.
Don’t let the fear of getting your hands dirty or diving into a repair hold you back. Start with that leaking valve you’ve been ignoring, apply what you’ve learned about diaphragms, solenoids, and seals, and consider investing in flow monitoring for long-term peace of mind. Your lawn, your wallet, and the environment will thank you for taking action today.