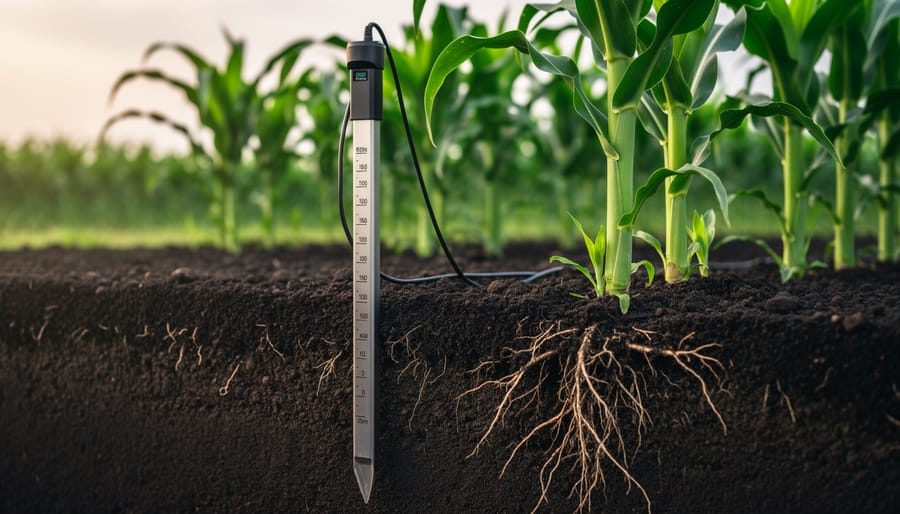
Stop watering on a fixed schedule and let your soil tell you when it actually needs water. Soil moisture sensors work by measuring the water content in your root zone and communicating directly with your irrigation controller, preventing overwatering that wastes money, drowns plants, and contributes to runoff pollution. Install sensors at multiple depths in representative areas of your lawn and garden to capture accurate moisture readings where roots actually grow, not just at the surface.
Program your irrigation controller to skip watering cycles when soil moisture exceeds your target threshold, typically when the soil still contains 50-60% of available water capacity. This automated approach eliminates the guesswork that leads most homeowners to water twice as much as their landscapes actually need, reducing water bills by 30-50% while producing healthier, deeper-rooted plants. The technology has advanced significantly in recent years, with wireless sensors now available at price points under $100 that integrate seamlessly with smart controllers.
Choose between volumetric sensors that measure actual water content or tensiometric sensors that measure how hard plants must work to extract moisture, depending on whether you prioritize precision or simplicity. Both types prevent the common mistake of watering based on timers that ignore recent rainfall, high humidity, or cooler temperatures that reduce plant water needs. The investment typically pays for itself within one growing season through reduced water consumption, and you’ll notice improved plant health as roots grow stronger without constant saturation in the root zone.
Why Your Gut Feeling About Watering Is Probably Wrong
If you’re like most gardeners, you probably water your lawn based on a timer schedule, a quick visual check, or simply when things start looking a bit droopy. It feels intuitive, right? Water when it looks dry, skip it when it rained yesterday, and run the sprinklers for the same 15 minutes every session. The problem is, our eyes and instincts are actually pretty terrible at judging what’s happening beneath the soil surface.
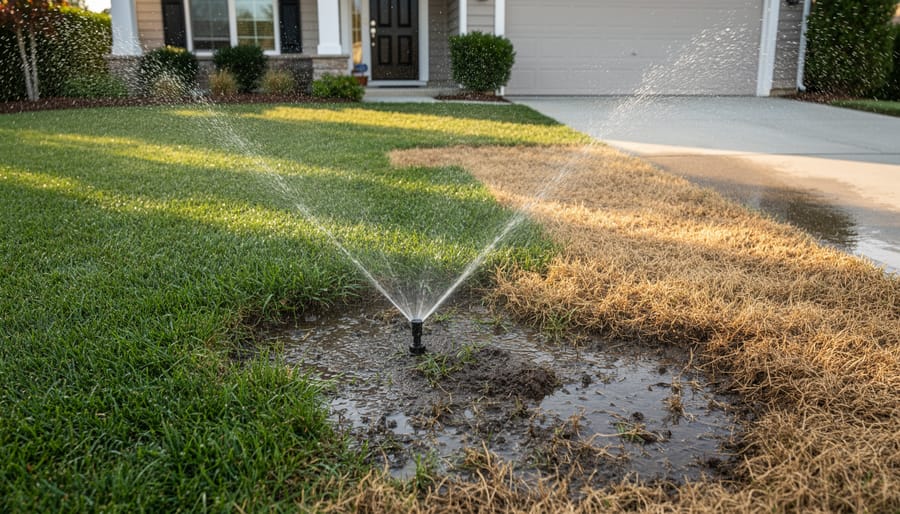
Traditional watering methods come with hidden costs that add up faster than you’d think. Timers don’t account for rainfall, humidity, or temperature changes. That Wednesday morning watering schedule you set in April keeps running through July’s heat waves and September’s rainy weeks alike. Visual inspection only tells you about the top inch of soil, completely missing whether your grass roots eight inches down are drowning or desperately thirsty. This guesswork approach means you’re likely wasting water and money without even realizing it.
The environmental impact matters too. Overwatering doesn’t just inflate your utility bill. It leads to runoff that carries fertilizers and pesticides into storm drains, promotes shallow root systems that make your lawn less drought-resistant, and creates the perfect conditions for fungal diseases and lawn pests. Meanwhile, underwatering stresses your plants and leaves brown patches that take weeks to recover. Both overwatering problems and drought stress weaken your lawn’s natural defenses.
Soil moisture sensors take the guesswork out of the equation entirely. Instead of relying on schedules or surface-level observations, these devices measure the actual water content where it matters most: in the root zone. They provide real-time data that adjusts to weather conditions, soil type, and your plants’ specific needs. It’s the difference between flying blind and having a reliable navigation system for your irrigation decisions.
What Soil Moisture Sensors Actually Do (And Why You Need One)
The Science Made Simple
You don’t need a degree in engineering to understand how these clever devices work. At their heart, soil moisture sensors measure water content using two main technologies, and both are surprisingly straightforward.
The first type uses electrical resistance. Think of it like this: dry soil acts as an insulator and barely conducts electricity, while moist soil conducts it much better. The sensor sends a small electrical current between two probes stuck in your soil. When your ground is parched, there’s high resistance and little current flows. As moisture increases, resistance drops and more current passes through. Your irrigation controller reads this change and knows whether to water or not.
The second technology, capacitance sensors, work without direct electrical contact with the soil. They create an electrical field around the probe and measure how moisture affects that field. Water changes the capacitance reading because of its unique electrical properties. These sensors tend to last longer since they’re less prone to corrosion.
Both methods are reliable and do the same job: they tell your irrigation system, “Hey, the soil’s dry enough to water,” or “Hold off, there’s plenty of moisture here.” This automatic decision-making saves water, protects your plants from overwatering, and gives you peace of mind.
Real Benefits for Your Lawn and Wallet
Let me be straight with you—investing in a soil moisture sensor for your irrigation system isn’t just a nice-to-have gadget. It’s a practical decision that delivers real, measurable benefits you’ll notice almost immediately.
First, your lawn will genuinely look better. By watering based on actual soil conditions rather than guesswork or a rigid schedule, your grass gets exactly what it needs when it needs it. No more brown patches from underwatering or soggy spots from overdoing it. One of my neighbors switched to sensor-based irrigation last spring, and by midsummer, his lawn was the envy of the block—thick, green, and resilient even during our drought period.
Your water bill will thank you too. Most homeowners see a 20-40% reduction in water usage after installing these sensors. That translates to real savings, often paying for the sensor within a single season. Combined with other water conservation strategies, you can maximize those savings even further.
Then there’s the time factor. No more dragging hoses around or constantly adjusting your irrigation timer. The sensor handles the decision-making automatically, freeing you up to enjoy your yard rather than endlessly maintaining it.
Finally, there’s the environmental impact. Using less water means less strain on local water resources, especially during peak summer months when demand is highest. It’s a small change that contributes to meaningful conservation efforts in your community.
Types of Soil Moisture Sensors: Finding Your Perfect Match
Basic Probe Sensors
If you’re just starting your journey into smarter watering, basic probe sensors are an excellent, wallet-friendly entry point. These simple devices typically feature a metal probe you insert into the soil and an analog or digital display that shows moisture levels. You’ll find them at most garden centers for under $20, making them perfect for testing the waters before investing in automated systems.
Think of these as training wheels for understanding your soil’s behavior. I started with a basic probe years ago, manually checking different zones in my garden each morning. It was eye-opening to discover how unevenly my sprinklers were performing! Some areas stayed soggy while others dried out quickly.
The beauty of these sensors lies in their simplicity. There’s no programming required, no batteries to replace in many models, and nothing to connect to your irrigation system. Simply push the probe into the soil near your plants’ roots, read the gauge, and decide whether to water. This hands-on approach helps you learn your garden’s unique moisture patterns and prevents that common mistake of watering on autopilot regardless of actual need. Many gardeners keep using basic probes even after upgrading to automated systems, finding them invaluable for spot-checking problem areas and building their soil moisture intuition.
Smart Irrigation Controllers with Built-In Sensors
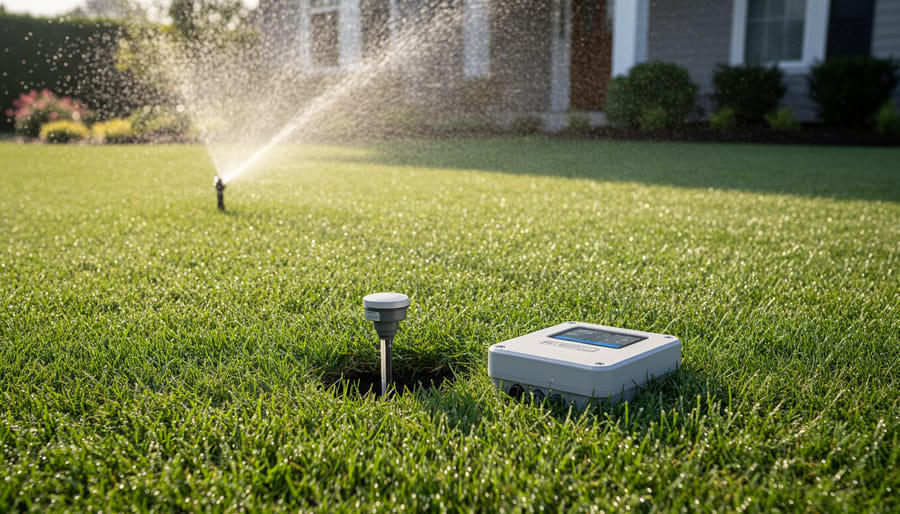
If you want truly hands-off watering management, smart irrigation controllers with built-in sensors are game-changers. These all-in-one systems combine moisture sensing technology with automated watering schedules, essentially doing the thinking for you.
Here’s how they work: the controller receives real-time data from sensors placed throughout your lawn or garden beds. When moisture levels drop below your preset threshold, the system automatically triggers irrigation. Once the soil reaches optimal moisture, watering stops. No guesswork, no waste, no forgetting to turn things on or off.
Many modern systems even integrate weather data, adjusting schedules based on rainfall forecasts and temperature changes. This means you’re not watering right before a rainstorm, which is both wasteful and unnecessary for plant health.
The initial investment might seem higher than basic timers, but the water savings typically pay for themselves within a season or two. Plus, you’ll enjoy healthier plants that receive precisely what they need, when they need it. For busy gardeners or anyone looking to embrace more sustainable practices, these integrated systems offer peace of mind and genuine environmental benefits.
Wireless and Smart Home-Connected Systems
Modern wireless soil moisture sensors have revolutionized home irrigation, bringing professional-grade monitoring right to your smartphone. These smart systems connect via Wi-Fi or Bluetooth, sending real-time moisture data directly to your device so you can check soil conditions from anywhere—whether you’re at work or on vacation.
The beauty of these connected systems lies in their integration capabilities. Many work seamlessly with popular home automation platforms like Alexa, Google Home, and Apple HomeKit, allowing you to incorporate irrigation management into your broader smart home ecosystem. You’ll receive alerts when moisture levels drop, track historical data to understand your garden’s patterns, and even adjust watering schedules remotely.
For sustainability-minded gardeners, this technology is a game-changer. The detailed data tracking helps you identify overwatering patterns and optimize your irrigation schedule based on actual soil conditions rather than guesswork. Some advanced models even pull local weather data to pause watering before predicted rainfall, maximizing water conservation while keeping your plants healthy and thriving.
Weather-Based vs. Soil-Based Systems
Weather-based irrigation controllers have their place, using data like rainfall, temperature, and evaporation rates to adjust watering schedules. They’re certainly smarter than basic timers. However, soil moisture sensors take accuracy to the next level by measuring what’s actually happening in your root zone.
Here’s the key difference: weather-based systems make educated guesses about when your plants need water, while soil-based sensors give you the real story. Two yards in the same neighborhood can have completely different watering needs due to soil type, sun exposure, and plant varieties. A clay-heavy bed retains moisture much longer than sandy soil, and weather controllers can’t account for these variations.
Soil moisture sensors eliminate the guesswork by monitoring moisture levels directly where roots absorb water. This means you’re responding to actual plant needs rather than atmospheric conditions. The result? More efficient watering, healthier plants, and less waste. For gardeners serious about sustainability and precision, soil-based monitoring consistently outperforms weather-based alternatives.
Setting Up Your Sensor-Based Irrigation System
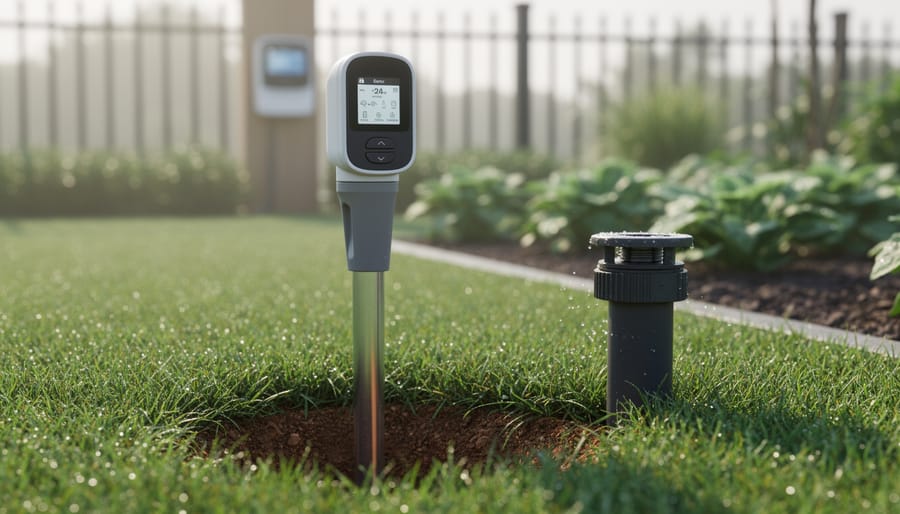
Where to Place Your Sensors for Accurate Readings
Getting sensor placement right makes all the difference between a perfectly watered lawn and wasted effort. Think of it like checking the temperature in your oven—you wouldn’t put the thermometer right next to the heating element, would you?
For most residential lawns, start with one sensor per irrigation zone, placing it in a representative area that gets typical sun exposure and drainage. Avoid spots near downspouts, under eaves, or beside heat-radiating driveways. These create false readings that’ll throw off your whole system.
If your yard has different lawn zones with varying conditions—like a sunny slope versus a shaded area under trees—you’ll need multiple sensors. I learned this the hard way when my single sensor sat in perpetually damp shade while my sunny backyard turned crispy!
Install sensors at root depth, typically 6 inches for most grasses. This ensures you’re measuring moisture where your lawn actually drinks from, not just surface wetness from dew or light rain.
For larger properties over half an acre, consider 2-3 sensors per zone to account for microclimates. Yes, it’s an extra investment upfront, but it prevents those frustrating dry patches that pop up despite running your irrigation regularly. Your lawn will thank you with consistently healthy growth throughout.
Installation Tips That Actually Work
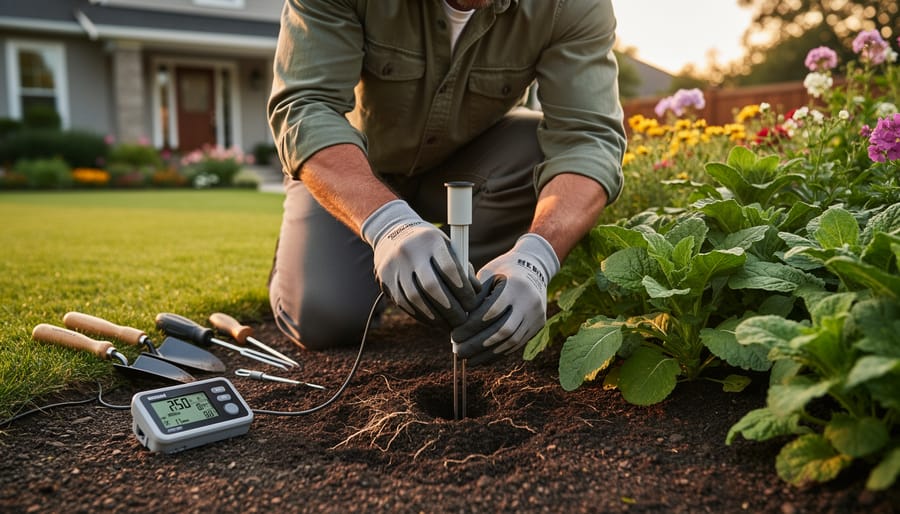
Getting your soil moisture sensor properly installed makes all the difference between a system that transforms your watering routine and one that frustrates you. Here’s what actually matters when you’re setting up your sensors.
First, placement is everything. Install sensors in representative areas of your lawn or garden—not next to sprinkler heads where they’ll always read wet, and not at the highest, driest spots either. Think of it like taking your garden’s temperature: you want an accurate reading of typical conditions. For most yards, positioning sensors about 12 inches from plant roots captures the moisture level that matters most.
Depth matters too. For lawns, place sensors 4-6 inches deep where grass roots actively drink. Garden beds might need deeper placement depending on what you’re growing—tomatoes and shrubs have different root zones than lettuce.
Here’s a mistake I see constantly: people bury sensors horizontally when most work best installed vertically or at an angle. Check your manufacturer’s instructions, as incorrect orientation can throw off readings by 20% or more.
Finally, protect those connections. Even weatherproof sensors benefit from a small junction box where wires meet your irrigation controller. Water intrusion at connection points causes more sensor failures than anything else, so invest ten extra minutes sealing things properly—your future self will thank you.
Connecting Sensors to Your Irrigation Controller
Connecting your soil moisture sensor doesn’t require an engineering degree, I promise! Most sensors work with both smart and traditional irrigation controllers, though the process varies slightly.
For smart controllers, you’re in luck. Many modern systems feature dedicated sensor ports with simple plug-and-play connections. Just match the sensor wires to the corresponding terminals (usually labeled clearly), and you’re done. The controller will handle the communication automatically.
Traditional controllers need a bit more hands-on work. You’ll typically connect sensors to interrupt the irrigation cycle when moisture levels are adequate. This usually involves wiring the sensor between the controller and valve, creating what’s called a “normally closed” circuit. Don’t worry—most sensors include clear diagrams showing exactly where each wire goes.
Before purchasing, check compatibility between your controller and sensor. Some brands play nicer together than others. If you’re unsure, snap a photo of your controller’s model number and share it with the retailer. They can confirm compatibility and save you headaches later. This upfront research ensures your investment in water-saving technology actually delivers results.
Programming Your System: Creating the Perfect Watering Schedule
Understanding Moisture Thresholds for Your Grass Type
Getting your moisture thresholds right is like finding the sweet spot for watering—not too much, not too little, but just right for your specific grass type. Different lawn varieties have surprisingly different water needs, and understanding these preferences is key to maximizing your soil moisture sensor’s effectiveness.
Cool-season grasses like Kentucky bluegrass and tall fescue prefer slightly moister conditions, typically thriving when soil moisture stays between 40-60% of field capacity. Set your sensor’s irrigation trigger around 40% to keep these varieties healthy without overwatering. On the flip side, warm-season grasses such as Bermuda and zoysia are drought-tolerant champions that actually prefer drier conditions between waterings. These tough performers do well when you program your sensor to trigger irrigation at 30-35% soil moisture.
Your local climate plays an equally important role. If you’re gardening in humid regions, you can afford to set slightly lower thresholds since natural rainfall supplements your irrigation. Desert and arid climate gardeners should consider more conservative settings to prevent stress during hot spells.
Start by researching your specific grass variety’s optimal moisture range, then program your sensor accordingly. Don’t worry about getting it perfect immediately—you can fine-tune settings as you observe your lawn’s response over a few weeks. This personalized approach not only promotes healthier grass but also prevents water waste, supporting truly sustainable lawn care practices.
Fine-Tuning Throughout the Seasons
Your soil moisture sensor isn’t a set-it-and-forget-it device, especially as the seasons shift and your lawn’s needs evolve. Think of it as a partnership that requires occasional check-ins to keep everything running smoothly.
During spring’s active growth period, your grass is thirsty and growing vigorously. You might need to adjust your sensor’s threshold settings to allow for more frequent watering while still preventing waste. As summer heat arrives, monitor how quickly the soil dries between waterings. If your sensor is positioned in full sun, you may need to recalibrate to account for faster evaporation rates.
Come fall, grass growth naturally slows down, and cooler temperatures mean moisture lingers longer in the soil. This is the perfect time to adjust your irrigation controller’s watering duration and frequency downward. Your sensor should reflect these seasonal changes by triggering less often.
Winter presents unique challenges in most climates. In frost-prone areas, consider whether your system needs winterization or if you should adjust sensor sensitivity to account for frozen ground readings that might give false moisture signals.
The key is reviewing your sensor data monthly and making small adjustments based on what your lawn is telling you. Most systems allow you to tweak moisture thresholds by 5-10 percent increments, giving you precise control over your sustainable watering approach throughout the year.
Making It Work: Real-World Tips from My Own Lawn
I’ll be honest with you – my first attempt at using soil moisture sensors wasn’t exactly smooth sailing. I installed three sensors in different zones of my yard, feeling pretty confident about my tech-savvy approach to lawn care. Within a week, I noticed one zone was bone dry while another had turned into a mini swamp. Turns out, I’d made the rookie mistake of placing one sensor right next to a downspout and another in compacted soil that didn’t represent the rest of that zone.
Here’s what I learned the hard way: sensor placement is everything. You want to position them in spots that truly represent each irrigation zone, away from sprinkler heads, slopes, and drainage areas. I now place mine about two-thirds of the distance between sprinkler heads, which gives me accurate readings for how the majority of that zone is doing.
Another game-changer was adjusting my threshold settings seasonally. During spring, I kept my sensors at around 40 percent moisture level, but come summer, I bumped that up to 50 percent to help my lawn handle the heat stress. Don’t just set it and forget it – your lawn’s needs change with the seasons.
The troubleshooting tip that saved me the most frustration? Check your sensor batteries twice a year. I mark it on my calendar for spring and fall cleanup. Nothing’s worse than wondering why your system isn’t working, only to discover dead batteries after days of either overwatering or underwatering.
My biggest piece of advice is to spend the first month observing how your sensors interact with your irrigation schedule. I kept a simple journal noting rainfall, sensor readings, and how my lawn actually looked. This helped me fine-tune the settings until everything clicked. Yes, it requires some patience upfront, but once dialed in, these sensors become your lawn’s best friend – and you’ll wonder how you ever managed without them.
Maintenance and Long-Term Care
Like any garden tool, soil moisture sensors need a little TLC to keep delivering accurate readings year after year. The good news? Maintenance is straightforward and takes just a few minutes each season.
Start with regular cleaning, especially if you’re using sensors in areas with clay-heavy soil or high mineral content in your water. Every few months, gently remove your sensors and wipe the probes with a soft, damp cloth. For stubborn buildup, a mix of water and white vinegar works wonders. Avoid harsh chemicals that might damage the sensor’s coating. This simple step prevents mineral deposits and soil particles from interfering with conductivity readings.
Calibration checks are essential for long-term accuracy. Most quality sensors maintain their calibration well, but it’s smart to verify readings annually. You can do this by testing in completely dry soil, then in saturated soil, comparing the sensor’s output to what you’d expect. If readings seem off by more than 10-15%, consult your manufacturer’s calibration instructions or consider replacement.
For battery-powered wireless sensors, replace batteries at the start of each growing season. It’s far easier to do this proactively than to troubleshoot irrigation issues mid-summer only to discover dead batteries. Mark your calendar as a reminder.
Even with excellent care, sensors don’t last forever. Plan to replace them every 3-5 years, or sooner if you notice erratic readings or physical damage to the probes. Corrosion, especially in areas with aggressive soil chemistry, can shorten sensor lifespan.
Winter storage matters in cold climates. Remove sensors before the ground freezes and store them indoors in a dry location. This simple practice significantly extends their working life and ensures they’re ready for spring installation.
What to Look for When Shopping: My Honest Buying Guide
I’ve been through my fair share of trial and error with soil moisture sensors, and I’m excited to help you avoid the mistakes I made. Here’s what really matters when you’re shopping for one to connect to your irrigation system.
First, let’s talk sensor type. You’ll encounter two main categories: resistive and capacitive sensors. From my experience, capacitive sensors are absolutely worth the extra investment. While resistive sensors might save you a few dollars upfront, they corrode quickly in the soil and typically need replacing every season or two. Capacitive sensors can last five years or more, making them the sustainable choice both environmentally and financially.
Installation depth and probe length matter more than you might think. Standard sensors work perfectly for lawns and shallow-rooted plants with 4 to 6-inch probes. However, if you’re monitoring trees, shrubs, or deep-rooted vegetables, you’ll want sensors with 12-inch or longer probes. I learned this the hard way when my tomato sensor kept triggering irrigation despite the deeper roots being bone dry.
Compatibility is where things get interesting. Many modern sensors offer wireless connectivity, which eliminates trenching for wires and makes installation infinitely easier. Check whether your existing irrigation controller supports the sensor you’re considering. Some controllers require specific brands, while others work with universal sensors. If you’re starting fresh, systems like Rachio, Orbit B-hyve, and Rain Bird offer excellent sensor-compatible controllers.
For budget considerations, expect to spend between twenty-five to sixty dollars for a reliable single-zone sensor. Multi-zone systems with wireless hubs run from one hundred to three hundred dollars. Yes, it’s an investment, but consider this: most people recoup costs within the first year through water savings alone.
Here’s my honest recommendation based on budget levels. If you’re testing the waters, the Rain Bird SMRT-Y soil moisture sensor offers reliable performance around thirty dollars and works with most standard controllers. For mid-range buyers wanting wireless convenience, the Orbit B-hyve Smart Hose Faucet Timer with soil sensor provides fantastic value and smartphone control. If you’re serious about precision irrigation across multiple zones, invest in a Rachio 3 controller with multiple capacitive sensors.
Don’t forget about certification labels. Look for EPA WaterSense certification, which ensures the sensor meets efficiency standards. Also check the warranty length as a quality indicator. Reputable manufacturers typically offer two to five-year warranties, showing confidence in their product’s durability. This matters because you’re trusting these devices to protect both your plants and water resources.
Making the switch to soil moisture sensor irrigation is one of the smartest decisions you can make for your lawn, your wallet, and the planet. These clever devices take the guesswork out of watering while helping you conserve precious water resources—often reducing outdoor water use by 20-50%. The beauty of this technology is that it works quietly in the background, making sustainable lawn care practically effortless.
Whether you opt for a budget-friendly basic sensor or invest in a smart system, you’re taking a meaningful step toward more responsible water management. Remember, you don’t need to overhaul your entire irrigation setup overnight. Start with a simple soil moisture sensor on one zone and see the difference for yourself. Many homeowners are amazed at how much they were overwatering before adding these sensors.
The environmental benefits are clear: less water waste, reduced runoff, and healthier soil ecosystems. The practical advantages are equally compelling: lower water bills, lusher grass, and the peace of mind that comes from knowing you’re watering only when needed. Sustainable lawn care doesn’t have to be complicated or expensive—sometimes it just takes one small sensor to make a big difference. Your lawn will thank you, and so will future generations.