Fixed line trimmer heads get a bad reputation for being finicky, but here’s the truth: once you understand their simple mechanics, they’re actually among the most reliable and eco-friendly options available. Unlike bump-feed or automatic systems that can jam or waste line, fixed heads give you complete control over line length and replacement, which means less plastic waste in landfills and more predictable performance on every job.
The key difference is in the name itself. Fixed heads require you to manually thread and secure trimmer line through pre-drilled holes, then lock it in place with caps or a retaining system. There’s no internal spool mechanism to fail, no springs to weaken over time, and no mysterious line disappearances mid-trim. What you see is what you get, making troubleshooting remarkably straightforward.
This simplicity comes with a learning curve, though. Many gardeners struggle initially because fixed heads demand a different approach than the bump-feed models they’re used to. Threading line through those small eyelets while maintaining equal lengths on both sides can test your patience, especially when you’re standing in tall grass on a hot afternoon. The payoff? Once properly installed, your line stays put until it wears down completely, eliminating those frustrating mid-job refills.
Whether you’re managing a small suburban yard or tackling larger landscape projects, understanding fixed head maintenance transforms what seems like an outdated headache into a dependable, sustainable trimming solution that rewards your effort with consistent, controllable results.
What Makes Fixed Line Trimmer Heads Different
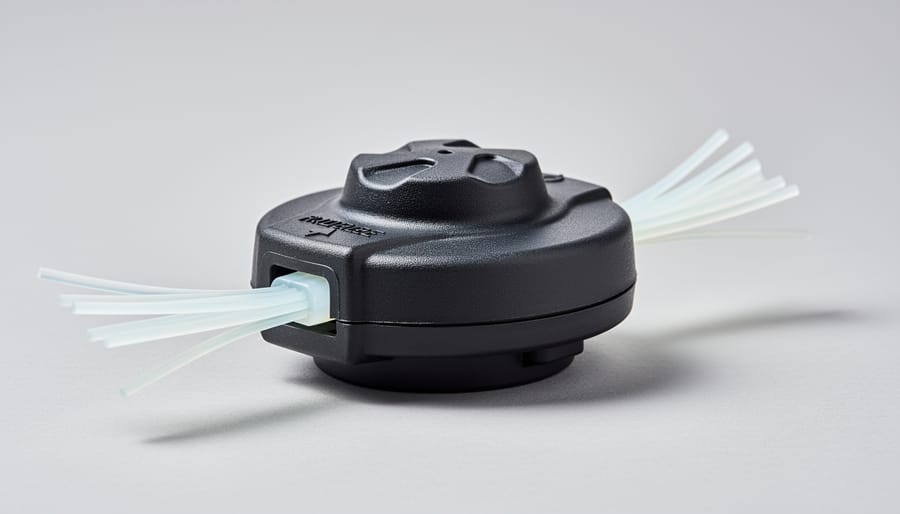
The Basic Anatomy of a Fixed Head
Think of a fixed head trimmer like a spool of thread – simple, straightforward, and remarkably efficient once you understand its parts. At its core, you’ll find the housing (that protective cap covering everything), the inner spool where your trimmer line lives, and the eyelets – those small holes where the line emerges to do its magic on your lawn.
The housing screws directly onto your trimmer’s shaft, creating a secure connection that won’t wobble during operation. Inside, the spool holds a predetermined length of line, typically wound in a specific pattern to prevent tangling. The eyelets, usually positioned opposite each other, guide the line out at the perfect angle for cutting. Some models include a spring mechanism to keep tension on the spool, while others rely on friction alone.
Understanding these basic components makes maintenance much less intimidating. You’re not dealing with complicated machinery here – just a clever arrangement of parts working together. When something goes wrong, it’s usually one of these few elements needing attention, making troubleshooting refreshingly straightforward for both beginners and experienced gardeners alike.
Fixed vs. Bump-Feed vs. Automatic: The Maintenance Trade-offs
When choosing a trimmer head, understanding the maintenance spectrum helps you make the right decision for your needs. Fixed line heads sit at the “most labor-intensive” end of maintenance, requiring you to manually wind new line each time it runs out. This means stopping your work, removing the spool, and carefully threading new line—a task that takes practice to master.
Bump-feed heads offer middle-ground convenience. A quick tap on the ground releases more line automatically, though you’ll still need to reload the spool periodically. They’re popular for their balance of ease and reliability.
Automatic heads are the most effortless option, feeding line as needed without any user intervention beyond occasional refills.
So why choose fixed heads? They’re incredibly durable with fewer moving parts to break, making them ideal for heavy-duty work around rocky areas or dense growth. They’re also more sustainable—you use exactly what you need without waste. While replacing trimmer heads or learning to restring may seem daunting initially, many gardeners appreciate the hands-on control and reduced long-term costs. Consider your tolerance for maintenance against your need for reliability when deciding.
The Real Challenge: Replacing Line on Fixed Heads
Tools and Materials You’ll Actually Need
Good news: you don’t need a garage full of specialized tools to maintain your fixed line trimmer head! Here’s what you’ll genuinely use:
First, grab a clean work surface and a few basic items: a pair of work gloves (those line ends can be sharp), scissors or garden snips for cutting trimmer line to length, and a ruler or tape measure. You might also want a small brush or old toothbrush for cleaning debris from the head.
For the line itself, consider sustainable options like biodegradable trimmer line made from plant-based materials. These eco-friendly alternatives work just as effectively as traditional nylon but break down naturally instead of contributing microplastics to your soil. Standard nylon line remains a reliable choice, but if you’re committed to sustainable gardening practices, the biodegradable versions are worth the slight extra cost.
Keep some rubbing alcohol and a cloth handy for cleaning the trimmer head housing. A small container for catching old line pieces helps with tidy disposal.
Finally, your trimmer’s manual is essential. I know it’s tempting to skip reading it, but fixed heads vary by manufacturer, and five minutes with the manual can save you an hour of frustration. Trust me on this one!
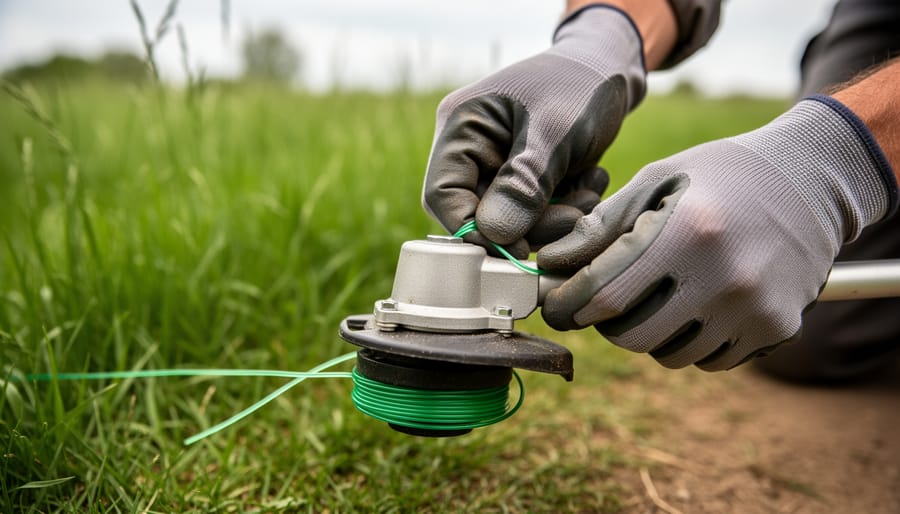
Step-by-Step Line Replacement Process
Ready to tackle that line replacement? Great! Let’s walk through this together, and I promise it’s easier than you think.
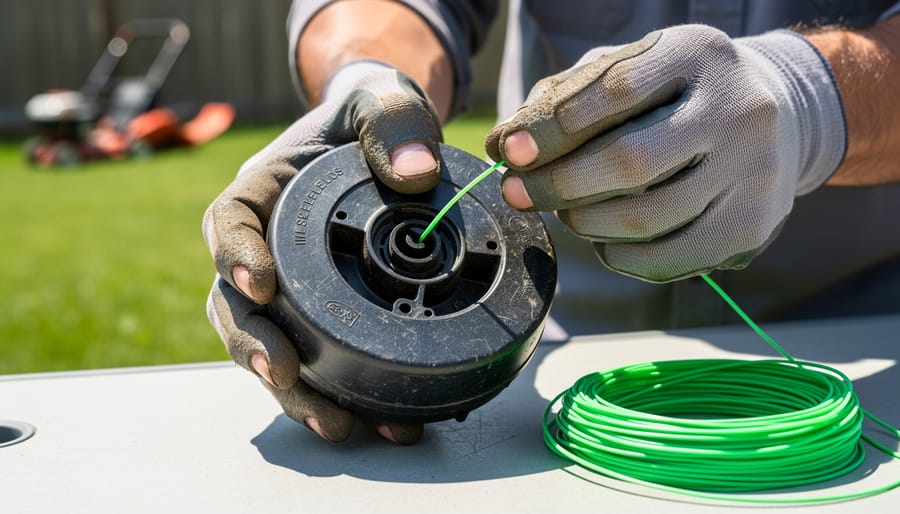
First, make sure your trimmer is off and cool. Safety first, always. Now, locate the eyelets on your fixed head where the line feeds through. Most fixed heads have two to four of these openings. Take a good look at how the old line sits in there before you remove it. Snap a quick photo with your phone if that helps you remember the pattern.
Remove any remaining old line completely. This is your chance to give the head a quick clean while you’re at it. A bit of grass and debris buildup is normal, so wipe it down with a dry cloth.
Here’s where people often hit their first snag: choosing the right line diameter. Check your trimmer’s manual or the markings on the head itself. Using line that’s too thick won’t feed properly, while line that’s too thin will break constantly. Most fixed heads work beautifully with 0.080 to 0.095 inch line.
Cut your replacement line to the length specified in your manual, typically between 8 and 10 inches per eyelet. Thread one end through an eyelet from the inside out, leaving equal lengths on both sides for dual-line heads. For stubborn eyelets, a slight twist as you push helps the line glide through.
If the line keeps slipping back through, don’t worry. This happens to everyone. Try leaving slightly more length on one side initially, or use a small piece of tape temporarily to hold it in place while you secure the other side. Once both lines are through, give them a firm tug to ensure they’re seated properly.
That’s it. You’ve just successfully replaced your trimmer line. See? You absolutely can do this.
Michael’s Time-Saving Tricks
Over the years, I’ve picked up a few tricks that make working with fixed line trimmer heads much less of a headache. First, always keep a small container of water nearby when removing the head—dipping the bump knob in it for a few seconds softens any grass residue and makes unscrewing so much easier. I learned this the hard way after struggling with a stuck head for twenty minutes!
Here’s another gem: before winding new line, mark your spool with a permanent marker to show which direction the line wraps. Trust me, you’ll thank yourself next time around. And speaking of equipment maintenance, I always do a quick inspection while changing line—checking for cracks or worn threading takes just seconds but prevents mid-job failures.
My favorite time-saver? Keep pre-cut line lengths in a labeled jar. Measure and cut five or six pieces during winter downtime, and you’ll breeze through replacements during busy growing season. These small habits transform frustrating maintenance into a five-minute task.
Ongoing Maintenance for Fixed Line Heads
Cleaning and Debris Management
Fixed line trimmer heads handle debris quite differently than their automatic-feed cousins, and understanding this can save you headaches down the road. Because the line sits closer to the head housing in most fixed designs, grass clippings and small debris tend to pack in around the spool area more readily. After each trimming session, I recommend spending just two minutes clearing away this buildup—it’s a habit that prevents line friction and extends your trimmer’s life considerably.
For cleaning, skip the chemical sprays and opt for sustainable methods instead. A stiff brush or old toothbrush works wonderfully to dislodge stuck clippings, while a garden hose rinse handles the rest. Let everything air-dry completely before storage to prevent rust on metal components. This simple routine applies equally to gas and electric models, though if you’re using a battery-powered tool, proper cordless trimmer maintenance matters too.
The environmental upside? All those grass clippings you’ve brushed off make excellent mulch or compost material. Rather than viewing debris removal as a chore, think of it as harvesting free garden nutrition. This small shift in perspective transforms maintenance into a sustainability practice that benefits your whole yard.
Inspection Points That Prevent Bigger Problems
Getting ahead of problems with your fixed line trimmer head is simpler than you might think. Just like regular maintenance keeps all your tools working smoothly, a quick weekly inspection saves you from mid-job breakdowns.
Start by checking the line length before each use. If it’s worn down to less than two inches from the head, you’re working inefficiently and stressing the motor. Look at the line ends too—they should be cleanly cut, not frayed or melted, which signals overheating issues.
Next, inspect the head housing for cracks, especially around the eyelets where line exits. Small cracks quickly become big problems under high-speed rotation. Spin the head by hand and listen for grinding sounds that indicate debris buildup inside.
Warning signs demanding immediate attention include excessive vibration during operation, unusual noise levels, or the trimmer pulling to one side. These symptoms often mean uneven line wear or internal damage. Also watch for line breakage happening more frequently than usual—this suggests either poor-quality line or a rough eyelet edge that needs filing smooth. Catching these issues early prevents motor damage and keeps your trimming sessions frustration-free.
Storage Practices That Matter
Your trimmer head deserves better than being tossed in a dusty corner come winter. Start by removing any remaining line and giving the head a thorough cleaning to prevent debris from hardening and causing issues later. Store your trimmer upright or hang it to avoid putting pressure on the head components. Keep it in a dry, temperature-stable location—extreme heat or cold can make trimmer line brittle and affect the head’s plastic parts.
Here’s a tip many gardeners miss: store extra trimmer line in a sealed bag with a damp paper towel. This keeps the line flexible and prevents it from becoming brittle, which means fewer frustrating breaks next season. Following proper storage practices for your entire trimmer will extend its life significantly. A little attention now saves money and headaches when spring gardening season arrives.
When Fixed Heads Make Sense (And When They Don’t)
Best Use Cases for Fixed Line Heads
Fixed line trimmer heads truly excel in certain situations, despite their reputation for being maintenance-intensive. If you have a smaller property, typically under half an acre, these heads make excellent sense. The reality is that with less trimming area, you’ll experience fewer line breaks and need replacements less frequently, making the trade-off worthwhile for the precise cutting performance you’ll gain.
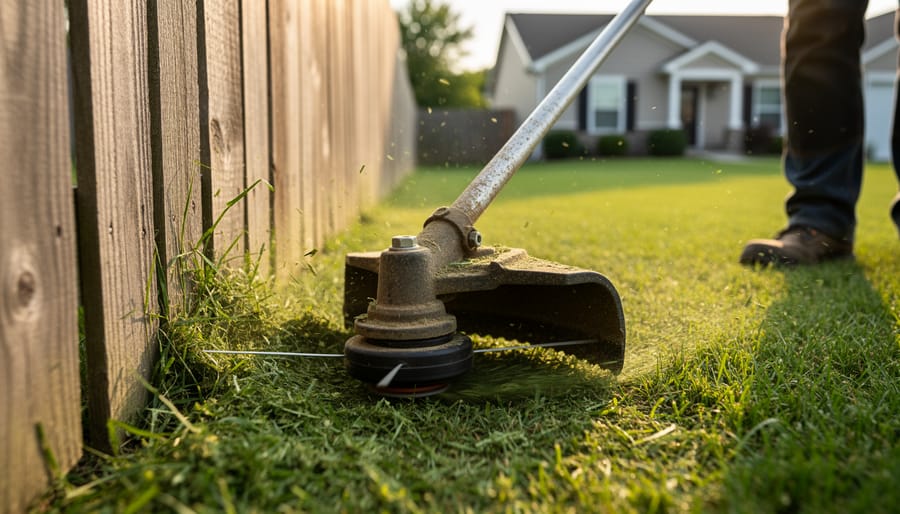
They’re particularly brilliant for properties with well-defined edges and minimal obstacles. Think manicured lawns with clean borders around flower beds, driveways, and sidewalks. The consistent line length provides superior control for detailed work, allowing you to create those crisp, professional-looking edges that make neighbors take notice.
Weekend gardeners who trim regularly, say every week or two during growing season, will find fixed heads remarkably practical. Frequent trimming means you’re catching grass while it’s manageable, so you’re not constantly wearing down the line. This lighter workload extends line life significantly.
From a sustainability perspective, fixed heads also suit gardeners committed to waste reduction. While the initial maintenance learning curve exists, once you’re comfortable with the process, you’ll appreciate using every inch of line rather than dealing with the excess waste some automatic systems create. They’re also ideal for those who value simplicity and prefer straightforward, repairable tools over complex mechanisms that might fail.
When to Consider Switching to Another Type
Fixed line trimmer heads work beautifully for many gardeners, but they aren’t always the best fit for every situation. If you find yourself constantly frustrated with the line replacement process or spending more time maintaining your trimmer than actually trimming, it might be time to explore other options.
Consider switching if you’re working with particularly thick weeds, dense brush, or overgrown areas regularly. Fixed heads typically handle light to moderate trimming tasks well, but they can struggle with heavy-duty work. In these cases, a bump-feed or automatic-feed head might serve you better, as they allow for quick line advancement without stopping your work.
If you have a large property and frequently run through trimmer line, the time investment required for fixed head maintenance can become impractical. Automatic heads let you focus more on the task at hand and less on rewinding line.
Physical limitations matter too. If you have arthritis, reduced hand strength, or dexterity challenges, the manual threading process of fixed heads can be genuinely difficult. There’s no shame in choosing equipment that works with your body rather than against it.
Finally, if sustainability is your priority, consider that some bump-feed heads actually reduce waste by letting you use every inch of line more efficiently, preventing the excess trimming and disposal that sometimes comes with fixed head adjustments.
Choosing the Right Line for Your Fixed Head
Selecting the right line for your fixed head trimmer is like choosing the right tool for any job—it makes all the difference in how smoothly things go. The good news? Once you understand the basics, you’ll be able to match your line to your specific trimming needs with confidence.
Start with line diameter, which typically ranges from 0.065 to 0.095 inches for most residential fixed head trimmers. Thinner lines around 0.065 inches work beautifully for light-duty trimming of soft grass and delicate areas around flower beds. If you’re tackling thicker weeds, overgrown areas, or tougher vegetation, you’ll want something closer to 0.080 or 0.095 inches. Always check your trimmer’s manual for the maximum diameter your fixed head can accommodate—using a line that’s too thick can strain your motor and reduce performance.
Line shape matters more than many gardeners realize. Round line is your versatile, all-purpose option that cuts cleanly and quietly. Twisted or serrated lines create a more aggressive cut, perfect for dense weeds and stubborn growth. Square or multi-sided lines offer exceptional cutting power but tend to be noisier during operation.
When it comes to materials, traditional nylon remains popular for its durability and affordability. However, eco-conscious gardeners now have exciting alternatives. Biodegradable trimmer lines made from plant-based materials offer similar performance while breaking down naturally over time. Some manufacturers even produce lines from recycled materials, reducing environmental impact without sacrificing cutting ability.
Consider your trimming environment too. If you frequently work near sidewalks or driveways, a quieter round line prevents disturbing neighbors. For rural properties with varied terrain, keep multiple line types on hand to handle different vegetation challenges effectively.
Fixed line trimmer heads definitely come with a learning curve, but don’t let that discourage you. Yes, they require more hands-on maintenance than their automatic counterparts, and you’ll need to pause your work to manually feed line when it wears down. However, for gardeners working smaller properties or those who value the reduced plastic waste from fewer spool replacements, these heads can be genuinely worthwhile. The key is approaching them with realistic expectations and a willingness to practice. Your first few line replacements might feel awkward, but most users find the process becomes second nature after just a handful of attempts. Remember those sustainable practices we discussed—from choosing biodegradable line options to properly maintaining your equipment for longevity. These choices add up to make a real difference in your environmental footprint. If you’re willing to invest a bit more time upfront learning proper technique, a fixed head trimmer can serve you reliably for years while keeping unnecessary waste out of landfills.