There’s nothing more frustrating than turning the key on your John Deere zero turn only to hear silence—or worse, a series of clicks and sputters that lead nowhere. Before you call a repair shop or consider an expensive replacement, you can diagnose and often fix the problem yourself with a systematic approach that moves from simple fixes to more complex solutions.
Most starting issues stem from five common culprits: dead batteries, faulty safety switches, fuel delivery problems, electrical connection issues, or starter motor failures. The good news? About 80% of these problems are straightforward enough for homeowners to resolve with basic tools and a little patience. Even if you’ve never worked on small engines before, following a logical troubleshooting sequence can save you hundreds of dollars in service calls.
This guide walks you through each potential issue step-by-step, starting with the easiest checks you can complete in minutes and progressing to solutions that require more time and attention. You’ll learn how to test components, identify warning signs, and determine when a problem genuinely requires professional expertise. By understanding how your zero turn’s starting system works, you’ll not only get back to mowing today but also prevent future breakdowns through proper maintenance.
Understanding Your John Deere Zero Turn’s Starting System
Before we dive into troubleshooting, let’s take a moment to understand what’s happening when you turn that key on your John Deere zero turn. Think of the starting system as a chain of events—each link needs to work perfectly for your mower to roar to life.
First, there’s your **battery**, the powerhouse that provides the electrical energy to crank the engine. When you turn the ignition, it sends power through a series of safety switches—and here’s where many starting issues hide. Your zero turn has multiple safety switches designed to protect you: one under the seat, others connected to the parking brake and motion control levers. These prevent the mower from starting unless you’re safely seated and the controls are in neutral.
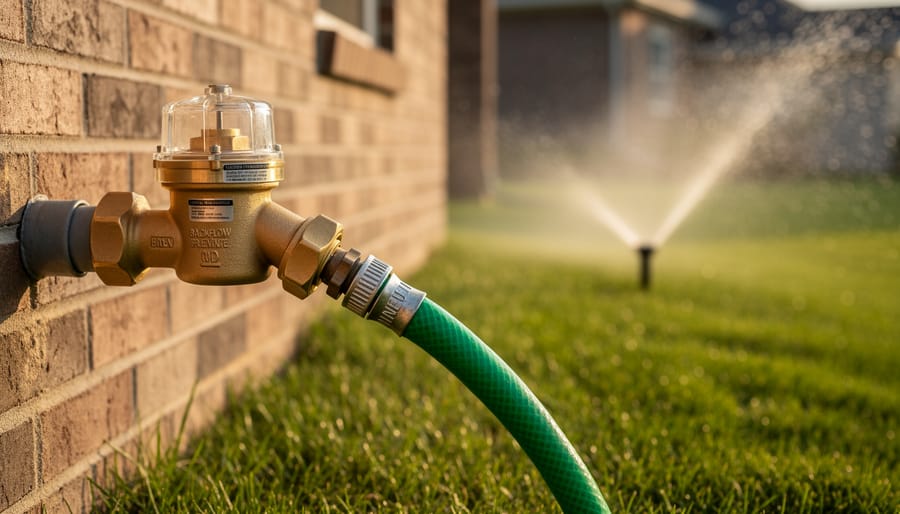
Next comes the **fuel system**, which delivers gasoline to the engine. Even with a full tank, problems with fuel flow, old gas, or a clogged filter can stop your mower cold. Finally, the **ignition system** creates the spark needed for combustion.
Understanding these basics makes starting riding lawn mowers much less mysterious. When something goes wrong, you’ll know where to look first. The good news? Most starting problems stem from just a handful of common issues that are surprisingly easy to fix yourself, saving you time, money, and reducing the environmental impact of unnecessary service calls.

The Most Common Culprits (And Easiest Fixes)
Safety Switches That Stop You Cold
You’re sitting on your mower, ready to tackle the lawn, but nothing happens when you turn the key. Before you assume the worst, there’s a good chance your John Deere’s safety switches are doing exactly what they’re designed to do—keeping you safe by preventing startup under potentially dangerous conditions.
Modern zero turn mowers include several safety switches that must all be in the correct position before the engine will fire up. The most common culprit is the seat safety switch, located beneath your seat. This switch ensures the mower won’t start unless there’s weight on the seat—a sensible feature that prevents accidental starts. If this switch becomes faulty or the connection corrodes, your mower stays silent. Try bouncing gently on the seat while turning the key. If it starts, you’ve found your problem.
Next, check your parking brake switch. Your John Deere requires the parking brake to be engaged before starting. Make sure it’s fully set—sometimes a partial engagement isn’t enough to satisfy the switch. Listen for a solid click when you engage it.
The PTO (Power Take-Off) switch controls your blades, and it must be disengaged for the mower to start. This prevents the dangerous scenario of blades spinning during startup. Verify the PTO lever is in the “off” position.
To test these switches, look for loose or corroded wire connections underneath the seat and near the brake lever. Clean any corrosion with a wire brush and ensure connections are tight. These simple checks often solve the mystery without requiring expensive repairs or service calls.
Battery Problems and Electrical Connections
I’ve been there on a Saturday morning, ready to tackle the lawn, only to hear that dreaded clicking sound when turning the key. More often than not, your John Deere’s battery is the culprit, and the good news is this is usually an easy fix you can handle yourself.
Start by checking your battery’s charge with a multimeter—a simple tool that’s worth having in your shed. A healthy battery should read around 12.6 volts when the mower’s off. Anything below 12.4 volts means it needs charging, and below 12 volts indicates it’s significantly discharged. Here’s the thing: a discharged battery will accept a charge and bounce back, while a failing battery won’t hold that charge for long.
Next, inspect those battery terminals. Corrosion appears as white, crusty buildup around the connections and acts like an insulator, preventing proper electrical flow. Disconnect the negative terminal first (always!), then the positive, and clean both terminals and cable ends with a wire brush or even an old toothbrush dipped in a baking soda and water solution—a sustainable cleaning method that works brilliantly.
Check that all connections are tight and secure. Loose cables can cause intermittent starting issues that’ll drive you crazy trying to diagnose. If your battery consistently fails to hold a charge after cleaning and securing connections, or if it’s more than three to four years old, consider replacing your battery before it leaves you stranded mid-season.

Old or Contaminated Fuel
Old fuel is one of the sneakiest culprits behind starting troubles, and I’ve seen it trip up even experienced lawn care enthusiasts. Here’s what happens: gasoline begins degrading after just 30 days, especially the ethanol-blended varieties most of us pump at the station. That ethanol attracts moisture like a magnet, leading to phase separation where water settles at the bottom of your tank. Not only does this create a combustion nightmare for your engine, but it can also corrode fuel system components over time.
You’ll know you’re dealing with fuel issues if your mower cranks but won’t catch, sputters weakly, or emits a varnish-like smell from the tank. The fuel might also look darker or cloudy instead of its original amber color.
The sustainable solution? Always use fresh fuel and add a quality fuel stabilizer—it extends gas life up to 12 months and reduces waste from disposing of old fuel. At season’s end, either run your tank dry or treat it with stabilizer. This simple practice prevents fuel-related headaches while minimizing environmental impact from contaminated fuel disposal. If your fuel’s been sitting all winter, drain it completely and start fresh.
When It Clicks But Won’t Turn Over
Testing Your Starter Solenoid
The starter solenoid acts as an electrical relay between your battery and the starter motor—think of it as a gatekeeper that allows power to flow when you turn the key. When it fails, your mower simply won’t crank, leaving you frustrated on mowing day.
Here’s a straightforward way to test it: First, ensure your mower is in neutral with the parking brake engaged. Listen carefully when you turn the key—if you hear a single click but nothing happens, the solenoid is likely receiving power but not transferring it to the starter. For a more definitive test, use a multimeter to check for voltage at the small terminal wire when turning the key (should read around 12 volts). Then check the large terminal wires—both should show battery voltage when the key is turned.
You can also try a bypass test: carefully touch a screwdriver across both large terminals on the solenoid. If the engine cranks, your solenoid needs replacing. This is a sustainable repair that saves you from replacing larger, more expensive components unnecessarily. Always disconnect the negative battery cable before working with electrical components to stay safe.
Starter Motor Issues
When you turn the key and hear a clicking sound—or worse, nothing at all—your starter motor might be the culprit. This hardworking component is responsible for cranking your engine to life, and like any mechanical part, it can wear out over time.
Listen carefully when you attempt to start your mower. A single loud click usually indicates the starter solenoid is engaging but the motor itself isn’t turning. Multiple rapid clicks often point to a weak battery, so rule that out first. If you hear grinding noises, the starter gear might be damaged and struggling to mesh with the flywheel.
Before assuming you need a replacement, check the electrical connections to your starter motor. Corrosion or loose wires can prevent proper power flow, mimicking starter failure. Clean any corroded terminals with a wire brush and ensure all connections are snug.
Most starter motors can last several years with proper maintenance, but frequent use and exposure to moisture accelerate wear. If cleaning connections doesn’t help and your battery tests strong, it’s likely time for professional evaluation. While some handy folks can replace starters themselves, this job requires mechanical confidence and proper tools to avoid damaging surrounding components.
When It Cranks But Won’t Fire Up
Fuel System Blockages
A clogged fuel system is like a garden hose with a kink—everything might look fine on the surface, but nothing’s flowing where it needs to go. This is one of the more common culprits when your John Deere refuses to fire up, especially if it’s been sitting unused for a while.
Start by examining your fuel lines for any visible cracks, kinks, or deterioration. Gently squeeze them—they should feel pliable, not brittle. If you spot any damage, replacement is straightforward and inexpensive. Next, trace the line to your fuel filter, typically a small cylindrical component between the tank and engine. Hold it up to the light; if you can’t see through it or notice particles floating inside, it’s time for a fresh one. I recommend replacing fuel filters annually as preventive maintenance—it’s much easier than dealing with a no-start situation on mowing day.
The fuel pump requires a bit more detective work. Turn your key to the “on” position (without starting) and listen carefully near the tank for a quiet humming or clicking sound. No sound often means a failed pump. You can also disconnect the fuel line at the carburetor and briefly turn the key—fuel should pulse out. If nothing happens, the pump likely needs replacement.
For a sustainable approach, always dispose of old fuel and filters properly at your local hazardous waste facility rather than dumping them. This protects our soil and groundwater while keeping your mower running smoothly.

Carburetor Troubles
Your carburetor might be the culprit if your mower has been sitting idle for a few months. When fuel sits in the carburetor over winter, it evaporates and leaves behind a sticky varnish that clogs the tiny jets and passages. This is especially common if you didn’t add fuel stabilizer before storage—a lesson many of us learn the hard way!
Start by inspecting the carburetor for visible residue or corrosion. If your mower shows signs of life when using starter fluid but won’t stay running, that’s a telltale sign of carburetor trouble. You can try cleaning it with carburetor cleaner spray, which works for minor buildup. Remove the air filter, spray into the carburetor throat, and let it sit for fifteen minutes before attempting to start.
For stubborn cases, you’ll need to remove and thoroughly clean the carburetor, or consider replacement if it’s heavily corroded. Replacement carburetors are surprisingly affordable—usually $20-40—and might be more practical than extensive cleaning.
Remember to dispose of old carburetor cleaner and fuel responsibly at your local hazardous waste facility. And going forward, always use fuel stabilizer or run your mower dry before winter storage to prevent these headaches next season!
Spark Plug and Ignition Checks
A faulty spark plug is one of the most common culprits when your John Deere won’t fire up, and the good news is it’s incredibly easy to check yourself. Start by locating your spark plug—consult your owner’s manual if needed—and carefully remove it using a spark plug socket. Look for carbon buildup (a black, sooty appearance), oil fouling, or a worn electrode. These signs tell you the plug needs replacing.
To test for spark, reconnect the plug wire, ground the plug’s threads against the engine block, and have someone turn the ignition key. You should see a bright blue spark jumping across the gap. No spark? Your ignition system may need attention, or you simply need a new plug.
Here’s a sustainable tip: keeping spare spark plugs on hand prevents unnecessary trips to the store and reduces your carbon footprint. Replace plugs annually as part of routine maintenance—they’re inexpensive insurance against frustrating no-start situations. When installing a new plug, gap it correctly per your manual’s specifications and hand-tighten before using your wrench. A properly functioning spark plug ensures efficient fuel combustion, which means better performance and lower emissions from your zero turn mower.
Preventive Maintenance to Avoid Future Starting Problems

Seasonal Preparation and Storage
Many starting issues can be prevented with proper seasonal care, especially if you live where winters are harsh. Think of it as tucking your mower in for a long nap—you want it to wake up ready to work come spring!
Before storing your John Deere for winter, add fuel stabilizer to a full tank. This prevents fuel degradation and that gummy buildup we discussed earlier that clogs carburetors. Run the engine for a few minutes after adding stabilizer to circulate it through the system. Some folks prefer draining the fuel completely, which also works well and reduces fire risk during storage.
Your battery deserves special attention too. Either remove it and store it in a warmer location on a trickle charger, or at minimum, disconnect the cables to prevent parasive drain. A fully charged battery is less likely to freeze and suffer permanent damage.
Clean grass clippings from the deck thoroughly—they trap moisture and accelerate rust. Change the oil before storage rather than after; used oil contains acids and contaminants that can corrode internal parts over months of sitting.
Store your mower in a dry, protected space with a breathable cover. These simple steps mean you’ll turn the key confidently next season instead of troubleshooting a stubborn non-starter!
Regular Maintenance Schedule
The best cure for starting problems? Not getting them in the first place! I’ve learned the hard way that a little preventive care goes a long way with zero turn mowers, and it’s better for the environment too.
Start with the basics: change your oil every 50 hours or at least once per season using eco-friendly, biodegradable options when possible. Clean or replace air filters monthly during mowing season—a clogged filter makes starting difficult and wastes fuel. Check spark plugs every spring and replace them annually; it’s a fifteen-minute job that prevents countless headaches.
Here’s something many folks overlook: keep your battery terminals clean and tight. A quick monthly inspection with a wire brush prevents corrosion that causes starting failures. I also recommend disconnecting the battery during winter storage to extend its life and reduce waste.
Fuel maintenance matters too. Use fresh gasoline and add a fuel stabilizer if your mower sits idle for more than 30 days. This simple step prevents the gummy buildup that clogs carburetors and fuel lines. Better yet, try to run the tank nearly empty before storage—less old fuel means fewer problems.
By sticking to these straightforward routines, you’ll spend more time enjoying your lawn and less time troubleshooting starting issues. Plus, well-maintained equipment lasts longer, reducing the environmental impact of manufacturing replacements.
When to Call a Professional
Let’s be honest—there’s no shame in calling for backup. Some zero turn issues require specialized diagnostic tools, technical expertise, or parts that simply aren’t practical for DIY repair. Knowing when to seek professional help actually shows smart stewardship of your equipment and your time.
Consider calling a certified technician if you’ve checked the basics (battery, fuel, safety switches) and your mower still won’t cooperate. Electrical system malfunctions, internal engine problems, or complex hydraulic issues definitely fall into professional territory. If you smell burning, hear unusual grinding noises, or notice fuel or oil leaking from unexpected places, stop troubleshooting and get expert eyes on it.
When you contact a repair shop, help them help you efficiently. Describe exactly what happens when you try starting—does it click, turn over slowly, or do absolutely nothing? Mention what you’ve already checked and any recent maintenance or incidents. This saves diagnostic time and potentially reduces your bill.
To find qualified service providers, start with John Deere’s official dealer locator on their website. Authorized dealers have factory-trained technicians and genuine parts access. Read online reviews, but prioritize shops with experience specifically on zero turn mowers. Ask about warranty coverage before authorizing repairs—some issues might still be covered.
Remember, professional maintenance helps your mower last longer and run more efficiently, which ultimately supports sustainable lawn care by reducing equipment waste and ensuring optimal fuel efficiency.
The good news? Most zero turn starting issues are completely solvable with a methodical approach. By working through the troubleshooting checklist we’ve covered—from checking your fuel and battery to inspecting safety switches and electrical connections—you’ll likely identify the culprit without needing a repair shop visit.
Remember, prevention is always easier than cure. Regular maintenance like changing your oil, keeping the battery charged during off-season, and using fresh fuel with stabilizer will spare you these frustrating mornings when you’re ready to tackle your lawn care.
There’s something genuinely satisfying about diagnosing and fixing your own equipment. Not only does it save money, but it deepens your connection with your mower and keeps it running sustainably for years to come. You’re not just maintaining machinery—you’re investing in long-term lawn care success while reducing waste. With patience and the systematic approach outlined here, you’ll have your John Deere back in action and ready to deliver that beautiful, professional-looking cut your lawn deserves.