Grab your Z-Spray owner’s manual and locate the calibration chart—this essential reference sheet determines precisely how much product your machine applies per 1,000 square feet based on your settings. Before each application season, measure your actual output by running the sprayer over a test area while collecting discharge in containers for exactly one minute, then compare those measurements against the chart’s predicted rates. Adjust your sprayer’s speed, nozzle pressure, or gear setting until your actual output matches your target application rate, remembering that even small deviations can lead to burned lawns from over-application or persistent weeds from under-application.
Understanding your calibration chart transforms guesswork into precision. The vertical axis typically shows ground speed in miles per hour, while the horizontal axis displays pressure settings in PSI, with the intersecting numbers revealing your application rate. This simple grid becomes your roadmap to lawn care success, preventing the environmental waste of excess chemicals and the frustration of ineffective treatments. Most Z-Spray models require recalibration whenever you change products, nozzles, or operating conditions, since factors like temperature, product viscosity, and even worn equipment affect output rates.
The calibration process takes just 15-20 minutes but saves you from costly mistakes throughout the season. Think of it as tuning a musical instrument before a performance—proper calibration ensures every application delivers consistent, predictable results that protect both your lawn’s health and our shared environment through responsible chemical use.
What Makes Z-Spray Equipment Different
If you’ve ever struggled with getting consistent results from your lawn treatments, the Z-Spray might just be the game-changer you’ve been looking for. But here’s the thing: this innovative equipment operates quite differently from the push spreaders or backpack sprayers you might be used to, which means calibration becomes absolutely essential to master.
What sets Z-Spray apart is its ingenious stand-on design that combines both spraying and spreading capabilities in one machine. Picture this: you’re standing comfortably on a platform, controlling a machine that can simultaneously handle liquid fertilizers, herbicides, and granular products without switching equipment. It’s like having two tools in one, which is fantastic for efficiency but requires a more thoughtful approach to calibration.
Traditional lawn care equipment typically does one job at a time. A broadcast spreader handles granules, while a separate sprayer manages liquids. The Z-Spray’s dual-function design means you’re working with two distinct delivery systems that need independent calibration. The liquid system uses specialized nozzles and pressure settings, while the granular spreader operates with its own metering system. Each function responds differently to variables like ground speed, product density, and environmental conditions.
The stand-on design also introduces another calibration consideration: your travel speed affects application rates more significantly than with walk-behind equipment. When you’re moving faster on a stand-on unit, maintaining accurate coverage requires precise calibration adjustments. This is where having a reliable calibration chart becomes your best friend.
Understanding these unique characteristics isn’t just about getting better results, it’s about being a responsible steward of your lawn and the environment. Proper calibration ensures you’re applying exactly what your lawn needs, nothing more, nothing less. This precision prevents product waste, protects beneficial insects and microorganisms in your soil, and keeps excess chemicals from running off into waterways. That’s sustainable lawn care at its finest.

Understanding Your Z-Spray Calibration Chart
Chart Components and What They Mean
When you first look at your Z-Spray calibration chart, it might seem a bit overwhelming, but I promise it’s simpler than it appears. Think of it as your personalized recipe card for achieving the perfect lawn application every single time.
The chart breaks down into several key components that work together to help you deliver the right amount of product to your turf. Let’s walk through what you’re looking at.
Application rates are typically shown across the top or side of the chart, displayed in pounds per thousand square feet or gallons per acre. This tells you exactly how much product you’re putting down on your lawn. Getting this right is crucial not just for lawn health, but also for environmental responsibility, ensuring you’re not over-applying chemicals that could run off into waterways.
Ground speed settings indicate how fast you should be moving your Z-Spray across the lawn. Most charts show speeds ranging from about 2 to 6 miles per hour. Speed matters tremendously because even a small change affects how much product lands on each section of grass. Moving too quickly means inadequate coverage, while going too slowly wastes product and money.
Nozzle configurations detail which nozzle tips to use and at what pressure settings. Different nozzle sizes create different droplet patterns and coverage widths, affecting both accuracy and drift potential. Understanding sprayer calibration formulas helps you make sense of these relationships.
Finally, spreader settings show the precise gate opening for your granular applications. These numerical settings correspond to how widely the gate opens to release fertilizer or other dry products, ensuring consistent coverage across your entire lawn.
Matching Chart Data to Your Lawn Care Needs
Now that you understand your Z-Spray calibration chart, let’s talk about matching those numbers to what you’re actually putting on your lawn. Think of this as connecting the dots between the product in your hopper and the results you want to see in your turf.
Start by checking your product label carefully. Whether you’re working with liquid fertilizer, herbicide, or granular products, the manufacturer will specify a recommended application rate, usually expressed in pounds per 1,000 square feet for granular products or gallons per acre for liquids. This is your target rate, and your calibration chart is the roadmap to hitting it.
For granular products like fertilizer or pre-emergent herbicides, you’ll reference the chart’s flow rate settings. Let’s say your lawn food calls for 3 pounds per 1,000 square feet. Find the chart column that matches your walking speed, then locate the deflector setting that delivers that rate. Don’t worry if you’re between two settings on the chart. You can always make small adjustments and recalibrate to dial things in perfectly.
Liquid applications work similarly, but you’ll focus on nozzle selection and pressure settings instead. Your chart will show how different combinations affect your gallons per acre coverage. For spot-treating with herbicides, you might want a lower volume with more concentrated product, while blanket fertilizer applications typically call for higher water volumes to ensure even distribution.
Here’s a practical tip from experience: always start conservative, especially with herbicides or products you haven’t used before. It’s much easier to make a second pass if needed than to deal with over-application damage. Your lawn and the environment will thank you for taking that measured approach. Remember, precision isn’t just about perfect grass; it’s about responsible stewardship of the products you’re using and protecting the ecosystem around your property.
Step-by-Step Z-Spray Calibration Process
Preparing for Calibration
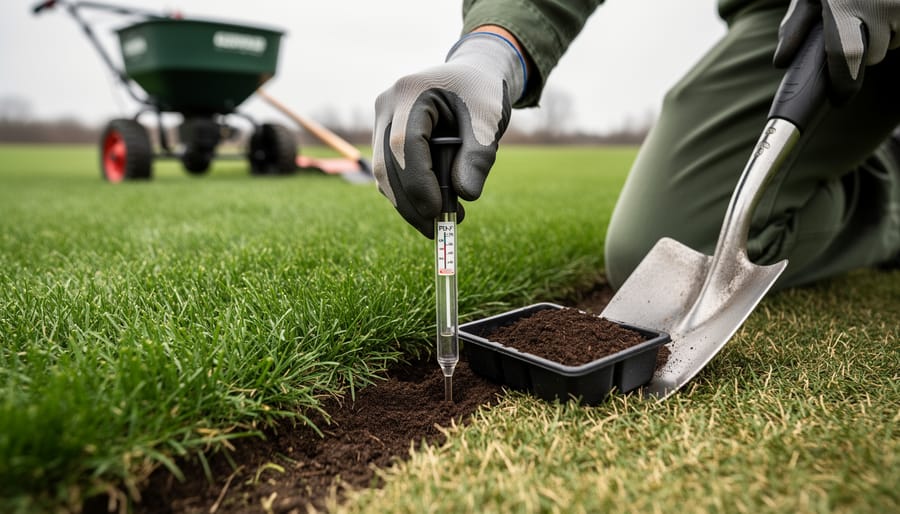
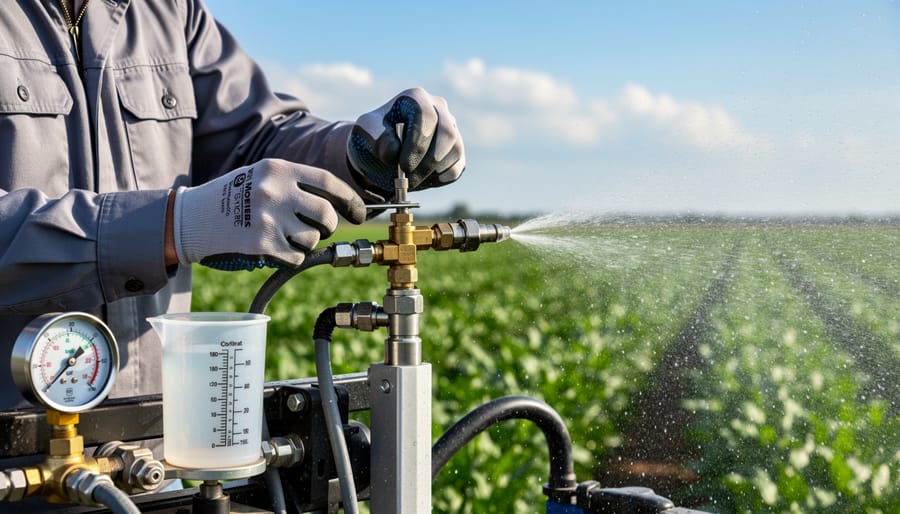
Before you begin calibrating your Z-Spray, take a few minutes to gather what you’ll need and set yourself up for success. You’ll want a catch container like a large measuring cup or graduated cylinder, a stopwatch or smartphone timer, and your calibration chart handy. Don’t forget a calculator and notepad to record your results.
Choose a flat, paved surface like a driveway or parking lot for your calibration work. This makes cleanup easier and prevents unwanted product application on your lawn. Concrete or asphalt surfaces also help you see exactly what’s happening during testing, which is especially helpful if you’re new to this process.
Safety comes first, so wear appropriate protective gear including gloves and safety glasses, even during calibration. This is a great habit to establish now. Check that your equipment is in good working order before starting, and keep children and pets away from your work area.
Weather matters more than you might think. Pick a calm day with minimal wind to prevent spray drift during testing. Avoid extremely hot conditions that could cause rapid evaporation and throw off your measurements. Ideal temperatures range between 50-85 degrees Fahrenheit. Taking these preparatory steps ensures accurate calibration and protects both you and the environment around you.
Calibrating the Sprayer System
Now that you understand your Z-Spray calibration chart, it’s time to put it into action. Think of this process like tuning a musical instrument—a little patience up front leads to beautiful results all season long.
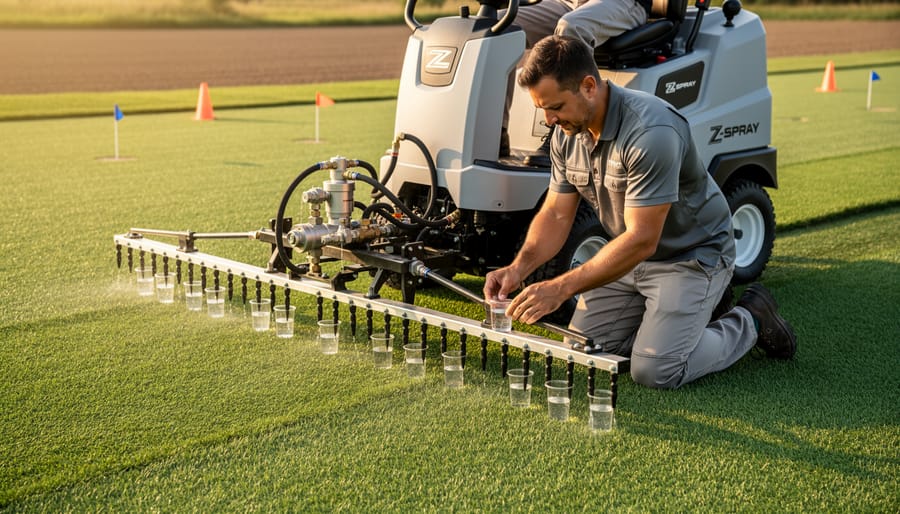
Start by measuring your sprayer’s output. Park your Z-Spray on level ground and collect spray from one nozzle for exactly one minute into a measuring container. Repeat this for each nozzle to ensure consistency. Compare your measurements to what the chart indicates for your current pressure setting. If there’s a discrepancy, don’t worry—that’s exactly why we’re calibrating.
Next, adjust your pressure accordingly. Most Z-Spray models have easily accessible pressure gauges and adjustment valves. If your output is too high, reduce pressure slightly; if too low, increase it. Make small adjustments of 5-10 PSI at a time, then retest. Remember, different products and conditions may require different pressures, so reference those handy calibration formulas when switching applications.
Testing your nozzles is crucial for environmental stewardship. Worn or clogged nozzles create uneven patterns that waste product and harm your lawn. Hold a piece of cardboard beneath each nozzle while spraying to verify the pattern. You should see a consistent, cone-shaped spray. Any streaming, dripping, or irregular patterns mean it’s time for nozzle replacement.
Finally, verify your spray pattern by doing a test run on pavement or cardboard. Mark off a measured area matching your chart’s specifications and check coverage. The goal is uniform application without gaps or overlaps. This precision means you’ll use exactly what your lawn needs—nothing more, nothing less—protecting both your wallet and the environment.
Calibrating the Spreader Function
Getting your spreader calibrated properly is like tuning a musical instrument—it takes a bit of patience, but the results make all the difference. Let’s walk through how to ensure your Z-Spray is distributing product evenly and accurately.
Start by placing collection pans or trays in a straight line perpendicular to your travel path, spacing them about 12 inches apart across the width of your spread pattern. Drive your Z-Spray over these collectors at your normal operating speed, keeping the spreader running just long enough to get measurable material in each pan. Weigh or measure the product in each container—you’re looking for a consistent, bell-curved distribution pattern. If you notice heavy concentrations on one side or significant gaps, it’s time to adjust your spreader gates.
Most Z-Spray models have adjustable gate openings that control product flow. Make small adjustments, typically a quarter-turn at a time, and retest. Remember, even coverage isn’t just about aesthetics—it prevents over-application that wastes product and can harm your lawn while protecting our environment from unnecessary chemical runoff.
To measure your actual output rate, collect all the product dispensed over a measured distance, then calculate pounds per 1,000 square feet. Compare this to your target rate from the calibration chart. If you’re off, adjust your gate settings or ground speed accordingly. Keep detailed notes of your settings—future applications will be much quicker when you’ve got proven configurations recorded.
Common Calibration Mistakes and How to Fix Them
Even experienced Z-Spray operators occasionally run into calibration challenges, but the good news is that most mistakes are easy to identify and fix. Let’s walk through the most common issues and their practical solutions, so you can avoid wasting product and protect your lawn from potential damage.
One of the most frequent mistakes is miscalculating the effective spray width. Many operators forget to account for overlapping passes, which leads to over-application in those overlap zones. The symptom? You’ll notice striping patterns or darker green strips where passes overlapped. To fix this, measure your actual effective width by spraying water on dry pavement and observing the pattern, then adjust your settings accordingly. This simple step prevents fertilizer burn and reduces unnecessary product waste, saving you money while protecting the environment.
Another common issue is inconsistent walking or driving speed during calibration. If you’re rushing during the actual application but walked slowly during calibration, you’ll under-apply product. The lawn may show patchy results with some areas thriving while others lag behind. The solution is to practice maintaining a consistent pace, ideally using a stopwatch to check your speed over a measured distance. Remember, proper calibration techniques require consistency above all else.
Failing to recalibrate when switching between products is another pitfall. Different fertilizers and pesticides have varying densities and flow characteristics. Always recalibrate when changing products, even if you’re using the same equipment settings. The few extra minutes you invest prevents costly mistakes and potential environmental harm from runoff.
Temperature changes can also affect calibration accuracy. Product flow rates change with temperature fluctuations, so if you calibrated in cool morning conditions but apply during hot afternoon weather, your rates may be off. When possible, calibrate under similar conditions to when you’ll be applying.
Finally, neglecting regular nozzle maintenance leads to uneven spray patterns. Clogged or worn nozzles distribute product inconsistently, creating an unpredictable application pattern that no amount of chart-checking can fix. Inspect and clean nozzles before each use, and replace them at the first sign of wear. This simple habit ensures your calibration efforts translate into the beautiful, healthy lawn you’re working toward.
Maintenance Tips to Keep Your Calibration Accurate
Getting your Z-Spray calibrated is just the beginning of the journey. Like any precision tool in your lawn care arsenal, maintaining that accuracy requires regular attention and a little TLC. Think of it this way: you wouldn’t expect a car to run perfectly without oil changes, and your Z-Spray deserves the same care.
Start by establishing a cleaning routine after each use. Flushing your system with clean water prevents chemical buildup that can clog nozzles and skew your application rates. I learned this lesson the hard way when I skipped cleanup one busy weekend and found myself recalibrating everything the following week. Pay special attention to the tank, strainer, and nozzle tips—these are the prime spots where residue loves to hide.
Nozzle inspection should become second nature. Before each application, examine your nozzles for wear, damage, or debris. Even tiny obstructions can dramatically alter your spray pattern and throw off your carefully calibrated rates. If you notice uneven wear or distorted patterns, replace the nozzle immediately. Mixing old and new nozzles creates inconsistent coverage, which defeats the purpose of calibration.
Filter maintenance is equally critical for sustainable equipment performance. Clean or replace filters regularly according to your usage frequency. A clogged filter reduces pressure and flow rate, meaning your calibration chart won’t match your actual output. Check filters weekly during heavy-use seasons and monthly during slower periods.
Seasonal preparation deserves special mention. Before storing your Z-Spray for winter, thoroughly clean and dry all components to prevent corrosion. When spring arrives, recalibrate before your first application—pressure changes and component settling during storage can affect accuracy. This lawn equipment maintenance approach ensures you start each season with confidence.
Keep a simple maintenance log noting cleaning dates, nozzle replacements, and calibration checks. This record helps you spot patterns and anticipate when components might need attention, extending your equipment’s lifespan while maintaining environmental responsibility through accurate applications.
When to Recalibrate Your Z-Spray
Regular calibration keeps your Z-Spray working efficiently and ensures you’re applying products at the right rates. As a general rule, you should recalibrate your sprayer at the start of each season, or roughly every 25-30 operating hours. Think of it like checking your car’s tire pressure—consistent maintenance prevents bigger problems down the road.
Beyond scheduled calibration, certain situations demand immediate attention. If you notice uneven coverage patterns, with some areas of your lawn looking darker or greener than others, it’s time to recalibrate. Similarly, if you’ve recently changed nozzles, replaced worn parts, or switched to a different product formulation, a fresh calibration is essential. Different products have varying viscosities and flow characteristics that affect application rates.
Environmental conditions matter too. Significant changes in temperature can alter product flow and spray patterns, particularly with liquid fertilizers and certain pesticides. If you’re switching between granular and liquid applications, always recalibrate—the two systems operate quite differently.
Watch for these warning signs: inconsistent spray patterns, clogged nozzles requiring frequent cleaning, or faster-than-expected product depletion. These indicators suggest your equipment isn’t delivering accurate application rates.
Create a personal calibration schedule by marking dates in your gardening calendar. Keep a simple log noting calibration dates, products used, and any adjustments made. This record helps you spot patterns and maintain optimal performance throughout the season, ensuring you’re not over-applying products and harming the environment or under-applying and wasting time and money.
Taking the time to properly calibrate your Z-Spray isn’t just about following instructions—it’s about investing in the long-term health of your lawn, protecting our environment, and being smart with your budget. When you apply the right amount of product every time, your grass gets exactly what it needs to thrive without the risk of burning or under-feeding. You’re also preventing excess chemicals from running off into waterways, which is something we can all feel good about.
I know calibration might seem like one more thing on your to-do list, especially when you’re eager to get started on your lawn care routine. But here’s the encouraging news: it gets easier every time you do it. That first calibration session might take you thirty minutes, but once you’re familiar with the process, you’ll breeze through it in just a few minutes. Think of it like learning to ride a bike—a little wobbly at first, but soon it becomes second nature.
Make calibration a regular habit, checking your equipment at least once per season or whenever you switch products. Your lawn will reward you with healthier, more vibrant growth, and you’ll likely notice your products lasting longer too. That’s a win for your wallet and the planet.