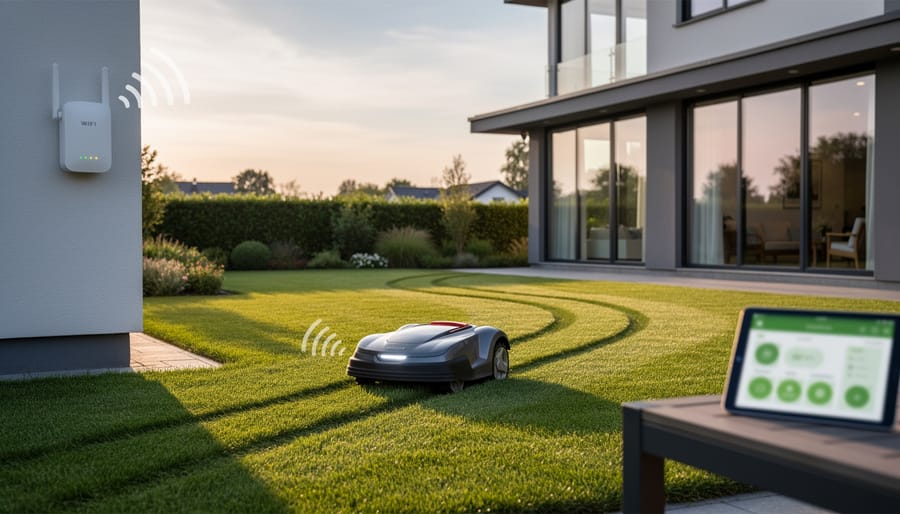
Picture this: You’ve invested in a sleek robot mower and smart irrigation system, promised yourself a perfectly maintained lawn with minimal effort, and then watched in frustration as your devices disconnect mid-cycle, leaving half-mowed patches and overwatered zones. You’re not alone. The reality is that your garden presents unique challenges for wireless connectivity that your indoor router was never designed to handle.
Smart zoning transforms this frustrating experience into the seamless automation you were promised. Think of it as creating invisible highways through your yard, ensuring your robot mower, soil sensors, and irrigation controllers maintain rock-solid connections exactly where they need them. Rather than fighting dead zones and dropouts, you’ll strategically position signal sources to match how your devices actually move and operate across your property.
The good news? You don’t need an engineering degree or expensive overhaul to make this work. Smart zoning relies on understanding three simple principles: identifying where your devices spend most of their time, recognizing the obstacles weakening your signal (thick hedges, metal sheds, and stone walls are major culprits), and placing connectivity solutions in spots that create overlapping coverage zones.
This approach goes beyond just getting devices online. Reliable connections mean your robot mower completes its programmed pattern without interruption, your irrigation system responds immediately to soil moisture readings, and you gain real-time insights that prevent water waste and promote healthier grass. The result is a truly sustainable, efficient lawn care system that actually delivers on the smart gardening promise.
What Is Smart Zoning for Your Outdoor Devices?
The WiFi Problem Every Smart Lawn Owner Faces
You’ve probably experienced this frustration: your shiny new robot mower or smart irrigation controller works perfectly when you test it near your house, but the moment it ventures to the back corner of your lawn, it loses connection. Welcome to the outdoor WiFi challenge that nearly every smart lawn owner encounters.
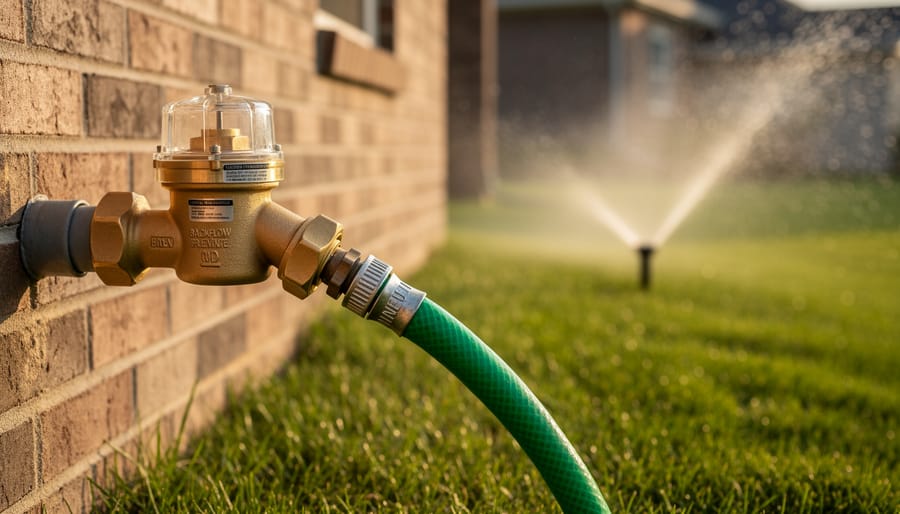
Here’s what’s working against you. Your WiFi signal needs to travel through multiple walls to reach your backyard, and each wall it passes through weakens the signal significantly. That sturdy brick exterior that protects your home? It’s also blocking the wireless signals your lawn devices desperately need. Add in metal siding, insulation, or even a thick wooden fence, and your signal can drop to nearly nothing before it reaches your garden beds.
Then there’s Mother Nature herself. Dense foliage, mature trees, and even tall shrubs act like signal sponges, absorbing and scattering WiFi waves. I’ve seen gardeners scratch their heads wondering why their sensor worked fine in spring but failed completely once their tomato plants reached full height. Water is particularly problematic because it absorbs radio frequencies, which explains why heavy rain or morning dew can temporarily knock your devices offline.
Weather conditions add another layer of complexity. Temperature extremes affect both your devices and signal propagation, while humidity can dampen signal strength. These aren’t insurmountable problems, but understanding them is the first step toward creating a reliable smart lawn system that actually works year-round.
How Smart Zoning Creates Reliable Coverage
Think of your yard like your home’s Wi-Fi network. You’ve probably noticed that some rooms get perfect signal while others are dead zones, right? The same principle applies to your outdoor smart devices. Smart zoning is simply the practice of dividing your yard into distinct connectivity areas based on where your devices work best and where signal struggles to reach.
Here’s why this matters for your lawn care routine. When you map out these zones, you’re essentially creating a blueprint that shows you exactly where your robot mower, smart irrigation controller, or soil sensors can reliably connect to your network. Instead of randomly placing devices and hoping for the best, you’re making informed decisions that prevent those frustrating moments when your mower stops mid-cut or your sprinklers don’t turn on as scheduled.
The beauty of smart zoning is that it’s remarkably practical. You don’t need to be a tech wizard to understand that a thick hedge might block signal or that your device needs to be within a certain distance of your router. By identifying these zones, you can spot problem areas before they become issues. Maybe you’ll discover that your vegetable garden is just barely out of range for that soil moisture sensor, or that your metal shed creates a signal shadow in the back corner.
This approach saves you time, reduces energy waste from devices constantly searching for connection, and ultimately helps you maintain a healthier lawn. When your smart tools work reliably, you’re not over-watering some areas while missing others, and your automated mower completes its entire cutting pattern without interruption. That’s sustainable lawn care made simple.
Mapping Your Yard for Smart Device Success
Tools You Already Have for Signal Testing
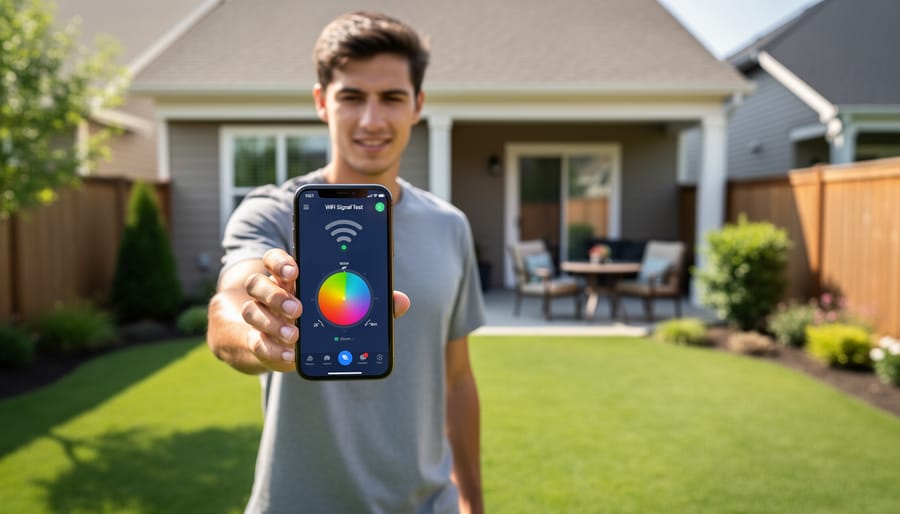
Good news – you don’t need to invest in expensive equipment to map your yard’s connectivity. Your smartphone already has everything you need to test WiFi and Bluetooth signals outdoors.
Start with free WiFi analyzer apps like WiFi Analyzer (Android) or Airport Utility (iOS). These show signal strength in real-time as you walk around your property with your phone. Simply open the app, select your network, and watch the numbers change as you move. Aim for signal strength above -70 dBm for reliable connections where your robot mower or irrigation controller will operate.
For Bluetooth range testing, use apps like LightBlue (available for both platforms). Connect to your smart garden devices and walk the perimeter of where they’ll work, noting where the connection drops.
Here’s a practical approach: grab a notepad, walk your yard in a grid pattern, and jot down signal readings every 15-20 feet. Mark weak spots on a simple hand-drawn map of your property. This low-tech method works beautifully and costs nothing.
The best part? Testing on different days and times helps identify interference patterns from neighbors’ networks, giving you a complete picture before positioning any equipment. This small time investment prevents frustrating connectivity issues down the road.
Creating Your Yard Connectivity Map
Grab a simple sketch pad or use your smartphone’s drawing app – we’re going to create a visual map that’ll save you countless hours of troubleshooting. Start by walking your property and drawing a rough outline that includes your lawn area, garden beds, and hardscaping features. Don’t worry about artistic perfection; this is your personal roadmap to better connectivity.
Begin marking where your Wi-Fi router sits – this is your signal’s starting point. Now comes the detective work: walk around with your smartphone’s Wi-Fi analyzer app (most are free) and note signal strength at key spots where you’ll place devices like your robot mower’s charging station, irrigation controllers, or soil sensors. Use a simple rating system – strong, medium, or weak – right on your sketch.
Here’s where things get interesting. Mark every potential signal blocker you encounter. That charming stone wall near your vegetable garden? It’s likely creating a connectivity dead zone. Your metal garden shed might be bouncing signals in unexpected directions. Dense evergreen hedges and thick trees can absorb Wi-Fi signals, especially when wet. Even your home’s brick or stucco exterior walls deserve notation.
Pay special attention to where water features, metal fencing, or concrete paths intersect with your planned device locations. Water and metal are notorious signal disruptors, while concrete can weaken transmission strength.
Color-code your map for easy reference – perhaps red for problem areas, green for strong coverage, and yellow for borderline zones. This visual guide becomes invaluable when deciding whether you need range extenders or if repositioning your charging station by just a few feet could solve everything.
Understanding Your Devices’ Connection Needs
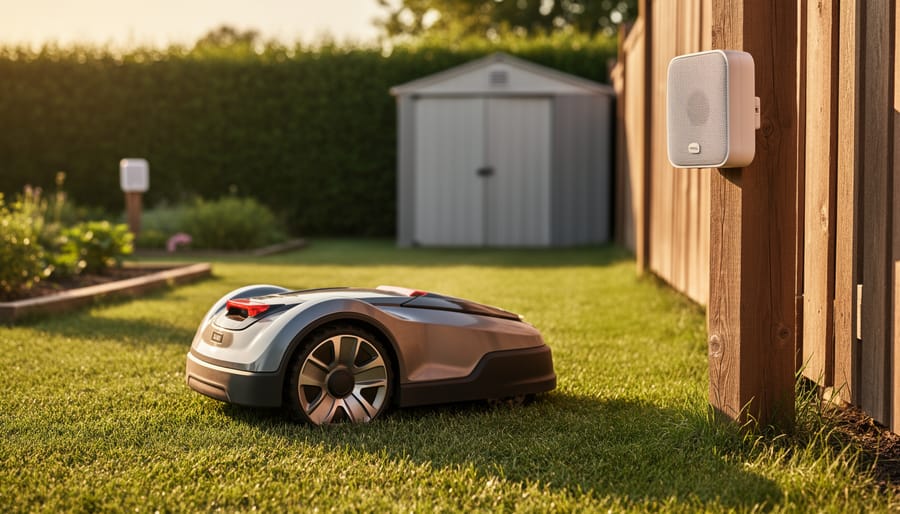
Before diving into smart zoning, it helps to understand what each device actually needs from your network. Robot mowers are the heaviest users, requiring both GPS signals and stable WiFi to navigate your lawn, receive updates, and send you notifications. They’re constantly communicating their location and adjusting their routes, so consistent coverage matters.
Smart irrigation controllers have much lighter demands. They mainly need brief connections to check weather data and receive your scheduling commands. Think of them as the easy-going members of your smart lawn family. Weather sensors fall somewhere in between, sending periodic updates about rainfall, temperature, and soil moisture. They don’t need constant connection, just reliable check-ins every few minutes.
Understanding these different needs helps you prioritize your network setup. Your robot mower needs the strongest, most consistent signal, while your rain sensor can work perfectly fine with occasional connectivity. This knowledge guides where you place extenders and which devices benefit most from dedicated network bandwidth, making your smart zoning strategy both practical and cost-effective.
Building Your Smart Zoning Network
Mesh Networks vs. WiFi Extenders: What Works Best Outdoors
When it comes to extending your network to reach that robot mower or irrigation controller, you’ve got two main options: mesh networks and WiFi extenders. Let’s break down what actually works in real garden conditions.
WiFi extenders are the budget-friendly starting point. They capture your existing signal and rebroadcast it, typically costing between $30-$80. The honest truth? They work adequately for straightforward outdoor layouts where you’re extending coverage maybe 50-75 feet beyond your house. I’ve seen them handle basic irrigation controllers and weather sensors just fine. However, they create a separate network name, which can cause hiccups when your robot mower transitions between zones.
Mesh networks offer more reliability but come with a higher price tag, usually $150-$400 for a multi-unit system. They create one seamless network across your entire property, intelligently routing signals between units. This matters when you’ve got a robot mower that roams your entire lawn or multiple smart devices scattered around. The handoff between mesh points is smooth and automatic.
Here’s the sustainability angle: mesh systems typically use more efficient chipsets and better signal management, which can reduce overall power consumption compared to running multiple extenders. However, a single well-placed extender uses less energy than a three-unit mesh system.
My practical advice? Start with an extender if you’re covering one specific area. Graduate to mesh when you’re managing multiple devices across a larger property or experiencing frequent disconnections.
Strategic Placement for Maximum Coverage
Think of your smart lawn devices like plants in your garden—they thrive when positioned thoughtfully. Start by placing your main Wi-Fi extender or base station centrally within your lawn area, ideally elevated 3-5 feet off the ground. This could be on a covered porch, garage wall, or weatherproof mounting post. Just as you wouldn’t plant shade-loving hostas in full sun, don’t position network equipment where it battles the elements needlessly.
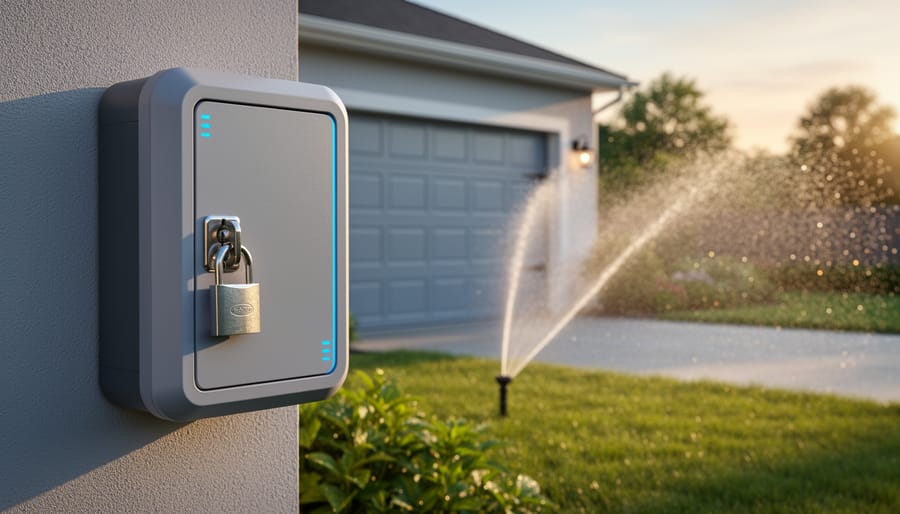
Weather protection is essential for longevity. While most outdoor-rated extenders handle rain and humidity, direct exposure to driving rain or intense afternoon sun shortens their lifespan. Mount devices under eaves, in protective enclosures, or facing away from prevailing weather patterns. I’ve learned this lesson the hard way—my first extender lasted half as long because I ignored the blazing western sun hitting it daily.
Power access often determines placement more than signal strength. Map out existing outdoor outlets before purchasing equipment, or plan for professional electrician installation of weatherproof receptacles where needed. Extension cords buried under mulch might seem convenient, but they’re neither safe nor sustainable long-term solutions.
Common mistakes include placing nodes too close together (creating redundant coverage) or too far apart (leaving dead zones). Walk your property with your smartphone’s Wi-Fi analyzer app, testing signal strength every 20-30 feet. Remember, robot mowers and irrigation controllers operate at ground level, so test there rather than at standing height. Strategic placement means fewer devices working smarter, reducing energy consumption while maximizing coverage—a win for both your lawn and the environment.
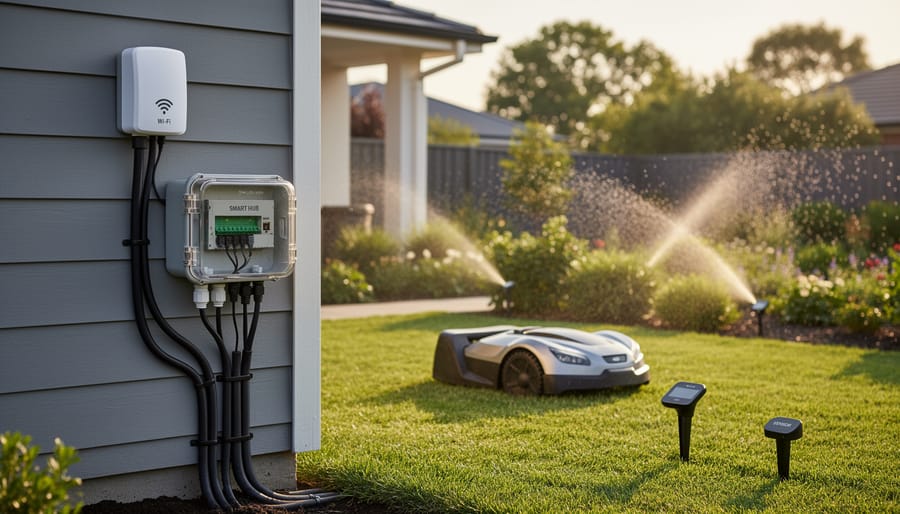
Connecting Multiple Device Types in Harmony
Your outdoor smart devices likely speak different languages. Your robot mower might use WiFi, while irrigation sensors rely on Zigbee, and your soil moisture monitors connect via Bluetooth. The good news? They can all work together with the right setup.
Start with a quality dual-band WiFi router as your foundation. This handles most major devices like smart mowers and weather stations. Position it centrally in your home, ideally near a window facing your yard to extend coverage outdoors.
For Zigbee devices like irrigation controllers and environmental sensors, you’ll need a compatible hub. Many smart home systems include this built-in. These create a mesh network where devices communicate with each other, extending range naturally as you add more sensors throughout your garden.
Bluetooth devices work best for close-range monitoring, perfect for checking soil conditions near your patio or deck. Keep these within 30 feet of your phone or a Bluetooth bridge device.
The beauty of this multi-protocol approach is sustainability. Instead of replacing perfectly good devices, you’re creating an inclusive network that welcomes different technologies. Think of it as companion planting for your smart garden ecosystem, where each protocol serves its purpose without competing for resources.
Real-World Smart Zoning Setups for Different Yards
Small Yard Strategy (Under 5,000 sq ft)
Good news for compact yard owners: your smart lawn care setup doesn’t need to be complicated or expensive! With under 5,000 square feet, you’re working with a manageable space where a single, well-positioned mesh network can typically handle all your devices beautifully.
Start by placing your primary router or mesh unit centrally, ideally near a window facing your yard. This simple move often provides sufficient coverage for your robot mower, smart irrigation controller, and soil sensors without additional hardware. I’ve seen countless small yards thrive with just one quality mesh unit positioned strategically.
Before investing in extra equipment, test your existing signal strength. Walk your property with your smartphone’s WiFi analyzer app to identify any dead spots. You might discover that slightly repositioning your router solves everything.
If you do need a boost, a single mesh extender placed near your back door or patio usually does the trick. This budget-friendly approach keeps your smart devices connected reliably while reducing energy consumption and electronic waste. Focus your resources on quality devices rather than complex infrastructure, and you’ll enjoy hassle-free automated lawn care all season long.
Medium Property Setup (5,000-15,000 sq ft)
Most suburban properties fall into this sweet spot where a two or three zone approach works beautifully. Think of your yard in practical sections: front lawn and street-facing areas in one zone, main backyard in another, and potentially a third zone for side yards or problem areas behind garages and fences.
Here’s the reality many homeowners face: your garage acts like a signal blocker, creating dead zones for robot mowers and smart sprinkler controllers. Instead of fighting it, work with your property’s layout. Position your primary Wi-Fi extender or mesh node where it can serve your backyard hub, typically near a back door or patio area. For front yards, a second access point near a front window usually does the trick.
Mixed landscaping actually helps with zoning decisions. That flower bed separating your lawn from the driveway? It’s a natural boundary for signal planning. Large trees can interfere with connectivity, so place sensors and irrigation controls on the house-facing side when possible.
The practical advantage here is flexibility. You can start with basic two-zone coverage and expand as you add more smart devices. Most medium properties need only one quality mesh system to maintain reliable connections throughout, making this an affordable and sustainable approach that grows with your lawn care needs.
Large Property Considerations (15,000+ sq ft)
Managing a large property over 15,000 square feet requires a thoughtful multi-zone approach to keep your smart lawn devices connected reliably. Think of it like creating neighborhoods within your property, each with its own wireless support system.
Start by dividing your property into logical zones based on natural boundaries like driveways, hedges, or elevation changes. For most extensive properties, you’ll need multiple access points or mesh network nodes positioned strategically throughout the landscape. A good rule of thumb is placing a node every 5,000-7,000 square feet, adjusted for obstacles like dense trees or buildings.
If you’re managing multiple structures like a main house, garage, and shed, consider mounting weatherproof extenders on each building. This creates overlapping coverage zones that your robot mower or irrigation controllers can seamlessly transition between.
For properties with challenging terrain or separate garden areas, dedicated outdoor mesh systems work wonderfully. They’re designed to handle distance and weather while maintaining the strong signal your devices need. Yes, the initial investment is higher, but the reliability gains mean your smart gardening system actually works as intended, saving water and keeping your lawn healthier through consistent automated care.
Troubleshooting Common Smart Zoning Issues
When Devices Keep Switching Zones
If your robot mower or irrigation controller keeps bouncing between network access points, you’re dealing with what we call “zone hopping,” and it’s more common than you’d think. The good news? A few simple tweaks can stabilize things beautifully.
Start by checking your router’s “roaming aggressiveness” settings. Most modern systems allow you to adjust how eagerly devices switch between nodes. For outdoor equipment that stays in relatively fixed areas, dial this down to “low” or “disabled.” Think of it like training your devices to be more content where they are, rather than constantly searching for a potentially stronger signal.
Next, consider assigning static IP addresses to your lawn care devices through your router’s settings. This prevents confusion when devices reconnect and helps maintain more consistent connections. You can also try adjusting the minimum connection strength threshold, ensuring devices only switch zones when absolutely necessary, not just for marginal signal improvements. These small configuration changes create a more stable environment for your smart gardening ecosystem to thrive.
Seasonal Changes That Affect Connectivity
Mother Nature has a significant say in how well your smart lawn devices communicate throughout the year. Think of your garden like a living, breathing barrier that changes with the seasons. During spring and summer, lush foliage creates dense obstacles that can seriously weaken Wi-Fi and Bluetooth signals. Those beautiful leafy trees and thick hedges you’ve cultivated act like signal sponges, absorbing and deflecting the wireless transmissions your robot mower and sensors depend on.
Come autumn and winter, the equation flips. Bare branches create a more transparent environment for signals to travel through, which might actually improve connectivity in areas that struggled during growing season. This seasonal shift means your smart zoning plan needs flexibility built in.
Here’s a practical approach: test your system’s connectivity during peak growing season when signals face the toughest challenge. If your devices maintain strong connections in July when your hedge is at its fullest, you’ll have reliable performance year-round. Consider positioning base stations and sensors where they’ll have the clearest sight lines regardless of foliage density. Strategic placement near evergreen trees or open lawn areas provides more consistent coverage than spots surrounded by deciduous plants that dramatically change their signal-blocking characteristics with the seasons.
Weather-Related Connection Problems
Mother Nature can be tough on outdoor network equipment, and I’ve seen my share of smart devices acting up after a heavy rainstorm or during temperature extremes. Your Wi-Fi extenders, mesh nodes, and router connections powering those robot mowers and irrigation controllers need protection from the elements.
Rain is often the biggest culprit for connectivity drops. Water can seep into outdoor-rated enclosures that aren’t properly sealed, causing signal interference or complete failure. Always verify your equipment has an IP65 rating or higher for outdoor use, and position devices under eaves or in sheltered spots when possible. A simple weatherproof enclosure designed for outdoor electronics can make a world of difference.
Extreme heat affects signal strength too. Direct summer sun can cause devices to overheat and throttle performance or shut down entirely. Consider mounting equipment on north-facing walls or under shade structures. For a sustainable approach, plant deciduous trees or install living walls nearby to provide natural cooling without blocking signals.
Cold weather presents different challenges, as batteries drain faster and plastic housings become brittle. During winter months, check connections regularly and ensure cables remain flexible. Using outdoor-rated ethernet cables with proper UV and temperature resistance prevents cracking and maintains reliable data transmission year-round.
Sustainable and Energy-Efficient Smart Zoning
Choosing Energy-Efficient Network Equipment
When you’re connecting multiple smart devices across your lawn, the power requirements can add up quickly. The good news? Modern equipment has become remarkably efficient, and choosing wisely means lower electricity bills and a smaller environmental footprint.
Let’s look at what actually uses energy in your outdoor network. A basic Wi-Fi extender typically draws 5-12 watts continuously, which translates to about $10-15 annually in electricity costs. Mesh network nodes are similar, usually in the 8-15 watt range. Compare that to older routers that could pull 20-40 watts, and you can see how technology has improved.
For outdoor-specific equipment, look for devices with Energy Star ratings or those specifically marketed as low-power. Some newer mesh systems even include sleep modes that reduce consumption during inactive hours, though you’ll want this feature to activate smartly so your robot mower doesn’t lose connection mid-job.
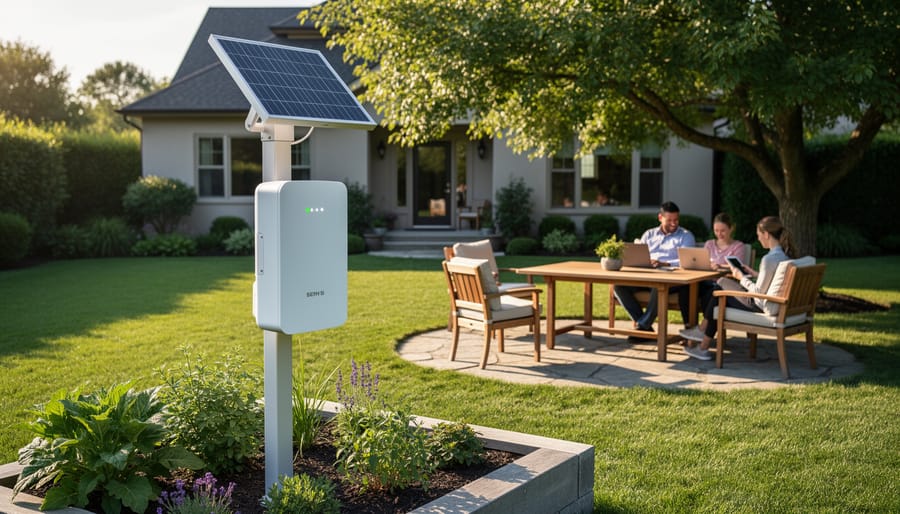
Solar-powered range extenders are worth considering for areas far from power outlets. While they cost more upfront, they eliminate ongoing electricity use entirely and give you placement flexibility. Just ensure they receive adequate sunlight during your peak device usage times.
The most efficient approach? Use fewer, well-placed devices rather than multiple weak ones fighting for bandwidth. A single quality mesh node often beats three budget extenders in both performance and energy consumption.
Solar-Powered Zone Extenders
Solar-powered zone extenders offer an appealing solution for reaching those far corners of your property where running power lines feels impractical or impossible. I’ll be honest with you though: they’re not a universal fix, and knowing when they make sense will save you both money and frustration.
These devices work best in genuinely remote areas like the back forty where your robot mower ventures, or a distant garden bed with soil moisture sensors. The technology has improved significantly, with modern units capable of maintaining steady connections even on cloudy days thanks to better battery storage. However, you’ll want realistic expectations about performance.
Solar extenders shine (pun intended) when you need connectivity for low-bandwidth devices that don’t constantly transmit data. Think irrigation controllers checking in every few hours rather than video cameras streaming continuously. They’re also excellent for seasonal applications where running permanent power doesn’t justify the cost.
The environmental win here is real. You’re extending your smart garden network without increasing your electrical footprint, which aligns perfectly with sustainable gardening principles. Just make sure the installation spot receives at least six hours of direct sunlight daily. Shaded locations under trees might seem like logical garden spots, but they’ll leave your extender struggling and your devices disconnected when you need them most.
Creating reliable outdoor connectivity through smart zoning doesn’t have to be complicated or overwhelming. By taking the time to map your yard, test signal strength in key areas, and strategically position your devices and network equipment, you’ll transform those frustrating connection dropouts into a seamless smart gardening experience.
Remember, building an effective network is an iterative process. Start simple by mapping where your robot mower, irrigation controller, and sensors need to operate. Test the basics first, then gradually expand your setup as you discover what works best in your unique outdoor space. You might find that a single well-placed range extender solves most of your connectivity challenges, or you may need to experiment with mesh networks for larger properties.
The beauty of smart zoning is that once you establish these reliable connections, your devices can truly work for you. Less time spent resetting offline mowers or manually adjusting irrigation systems means more time actually enjoying your beautiful, healthy lawn. Your future self will thank you for the effort you invest now in creating a robust, dependable network that keeps your smart gardening ecosystem running smoothly season after season.