Inspect your blade adapter immediately if you notice wobbling blades, unusual vibrations, or difficulty securing the cutting blade to the spindle shaft. This small but crucial component—the metal piece connecting your mower blade to the drive system—can crack, strip, or corrode over time, turning routine mowing into a safety hazard. Most homeowners can replace a damaged adapter in 20-30 minutes with basic tools, saving the cost of professional repair while extending their mower’s lifespan.
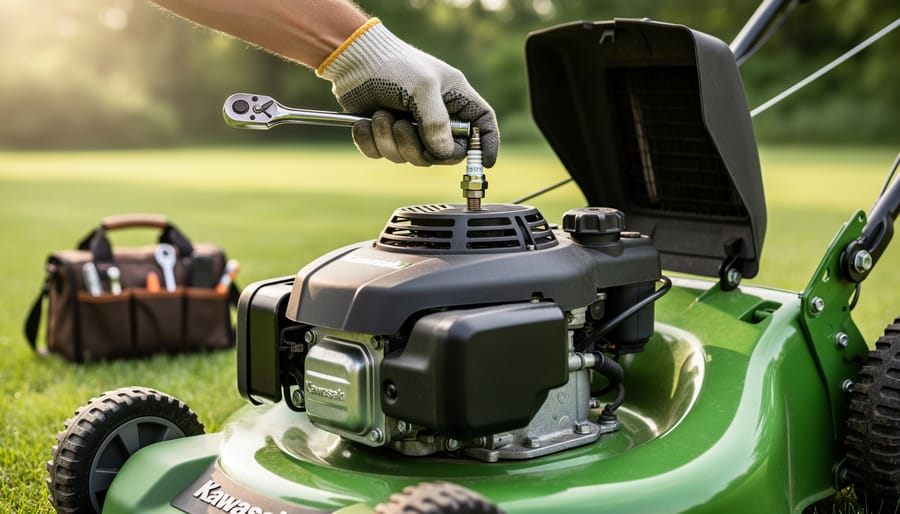
Start by disconnecting the spark plug wire and tipping your mower to access the blade assembly. Remove the blade bolt and examine the adapter for rounded edges, cracks, or excessive wear around the mounting holes. A worn adapter won’t hold your blade securely, creating dangerous imbalance that can damage your mower’s engine bearings and deck. Match your replacement adapter to your specific mower model, as adapters vary by spindle size, blade center hole diameter, and mounting configuration.
The replacement process requires attention to torque specifications and proper orientation, but it’s far simpler than most people expect. By handling this maintenance yourself, you’re not only avoiding landfill waste from premature mower replacement but also gaining valuable knowledge about your equipment’s mechanics—skills that make sustainable lawn care more accessible and affordable for every gardener.
What Is a Lawn Mower Blade Adapter (And Why It Matters)
If you’ve ever flipped your lawn mower over to inspect the underside (always disconnect the spark plug first, by the way), you’ve probably noticed a small but mighty component sitting between your mower blade and the engine shaft. That’s your blade adapter, and while it might not look like much, it’s doing some seriously important work every time you mow.
Think of the blade adapter as the handshake between your engine and your blade. This metal piece fits snugly onto the engine’s drive shaft and locks your blade into position, transferring all that rotational power from the engine directly to the blade. Without a properly functioning adapter, your blade simply won’t spin correctly, if it spins at all.
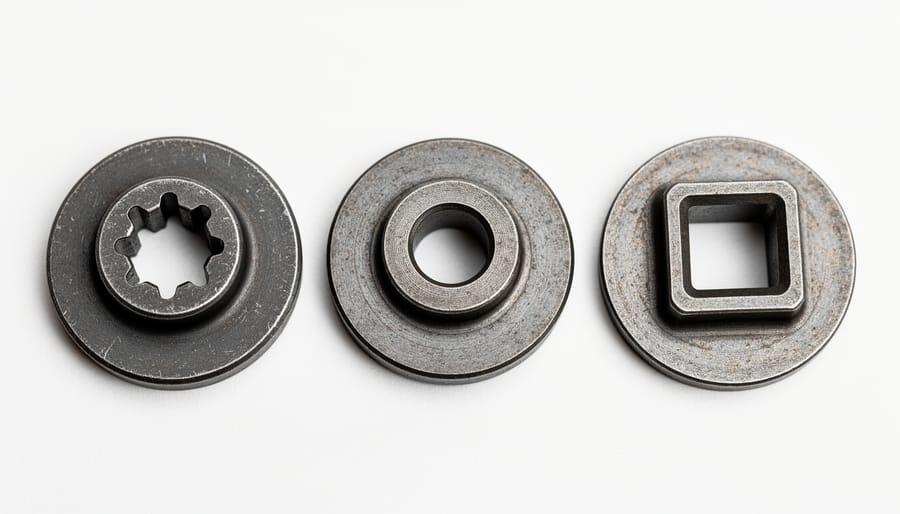
Blade adapters come in several shapes, and identifying yours is the first step toward a successful replacement. The most common types include star-shaped adapters with multiple points radiating from the center, round adapters with a centered hole, and square adapters that fit onto a squared-off shaft. Each design serves the same purpose but requires its specific matching blade.
Here’s why this little component matters so much for safe, sustainable lawn care: a worn or damaged adapter creates dangerous wobble, produces uneven cuts that stress your grass, and can even cause your blade to detach mid-mow. That wobble also puts unnecessary strain on your engine bearings, potentially shortening your mower’s lifespan and creating more waste down the line. When you keep your adapter in good condition, you’re not just maintaining your mower, you’re practicing the kind of preventive care that reduces replacements and keeps equipment out of landfills. Pretty impressive for something that typically costs less than twenty dollars.
Signs Your Blade Adapter Needs Replacement
Your lawn mower will usually give you clear signals when the blade adapter is failing, and recognizing these early can prevent both poor cutting performance and potential safety hazards. Let’s walk through the warning signs so you can catch this issue before it becomes a bigger problem.
The most common symptom is excessive vibration during operation. If your mower suddenly starts shaking more than usual or you feel stronger vibrations through the handle, the adapter may be worn or cracked. This happens because the adapter can no longer hold the blade securely in its centered position, creating an imbalance as the blade spins at high speed.
You might also notice your blade wobbling or appearing loose even when the retaining bolt seems tight. This wobble indicates the adapter’s mounting surface has worn down or become damaged. Sometimes you can actually see the blade moving side to side if you carefully tip the mower and manually rotate it (with the spark plug disconnected, of course).
Unusual grinding, rattling, or clunking noises coming from underneath your mower deck are red flags too. These sounds suggest metal-on-metal contact where the adapter has failed, allowing components to strike each other during operation.
Uneven cutting patterns across your lawn can also point to adapter problems. When the adapter fails, the blade doesn’t spin true, leaving strips of taller grass or scalped patches.
Finally, always perform a visual inspection. Look for cracks, stripped threads, corrosion, or any deformation in the adapter itself. If you spot visible damage, replacement isn’t just recommended—it’s essential for safe operation and maintaining your mower’s performance while protecting your investment in sustainable lawn care equipment.
Tools and Materials You’ll Need
Before diving into your adapter replacement project, let’s gather everything you’ll need. Having the right tools on hand makes this job surprisingly straightforward, even if you’re tackling it for the first time.
Your essential toolkit includes a socket wrench set with various sizes (typically 1/2-inch to 3/4-inch sockets work for most mowers), a sturdy block of wood or blade wedge to safely secure the blade during removal, and durable work gloves to protect your hands from sharp edges. You’ll also want a wire brush for cleaning accumulated grass debris and rust, penetrating oil for stubborn bolts, and safety glasses because debris happens.
The star of the show is, of course, your replacement adapter itself. Finding the correct one requires a bit of detective work. Check your mower’s manual for the model number, or look for stamped information on the original adapter. Many hardware stores and online retailers allow you to search by mower brand and model, which takes the guesswork out of compatibility. When possible, bring your old adapter along for comparison.
Here’s a sustainability tip I always share: invest in quality tools that will last for years rather than cheaper options that need frequent replacement. A well-maintained socket set serves multiple lawn care projects, reducing waste and saving money long-term. Keep your tools clean and lightly oiled, storing them in a dry place to prevent rust and extend their working life.
Safety First: Preparing Your Mower for Blade Work
Here’s something I’ve learned from years of lawn care: most DIY mower injuries happen because someone rushed through the safety prep. I get it—you’re eager to fix that adapter and get back to mowing. But trust me, taking ten minutes now beats a trip to urgent care every single time.
Start by disconnecting the spark plug wire. This single step prevents accidental starts while you’re working. Simply pull the boot off the spark plug and tuck it away where it can’t accidentally reconnect. Next, consider draining the fuel tank, especially if you need to tip your mower on its side. Use a hand siphon to transfer gasoline into an approved container—never down storm drains or onto the ground, as this contaminates soil and groundwater. Many auto parts stores and recycling centers accept old fuel for proper disposal, keeping your lawn care practices sustainable.
Position your mower on a flat, stable surface. If you’re tilting it, check your owner’s manual first—most mowers should tilt with the air filter side up to prevent oil contamination. Place cardboard underneath to catch any residual fuel drips and protect your workspace.
Don’t skimp on protective gear. Heavy-duty work gloves protect against sharp blade edges, while safety glasses shield your eyes from debris. These blades are surprisingly sharp, even when they look dull. I keep dedicated mower-work gloves in my shed because regular garden gloves just don’t offer enough protection.
This preparation phase isn’t optional—it’s the foundation for successful, injury-free blade work.
Step-by-Step Blade Adapter Replacement Process
Removing the Old Blade and Adapter
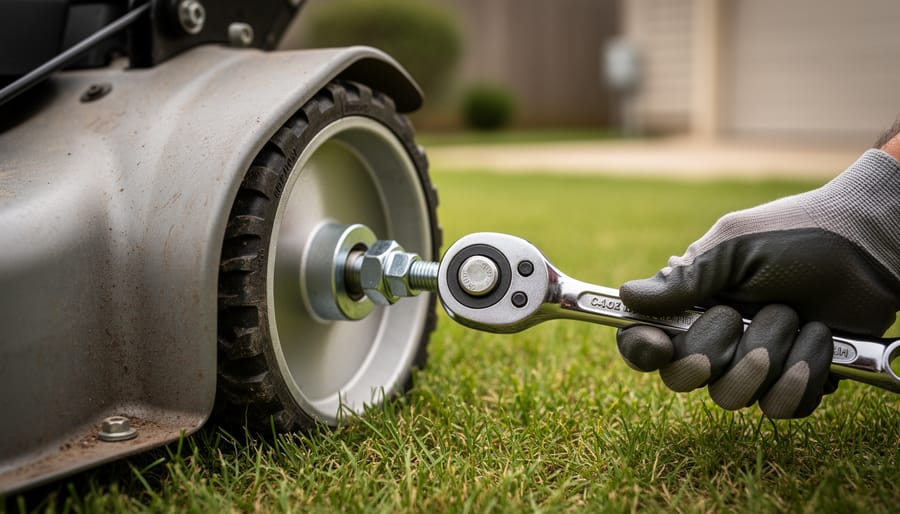
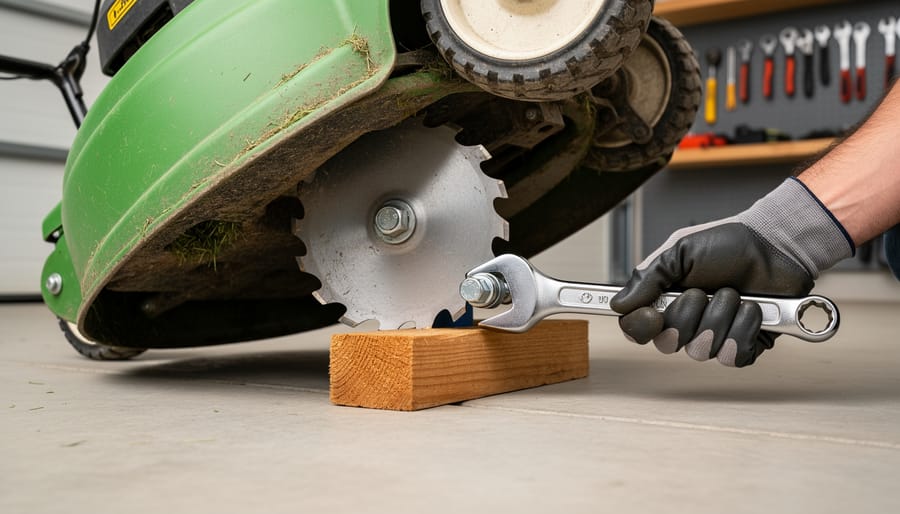
Now comes the hands-on part! First things first, you’ll need to secure the blade to prevent it from spinning while you work. The easiest method is to place a wooden block between the blade and the mower deck, wedging it firmly in place. This simple trick protects both you and your equipment.
Next, it’s time to loosen the center bolt. Here’s where many beginners get confused about which direction to turn. Most lawn mower blades use standard right-hand threading, meaning you’ll turn the bolt counterclockwise to loosen it. However, some models do feature reverse threading, so check your owner’s manual if you’re unsure. Apply steady pressure with your socket wrench or breaker bar. If the bolt seems stubborn, that’s completely normal after months of vibration and exposure to grass clippings.
For particularly stubborn bolts, try applying penetrating oil and letting it sit for 15-20 minutes. This eco-friendly approach beats forcing things and potentially damaging threads. A little patience now saves headaches later.
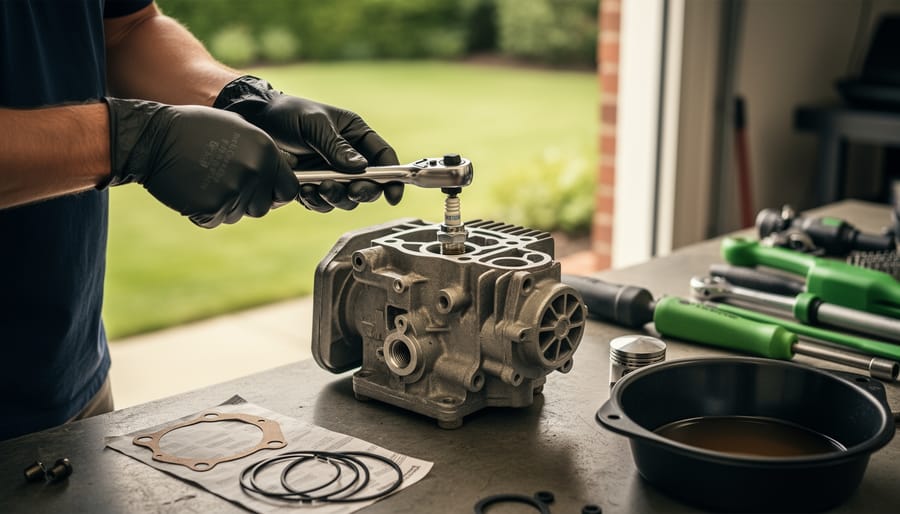
Once the bolt is removed, carefully lift the blade away. You’ll now see the adapter sitting on the crankshaft. The adapter might slide off easily, or it could be stuck from corrosion. If it’s resistant, gently wiggle it while pulling upward. Avoid using excessive force or prying tools that could damage the crankshaft.
Take this moment to inspect the crankshaft itself for any damage or excessive wear. A quick wipe with a clean cloth removes debris and lets you see the condition clearly, helping ensure your new adapter will seat properly.
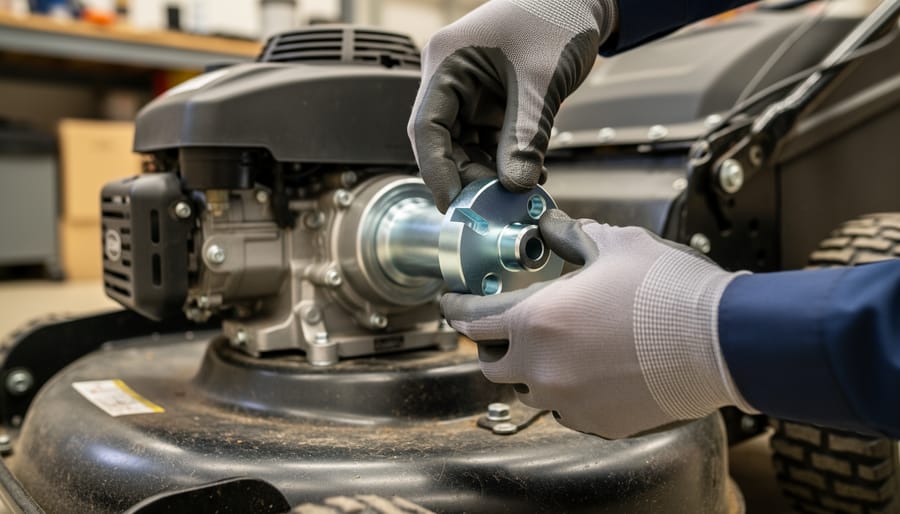
Installing the New Adapter
Before installing your new adapter, take a moment to inspect the engine shaft itself. Wipe away any grass clippings, oil residue, or dirt with a clean rag. Look for signs of wear, scoring, or damage on the shaft’s surface. A damaged shaft can compromise even a brand-new adapter, so addressing this now saves frustration later. This quick check embodies sustainable lawn care by helping you maximize the lifespan of all your mower components.
Now you’re ready to position the new adapter. The key here is proper orientation. Most adapters have a specific top and bottom, often indicated by a flat side on the shaft opening or a manufacturer’s mark. Slide the adapter onto the shaft, ensuring it sits flush against the engine’s mounting surface. There should be no gaps or wobbling at this stage.
Here’s where many folks stumble: forcing the adapter onto a shaft that hasn’t been cleaned properly, or installing it upside down. Both mistakes lead to blade wobble and premature wear. If your adapter doesn’t slide on smoothly, don’t force it. Remove it, recheck the shaft for debris, and verify you’ve got the correct replacement part.
Align any keyways or slots carefully. These small features prevent the adapter from spinning independently of the shaft, so precise alignment is essential for safe, effective mowing.
Reinstalling the Blade Correctly
Now that you’ve successfully replaced your adapter, it’s time to reunite blade with mower—and this step deserves your full attention! Proper blade installation is where all your careful adapter work pays off, so let’s make sure everything comes together perfectly.
First, check your blade’s orientation. The cutting edges should face toward the direction of rotation, typically angled upward toward the mower deck. Think of it like airplane wings—they need to create lift to pull grass upward for a clean cut. Installing a blade upside-down won’t just give you a disappointing trim; it can damage your mower and waste fuel, which isn’t exactly sustainable lawn care!
Slide the blade onto your freshly installed adapter, ensuring any centering holes or locating pins align properly. Hand-thread the retaining bolt clockwise until snug, then reach for your torque wrench. Most residential mowers require 35-50 foot-pounds of torque, but always verify your manufacturer’s specifications—over-tightening can strip threads or crack the adapter you just replaced, while under-tightening creates dangerous vibration.
Give the blade a gentle spin by hand to confirm it rotates freely without wobbling. This final check ensures your adapter replacement has created a solid foundation for safe, efficient mowing seasons ahead.
Testing Your Repair and Final Adjustments
Before starting your mower, do a quick visual check to ensure the adapter sits flush and the blade spins freely by hand. Now here’s the moment of truth: start your mower on a flat surface, standing clear of the discharge chute. Let it run for about 30 seconds at idle speed, listening carefully for any unusual rattling, grinding, or wobbling sounds. A properly installed adapter should run smoothly and quietly.
If everything sounds good, gradually increase to full throttle and listen again. You shouldn’t feel excessive vibration through the handle. Take your first test cut on a small patch of grass, watching for an even cutting pattern. Uneven cuts or strange noises mean you’ll need to shut down immediately and recheck your installation, ensuring the blade is oriented correctly and all fasteners are properly tightened.
Sometimes minor adjustments are needed. If there’s slight vibration, the blade might need balancing or the adapter could require repositioning. However, if problems persist after rechecking everything, don’t hesitate to consult a professional repair service. There’s wisdom in knowing when a task exceeds our comfort level. A local small engine mechanic can diagnose issues quickly, and you’ll have learned valuable knowledge for future maintenance. Remember, safe operation always takes priority over saving a few dollars.
Preventing Future Adapter Wear
A little preventive care goes a long way in extending the life of your blade adapter and saving you time and money down the road. Think of it as giving your mower a regular health check—just a few simple habits can prevent premature wear.
Start by making regular visual inspections part of your routine maintenance schedule. Every few mowing sessions, flip your mower over and examine the adapter for signs of wear, cracks, or looseness. Catching problems early means you can address them before they cause damage to other components.
Proper torque is essential when installing blades. Over-tightening can strip threads or crack the adapter, while under-tightening allows excessive movement that accelerates wear. Invest in a torque wrench and consult your owner’s manual for the correct specifications—it’s a small investment that protects your equipment.
One of the best ways to reduce adapter stress is avoiding impacts with rocks, tree roots, and other hard objects. Walk your lawn before mowing to remove debris, and raise your cutting height in areas where obstacles might be hiding. These impacts don’t just dull your blade—they transfer tremendous force through the adapter.
Finally, embrace sustainable practices like sharpening blades regularly instead of constantly replacing them. Sharp blades cut cleanly with less resistance, reducing strain on the adapter and engine while promoting healthier grass growth.
You’ve just completed a repair that many homeowners pay professionals to handle, and that’s something to feel proud of. Replacing your lawn mower blade adapter might have seemed intimidating at first, but by following proper safety protocols—disconnecting the spark plug, wearing protective gloves, and working on a stable surface—you’ve kept yourself safe while extending your mower’s life. This kind of hands-on maintenance is exactly what sustainable lawn care is all about: fixing rather than replacing, reducing waste, and building a deeper connection with your tools.
Remember, regular inspections of your blade adapter, along with broader mower maintenance, will help you catch problems before they become expensive emergencies. Keep that replacement adapter in your toolkit, clean your mower deck after each use, and you’ll enjoy years of reliable performance. There’s genuine satisfaction in hearing your mower start up smoothly, knowing you solved the problem yourself. You’ve saved money, gained valuable skills, and taken another step toward more self-sufficient, environmentally conscious lawn care. Your yard—and your wallet—will thank you for it.