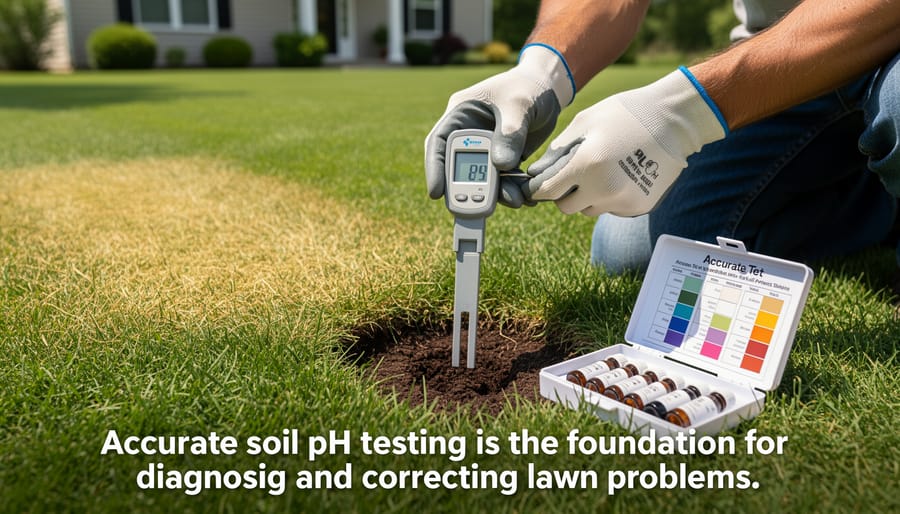
Test your lawn’s pH level using an inexpensive soil test kit from your local garden center—simply collect samples from several spots across your yard, mix them together, and follow the kit instructions to get a reading within minutes. Most grass thrives between 6.0 and 7.0 pH, so if your results fall outside this range, you’ve likely found why your grass won’t grow as thick and green as you’d like.
Apply lime to raise acidic soil (below 6.0) or sulfur to lower alkaline soil (above 7.5), but do this gradually—soil pH changes slowly, and overdoing amendments wastes money and can shock your lawn. Spread the recommended amount based on your test results, typically in early spring or fall when grass isn’t stressed, and plan to retest in six months since soil naturally resists pH changes through a process called buffering.
Understanding soil pH isn’t just about numbers on a chart. When pH strays too far from ideal, your grass literally can’t access the nutrients already in your soil, no matter how much fertilizer you apply. Iron, nitrogen, and phosphorus become chemically locked up in acidic conditions, while alkaline soils bind up iron and manganese. This explains why some lawns stay pale and patchy despite regular feeding—the nutrients are there, but unavailable.
The good news? Correcting pH problems delivers lasting results that transform struggling turf into the enviable lawn you’ve been working toward, and the process is more straightforward than most homeowners realize.
What Soil pH Actually Means for Your Grass
The Sweet Spot: Ideal pH Ranges for Different Grass Types
Here’s the thing about grass and pH: different types have different preferences, and knowing your grass type is half the battle won. Think of it like houseguests—some prefer their coffee strong and acidic, while others want it mild and smooth.
Cool-season grasses, those hardy varieties that thrive in northern climates and cooler temperatures, generally prefer a slightly acidic to neutral pH range of 6.0 to 7.0, with the sweet spot around 6.5. Kentucky bluegrass, tall fescue, fine fescues, and perennial ryegrass all fall into this category. If you’re managing a lawn in the Northeast, Midwest, or Pacific Northwest, you’re likely dealing with these grass types. The good news? Most soils in these regions naturally fall within this range, though acid rain and organic matter decomposition can gradually push pH lower over time.
Warm-season grasses are a bit more flexible and forgiving. Bermudagrass, zoysiagrass, St. Augustine, and centipedegrass dominate southern lawns and prefer a pH range of 6.0 to 7.5. Bermudagrass, the workhorse of southern athletics fields, actually performs admirably even up to 7.5. St. Augustine is similarly adaptable, which is why it’s so popular along coastal areas where soils can vary significantly. Centipedegrass stands out as the outlier—it actually prefers more acidic conditions, thriving best between 5.0 and 6.0, making it perfect for those naturally acidic southern soils without amendments.
The practical takeaway? Know your grass type before you start adjusting pH. Testing your soil first prevents you from solving problems you don’t have, saving money and supporting more sustainable lawn care practices.
Why pH Controls What Your Grass Can Actually Eat
Think of soil pH as the gatekeeper to your lawn’s pantry. Even if your soil is packed with nutrients, the wrong pH locks the door, leaving your grass unable to access what it needs to thrive. It’s frustrating to fertilize diligently only to see mediocre results, but pH might be the missing piece of your puzzle.
Here’s what happens at different pH levels. When soil becomes too acidic (below 6.0), essential nutrients like nitrogen, phosphorus, and potassium start becoming less available. Meanwhile, toxic elements like aluminum and manganese become more soluble, potentially harming grass roots. On the flip side, when soil turns too alkaline (above 7.5), iron, manganese, and phosphorus get locked up in chemical compounds your grass roots simply can’t absorb. This is why lawns on alkaline soil often show yellowing despite having iron present in the soil.
Most grass species thrive between 6.0 and 7.0 pH because this sweet spot maximizes nutrient availability across the board. Picture a bell curve where nutrients peak in availability right in that ideal range, then drop off sharply on either end. Phosphorus, crucial for root development, becomes particularly problematic outside this zone, binding tightly to soil particles.
Understanding this relationship helps explain why pH correction is often the most sustainable, cost-effective lawn improvement you can make. Rather than constantly adding more fertilizer that your grass can’t fully use, adjusting pH unlocks the nutrients already present, reducing waste and environmental impact.
Signs Your Lawn Has a pH Problem
When Your Soil Is Too Acidic (Low pH)
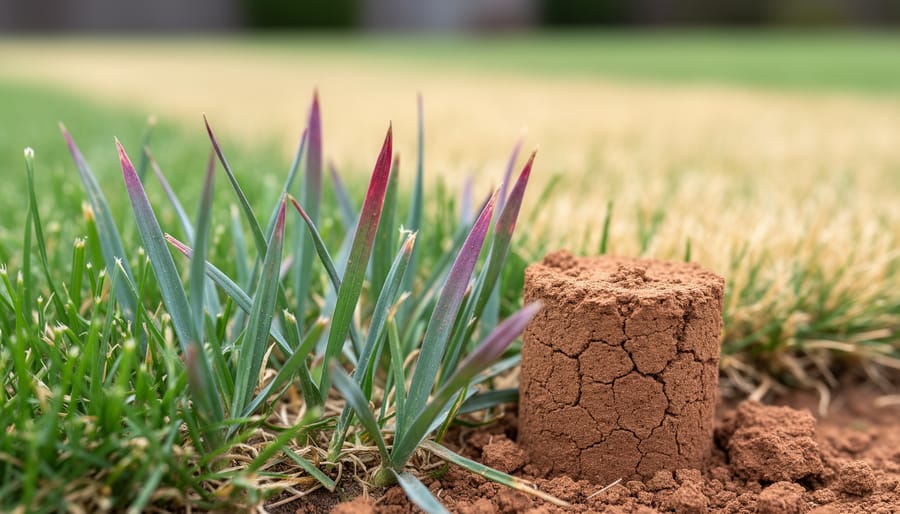
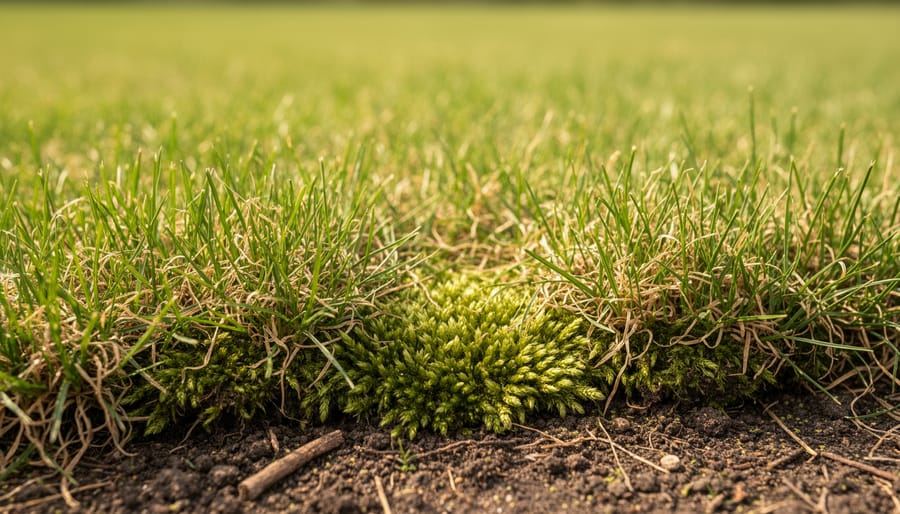
When your soil pH dips below 6.0, you’re entering acidic territory, and your lawn will start sending distress signals. One of the most telltale signs? Moss taking over your grass. If you notice those velvety green patches spreading across your yard, especially in shady or damp areas, acidic soil is likely rolling out the welcome mat for moss while making life difficult for your grass.
You might also find yourself scratching your head when your fertilizer not working despite regular applications. That’s because acidic soil locks up essential nutrients like nitrogen, phosphorus, and potassium, making them unavailable to grass roots even though they’re technically present. It’s like having food in a locked pantry.
Watch for yellowing grass blades, particularly older leaves, which signal nutrient deficiencies caused by that acidic environment. Your lawn might look thin and weak, struggling to fill in bare spots. Weeds like dandelions, plantain, and sorrel absolutely thrive in acidic conditions, so if they’re multiplying faster than you can pull them, your pH is probably too low.
I’ve seen countless homeowners spend hundreds on premium fertilizers, only to discover their real problem was acidic soil all along. Testing your pH first saves time, money, and frustration.
When Your Soil Is Too Alkaline (High pH)
If your lawn’s pH is creeping above 7.5, you’ll start noticing some telltale signs that your grass isn’t happy. The most distinctive symptom is iron chlorosis, where your grass blades turn yellow but the veins remain green, creating a striped appearance. This happens because alkaline soil locks up iron and other micronutrients, making them unavailable to your grass roots even when they’re present in the soil.
You might also notice stunted growth despite keeping up with your watering schedule. Your grass just seems lackluster and thin, refusing to thrive no matter how much care you give it. This is frustrating, I know, but understanding the cause helps you fix it effectively.
Pay attention to the weeds that show up uninvited. Alkaline-loving weeds like bindweed, chickweed, and certain clovers often colonize high-pH lawns. While these weeds aren’t necessarily bad (clover actually fixes nitrogen naturally), their dominance can signal a pH imbalance that’s favoring them over your desired grass species.
Another clue is patchy, uneven growth patterns where some areas look okay while others struggle. This often reflects variations in soil pH across your lawn. The good news? Alkaline soil is generally easier to correct than acidic soil, and with sustainable amendments like sulfur or organic compost, you can gradually bring that pH down to a grass-friendly range.
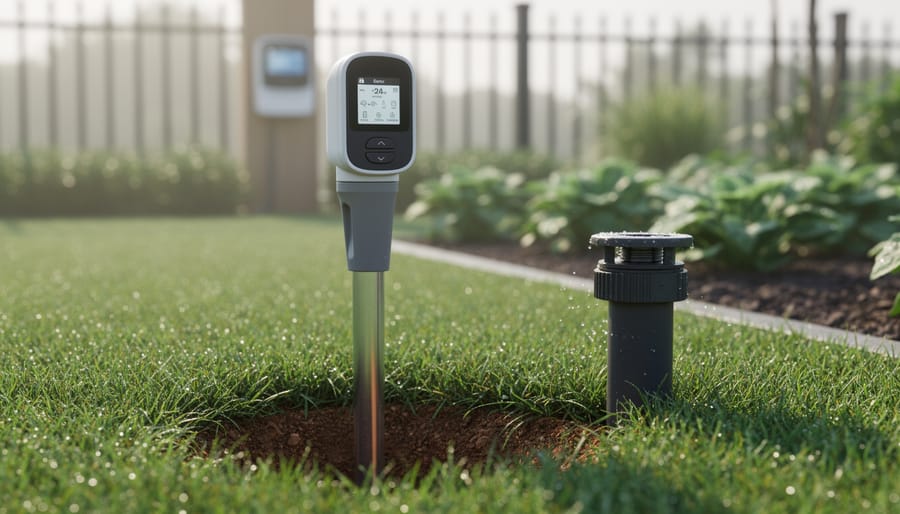
How to Test Your Grass Soil pH (The Right Way)
DIY Testing Kits vs. Professional Lab Analysis
When it comes to testing your grass soil pH, you’ve got two main paths: grabbing a DIY kit or sending samples to a professional lab. Let’s break down what works best for your situation.
DIY testing kits are wonderfully convenient and budget-friendly, typically costing between $10 and $30. I’ve used countless home kits over the years, and they’re perfect for quick checks and routine monitoring. Digital pH meters (around $20-40) give instant readings, while probe-style testers are super affordable at $10-15. For more comprehensive results, look for quality test strips or color-match kits from brands like MySoil, Luster Leaf’s Rapitest, or the reliable Soil Savvy kit, which includes lab analysis for about $30.
The trade-off? Home kits measure pH accurately enough for most purposes but won’t give you the detailed nutrient breakdown that professional labs provide. Professional soil testing through your local extension office or commercial labs costs $15-50 and delivers precise pH measurements plus information about nitrogen, phosphorus, potassium, and micronutrients. This comprehensive picture is incredibly valuable when you’re starting a new lawn or troubleshooting persistent problems.
Here’s my recommendation: Use DIY kits for annual monitoring once you know your soil’s baseline. They’re perfect for tracking whether your amendments are working. Spring for professional testing every 3-4 years, when establishing new grass, or when facing mysterious lawn issues that simple pH adjustments aren’t solving. This balanced approach keeps costs reasonable while ensuring you’re making informed decisions about your lawn care.
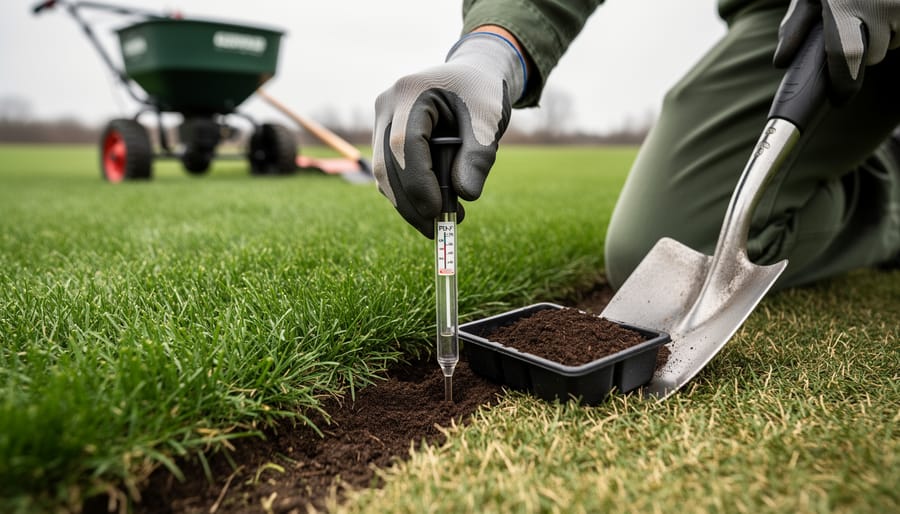
Taking Samples That Actually Tell You Something
Getting an accurate soil pH reading isn’t complicated, but it does require a bit of technique. Think of it like baking—measure carefully, and you’ll get reliable results.
Start by collecting samples from 10 to 15 random spots across your lawn. I know that sounds like a lot, but here’s why it matters: soil pH can vary significantly even within a small yard. That bare patch near the oak tree might be quite different from the sunny area by your driveway. By combining multiple samples into one composite sample, you’ll get a true picture of your lawn’s overall condition.
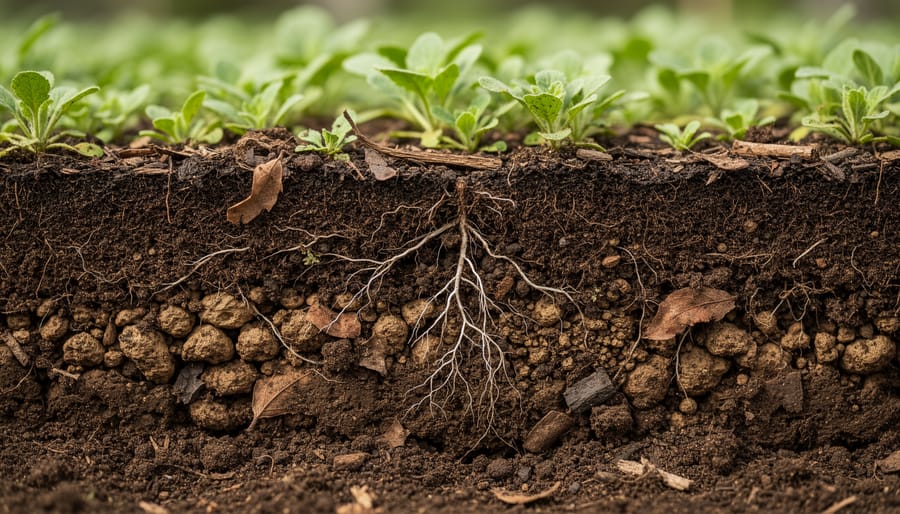
For each spot, remove any grass clippings or debris from the surface, then take a core sample 4 to 6 inches deep. This is your grass’s root zone, where pH actually affects nutrient availability. Mix all your samples together in a clean plastic bucket—avoid metal containers as they can contaminate your sample.
Timing matters too. Test in early spring or fall when the soil is workable but not waterlogged. Avoid testing right after fertilizing or liming, as you’ll need to wait at least six weeks for accurate results.
The biggest mistake I see? Testing only one spot and assuming it represents the entire lawn. Another common error is sampling too shallow—surface samples don’t reflect what roots are experiencing. Also, skip that spot where your dog always does his business; it’s not representative of your lawn’s overall pH and will skew your results unnecessarily.
Fixing pH Problems: Practical Solutions That Work
Raising pH in Acidic Soils (Liming Your Lawn)
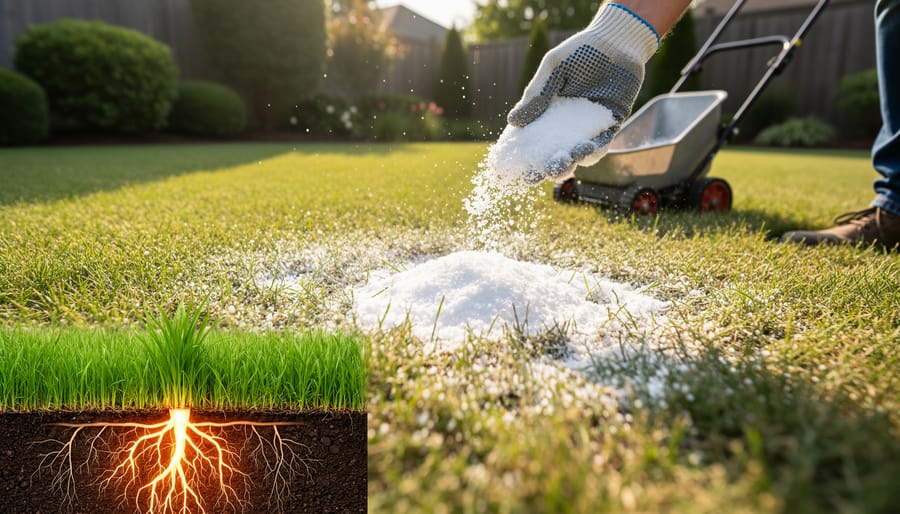
If your soil test reveals acidic conditions that need correcting, liming is your go-to solution for raising pH and transforming weak grass growth into a thriving lawn. Think of lime as your soil’s antacid—it neutralizes excess acidity and creates the balanced environment your grass craves.
You’ll encounter two main types of lime at your garden center: calcitic lime and dolomitic lime. Calcitic lime is pure calcium carbonate, perfect when your soil only needs pH adjustment. Dolomitic lime contains both calcium and magnesium, making it ideal if your soil test shows magnesium deficiency alongside low pH. I always recommend letting your soil test results guide this choice rather than guessing.
Calculating how much lime you need depends on three factors: your current pH, your target pH, and your soil type. Sandy soils require less lime than clay soils because they have lower buffering capacity. Your soil test report typically includes lime recommendations, but as a general guideline, raising pH by one full point in loamy soil requires about 50 pounds of lime per 1,000 square feet. Clay soils might need 75-100 pounds for the same adjustment.
Timing matters significantly for effective liming. Fall application works best because winter moisture helps lime break down and penetrate the soil gradually. Spring application is your second-best option, ideally six weeks before heavy growing season. Avoid liming during drought or when grass is stressed.
For application, use a broadcast or drop spreader for even coverage. Water lightly afterward to start the activation process, but don’t drench the lawn. Lime works slowly—expect to wait 3-6 months for noticeable pH changes.
From a sustainability perspective, lime is wonderfully eco-friendly since it’s a naturally occurring mineral. However, wear a dust mask during application to protect your lungs, and keep pets off the lawn until you’ve watered it in. Never over-apply lime thinking faster is better—excessive pH swings create new nutrient problems, defeating your purpose entirely.
Lowering pH in Alkaline Soils
I’ll be honest with you: lowering pH in alkaline soil is tougher than raising it in acidic conditions. Think of alkaline soil as stubbornly holding onto its high pH, while acidic soil is more willing to budge. But don’t worry, it’s definitely doable with patience and the right approach.
Elemental sulfur is your most effective option for significant pH reduction. Soil bacteria convert it to sulfuric acid, which gradually lowers pH over several months. For moderately alkaline soil (pH 7.5-8.0), you’ll typically need about 1-2 pounds of elemental sulfur per 100 square feet to drop the pH by half a point. Apply it in early fall so it has time to work before spring growth begins.
Iron sulfate (ferrous sulfate) works faster than elemental sulfur, showing results in 3-4 weeks, but it’s less potent and more expensive for treating large lawn areas. Use about 5 pounds per 100 square feet for similar results.
Here’s where I encourage sustainable practices: organic amendments like compost and peat moss not only help acidify soil gradually but also improve overall soil structure. Work 2-3 inches of compost into the top 6 inches of soil before seeding or sodding. While peat moss is more acidifying, consider sustainability and use it sparingly or opt for composted pine bark as an alternative.
Set realistic expectations. You won’t transform alkaline soil overnight, and heavily buffered soils with high calcium content may resist change stubbornly. Test your pH every 6-12 months and reapply amendments as needed, because alkaline soils tend to creep back up over time.
Understanding Soil Buffering: Why pH Changes Take Time
Clay vs. Sandy Soils: How Texture Affects pH Management
Understanding your soil texture is just as important as knowing your pH number, because clay and sandy soils behave completely differently when you’re trying to adjust pH levels. Think of it like this: clay soils are like a sponge that holds onto everything tightly, while sandy soils are more like a strainer that lets things pass right through.
Clay soils have a naturally high buffering capacity, which means they resist pH changes. Those tiny clay particles have lots of surface area and hold nutrients and minerals much more firmly. When you add lime to raise pH in clay soil, you’ll need significantly more product compared to sandy soil, sometimes two to three times as much. The good news? Once you’ve adjusted the pH in clay, it stays stable much longer, often holding for several years before needing another amendment.
Sandy soils are the opposite. They’re easier to adjust initially since they have less buffering capacity, requiring smaller amounts of lime or sulfur. However, amendments wash through sandy soil quickly with rainfall and irrigation. You’ll likely need to retest and reapply more frequently, perhaps annually instead of every few years.
For practical homeowners, this means your soil texture directly impacts your budget and maintenance schedule. If you have clay soil, invest in a proper soil test first to avoid over-applying amendments. Be patient too, because clay takes longer to show pH changes, sometimes six months or more. Sandy soil gardeners should plan for more frequent, lighter applications and consider organic matter additions to improve nutrient retention. Understanding these differences helps set realistic expectations and saves you from frustration when your neighbor’s lawn responds differently than yours.
The Role of Organic Matter in pH Stability
Think of organic matter as your soil’s natural shock absorber for pH fluctuations. When you build healthy levels of organic material in your lawn soil, you’re creating a buffer system that resists dramatic pH swings, whether from heavy rainfall, fertilizer applications, or seasonal changes.
Here’s what makes organic matter so valuable: it contains humic substances that can both donate and accept hydrogen ions, essentially moderating acidic and alkaline conditions simultaneously. This means your soil becomes more forgiving and stable, giving your grass a consistent growing environment.
The beauty of this approach is that it works gradually and naturally. By practicing grasscycling (leaving clippings on your lawn after mowing), you’re returning valuable organic matter to the soil with every cut. Those clippings break down within days, feeding beneficial microorganisms that further enhance soil structure and buffering capacity.
Adding compost is another fantastic way to boost organic matter. Just a quarter-inch layer applied annually can significantly improve pH stability over time. Unlike quick-fix amendments that address immediate pH problems, organic matter provides long-term insurance against future imbalances. Plus, you’re improving soil drainage, water retention, and nutrient availability all at once—a true win-win for sustainable lawn care.
Long-Term pH Management: Keeping Your Lawn in Balance
How Often Should You Test and Adjust?
Here’s the realistic truth about testing schedules: you don’t need to obsess over pH levels, but you shouldn’t ignore them either. For most lawns, testing once a year is perfectly adequate. The best time? Early spring or fall, when you’re already thinking about lawn care anyway.
If you’ve recently applied amendments to correct pH issues, patience is your friend. Retest about 6-8 weeks after application to see how things are progressing, but remember that significant pH changes, especially in clay soils, can take several months to fully develop. Sandy soils respond faster, sometimes showing changes in just 4-6 weeks.
Your testing frequency might need adjusting based on a few factors. If you’re dealing with extreme pH problems or heavy clay soil, consider testing twice yearly until you’ve reached your target range. Lawns in areas with high rainfall may need more frequent monitoring since water can gradually shift pH over time. Once your pH is stable and your grass is thriving, you can even stretch testing to every other year.
Keep a simple log of your results and amendments. This creates a helpful history that makes future adjustments easier and prevents you from over-correcting, which wastes money and isn’t environmentally friendly.
Fertilizer Choices and Their Impact on Soil pH
Here’s something many gardeners don’t realize: your fertilizer choice can quietly shift your soil pH over time, either helping or hindering your lawn care goals. Let’s talk about making smart fertilizer decisions that work with your pH, not against it.
Most synthetic nitrogen fertilizers, like ammonium sulfate and urea, are acidifying. Each time you apply them, they gradually lower your soil pH through a natural process where beneficial soil bacteria convert ammonium to nitrate. If you’re already battling acidic soil, these products will make your situation worse over the seasons. On the flip side, if you have alkaline soil, these acidifying fertilizers can actually help bring your pH closer to that sweet spot grasses love.
Organic options like composted manure and alfalfa meal tend to have a more neutral effect on pH, making them excellent choices for maintaining balanced soil. Plus, they feed beneficial microbes and improve soil structure, which is a win for sustainability.
Nitrate-based fertilizers, such as calcium nitrate, have an alkalizing effect and can be useful if you’re working with acidic conditions. Some fertilizers even come pre-blended with lime to counteract their acidifying nature.
The key is knowing your starting pH and choosing fertilizers that support your long-term goals. Reading fertilizer labels carefully helps you understand what you’re actually applying. For sustainable lawn care, consider rotating between organic and synthetic options, which reduces your reliance on harsh amendments while building healthier soil biology. Your grass will thank you with stronger roots and better resilience.
Managing your soil’s pH isn’t a one-and-done task, but rather an ongoing commitment to your lawn’s foundation. Think of it as setting the stage for everything else you do in your yard. When pH levels are right, your grass can actually access the nutrients already in your soil, which means you’ll likely need fewer fertilizers, pesticides, and other inputs down the road. That’s not just good for your wallet, it’s better for the environment too.
If you’ve been battling lawn health problems despite your best efforts, testing your soil pH should be your first step. Get that test done, interpret the results honestly, and take action based on what you find. Whether you’re adding lime to raise pH or sulfur to lower it, remember that patience is part of the process. Soil chemistry changes gradually, and that’s actually a good thing since it means your corrections will be longer-lasting.
The beauty of proper pH management is how it reduces your reliance on chemical interventions. When your grass can efficiently absorb nutrients, you’re working with nature rather than against it. Test your soil annually, make adjustments as needed, and trust the process. Your lawn will reward your attention to this fundamental detail with healthier growth, better resilience, and that lush green appearance you’re after.