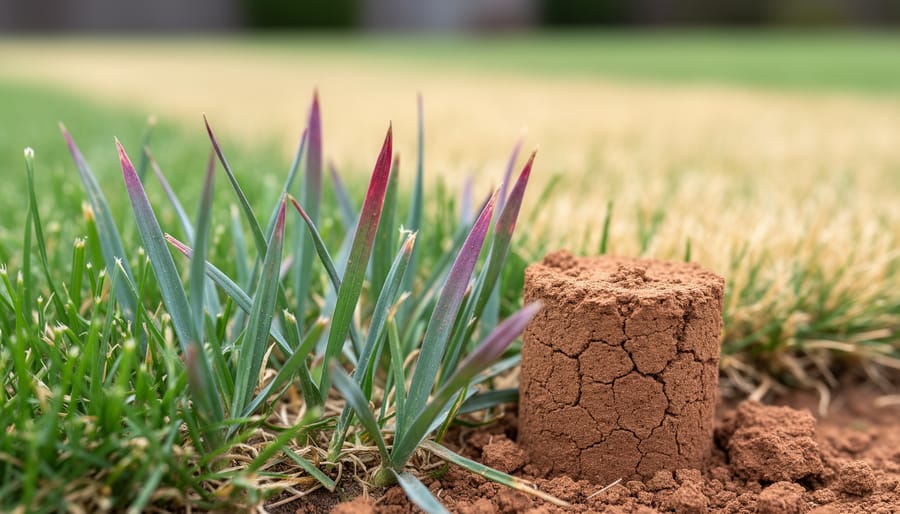
Check your electric mower’s manual or manufacturer website first—most corded and battery-powered models use direct-drive motors without any belts at all, saving you time chasing maintenance that doesn’t exist. If you own a self-propelled electric mower, inspect the drive belt every 25 hours of use for cracks, fraying, or glazing, as these models do require belt attention like their gas counterparts. Clean underneath your mower deck after every third mowing session to prevent grass buildup that forces the motor to work harder, shortening its lifespan and reducing cutting efficiency.
Electric mowers represent a genuine leap forward in sustainable lawn care—quieter operation, zero emissions, and dramatically simplified maintenance compared to gas alternatives. The belt confusion stems from decades of gas mower ownership, where belt replacements were routine summer rituals. Electric technology changed that equation entirely. Most electric mowers eliminated belts by connecting the blade directly to the motor shaft, removing a common failure point and cutting your maintenance checklist significantly.
Understanding what your specific model actually needs prevents wasted money on unnecessary parts and redirects your energy toward maintenance tasks that genuinely matter: battery care, blade sharpening, and electrical connection integrity. Self-propelled models bridge both worlds, using electric power for cutting while employing a traditional belt-driven wheel system for forward motion. These hybrid designs require the best of both maintenance approaches—electronic component care plus mechanical belt inspection—but still demand far less attention than any gas-powered alternative, making them ideal for environmentally conscious homeowners seeking convenience without compromise.
The Belt Reality: Do Electric Mowers Actually Have Belts?
Corded Electric Mowers: Direct Drive Systems
Here’s some good news for you: if you own a standard corded electric mower, you can cross belt maintenance off your to-do list entirely. These mowers are beautifully simple machines that typically use direct drive systems, meaning the motor connects straight to the blade without any belts involved.
Think of it like the difference between a bicycle with gears and a child’s tricycle. Corded electric mowers take the straightforward approach. The electric motor sits directly above or connects immediately to the blade spindle, delivering power without intermediary components. This direct connection is one reason these mowers are so wonderfully low-maintenance compared to their gas-powered cousins.
This design choice aligns perfectly with sustainable lawn care practices because fewer parts mean less waste and fewer replacements over time. You’ll never need to hunt down replacement belts or deal with the frustration of a slipping belt mid-mow.
The direct drive system does mean you’ll want to keep the blade area clean and ensure the motor housing stays free of debris, but that’s standard care rather than belt-specific maintenance. It’s this elegant simplicity that makes corded electric mowers such practical, eco-friendly choices for homeowners who value straightforward solutions.

Battery-Powered Mowers: Belt-Free Design
Here’s some good news if you’ve recently switched to a battery-powered mower: you can cross belt maintenance off your to-do list entirely! Unlike their gas-powered cousins, most battery-electric mowers feature a beautifully simple belt-free design that’s both sustainable and hassle-free.
Battery mowers typically use direct-drive motors, meaning the motor connects straight to the blade without any belts or pulleys in between. This streamlined construction eliminates several potential failure points and saves you from the regular belt inspections and replacements that gas mower owners face. It’s one of those wonderful situations where eco-friendly technology actually makes your life easier.
This direct-drive design contributes to the overall reliability of battery mowers, though like any machine, they can occasionally experience other issues requiring electric mower troubleshooting. The absence of belts means fewer moving parts to wear out, less maintenance overall, and more time enjoying your beautifully manicured lawn.
There is one exception worth noting: self-propelled battery mowers may include a drive belt that powers the wheels, not the cutting blade. We’ll cover that specific situation in the next section, but for now, celebrate this maintenance task you don’t need to worry about!
The Exception: Self-Propelled Electric Mowers
How to Tell If Your Self-Propelled Mower Has a Belt
If you own a self-propelled electric mower and suspect it might have a belt, here’s how to find out. Start by consulting your owner’s manual, which will clearly specify whether your model uses a belt-driven system. This is the quickest way to get definitive information about your specific mower.
For a hands-on check, ensure your mower is completely powered off and unplugged from any power source. Flip the mower on its side (with the air filter side up if it’s a hybrid model) to examine the undercarriage. Look beneath the deck between the wheels and motor. If your mower has a drive belt, you’ll typically see a rubber belt connecting the motor to the rear wheels through a pulley system.
Most purely electric push mowers don’t have belts at all since they use direct motor drive. However, some self-propelled models do incorporate belts to transfer power from the motor to the wheels. These belts are usually visible without removing any covers, though you might need a flashlight to see clearly.
If you’re unsure what you’re looking at, take a photo and compare it with images in your manual or online resources. Remember, knowing your mower’s drive system helps you perform the right maintenance tasks and avoid unnecessary work on components that don’t exist in your model.

Basic Belt Inspection for Self-Propelled Models
If you own a self-propelled electric mower, congratulations – you’re part of a select group that actually does need to think about belt maintenance! While most electric mowers are blissfully belt-free, your self-propelled model relies on a drive belt to power those wheels and make your mowing experience easier.
The good news? Checking your drive belt is straightforward and takes just a few minutes. Start by disconnecting the battery for safety, then locate the belt cover on your mower’s underside or rear wheel area. Once you’ve removed the cover, give that belt a good visual inspection. Look for common belt wear signs like cracking, fraying edges, glazing (a shiny, worn appearance), or any obvious damage. Run your fingers along the belt to feel for rough spots or thin areas.
Next, check the tension. A properly tensioned belt should have about half an inch of give when you press down on it. Too loose, and your mower won’t self-propel efficiently. Too tight, and you’ll wear out bearings prematurely.
Most manufacturers recommend replacing drive belts every 1-2 years or sooner if you notice slipping, squealing, or reduced self-propel performance. This simple maintenance task keeps your mower running smoothly and prevents those frustrating mid-mow breakdowns. Plus, catching wear early means you’re being proactive rather than reactive – always the sustainable approach to equipment care!
What Electric Mower Owners Should Actually Maintain

Blade Care: Your Most Important Maintenance Task
Your mower’s blade is the hardest-working part of your electric lawn mower, and keeping it in top shape makes all the difference between a healthy, vibrant lawn and one that looks stressed and brown. Think of it this way: a dull blade doesn’t cut grass cleanly—it tears it, leaving ragged edges that turn brown and make your lawn vulnerable to disease. Plus, a sharp blade means your motor works less hard, saving energy and extending your mower’s life. Now that’s sustainable lawn care in action!
Start by inspecting your blade monthly during mowing season. Look for nicks, bends, or dull edges. If you spot any blade issues, it’s time to take action. Always disconnect the power source completely before touching the blade—remove the battery or unplug your corded mower. Safety first, always.
For sharpening, you can use a metal file, angle grinder, or take it to a professional. I recommend sharpening every 20-25 hours of mowing. Follow the existing angle of the blade edge, making smooth, even strokes. The goal is sharp, not razor-sharp—you want it to cut grass, not paper. After sharpening, check the blade’s balance by hanging it on a nail through the center hole. If one side dips, remove a bit more metal from the heavier side.
Cleaning is simpler but equally important. After each mow, scrape off grass clippings and debris. This prevents buildup that can harbor moisture and cause rust, plus it keeps your mower running efficiently.
Replace blades when they become too thin from repeated sharpening, typically every 2-3 years with regular use. Quality replacement blades are an investment in your lawn’s health and your mower’s performance.
Battery Health and Longevity
Your electric mower’s battery is its heart, and treating it right means years of reliable service and less waste heading to landfills. The good news? Lithium-ion batteries are pretty forgiving when you follow a few simple guidelines.
First, let’s talk charging. Avoid letting your battery completely drain before recharging. These batteries actually prefer partial discharge cycles, so topping up after each mowing session is perfectly fine. Just use the manufacturer’s charger—third-party options might seem convenient, but they can cause battery problems down the line.
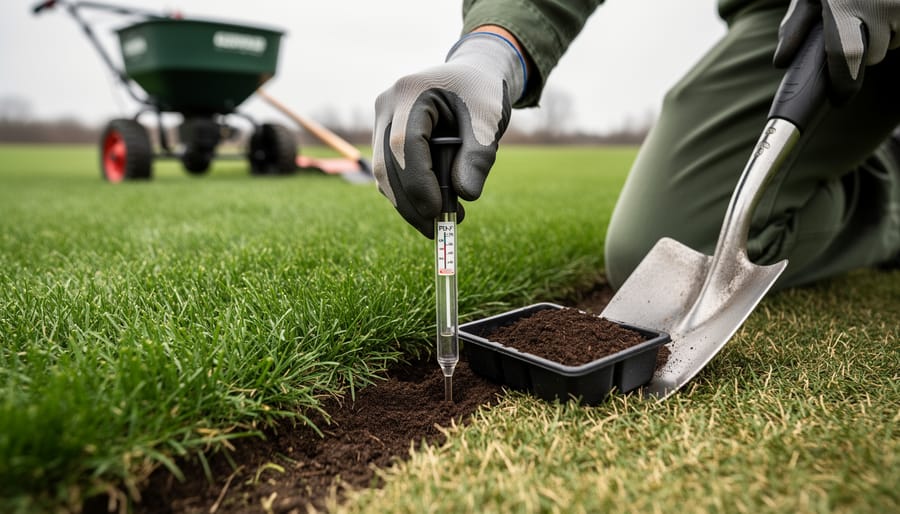
Storage makes a huge difference in battery lifespan. If you’re putting your mower away for winter, charge the battery to about 40-60% capacity first. Store it in a cool, dry place where temperatures stay between 50-77°F. Extreme heat or cold can permanently damage the cells, reducing capacity faster than normal use ever would.
During the growing season, keep your battery contacts clean. A quick wipe with a dry cloth removes grass clippings and debris that can interfere with charging. If you notice decreased runtime, it might just need a full charge cycle—let it run down to about 20%, then charge completely.
Here’s a sustainability win: proper battery care can extend lifespan from 3-5 years to 5-7 years or more. That’s fewer batteries manufactured and less electronic waste, all while keeping your mower running strong.
Motor and Electrical Component Checks
Your electric mower’s motor is the heart of the machine, and keeping it healthy doesn’t require mechanical expertise. Start by unplugging your mower and giving the motor housing a visual once-over. Dust, grass clippings, and debris love to accumulate around ventilation ports, which can cause overheating during those longer mowing sessions.
Use a dry cloth or soft brush to gently clean around these vents every few mowings. I’ve found that a simple toothbrush works wonders for reaching tight spots. Check that air can flow freely through all openings, as proper ventilation extends motor life significantly.
Next, inspect all visible electrical connections, looking for signs of corrosion, fraying wires, or loose plugs. These small issues can snowball into bigger problems if ignored. Pay special attention to the power cord where it connects to the mower, as this area experiences the most stress.
If you notice any damaged wiring or unusual burning smells, don’t attempt repairs yourself. Electric motors demand respect and professional attention when problems arise. This simple five-minute inspection routine, done monthly during mowing season, prevents most electrical headaches while supporting your commitment to sustainable lawn care through equipment longevity.
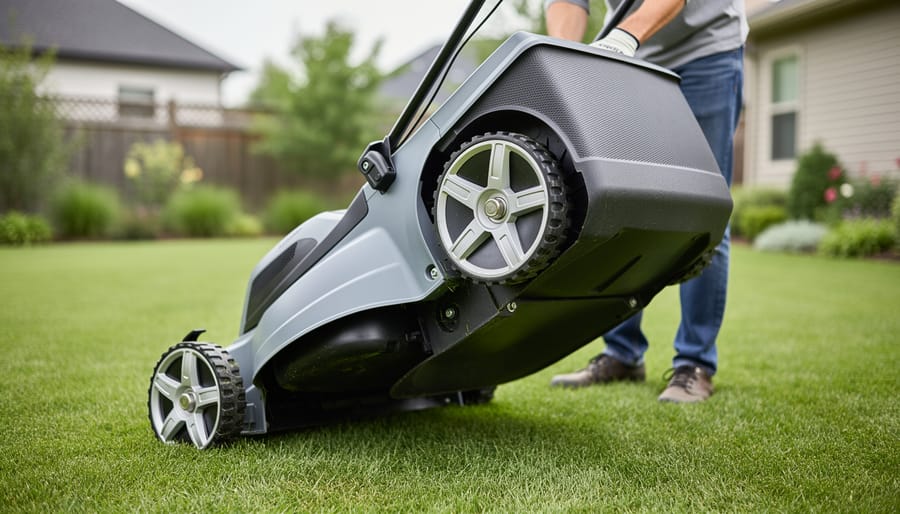
Deck Cleaning and Corrosion Prevention
After each mowing session, take a moment to clean your mower deck. This simple habit prevents grass clippings from accumulating and causing corrosion, which can significantly extend your mower’s lifespan.
For sustainable cleaning, avoid harsh chemicals. Instead, use a stiff brush or plastic scraper to remove dried grass from underneath the deck. I like to tip my mower on its side (always check your manual for the proper direction) and brush away the buildup. For stubborn residue, a spray bottle with plain water works wonders. Let it soften the grass for a few minutes, then scrape it away.
To prevent rust on metal components, keep your mower stored in a dry location. If you notice any paint chips or scratches on the deck, touch them up promptly with rust-resistant paint to create a protective barrier. Some gardeners apply a thin layer of vegetable oil to the underside of the deck, which creates a natural coating that grass won’t stick to as readily.
During wet seasons, inspect your mower more frequently for signs of corrosion. Catching rust early means you can address it with simple cleaning rather than costly replacements. This preventive approach aligns perfectly with sustainable gardening practices while keeping your equipment running smoothly for years.
Creating Your Electric Mower Maintenance Schedule
Creating a maintenance schedule might sound intimidating, but trust me, electric mowers make this surprisingly manageable. Since you’re already embracing the more sustainable choice with an electric mower, keeping it in top shape is easier than you might think.
Let’s break this down by season, with realistic time estimates that fit into your weekend routine.
Spring (Pre-Season Startup – 20 minutes total):
Before your first mow, inspect the blade for winter damage or dullness (5 minutes). Clean any dust or debris from the motor vents and undercarriage (10 minutes). Check your power cord for fraying or your battery connections for corrosion (5 minutes). This quick once-over prevents problems before they start.
Throughout Mowing Season (Every 3-4 uses – 10 minutes):
After each few mowing sessions, brush away grass clippings from the deck and wheels. Wipe down the exterior with a damp cloth. This simple habit prevents buildup that could affect performance. Think of it as giving your mower a quick shower, nothing complicated.
Mid-Season Check (July – 30 minutes):
Halfway through summer, do a more thorough cleaning of the undercarriage. Inspect the blade again, as summer growth can dull it faster than expected. For battery models, check the battery health indicator if your model has one. Tighten any loose bolts or screws you notice.
Fall (End-of-Season Care – 25 minutes):
Clean everything thoroughly before storing. Sharpen or replace the blade so it’s ready next spring. For corded models, inspect the entire cord length carefully. Store your mower in a dry location, ideally indoors. If you have a battery model, store the battery separately at around 40-50% charge for optimal longevity.
Winter (Occasional Check – 5 minutes monthly):
During off-season, peek at your stored mower monthly. This catches any moisture issues or pest activity early.
Following this schedule means you’ll spend roughly 90 minutes annually on maintenance, a small investment for years of reliable, eco-friendly lawn care.
Here’s the good news: once you understand what your electric mower actually needs, you’ll discover it requires far less maintenance than its gas-powered cousins. No oil changes, no spark plug replacements, no carburetor cleanings—just a handful of straightforward tasks that keep your mower running smoothly for years.
By focusing on the right maintenance activities—cleaning your deck, sharpening blades, checking your battery health, and inspecting drive belts if you have a self-propelled model—you’re not just extending your mower’s lifespan. You’re making an active choice for environmental sustainability. A well-maintained electric mower operates at peak efficiency, using less energy and producing zero direct emissions while delivering that perfect cut your lawn deserves.
The beauty of electric mower maintenance is its simplicity. You don’t need a garage full of specialized tools or a mechanical engineering degree. Just regular attention to the basics will keep your mower performing beautifully season after season. And remember, every time you choose to maintain rather than replace, you’re reducing waste and supporting a more sustainable approach to lawn care. That’s something both your lawn and the planet can feel good about.