Check the spark plug first—a fouled or disconnected plug causes most starting failures, and cleaning or replacing this $3 part takes just five minutes with a socket wrench. Your Craftsman mower speaks to you through specific symptoms, and learning this language means the difference between a quick fix and an expensive repair shop visit.
When your mower refuses to start, runs rough, or cuts unevenly, you’re facing one of about a dozen common issues that any homeowner can diagnose and often repair themselves. Most problems stem from fuel system clogs, air flow restrictions, or blade maintenance—not catastrophic engine failure. Understanding this saves you money and keeps a perfectly serviceable machine out of the landfill, aligning with sustainable practices that benefit both your wallet and the environment.
This troubleshooting guide walks you through systematic diagnostics for each symptom your Craftsman mower displays. You’ll learn to identify whether that sputtering engine needs fresh fuel, a clean air filter, or a carburetor adjustment. We’ll cover starting problems, performance issues, cutting quality concerns, and self-propelled drive malfunctions using the same logical approach professional mechanics follow—but explained in plain language without assuming you have advanced mechanical knowledge.
The solutions ahead prioritize simple fixes first, often requiring nothing more than basic hand tools and readily available parts. By following these step-by-step methods, you’ll develop the confidence to maintain your mower proactively, preventing many issues before they occur and extending your machine’s lifespan for years of reliable service.
Understanding Your Craftsman Mower’s Basic Systems
The Four Things Every Mower Needs to Run
Before you dive into troubleshooting your Craftsman mower, let’s talk about the four essential elements every small engine needs to run properly. Think of these as the foundation of your diagnosis—once you understand them, fixing problems becomes much more straightforward.
First, your mower needs fuel that’s fresh and flowing freely. Old gasoline breaks down and causes more problems than you’d think. Second is spark—that electrical charge that ignites the fuel mixture. Without a strong spark from your spark plug, nothing happens. Third is air, which mixes with fuel for combustion. A clogged air filter starves your engine and prevents it from running efficiently. Finally, there’s compression—the pressure your engine creates to make combustion happen. Low compression usually signals more serious wear issues.
Here’s the good news: most mower problems trace back to the first three items, which are relatively easy to check and fix yourself. When you’re troubleshooting, mentally run through this checklist. Is fuel reaching the carburetor? Is the spark plug producing a strong blue spark? Is air flowing through a clean filter? By systematically checking these fundamentals, you’ll solve most issues without needing expensive repairs or throwing away a perfectly fixable mower—which is better for both your wallet and the environment.
Craftsman-Specific Features Worth Knowing
Before we dive into troubleshooting, it helps to understand what makes your Craftsman mower tick. Craftsman offers three main types of mowers, each with its own personality and common quirks.
Push mowers are the simplest of the bunch, perfect for smaller yards under a quarter acre. They’re straightforward machines with fewer parts to worry about, which means easier maintenance and repairs. Most issues you’ll encounter involve the starting system, blade engagement, or basic engine problems.
Self-propelled models add a drive system to save your energy on larger properties. These mowers share similar engine concerns with push models but introduce additional components like drive belts, transmission assemblies, and wheel gears. When troubleshooting these machines, you’ll want to check whether problems stem from the engine itself or the drive mechanism.
Riding mowers are the workhorses for properties over half an acre. They’re more complex, featuring electrical systems with safety switches, larger engines, cutting decks with multiple blades, and hydrostatic or gear transmissions. The good news? Their added complexity often means better diagnostics, as many models include indicator lights or gauges to point you toward problems.
Understanding which type you own helps narrow down potential issues quickly. Most Craftsman mowers also share common engine brands like Briggs & Stratton or Honda, meaning solutions often apply across different models. This compatibility makes finding fixes and replacement parts much easier for the DIY homeowner.
When Your Craftsman Mower Won’t Start
Check the Fuel System First
More often than not, when your Craftsman mower refuses to cooperate, the culprit is hiding somewhere in the fuel system. I learned this the hard way after spending an entire Saturday morning pulling the starter cord on my mower, only to realize I was trying to run it on last season’s stale gasoline. Let’s walk through the most common fuel-related issues and their surprisingly simple fixes.
Start by checking your fuel’s age. Gasoline begins breaking down after just 30 days, creating gummy deposits that wreak havoc on small engines. If your mower has been sitting idle since last season, drain that old fuel immediately. Here’s a sustainable tip: don’t pour it down the drain. Instead, take it to your local hazardous waste facility or auto parts store for proper disposal. Replace it with fresh fuel, and consider adding a fuel stabilizer if you’re storing your mower for more than a few weeks.
Next, inspect the fuel line for cracks, kinks, or blockages. Squeeze it gently along its length. It should feel pliable, not brittle. If you spot any damage or if fuel isn’t flowing freely when you disconnect the line at the carburetor, replacement is inexpensive and straightforward.
The fuel filter deserves attention too. This small component prevents debris from reaching your carburetor, but it can become clogged over time. If it looks dark or dirty, swap it out. Most Craftsman mowers use inline filters that simply clip into place.
Finally, carburetor problems often stem from those gummy deposits I mentioned earlier. If your mower starts but runs roughly or dies quickly, the carburetor jets may be clogged. You can try carburetor cleaner spray as a first step, but sometimes removal and thorough cleaning is necessary for a complete fix.
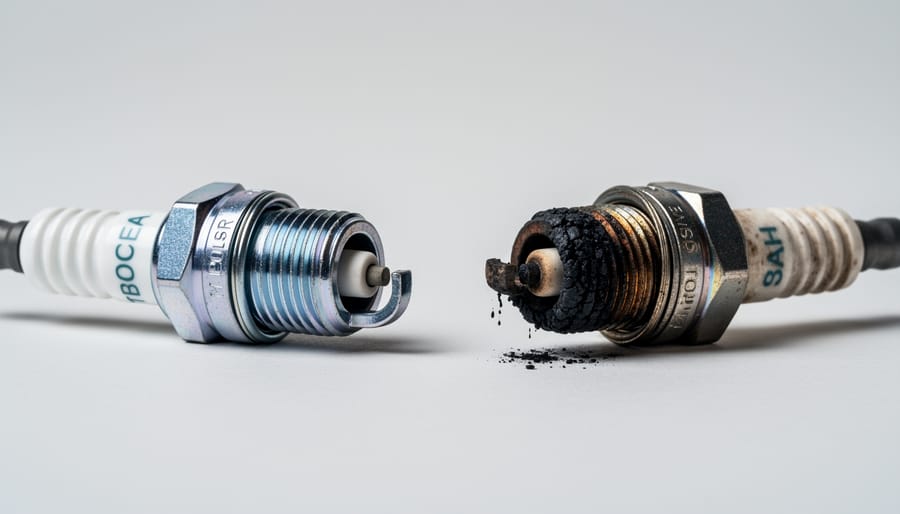
Spark Plug and Ignition Issues
When your Craftsman mower sputters, refuses to start, or runs inconsistently, the spark plug is often the culprit. Think of it as your mower’s heartbeat—without a strong spark, nothing happens. The good news? This is one of the most straightforward fixes you can tackle yourself.
Start by locating the spark plug, usually found on the front or side of the engine with a thick rubber boot attached. Before removing it, disconnect that spark plug wire for safety. Use a spark plug socket (typically 5/8 or 13/16 inch) to unscrew the plug. Once out, inspect it closely. A healthy plug should have a light tan or gray electrode. If you see heavy carbon buildup, oil residue, or a cracked ceramic insulator, it’s time for a replacement.
For cleaning, use a wire brush and spray cleaner to remove deposits, but honestly, spark plugs are inexpensive enough that replacing them annually makes sense for reliable performance and better fuel efficiency—a sustainable choice that reduces emissions too.
If your mower turns over but won’t start even with a new plug, check the ignition coil. This component sends electricity to the spark plug, and connections can corrode or loosen over time. Ensure all wires are firmly attached and inspect for visible damage.
Don’t overlook the safety switch connections either. These switches prevent the mower from starting unless safety conditions are met. A faulty connection here can mimic ignition problems, leading you down the wrong troubleshooting path entirely.
Air Filter and Breathing Problems
Think of your air filter as your mower’s lungs—when it can’t breathe properly, performance suffers immediately. A clogged air filter is one of the most common culprits behind starting issues, rough running, and poor power output, yet it’s also one of the easiest problems to fix yourself.
Start by locating the air filter housing, typically found on the side of the engine. Remove the cover (usually held by a clip or screws) and pull out the foam or paper filter. Hold it up to sunlight—if you can’t see light passing through, it’s definitely time for attention.
For foam filters, wash them in warm, soapy water, rinse thoroughly, and let them dry completely before reinstalling. A few drops of clean engine oil rubbed into the foam helps trap debris more effectively. Paper filters should never be washed; instead, gently tap them against a hard surface to dislodge loose dirt. If they’re heavily soiled, cracked, or oil-stained, replacement is your best option. Most filters cost under ten dollars and can save you expensive engine repairs down the road.
Check your filter monthly during mowing season, especially if you’re cutting in dusty conditions. This simple five-minute task keeps your Craftsman running smoothly and extends engine life significantly. Clean air equals efficient combustion, better fuel economy, and reliable starts every time.
Battery and Electrical Troubles (Riding Mowers)
When your riding mower refuses to turn over, the battery often deserves first attention. Start by testing the battery voltage with an inexpensive multimeter—you’re looking for at least 12.4 volts. While you’re there, inspect those battery terminals for the white, crusty buildup that loves to sabotage connections. A wire brush and a mixture of baking soda and water work wonders for cleaning them up, creating a better electrical pathway.
Next, locate your mower’s fuse box, typically found under the seat or near the battery. A blown fuse is a simple fix that saves many unnecessary repair bills. Replace any darkened or broken fuses with the exact amperage rating specified in your manual.
Don’t overlook the safety switches—these unsung heroes prevent accidents but can cause starting headaches when they malfunction. Your riding mower likely has switches under the seat, at the brake pedal, and near the blade engagement lever. Test each one by bypassing it temporarily with a jumper wire to identify culprits. This systematic approach gets you back to mowing while supporting a more sustainable, repair-first mindset rather than rushing to replace equipment.
Engine Starts But Runs Rough or Dies
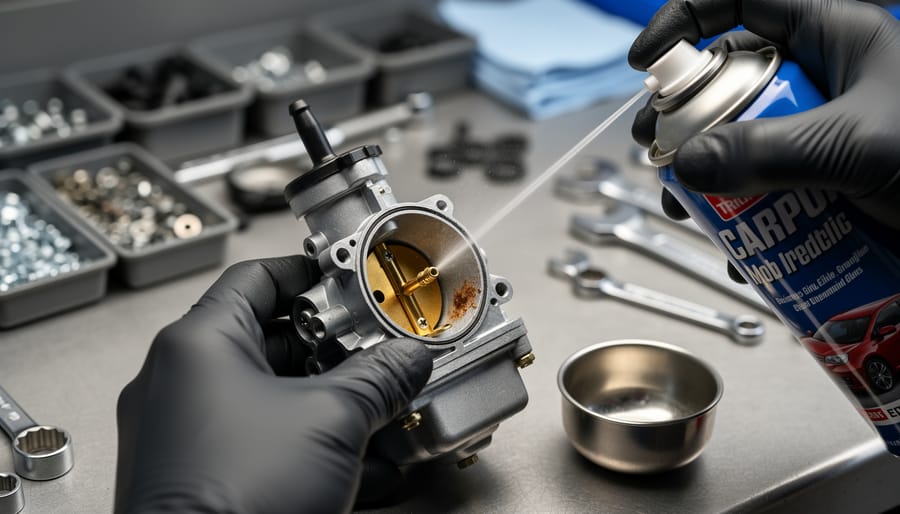
Carburetor Cleaning and Adjustment
A dirty carburetor is one of the most common culprits behind starting troubles and rough running. The good news? With a little patience, you can tackle this yourself and save a service call.
First, safety comes first. Disconnect the spark plug wire to prevent accidental starts, and work in a well-ventilated area away from open flames. Old fuel often leaves behind gummy deposits that clog tiny passages, so you’re essentially giving your mower’s fuel system a fresh start.
Remove the air filter and carburetor by disconnecting the fuel line (have a container ready to catch any drips). Take a photo with your phone before disassembly so you’ll remember where everything goes. Use carburetor cleaner spray to thoroughly flush out all passages and jets. An old toothbrush works wonders for scrubbing external buildup. For stubborn deposits, let parts soak in cleaner for 15-20 minutes.
When reassembling, check the carburetor gasket and replace it if cracked or compressed. A bad seal causes air leaks that throw off the fuel mixture. Most Craftsman mowers have a simple adjustment screw for idle speed. Start the engine and let it warm up for five minutes, then turn the screw slowly until the engine runs smoothly without sputtering or racing.
Here’s a sustainable tip: prevent future carburetor problems by using fresh fuel and adding a fuel stabilizer, especially before winter storage. This simple step keeps fuel from breaking down and forming those troublesome varnish deposits. Your mower and the environment will thank you for reducing the need for harsh chemical cleaners down the road.
Governor and Throttle Issues
If your Craftsman mower is racing uncontrollably or struggling to maintain steady speed, you’re likely dealing with governor or throttle issues. The good news? These problems are often simpler to fix than you might think.
Start by checking the governor linkage, which connects the engine to the throttle. Look for bent, disconnected, or worn components. The governor spring should be properly attached at both ends without visible damage. If the spring looks stretched or broken, replacing it is an inexpensive fix that can restore proper speed control.
For throttle problems, inspect the cable running from your control lever to the carburetor. A frayed, kinked, or stuck cable prevents smooth operation. You may need throttle cable adjustments to restore proper tension and responsiveness.
Check that the throttle lever moves freely through its full range. Sometimes debris or dried lubricant creates resistance. Clean the linkage area and apply a small amount of white lithium grease to moving parts.
If your engine surges rhythmically, the governor might be hunting for the right speed due to carburetor issues rather than governor malfunction. Rule out fuel problems first before diving deeper into governor repairs. Taking a methodical approach saves time and helps you avoid unnecessary part replacements while keeping your mower running efficiently for seasons to come.
Fuel Cap Venting Problems
Here’s something many mower owners overlook: that little fuel cap on your Craftsman isn’t just keeping gas from spilling out. It’s designed with a tiny vent that allows air to enter the tank as fuel flows to the engine. When this vent gets clogged with dirt or debris, it creates a vacuum inside the tank that essentially starves your engine of fuel.
You might notice your mower acting like it’s running out of gas after running smoothly for 10-15 minutes, then mysteriously working again after cooling down. This classic symptom points directly to a venting problem.
The good news? Testing is incredibly simple. While your mower is running, carefully loosen the fuel cap. If you hear a hissing sound and the engine suddenly runs better, you’ve found your culprit. The vacuum seal was broken, allowing fuel to flow freely again.
To fix this issue sustainably, first try cleaning the cap’s vent hole with compressed air or a thin wire. Sometimes that’s all it needs. If cleaning doesn’t work, replacement caps are inexpensive and readily available. Consider keeping a spare on hand as preventive maintenance. Regular cleaning during your seasonal tune-ups will help prevent this frustrating problem from interrupting your mowing routine.
Blade and Cutting Performance Problems
Blades Won’t Engage or Disengage
When your mower blades refuse to cooperate, it’s usually one of three culprits: the engagement cable, the PTO clutch, or a safety switch. Let’s walk through these common issues together.
Start by inspecting the blade engagement cable running from your control lever to the deck. Look for fraying, stretching, or disconnection at either end. If the cable feels loose or doesn’t return smoothly when released, it likely needs adjustment or replacement. Most cables have an adjustment nut you can tighten to restore proper tension.
Next, check for PTO clutch problems. This electromagnetic component engages and disengages your blades. Listen for a clicking sound when you pull the engagement lever. If you hear nothing, or smell burning, the clutch may have failed. Test it with a multimeter to check if it’s receiving proper voltage, usually around 12 volts.
Don’t overlook safety switches, which are designed to protect you by preventing blade engagement under unsafe conditions. Your seat switch, brake switch, or reverse safety switch could be faulty. Bypass each switch temporarily during testing to identify the problem, but always reconnect them afterward for safe operation. These simple checks will have your blades spinning again while keeping your mower running sustainably for years to come.
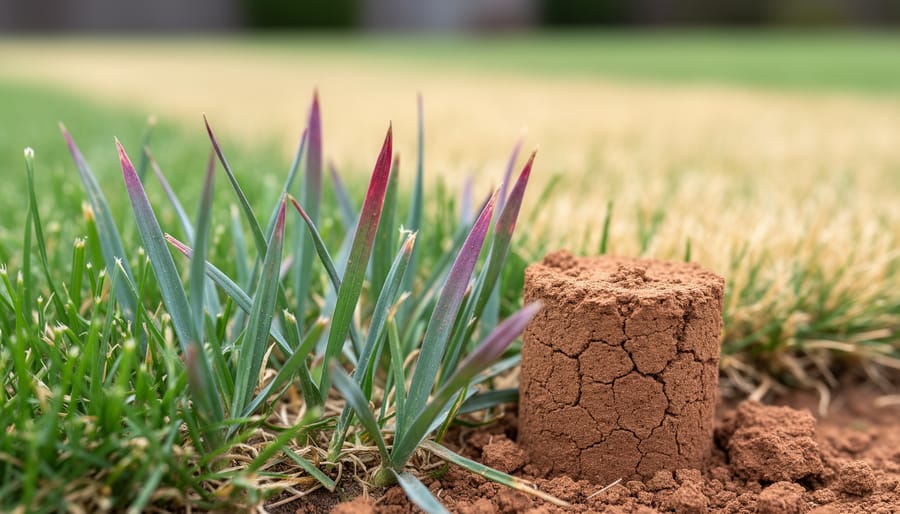
Uneven Cutting and Scalping
Nothing’s more frustrating than finishing your lawn only to discover uneven stripes and patchy scalped areas. The good news? This common issue usually has straightforward fixes that don’t require a repair shop visit.
Start by checking your deck level. Park your mower on a flat surface and measure the blade height from the ground on both sides. Your Craftsman’s deck should sit level side-to-side, with a slight forward pitch (about 1/4 inch lower in front than rear). Consult your owner’s manual for specific adjustment points. An unlevel deck creates that telltale stepped appearance in your grass.
Next, grab a tire pressure gauge. Uneven tire pressure is surprisingly often the culprit behind scalping issues. Check all tires against the manufacturer’s recommended PSI, usually found on the tire sidewall or in your manual. Even a few pounds difference can throw off your cut quality.
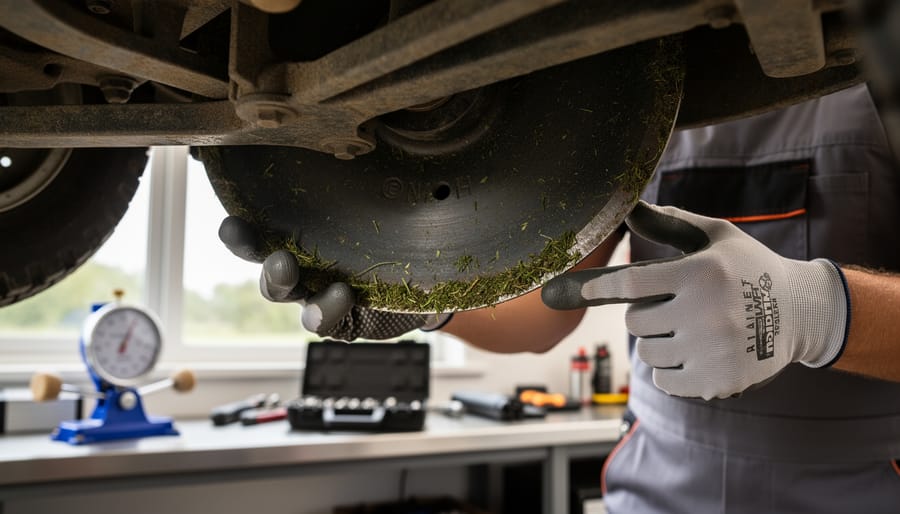
Finally, inspect your blades. Dull blades tear grass instead of cutting cleanly, leaving brown, ragged edges that invite disease. Remove the blade (disconnect the spark plug first for safety) and sharpen it with a file or grinder, maintaining the original angle. Here’s a pro tip: balance your blade afterward by hanging it on a nail through the center hole. If one side dips, file a bit more metal from that end. A balanced blade means smoother operation and better cuts, while reducing stress on your mower’s engine—a win for both your lawn and sustainability goals.
Excessive Vibration
If your Craftsman mower is shaking like it’s had too much coffee, it’s time to investigate. Excessive vibration isn’t just annoying—it can damage your mower and make for an unpleasant mowing experience.
Start by disconnecting the spark plug for safety, then flip the mower to inspect the blade. A bent or damaged blade is the most common culprit. Even a small bend creates imbalance at high speeds. If you notice any warping or damage, replace the blade immediately. This is also a great opportunity to check if the blade is properly secured—a loose blade bolt can cause serious vibration.
Next, examine the blade adapter and mounting hardware. These components can work loose over time from normal use. Tighten everything according to your manual’s specifications, but don’t overtighten.
Check the mower deck for cracks or damage, especially if you’ve hit rocks or stumps recently. A compromised deck can throw off the entire balance. Also, look for debris buildup under the deck—packed grass clippings can create vibration too.
Finally, inspect the engine mounting bolts. Loose engine mounts will definitely cause shaking. Taking these simple steps protects your investment and makes mowing more enjoyable while extending your mower’s lifespan.
Self-Propelled and Drive System Troubles
Self-Propelled Not Working or Weak
If your Craftsman walk-behind mower moves sluggishly or won’t propel itself at all, don’t worry—this is one of the more straightforward fixes you can tackle at home. The self-propelled system relies on a few key components working together, and identifying which one is causing trouble will get you back to easier mowing.
Start by checking the drive cable, which connects your handlebar control to the transmission. Engage the drive control and look underneath to see if the cable moves the drive mechanism. If nothing happens, the cable may be disconnected, frayed, or broken. Cable replacement is surprisingly simple and typically costs less than twenty dollars, making it an eco-friendly repair that extends your mower’s life rather than replacing the whole machine.
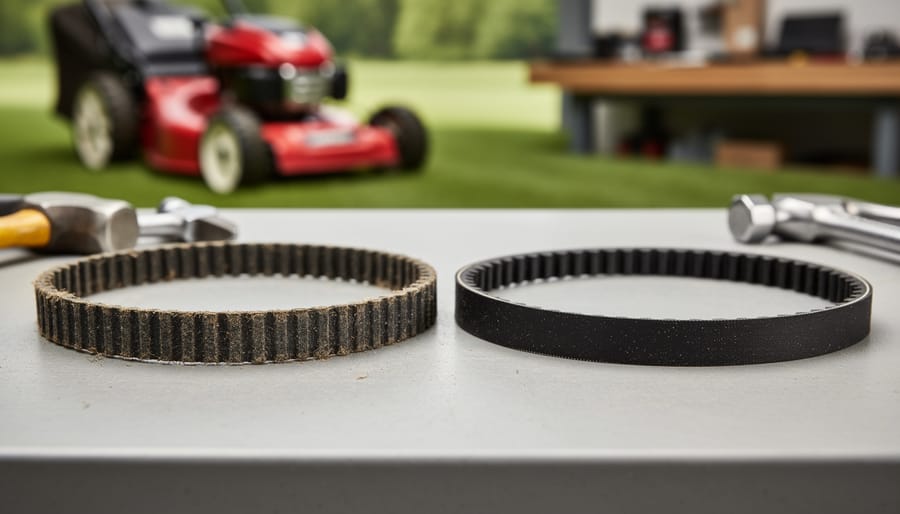
Next, inspect the drive belt located under the mower deck. Disengage the spark plug for safety, then tip the mower to access the underside. A worn, cracked, or broken belt is your culprit if the cable works fine. Belts naturally wear over time, and replacing them prevents the waste of discarding a functional mower.
Finally, check the transmission by ensuring the drive wheels spin freely when disengaged but lock when engaged. If they spin constantly or never engage, the transmission may need professional attention, though this is less common.
Regular maintenance prevents most drive issues—keep the cable lubricated, clear grass buildup from the belt area, and inspect components seasonally. These small efforts reduce waste and keep your mower running reliably for years.
Riding Mower Won’t Move or Moves Sluggishly
When your Craftsman riding mower refuses to budge or creeps along like a tired snail, it’s understandably frustrating. Let’s walk through the most common culprits together.
First, check your hydrostatic transmission fluid level. Low fluid is a frequent cause of sluggish performance. Locate the transmission reservoir, typically beneath the seat, and ensure it’s filled to the proper mark with the manufacturer-recommended fluid. If the level looks good, examine the drive belt that connects your engine to the transmission. A worn, loose, or damaged belt can’t transfer power effectively. Look for cracks, glazing, or excessive slack. Replacing a worn belt is a straightforward fix that can restore your mower’s pep.
Don’t overlook the bypass valve either. This small lever or rod allows you to push the mower manually when disengaged, but if it’s accidentally left in bypass mode, your mower won’t move under power. Make sure it’s fully engaged.
Tire pressure matters more than you might think. Uneven or low tire pressure, especially on the drive wheels, reduces traction and creates sluggish movement. Inflate all tires to the specifications listed in your owner’s manual.
For more detailed guidance on diagnosing riding mower movement issues, remember that systematic troubleshooting saves time and money while keeping your mower running efficiently for seasons to come.
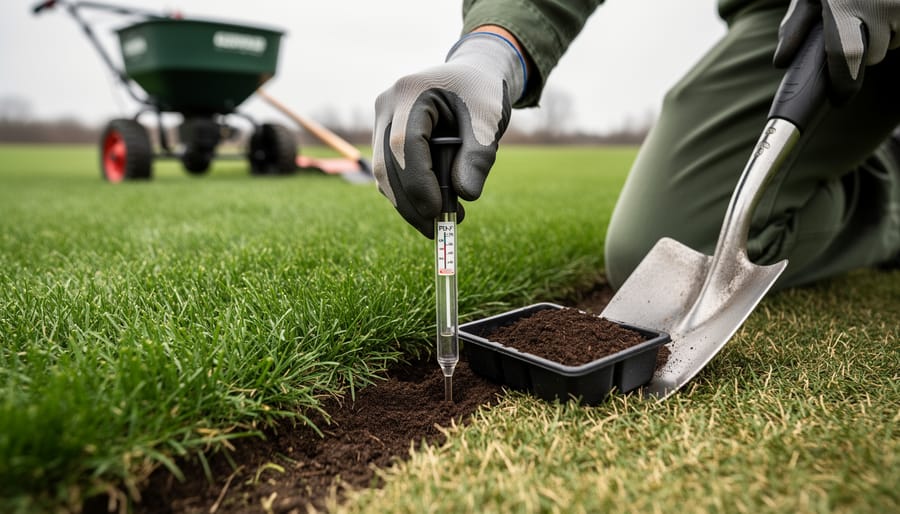
Seasonal Maintenance to Prevent Common Problems
Pre-Season Preparation
Before that first mow of the season, a little prep work goes a long way in preventing frustrating breakdowns. Start by draining last year’s stale fuel, which is often the culprit behind startup troubles. Replace it with fresh gasoline and check the oil level while you’re at it. Inspect the air filter for dirt buildup and either clean or replace it. Don’t forget to examine the spark plug for corrosion or wear. Give your blade a good look too—sharpen it if needed for cleaner cuts that are healthier for your grass. Check tire pressure and tighten any loose bolts or cables. Finally, reconnect the battery if you disconnected it for winter storage. This simple 15-minute routine saves hours of troubleshooting later and keeps your Craftsman running reliably all season long. Think of it as a spring wellness check for your mower.
End-of-Season Winterization
Proper winterization is your mower’s best friend when cold weather approaches, and it’s one of those tasks that takes just a little effort now to save you major headaches come spring. Think of it as tucking your Craftsman in for a long winter’s nap.
Start by running your mower until the fuel tank is nearly empty, then add a quality fuel stabilizer to whatever remains. This prevents the fuel from breaking down and gumming up your carburetor over winter. Run the engine for five minutes to circulate the stabilized fuel throughout the system. Alternatively, you can drain the fuel completely if you prefer, though stabilization is often more practical and reduces waste.
Change the oil while the engine is still warm, as this helps remove contaminants that could cause corrosion during storage. Remove the spark plug, add a tablespoon of fresh oil into the cylinder, and pull the starter cord a few times to distribute it. This protects internal components from rust.
Clean the mower deck thoroughly, removing all grass clippings and debris. Store your mower in a dry location, ideally covered with a breathable tarp rather than plastic, which can trap moisture.
If you’re retiring an old mower permanently, consider eco-friendly disposal. Many municipalities offer recycling programs for small engines, and metal components are highly recyclable. Some retailers even provide trade-in programs that ensure responsible recycling while giving you credit toward a new machine.
When to Call a Professional (And When to DIY)
Let’s be honest – you can handle more than you think! Most Craftsman lawn mower issues we’ve covered are absolutely DIY-friendly. Spark plug changes, air filter replacements, blade sharpening, and basic carburetor cleaning are all within reach for the average homeowner with basic tools and a little patience.
However, some repairs genuinely require professional help. If you’re facing engine rebuild needs, transmission problems, or electrical issues beyond simple safety switches, it’s time to call in the experts. Same goes if you’ve diagnosed the problem but lack the specialized tools – like torque wrenches for specific engine work or equipment to safely discharge capacitors on electric models.
Cost-wise, professional tune-ups typically run $75-150, while major repairs might hit $200-400. Before authorizing expensive work, compare that against replacement costs. If your mower is 8-10 years old and needs $300 in repairs, replacement might make more environmental and financial sense, especially with newer, more fuel-efficient models available.
Finding quality service matters. Check reviews, ask for upfront estimates, and choose repair shops that properly dispose of old oil and parts – sustainability doesn’t stop at your garage door. Local small-engine repair shops often provide better service than big-box stores and keep your money in the community.
Bottom line: Try the straightforward fixes yourself first. You’ll save money, learn valuable skills, and gain confidence. But don’t hesitate to seek professional help when needed – there’s wisdom in knowing your limits, and a properly running mower is worth the investment.
There’s something genuinely satisfying about diagnosing and fixing your own lawn mower, isn’t there? Most Craftsman mower problems you’ll encounter are completely fixable with a little patience, some basic tools, and the methodical approach we’ve outlined here. Whether you’re dealing with starting issues, uneven cuts, or drive problems, remember that these machines are designed to be maintained and repaired by homeowners like you.
The key is taking it one step at a time and not getting overwhelmed. Start with the simplest solutions first, like checking fuel quality or cleaning the air filter, before moving to more complex repairs. You’ll be surprised how often the fix is easier than you expected. Plus, keeping your mower running smoothly is better for your wallet and the environment than constantly replacing equipment.
We’d love to hear about your troubleshooting experiences! Did this guide help you solve a stubborn problem? Do you have a question we didn’t cover? Drop a comment below and let’s keep the conversation going. For more lawn care tips, seasonal maintenance schedules, and sustainable mowing practices, be sure to explore the additional resources available here at Mowing.Expert. Happy mowing!