Collecting rainwater from your roof can reduce your water bills by 30-50% while keeping your lawn and garden thriving during dry spells. Every inch of rain falling on a 1,000-square-foot roof produces about 600 gallons of water—enough to irrigate a typical suburban lawn for two weeks during summer.
The concept is beautifully simple: gutters channel rainfall into storage barrels or tanks, and you use that free water when your plants need it most. This isn’t just about saving money, though that’s certainly a welcome benefit. You’re also reducing strain on municipal water systems, preventing stormwater runoff that can carry pollutants into local waterways, and giving your plants a chemical-free drink that’s often better than chlorinated tap water.
Whether you’re managing a small vegetable garden or maintaining several acres, rainwater harvesting systems scale to fit your needs. A beginner might start with a single 55-gallon barrel connected to a downspout, while experienced gardeners often graduate to 500-gallon cisterns or elaborate underground storage systems with automated irrigation.
The beauty of rainwater harvesting lies in its accessibility. You don’t need special skills or expensive equipment to get started. Basic systems require minimal maintenance—just occasional cleaning of gutters and filters—and they pay for themselves within a few seasons. Even better, you’re taking a meaningful step toward water independence while nurturing healthier plants and a more sustainable landscape.
Why Rainwater Harvesting Makes Sense for Your Landscape
If you’ve ever watched rain pour down your driveway and into storm drains while your sprinkler system runs on a timer, you know there’s something a bit ironic about paying for water when nature provides it for free. Rainwater harvesting isn’t just a feel-good environmental practice—it makes real, practical sense for your landscape in ways that’ll benefit both your garden and your wallet.
Let’s talk dollars first, because who doesn’t love saving money? Depending on your location and lawn size, irrigation can account for up to half of your household water usage during growing season. By capturing and storing rainwater, you’re essentially creating a free water supply that reduces your monthly bills. Many homeowners report cutting their irrigation costs by 30-50% after installing even basic collection systems. When you consider the typical water waste that happens with conventional irrigation, those savings add up quickly.
But here’s something many gardeners don’t realize—rainwater is actually better for your plants than treated municipal water. It’s naturally soft, free from chlorine, fluoride, and dissolved salts that can build up in soil over time. Plants genuinely respond better to rainwater, often showing improved growth and healthier foliage. Think of it as giving your garden premium bottled water instead of tap water.
The environmental benefits extend beyond your property line too. Collecting rainwater reduces stormwater runoff, which carries pollutants into local waterways. You’re essentially keeping that water in your local ecosystem rather than sending it downstream.
Perhaps most valuable is the independence rainwater harvesting provides. During drought seasons when municipalities impose watering restrictions, your collected rainwater gives you flexibility to keep your landscape thriving. You’re not at the mercy of restriction schedules or wondering if you’ll face fines for watering on the wrong day. Your stored rainwater is yours to use when your plants need it most, making you a more resilient and resourceful gardener.

Understanding Your Rainwater Potential
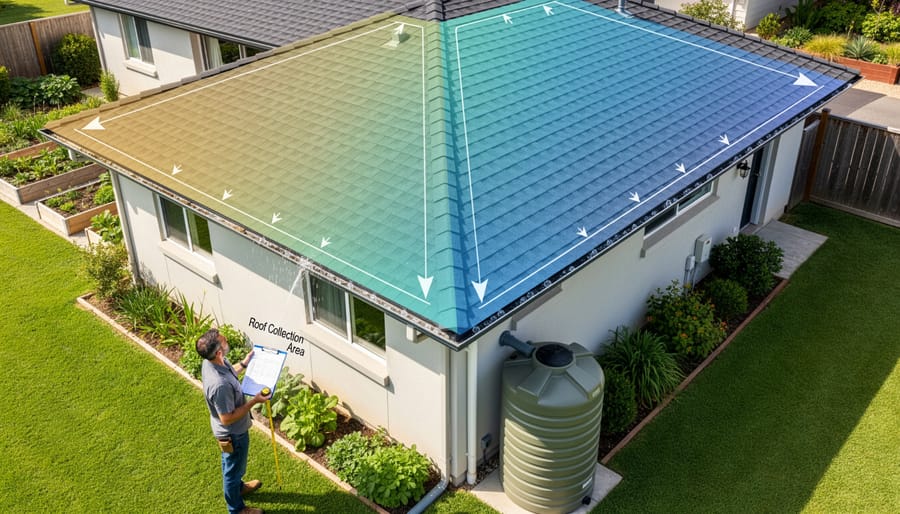
Calculating Your Collection Area
Before you can set up your rainwater harvesting system, you’ll need to know how much water you can actually collect. The good news? Calculating your collection area is simpler than you might think!
Start by measuring your roof’s footprint, which is the area your roof covers when viewed from above. For a basic rectangular roof, just multiply the length times the width of your home’s base. Don’t worry about measuring the actual sloped roof surface—we’re only concerned with the ground area it covers. If your roof has multiple sections or complex angles, break it down into rectangles and add them together.
Here’s where it gets interesting: not every drop of rain that hits your roof makes it into your collection system. Most residential roofs have a collection efficiency of about 75-90%, meaning some water is lost to evaporation, splash-out, and initial runoff that washes away debris. Asphalt shingles, metal roofing, and tile all perform well for collection.
To estimate your potential harvest, use this simple formula: Collection Area (square feet) x Rainfall (inches) x 0.623 x 0.85 (efficiency factor) = Gallons collected. For example, a 1,000 square foot roof collecting from a 1-inch rainfall would yield approximately 530 gallons—enough to keep your garden thriving through dry spells!
Estimating Your Landscape’s Water Needs
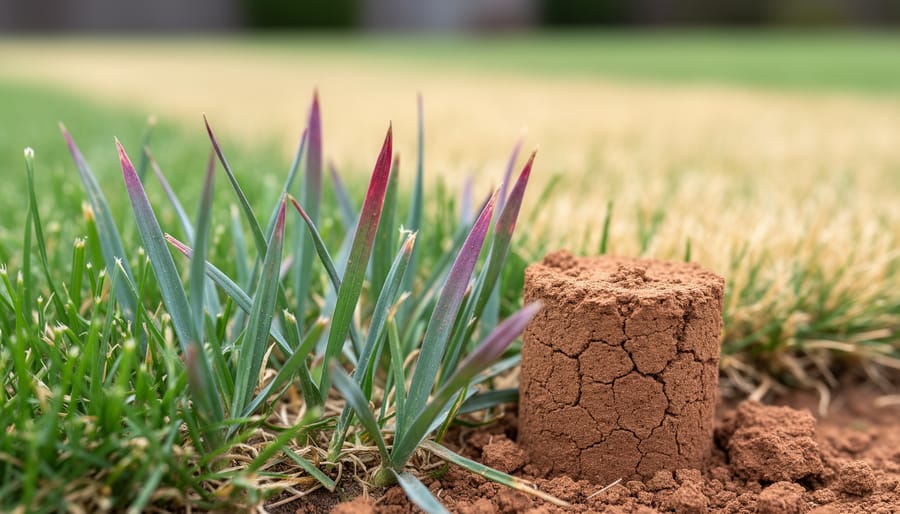
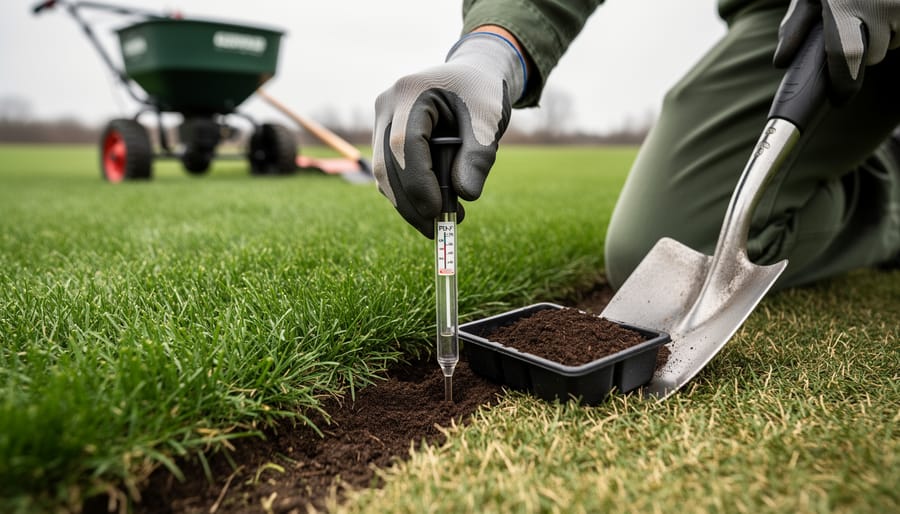
Before you start collecting rainwater, it’s essential to understand how much water your landscape actually needs. This might surprise you: most homeowners overwater their lawns by 30-50%, which means you could get by with less storage capacity than you’d think.
Start by calculating your lawn’s square footage. Simply multiply the length times width of your grass areas. For garden beds, measure each section separately. Now here’s where it gets interesting – different plants have vastly different water needs. Cool-season grasses typically need about 1-1.5 inches of water weekly during growing season, while established native plants might need half that or less. Understanding lawn water requirements is crucial for right-sizing your rainwater harvesting system.
Next, consider your climate and seasonal patterns. Track your area’s average rainfall using local weather data – many areas receive enough natural rainfall during spring and fall to reduce or eliminate irrigation needs entirely. Your rainwater system really needs to bridge those dry summer gaps.
A simple formula: multiply your landscape’s square footage by the weekly water requirement (in inches), then divide by 96.3 to get gallons needed per week. For a 5,000 square foot lawn needing 1 inch weekly, that’s roughly 520 gallons. This baseline helps you determine appropriate storage tank size and understand whether your roof’s catchment area can realistically meet your irrigation demands throughout the growing season.
Choosing the Right Rainwater Collection System
Basic Rain Barrel Systems
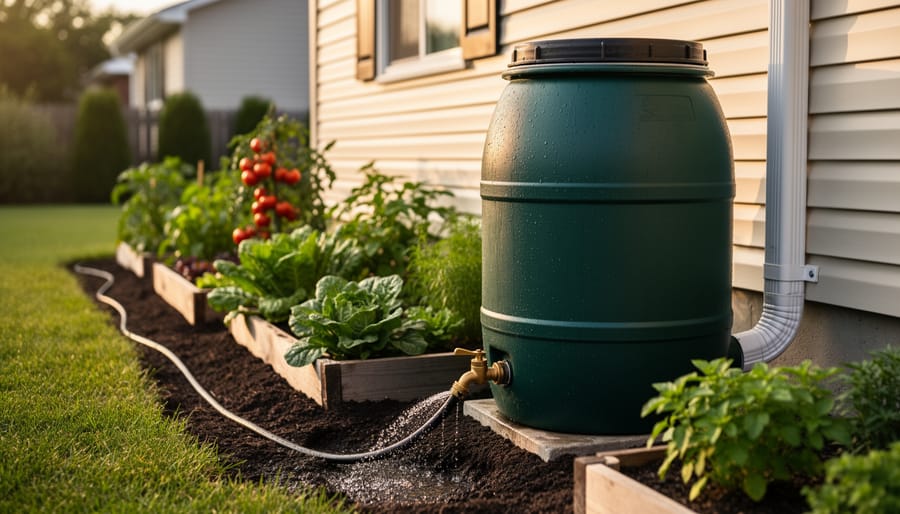
If you’re just starting your rainwater harvesting journey, a basic rain barrel system is the perfect entry point. These simple setups typically consist of a 50-75 gallon barrel positioned beneath a downspout, collecting runoff from your roof. Most come with a spigot near the bottom for easy access and a screen on top to keep out debris and mosquitoes.
The beauty of rain barrels lies in their simplicity and affordability. You can find quality starter barrels for $75-150, or even create a DIY version from food-grade containers for less. They’re ideal for small gardens, container plants, or supplementing water needs for a modest lawn area. One barrel can save you hundreds of gallons during the growing season, putting a noticeable dent in your water bill while reducing stormwater runoff.
However, basic barrels do have limitations. Their capacity fills quickly during heavy rainfall, and gravity-fed systems provide relatively low water pressure, which means you’ll be hauling watering cans or using a hose on nearby plants only. They also require manual emptying before winter in cold climates to prevent freezing damage. Despite these constraints, rain barrels offer an accessible, sustainable way to start conserving water and nurturing your garden more responsibly.
Intermediate Systems with Multiple Tanks
Once you’ve mastered the basics with a single barrel, you might find yourself needing more water storage, especially if you’re maintaining a decent-sized vegetable garden or several flower beds. That’s where linked barrel systems and larger capacity tanks come into play, and trust me, this upgrade is easier than you might think.
Connecting multiple rain barrels is surprisingly straightforward. You can link two or more barrels using simple connector kits available at most garden centers. The key is ensuring all barrels sit on a level surface so water distributes evenly between them. I’ve seen gardeners create impressive daisy-chain systems that store 200-300 gallons simply by connecting four or five barrels along their home’s foundation.
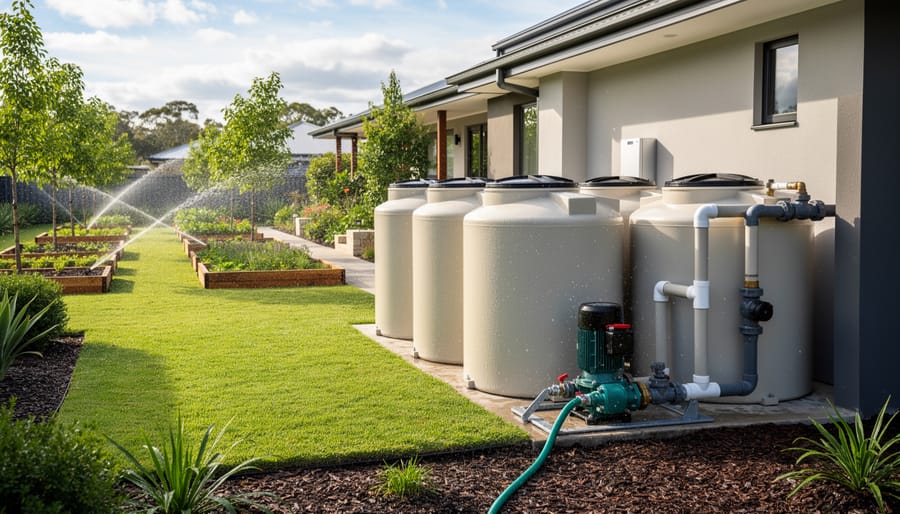
For those ready to scale up further, consider investing in a larger capacity tank ranging from 200 to 500 gallons. These tanks offer more water security during dry spells while taking up less horizontal space than multiple barrels.
Strategic placement becomes crucial at this level. Position your tanks near high-water-use areas like vegetable gardens, but also consider aesthetics since larger systems are harder to hide. Most importantly, plan your overflow management carefully. Direct overflow water away from your foundation using drainage pipes or create a rain garden to capture excess water naturally, turning potential problems into environmental solutions.
Advanced Cistern and Underground Storage
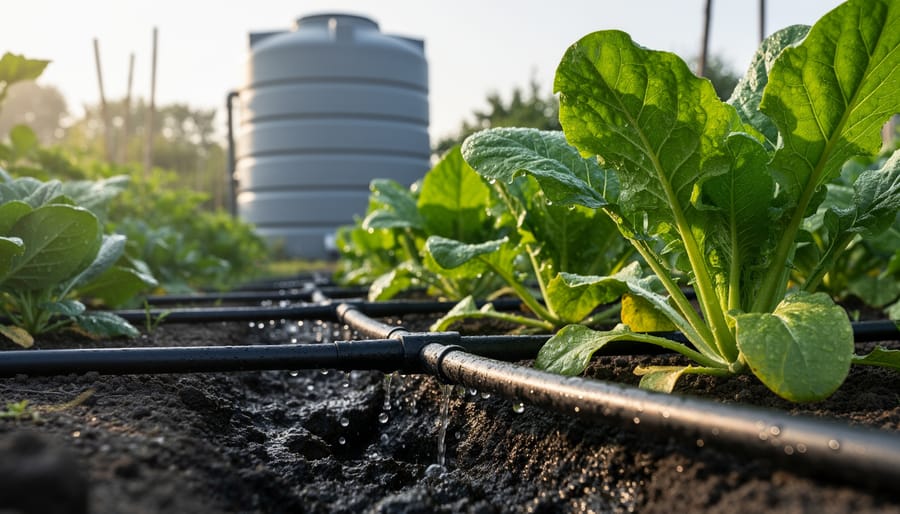
For gardeners managing large properties, commercial landscapes, or extensive vegetable gardens, underground cisterns offer serious water storage capacity that surface-level barrels simply can’t match. These systems typically range from 500 to several thousand gallons and can keep your entire landscape thriving through extended dry periods.
Underground cisterns work beautifully because they’re invisible, don’t take up valuable yard space, and maintain cooler water temperatures that plants prefer. You’ll connect them to your home’s downspouts just like smaller systems, but they require excavation and proper foundation work to prevent settling or cracking.
This is where professional installation becomes worth considering. While ambitious DIYers can tackle this project, hiring professionals ensures proper site assessment, adequate drainage, and compliance with local codes. Many municipalities have specific requirements for large water storage systems, and professionals navigate these regulations daily.
Expect to invest between $2,000 and $10,000 depending on capacity and site conditions. However, if you’re irrigating a half-acre or more, the water bill savings add up quickly. Plus, you’re creating a drought-resistant landscape that stays green when neighbors are facing watering restrictions. Consider professional installation if you’re uncertain about excavation depth, dealing with challenging soil conditions, or need pump systems for pressurized irrigation distribution.
Essential Components for a Functional System
Filtration and Water Quality
Keeping your harvested rainwater clean doesn’t require complicated equipment, but a few strategic filters will make a world of difference for your plants. Think of filtration as insurance for your irrigation system and garden health.
Start with a basic gutter screen or leaf guard to catch large debris before water enters your downspouts. These inexpensive mesh screens prevent leaves, twigs, and roof debris from entering your collection system. Next, install a first-flush diverter, which automatically diverts the initial runoff from each rain event. This first batch of water carries most contaminants like bird droppings, dust, and accumulated roof debris, so you definitely want to send it away from your storage tank.
For the water entering your barrel or cistern, a fine mesh screen (about 1mm) over the inlet keeps out mosquitoes and smaller particles. Many rain barrels come with these built in, but you can easily retrofit older systems. Inside your tank, consider a floating filter that draws water from just below the surface, where it’s cleanest, avoiding sediment that settles at the bottom.
Don’t worry about achieving drinking water standards. Your lawn and garden plants are quite forgiving and actually benefit from the natural nutrients in rainwater. Regular cleaning of gutters and periodic tank maintenance will keep your system running smoothly and your plants thriving.
Distribution Options for Irrigation
Once you’ve collected your rainwater, the fun part begins: getting that water to your plants efficiently. The good news is that connecting your rain barrels to existing irrigation systems or creating new distribution methods is easier than you might think.
Let’s start with the simplest option: gravity-fed systems. These work beautifully if your rain barrel sits higher than your garden beds. Water naturally flows downward, providing gentle pressure perfect for soaker hoses and drip lines. The key is elevation—every foot of height adds about 0.43 PSI of water pressure. While this won’t match your municipal water pressure, it’s often sufficient for smaller gardens. I’ve found that elevating barrels on cinder block platforms works wonderfully for most home garden setups.
If gravity isn’t on your side, or you need more consistent pressure, pump systems are your answer. Small submersible pumps or external models can be connected directly to your barrel’s spigot. These range from simple battery-operated models to more robust electric pumps that can power multiple drip lines simultaneously. They’re particularly helpful for larger properties or when your garden sits higher than your collection system.
Drip irrigation is the gold standard for efficient water delivery. You can attach drip lines directly to your barrel’s spigot, creating zones throughout your garden. These systems deliver water right to plant roots, minimizing evaporation and waste—a perfect match for rainwater’s sustainability benefits.
Soaker hoses offer another excellent integration option. Simply screw them onto your barrel’s outlet, lay them through your beds, and let them slowly seep moisture into the soil. They work exceptionally well with gravity-fed systems and are incredibly forgiving for beginners just starting their rainwater harvesting journey.
Installation: DIY or Professional Help?
The good news? Many rainwater harvesting systems are absolutely within reach for confident DIYers. If you’re comfortable with basic hand tools and have successfully tackled weekend home projects before, a simple barrel-based system is definitely manageable. Think of it like assembling outdoor furniture with plumbing connections—straightforward when you take it step by step.
For a basic setup, you’ll need a rain barrel or two, a diverter kit for your downspout, some flexible tubing, and a spigot. Most home improvement stores sell complete starter kits with everything included. The installation process typically involves positioning your barrel on a stable, level platform near a downspout, cutting the downspout at the appropriate height, attaching the diverter, and connecting your barrel. You can usually complete this in an afternoon, and countless online tutorials walk you through each step.
However, there are situations where calling a professional makes practical sense. If your system requires modifications to your home’s guttering system, involves pumps and electrical components, or needs underground piping to reach distant garden beds, professional expertise becomes valuable. Similarly, if you’re installing a large-scale cistern system or integrating rainwater into an automated irrigation setup, the complexity jumps significantly. Professionals can also ensure your system complies with local regulations and building codes, which vary widely by location.
Safety considerations matter regardless of who installs your system. Always use a sturdy ladder with a spotter when working on gutters, and secure barrels properly to prevent tipping, especially important if you have children or pets. Ensure your platform can support the weight—remember that a full 55-gallon barrel weighs over 400 pounds. If installing electrical pumps, follow proper outdoor electrical safety protocols or hire a licensed electrician for that component.
Start simple and expand as you gain confidence. Many homeowners begin with one barrel, see the benefits, and gradually build a more sophisticated system. There’s no shame in handling the basic setup yourself while hiring professionals for the technical components—it’s often the most cost-effective and safest approach.
Seasonal Maintenance and System Care
Spring and Summer Upkeep
As the weather warms up and your garden comes alive, it’s time to give your rainwater harvesting system a little attention. Think of this as your pre-season tune-up to ensure everything runs smoothly during peak watering months.
Start with a visual inspection of your barrels or tanks. Check for any cracks, leaks, or damage that might have occurred during winter. Look at all connections, spigots, and hoses to make sure everything is secure and functional. This is also the perfect time to clean out any debris that accumulated in your gutters and downspouts since these feed directly into your collection system.
Next, inspect your mesh screens and filters. These hardworking components prevent leaves, insects, and other debris from entering your system, but they can get clogged. Give them a thorough cleaning or replace them if needed.
During spring and summer, you’ll likely be using your stored water more frequently, so monitor water levels regularly. This helps you gauge how much water you’re using and whether you need to adjust your irrigation schedule. Also, keep an eye out for mosquitoes, especially during humid periods. Ensure your containers are properly sealed and consider adding mosquito dunks if you notice any larvae. With these simple maintenance steps, your rainwater system will keep your garden thriving all season long.
Fall and Winter Preparation
As autumn approaches and temperatures begin to drop, it’s time to think about protecting your rainwater harvesting investment from winter’s harsh conditions. Don’t worry—winterizing your system is straightforward and will save you from costly repairs come spring.
The most critical step is preventing freeze damage to your barrels, tanks, and pipes. Water expands when it freezes, which can crack containers and burst connections. Start by draining all water from your collection system before the first hard freeze. This includes barrels, connecting pipes, downspout diversters, and any pumps or filters you’ve installed. Even a small amount of remaining water can cause problems, so take time to ensure everything is completely empty.
For above-ground barrels, you have a couple of options. You can either store them upside down in a garage or shed, or leave them in place with their lids open or slightly ajar. The open position prevents water from accumulating and allows any moisture to evaporate. If you’re leaving barrels outside, disconnect and store hoses and spigots separately—these components are particularly vulnerable to freeze damage.
Underground cisterns typically fare better in winter since they’re below the frost line, but you should still check your manufacturer’s recommendations for any specific winterization steps. Disconnect and drain surface-level pipes and valves that feed into the system.
Take advantage of the dormant season to inspect all components for wear and tear. Check for cracks, examine seals and gaskets, and make a list of any parts you’ll need to replace before spring rains arrive. This proactive approach means you’ll be ready to capture that first rainfall when your garden awakens.
Maximizing Your Rainwater for Landscape Health
Once you’ve invested time and effort into collecting rainwater, the next step is using it wisely to keep your landscape thriving while stretching every drop. The good news? A few strategic practices can dramatically increase the effectiveness of your harvested water.
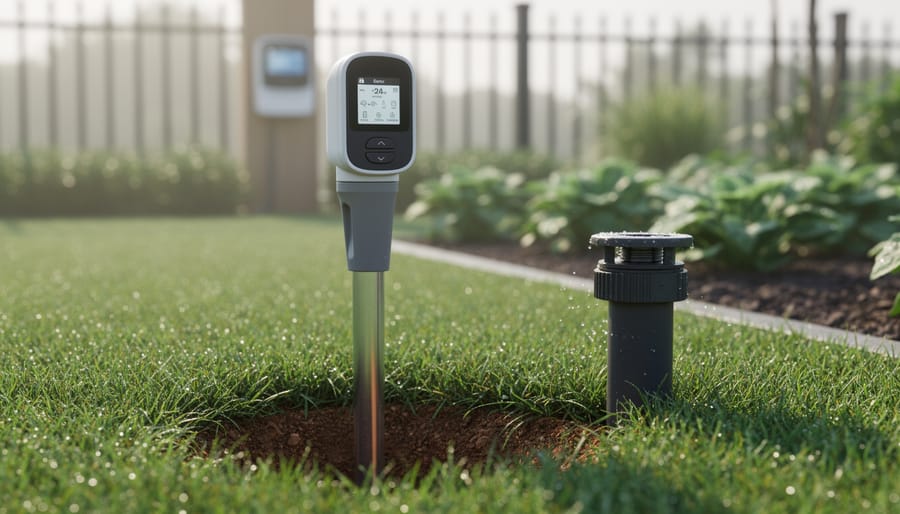
Timing is everything when it comes to irrigation. Water your garden in the early morning or evening when temperatures are cooler and evaporation rates are lowest. This simple adjustment means more water reaches plant roots instead of disappearing into the air. If you’re ready to take it further, consider integrating smart irrigation controllers with your rainwater system to optimize irrigation timing based on weather conditions and soil moisture levels.
Pairing your rainwater system with drought-tolerant plants is perhaps the smartest long-term strategy for water conservation. Native plants and adapted varieties naturally require less water once established, meaning your collected rainwater goes much further. Think of it as working with nature rather than against it. Your rain barrel might sustain a bed of native perennials all summer, while thirsty exotic species would drain it in days.
Mulch is your secret weapon for water efficiency. A two to three-inch layer of organic mulch around plants acts like a protective blanket, reducing evaporation by up to 70 percent while suppressing weeds that compete for moisture. Wood chips, shredded bark, or compost all work beautifully. I’ve seen gardeners cut their watering frequency in half simply by mulching properly.
Finally, don’t think of rainwater harvesting as an all-or-nothing proposition. Many homeowners successfully integrate rain barrels with their existing irrigation systems, using harvested water as a primary source and municipal water as backup during dry spells. This hybrid approach maximizes sustainability while maintaining the convenience and reliability your landscape needs.
Common Mistakes and How to Avoid Them
When I first set up my rainwater system, I made just about every mistake in the book—so let me save you some trouble! The most common error is undersizing your storage. Many beginners grab a single 50-gallon barrel thinking it’ll be plenty, only to watch it overflow after a moderate rain while their garden stays thirsty a week later. Here’s a better approach: calculate your roof’s catchment area and average rainfall to determine realistic needs. A typical suburban roof can collect over 600 gallons from just one inch of rain, so consider starting with at least 200-300 gallons of storage capacity if you’re serious about irrigation.
Poor placement is another frequent headache. I’ve seen folks tuck barrels in the shadiest corner of their yard for aesthetics, then struggle with lengthy hose runs and pressure issues. Instead, position your collection system as close to your main garden beds as possible, and remember that water flows downhill—elevating your barrels even slightly improves water pressure naturally.
Skimping on filtration seems harmless until you’re dealing with clogged drip lines or emitters. A simple mesh screen over your downspout costs just a few dollars and prevents most debris from entering your system. This small investment saves hours of maintenance down the road.
The mosquito issue catches many people off guard. Standing water becomes a breeding ground within days. The fix is straightforward: keep all openings covered with fine mesh screening, ensure your barrels have tight-fitting lids, and add an overflow valve to prevent stagnation. Some gardeners also add mosquito dunks, which are completely safe for plants and wildlife while eliminating larvae effectively.
As you’ve discovered throughout this guide, harvesting rainwater for irrigation isn’t just an environmentally responsible choice—it’s a smart investment that pays dividends in lower water bills, healthier plants, and the satisfaction of working with nature rather than against it. The beauty of rainwater harvesting is that it truly is achievable for every gardener, regardless of your experience level or budget constraints.
If the idea of installing a comprehensive system feels overwhelming, remember that you don’t need to tackle everything at once. Starting small is perfectly acceptable and often the wisest approach. A single rain barrel connected to a downspout can collect hundreds of gallons during the growing season, making a noticeable difference in your water usage and plant health. As you gain confidence and see the benefits firsthand, you can always expand your system gradually.
The financial benefits become even more compelling when you consider the long-term picture. While there’s an initial investment, most gardeners recoup their costs within a few years through reduced water bills, and the system continues saving money for decades afterward. Plus, you’re protecting your garden during drought restrictions and reducing strain on municipal water supplies—contributions that benefit your entire community.
Now is the perfect time to take that first step. Walk around your property with fresh eyes and assess your options. Look at your roof area, consider where downspouts could be diverted, and think about where storage tanks might fit into your landscape. Even fifteen minutes of observation can reveal possibilities you hadn’t noticed before. Your sustainable gardening journey starts with that single action, and the rewards will flow as abundantly as the rain itself.