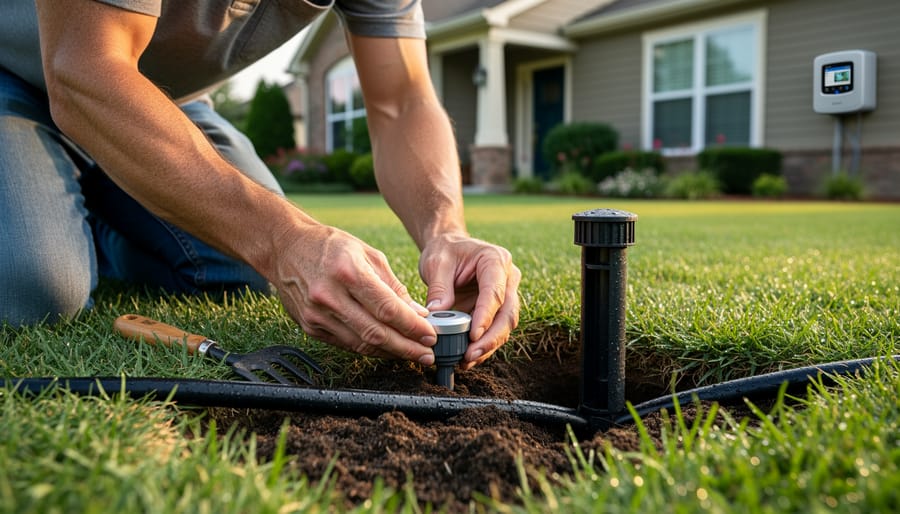
Install soil moisture sensors 4-6 inches deep in your lawn’s root zone, positioning them in areas that represent average soil conditions rather than the wettest or driest spots. This placement ensures your irrigation system responds to actual water needs instead of running on arbitrary schedules that waste thousands of gallons annually.
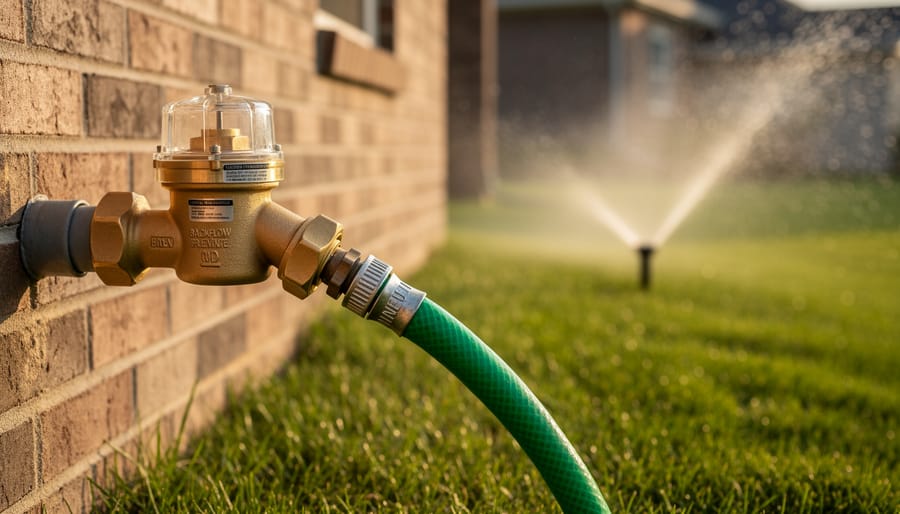
Connect these sensors to your existing sprinkler timer through a simple two-wire setup that interrupts watering cycles when soil moisture reaches optimal levels. Most systems require no professional installation and integrate with standard controllers in under an hour, making this upgrade accessible even if you’ve never worked with irrigation equipment before.
Calibrate sensors for your specific soil type by testing moisture readings against the finger test – soil should feel like a wrung-out sponge at the ideal moisture level. Clay soils hold water longer and need different threshold settings than sandy soils, which drain quickly and require more frequent but shorter watering sessions.
Expect water bill reductions of 30-50% within the first season while simultaneously improving plant health through precision watering. Traditional timers can’t account for yesterday’s rainstorm or this week’s cooler temperatures, leading to overwatered lawns that develop shallow roots, fungal diseases, and increased weed pressure. Moisture-sensing systems eliminate this guesswork by measuring what actually matters – the water available to your plants right now.
These systems represent the intersection of water conservation and lawn care excellence, transforming irrigation from a set-it-and-forget-it routine into a responsive partnership with your landscape. Whether you’re managing a small suburban yard or extensive garden beds, sensor-based irrigation delivers measurable results while reducing your environmental footprint.
What Exactly Is a Moisture Sensing Irrigation System?

The Brain and the Sensors: How They Work Together
Think of your moisture sensing irrigation system like your body’s nervous system. The soil moisture sensors are like nerve endings in your fingertips, constantly feeling and gathering information about what’s happening in the ground. These sensors detect how much water is present in the soil at different depths, just as your fingers can tell whether something is wet or dry. They’re the system’s information gatherers, working 24/7 to keep tabs on soil conditions.
The irrigation controller, on the other hand, is the brain. It receives all those signals from the sensors and makes intelligent decisions about when to water and for how long. Just as your brain processes the message that your hand is touching something hot and tells you to pull away, the controller processes soil moisture data and decides whether your lawn needs watering or if it’s better to wait.
Here’s where it gets really smart: when the sensors detect that soil moisture has dropped below a certain threshold, they send that information to the controller. The brain then activates your sprinkler system to deliver water exactly where and when it’s needed. Once the sensors report that moisture levels are back to optimal range, the controller shuts everything off. No waste, no guesswork.
This partnership between sensors and controller creates a truly responsive system that adapts to your lawn’s actual needs rather than running on a fixed schedule. It’s sustainable irrigation at its finest, combining technology with environmental responsibility.
Why Your Lawn Actually Needs This (Hint: It’s Not Just About Convenience)
Let’s be honest—a moisture sensing irrigation system isn’t just about making your life easier (though that’s certainly a nice perk). Your lawn genuinely needs this technology to thrive, and here’s why.
First, we’re talking serious water conservation. Traditional irrigation systems operate on timers, which means they’ll water your lawn whether it needs it or not—even after a heavy rain. A moisture sensor puts an end to this waste by checking soil conditions before releasing a single drop. You’ll typically save 30-50% on water usage, which translates directly to lower utility bills and a lighter environmental footprint. Just like self-powered yard technology works with nature rather than against it, moisture sensors help you become a more responsible steward of natural resources.
Your grass roots will thank you too. Overwatering is actually one of the most common lawn killers because it encourages shallow root growth and creates the perfect breeding ground for fungal diseases like brown patch and pythium blight. When you water based on actual soil moisture rather than guesswork, roots grow deeper seeking water, making your lawn more drought-resistant and resilient.
The financial benefits extend beyond water savings. Fewer disease problems mean less money spent on fungicides and lawn treatments. You’ll also reduce fertilizer runoff since properly watered lawns absorb nutrients more efficiently rather than washing them into storm drains during unnecessary watering sessions.
Bottom line? This isn’t about convenience alone—it’s about creating a healthier, more sustainable lawn care routine that benefits your yard, your wallet, and the environment simultaneously.
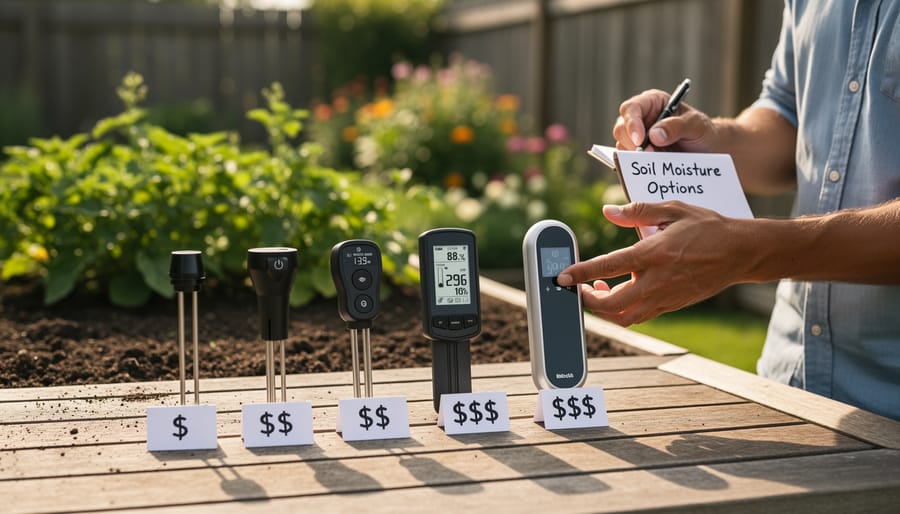
Types of Soil Moisture Sensors: Finding Your Perfect Match
Volumetric Water Content Sensors
When you’re choosing a moisture sensor for your lawn, you’ll encounter two primary types of volumetric water content sensors: capacitance-based and Time Domain Reflectometry (TDR) sensors. Don’t let the technical names intimidate you—both work brilliantly for residential applications.
Capacitance-based sensors are the more affordable option and they’re perfect for most home lawns. These sensors measure the water content in soil by detecting changes in electrical capacitance as moisture levels fluctuate. They’re accurate within about 3-5% for typical residential use, which is more than sufficient for keeping your grass healthy. I’ve found them particularly reliable in clay and loam soils, and they require minimal maintenance once installed.
TDR sensors offer even greater precision (within 1-2%), making them ideal if you’re managing specialized turf areas or have specific plant varieties with demanding water requirements. They send electromagnetic pulses through the soil and measure how quickly they return, calculating moisture content with impressive accuracy. However, they come with a higher price tag.
For most gardening enthusiasts, capacitance sensors strike the perfect balance between performance and affordability, delivering the accuracy you need without breaking the bank while supporting your sustainable watering goals.
Tensiometers: The Old Reliable Option
Think of tensiometers as the seasoned veterans of soil moisture sensing – they’ve been around for decades because they simply work. These devices measure soil moisture tension, which is basically how hard plant roots have to work to pull water from the soil. A tensiometer consists of a water-filled tube with a porous ceramic tip that you insert into the ground. As soil dries out, water gets pulled through the ceramic, creating suction that’s measured by a gauge or sensor.
The beauty of tensiometers is their accuracy and reliability. They give you direct readings of what your plants actually experience, making them particularly valuable for vegetable gardens and landscape beds where precise watering matters. They’re also relatively affordable and don’t require batteries in their basic form.
However, they do need some babysitting. You’ll need to refill the water periodically and keep the ceramic tips clean. They also don’t perform well in very dry or sandy soils, and you’ll want to remove them before freezing temperatures arrive.
For hands-on gardeners who enjoy being involved in their irrigation decisions and have the time for occasional maintenance, tensiometers remain an excellent, sustainable choice that won’t break the bank.
Resistance-Based Sensors: Budget-Friendly Basics
If you’re dipping your toes into moisture sensing without breaking the bank, gypsum block sensors are worth considering. These budget-friendly devices work by measuring electrical resistance in a porous gypsum block buried in your soil. As the soil dries out, the block loses moisture too, increasing resistance and signaling your irrigation system to water.
Here’s the thing: gypsum blocks are wonderfully affordable and require no power source, making them accessible for most gardeners. They’re particularly reliable in clay soils and can last several seasons with proper care. However, they do have limitations. Response time is slower than electronic sensors, sometimes taking hours to register moisture changes. They also require periodic replacement as the gypsum gradually dissolves, and accuracy can vary depending on soil salinity levels.
For small gardens or raised beds where you’re looking for a simple, sustainable solution without fancy electronics, these sensors work perfectly well. But if you need real-time data or you’re managing diverse planting zones with different watering needs, you might find yourself frustrated with their slow response and lack of precision. They’re solid starters, just not sophisticated multitaskers.
Setting Up Your Smart Irrigation System: A Step-by-Step Approach
Choosing the Right Locations for Your Sensors
Getting the most accurate moisture readings depends on strategic sensor placement, and this is where a little planning goes a long way. Think of your lawn as having unique microclimates, each with different water needs.
Start by identifying your irrigation zones. If you have a larger yard, you likely have areas that receive different amounts of sunlight throughout the day. That shady spot under the oak tree retains moisture much longer than the sunny patch near your driveway. Place sensors in representative locations within each zone rather than clustering them all in one area. This gives your system a complete picture of what’s actually happening across your entire lawn.
Sun exposure is crucial. Avoid placing sensors in the shadiest or sunniest extremes unless those areas dominate your landscape. Instead, aim for spots that reflect the typical conditions of each zone. A sensor baking in full afternoon sun will trigger irrigation more frequently, while one tucked under dense foliage might leave sunnier areas parched.
Consider soil variations too. If part of your yard has sandy soil that drains quickly while another section has clay that holds water, you’ll want sensors in both areas. This is especially important for those of us dealing with yards that weren’t exactly professionally landscaped from the start.
Finally, install sensors away from sprinkler heads to prevent false readings from direct water contact, and keep them accessible for occasional checking and battery changes. A well-placed sensor network is your ticket to truly efficient, sustainable irrigation.
Installation Tips That Save You Headaches Later
Getting your moisture sensing system installed correctly the first time saves you from frustrating troubleshooting sessions down the road. Let me share some lessons I’ve learned, often the hard way, so you don’t have to repeat my mistakes.
First, sensor placement depth matters more than you’d think. Most sensors work best at 4-6 inches deep, right where your grass roots actively drink. Installing too shallow means you’re measuring surface moisture that evaporates quickly, not what your lawn actually needs. Too deep, and you’ll overwater because the sensor misses what’s happening in the root zone. Mark your desired depth on the probe before inserting it to keep things consistent.
Protecting your wiring is another area where shortcuts come back to haunt you. I’ve seen too many systems fail because wires got nicked by mowers or chewed through by curious critters. Use conduit wherever wires run above ground, and when burying cables, go at least 6 inches down. Add a layer of bright caution tape a few inches above buried wires as a visual reminder when you’re digging later.
Wireless connectivity sounds convenient, but walls, metal siding, and dense landscaping can interfere with signals. Test your connection before permanently mounting anything. Walk around with your receiver to find dead zones, and consider adding a signal repeater if your yard is large.
Finally, take photos of your installation, noting where everything is buried. Your future self will thank you when modifications are needed.
Calibrating Your System for Peak Performance
Getting your moisture thresholds right is where the magic happens, and I promise it’s easier than it sounds. Think of it as tuning a guitar – a little adjustment makes all the difference.
Start with your grass type as your guide. Cool-season grasses like fescue and bluegrass thrive when soil moisture stays between 40-60%, while warm-season varieties such as Bermuda and zoysia prefer slightly drier conditions at 30-50%. Your sensor’s manual should help you translate these percentages into specific threshold settings.
Here’s a practical starting point: set your system to trigger irrigation when moisture drops to 50% for cool-season lawns or 40% for warm-season varieties. Run this for two weeks while observing your lawn’s response. Is the grass looking stressed before watering kicks in? Lower your threshold by 5%. Does it seem perpetually soggy? Raise it slightly.
Climate matters too. In humid regions, you might need higher thresholds to prevent overwatering, while arid climates often require more frequent irrigation cycles. Adjust seasonally – what works in July’s heat won’t be ideal for September’s cooler temperatures. The beauty of these systems is their flexibility, so don’t be afraid to experiment until you find your lawn’s sweet spot.
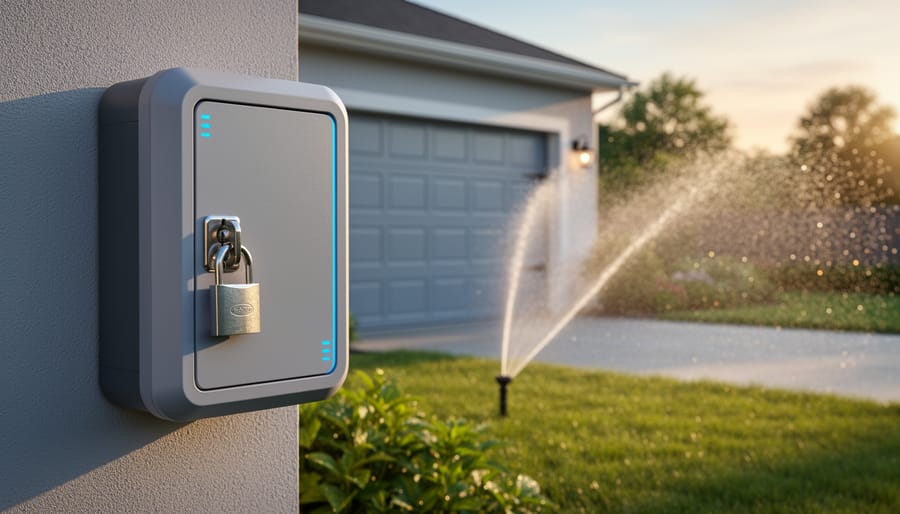
Integrating Sensors With Your Existing Irrigation Setup
Retrofitting Traditional Timer Systems
Good news if you’re already invested in a traditional timer-based irrigation system—you don’t necessarily need to replace everything to enjoy the benefits of moisture sensing technology. Upgrading your existing setup can be surprisingly straightforward and budget-friendly.
The most popular retrofit option is adding a bypass module or sensor override device. These clever little units connect between your existing controller and the valve wiring, allowing soil moisture sensors to interrupt scheduled watering when conditions are already wet enough. You’re essentially giving your old-school timer a modern brain without gutting the whole system. Many models work with any standard controller, making them universally compatible.
Installation typically involves mounting the bypass module near your controller, connecting a few wires, and placing moisture sensors in representative areas of your lawn. Most gardeners can handle this as a weekend DIY project, though having a friend help with the wiring makes things easier.
Another option worth considering is replacing just the controller itself while keeping your existing valves and wiring infrastructure. Many modern smart controllers are designed as drop-in replacements for traditional timers, offering moisture-based scheduling without extensive rewiring.
The sustainable advantage here is clear: you’re reducing water waste while extending the life of equipment you’ve already purchased, keeping perfectly functional components out of landfills while modernizing your irrigation approach.
Pairing With Smart Controllers and WiFi Systems
Here’s where things get really exciting! When you connect your moisture sensing system to a smart controller or WiFi-enabled hub, you’re essentially giving your irrigation setup a brain upgrade. These systems pull real-time weather data from local stations, automatically adjusting watering schedules when rain is forecast or temperatures drop. No more watering during a rainstorm because you forgot to turn off the timer!
The beauty of app-based control means you can monitor soil moisture levels from anywhere—whether you’re at work, on vacation, or just relaxing inside. Get notifications when your sensors detect dry conditions or when there’s a system malfunction. Many platforms now incorporate smart zoning technology, letting you customize watering for different areas based on sun exposure, plant types, and soil conditions.
Integration capabilities extend beyond just irrigation too. Some systems sync with smart irrigation integration features across your entire landscape setup, creating a cohesive yard management system. From a sustainability standpoint, this technology is a game-changer—you’re conserving water while maintaining healthier plants. Plus, detailed usage reports help you track water savings over time, which is both environmentally responsible and wallet-friendly.
Real-World Performance: What to Expect From Your System
The First Month: Adjustment Period
The first month with your new moisture sensing irrigation system is all about observation and fine-tuning. Think of it as getting to know a new gardening partner—you’ll both need time to sync up.
During this adjustment period, keep an eye on your lawn’s appearance and the soil moisture levels. Walk your yard regularly, checking for areas that seem too wet or too dry. Your grass might initially show some stress as it adapts from its old watering schedule to a more efficient, sensor-driven routine. This is completely normal. You may notice the system waters less frequently than you’re used to, which can feel unsettling at first, but trust the technology—it’s responding to actual soil conditions rather than arbitrary timers.
Take notes on which zones seem to dry out faster and which retain moisture longer. These observations will help you adjust sensor placement or calibration settings. Most systems allow you to tweak sensitivity levels, and you might need to increase or decrease watering durations for specific zones based on factors like sun exposure, soil type, or plant density.
Don’t expect perfection immediately. Small adjustments based on real-world performance will optimize your system for your unique landscape, ultimately delivering both water savings and a healthier, more sustainable lawn.
Long-Term Benefits You’ll Actually Notice
After you’ve installed your moisture sensing system and settled into the rhythm of automated care, you’ll start noticing improvements that make the initial investment feel worthwhile. Most homeowners report water bill reductions between 20-50% within the first year, with some seeing even greater savings during particularly rainy seasons when their old timers would have run unnecessarily.
Your lawn’s health typically improves noticeably within 4-6 weeks. Grass develops deeper root systems when watered according to actual need rather than a fixed schedule, making it more drought-resistant and naturally lusher. You’ll see fewer brown patches and more consistent color throughout your yard. Many gardeners also notice reduced fungal issues since the system prevents the overwatering that encourages lawn diseases.
From an environmental perspective, the average household conserves approximately 7,000-15,000 gallons annually. That’s equivalent to about 100 bathtubs of water returned to your local water table instead of running off into storm drains. For those of us passionate about sustainable gardening practices, knowing your lawn care routine actively helps rather than harms the environment provides genuine peace of mind that extends well beyond your property line.
Maintenance and Troubleshooting Your Moisture Sensing System
Seasonal Care and Sensor Checks
Regular maintenance keeps your moisture sensing system running smoothly year-round. I recommend inspecting sensors every four to six weeks during the growing season. Check for dirt buildup, spider webs, or debris that might interfere with readings. A simple wipe with a damp cloth usually does the trick—avoid harsh chemicals that could damage the sensor coating.
Battery replacement varies by model, but most systems will alert you when power runs low. Like other smart yard systems, proper charging habits extend battery life significantly. Keep spare batteries on hand so you’re never caught off guard during peak watering season.
Winterization is crucial in cold climates. Before the first freeze, remove sensors from the ground, clean them thoroughly, and store them indoors. Drain any water from control units and disconnect batteries to prevent corrosion. This simple routine prevents costly damage and ensures your system starts strong next spring.
For in-ground sensors in milder climates, a thorough cleaning and inspection before winter dormancy suffices. Mark sensor locations so you don’t accidentally damage them during spring planting. This proactive approach means less troubleshooting and more time enjoying your garden.
Fixing Common Problems Without Calling Tech Support
Most moisture sensor hiccups are surprisingly easy to fix yourself. If you’re getting false readings, start by checking whether your sensors are actually making good contact with the soil. Sometimes they work their way loose during watering or settle into air pockets. Gently push them deeper and pack soil around them firmly.
Connectivity problems with wireless sensors often stem from weak batteries rather than technical glitches. Check those power levels first, and follow proper battery maintenance tips to extend their lifespan. If your system still seems disconnected, try moving the controller closer to problem sensors or clearing away dense vegetation that might block signals.
Calibration drift happens over time as minerals build up on sensor probes. Clean them quarterly with a soft brush and white vinegar solution, then let them dry completely before reinserting. If readings still seem off, run your system’s recalibration sequence, which you’ll find in the manual. Think of it like resetting your expectations – you’re teaching the sensors to read your specific soil conditions accurately again. These simple fixes save both service calls and water waste.
Top Moisture Sensing Irrigation Systems Worth Considering
Best Overall for Most Homeowners
For most homeowners ready to embrace smarter watering, the Rain Bird SST1200OUT Simple-to-Set Indoor/Outdoor Timer with soil sensor strikes the perfect balance between functionality and user-friendliness. This system consistently earns top marks because it delivers professional-grade moisture sensing without requiring an engineering degree to install.
What makes this model particularly appealing is its dual-zone capability, allowing you to manage different areas of your yard independently—crucial since your sunny front lawn has vastly different watering needs than your shaded backyard garden. The included soil moisture sensor automatically pauses irrigation when adequate moisture is detected, typically reducing water usage by 30-40% compared to traditional timers.
Installation takes about an hour for most DIYers, and the intuitive dial interface makes programming straightforward even if you’re not tech-savvy. The sensor probe works reliably in various soil types, though clay-heavy soils may require slight adjustment to sensitivity settings.
At a mid-range price point, it represents genuine value—you’ll likely recoup your investment through water savings within the first growing season while nurturing healthier plants through more consistent, responsive watering. It’s the kind of practical upgrade that makes sustainable lawn care feel effortless rather than overwhelming.
Budget-Friendly Options That Don’t Sacrifice Quality
You don’t need to break the bank to enjoy the benefits of moisture-sensing technology. Several affordable systems offer excellent performance for smaller yards or gardeners wanting to test smart irrigation before committing to a full system upgrade.
Basic soil moisture sensors that connect to traditional timers start around $30-50 and provide the essential function of preventing watering when soil is already moist. While they lack fancy apps and weather integration, they’ll still save water and money on your utility bills. Brands like Rain Bird and Orbit offer reliable entry-level options that are surprisingly durable.
For those with slightly larger budgets, single-zone smart controllers in the $100-150 range deliver impressive results. These systems typically include one or two moisture sensors and basic smartphone connectivity, perfect for managing a typical residential lawn without overwhelming complexity.
Remember, even a simple moisture sensor beats watering on a fixed schedule. Starting small lets you learn how these systems work in your specific garden conditions, and you can always expand later as your confidence and needs grow.
Premium Systems for Serious Lawn Enthusiasts
If you’re managing a larger property or simply want the absolute best technology for your lawn, premium moisture sensing systems deliver exceptional performance and features that justify their higher price point. These sophisticated systems typically control 8-16 zones independently, allowing you to customize watering for different plant types, sun exposures, and soil conditions across your entire landscape.
What sets premium systems apart is their comprehensive monitoring capabilities. They don’t just measure moisture—they integrate weather data, track historical usage patterns, and provide detailed analytics through smartphone apps. You’ll receive alerts about potential system issues, unusual water consumption, or zones that might need attention. Many include professional-grade sensors that measure moisture at multiple depths, giving you unprecedented insight into your soil’s water profile.
The investment makes particular sense for sustainability-focused gardeners with diverse landscapes. While these systems cost $500-1500, they can reduce water usage by 40-60% compared to conventional timers. For properties with mixed plantings—say, native grasses alongside vegetable gardens and ornamental beds—this precision prevents both drought stress and overwatering, creating healthier plants while significantly lowering utility bills and environmental impact.
Making the switch to a moisture sensing irrigation system isn’t just about convenience, though that’s certainly a welcome bonus. It’s about partnering with nature rather than trying to override it. These systems represent a thoughtful approach to lawn care that respects both your time and our planet’s precious water resources.
Think about it: every drop of water saved, every hour you’re not standing with a hose or manually adjusting timers, and every patch of lawn that receives exactly what it needs translates into a healthier, more resilient landscape. You’re not fighting against the natural rhythms of soil and weather anymore. Instead, you’re working alongside them, letting technology handle the monitoring while you enjoy the results.
The beauty of moisture sensing irrigation lies in its simplicity. Once installed, these systems quietly do their job, learning your soil’s unique characteristics and responding to conditions in real time. Whether you’re a weekend warrior gardener or someone with decades of experience, the peace of mind that comes from knowing your lawn is getting precisely the right amount of water is invaluable.
Taking that first step might feel daunting, but remember that sustainable gardening isn’t about perfection. It’s about progress. Start small if you need to, perhaps with a single zone or even standalone sensors. As you see the results, both in your water bills and your lawn’s health, you’ll wonder why you didn’t make the change sooner. This is smart watering that benefits everyone.