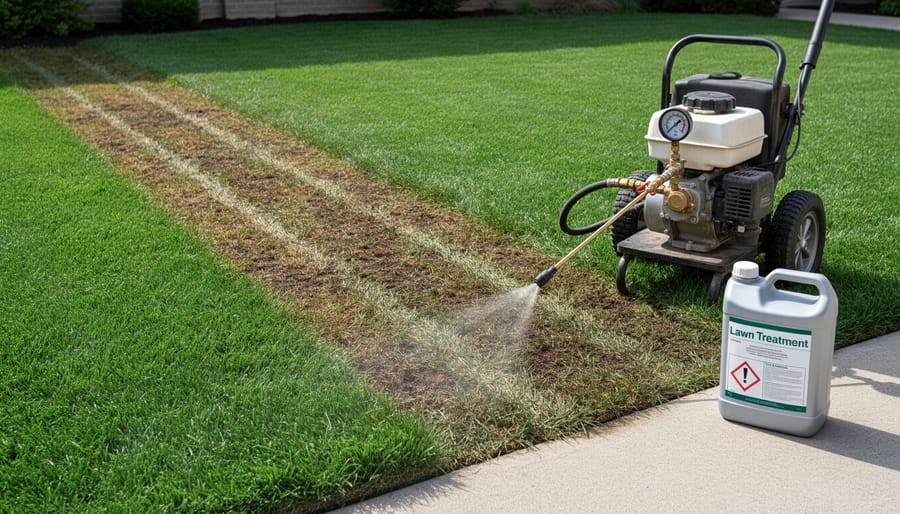
Calculate your sprayer’s output by marking a 1,000 square foot test area, filling your tank with water, spraying at your normal speed and pressure, then measuring how much water it takes to refill the tank. Divide the gallons used by 1,000 and multiply by 43,560 to determine your gallons per acre rate—this single test gives you the baseline number for every formula that follows.
Measure your exact nozzle output using the container method: spray into a measuring cup for exactly one minute at your operating pressure, then multiply the ounces collected by 5,940 and divide by your miles per hour times the nozzle spacing in inches. This reveals whether worn nozzles are causing you to over-apply expensive products or under-apply crucial treatments that won’t work at reduced rates.
Adjust your application rate using the simple formula: desired rate divided by your current rate, multiplied by your current pressure, equals your new pressure setting. If you’re applying 20 gallons per acre but need 15, and you’re running at 40 PSI, you’ll drop to 30 PSI to hit your target without changing speed or equipment.
Understanding these calibration formulas saves money immediately—a 10% calibration error on a $30 per acre herbicide costs $3 per acre, adding up to hundreds of dollars on typical properties while potentially harming plants through over-application or allowing weeds to survive under-application. Proper calibration transforms guesswork into precision, ensuring every product performs exactly as intended while protecting your landscape investment and the environment.
Why Sprayer Calibration Matters for Your Lawn and Wallet
Picture this: you’ve spent a gorgeous Saturday morning mixing up herbicide to tackle those stubborn dandelions, only to find them thriving a week later. Or worse, you notice brown patches spreading across your lawn where you applied what you thought was the right amount of fertilizer. These frustrating scenarios happen more often than you’d think, and they all trace back to one issue: improper sprayer calibration.
When your sprayer isn’t calibrated correctly, you’re essentially flying blind. Under-application means you’re wasting time, effort, and money on treatments that simply don’t work. Those weeds keep coming back, diseases linger, and you end up applying multiple rounds of product when one properly calibrated application would have done the job. That’s not just inconvenient; it’s expensive and environmentally wasteful.
On the flip side, over-application creates its own set of problems. I’ve seen homeowners accidentally apply twice the recommended rate of fertilizer, burning their grass and creating brown spots that take months to recover. Beyond damaging your lawn, excess chemicals don’t just disappear. They wash into storm drains, contaminate groundwater, and contribute to algae blooms in nearby lakes and streams. This environmental runoff affects the whole community and the ecosystems we’re trying to protect.
Here’s the wallet impact: imagine buying a product designed to cover 5,000 square feet but unknowingly applying it to only 3,000 square feet because your sprayer output is off. You’ve just wasted 40 percent of your purchase. Over a season of lawn treatments, that adds up to hundreds of dollars literally poured onto the ground.
The sustainability angle matters too. Every drop of product we use carries an environmental footprint from manufacturing to application. Proper calibration ensures we use exactly what’s needed and nothing more. It’s about being good stewards of our yards and our planet, achieving beautiful lawns while minimizing our environmental impact. That’s a win everyone can feel good about.
Essential Terms You Need to Know Before We Start
Before we dive into the formulas, let’s make sure we’re all speaking the same language. Think of this as your translation guide from confusing equipment manuals to real-world gardening.
Application rate is simply how much product you’re applying to a specific area. Imagine frosting a cake—you want even coverage, not thick globs in some spots and bare patches in others. In spraying, we measure this as the amount of liquid (usually mixed with your fertilizer or pesticide) that lands on each section of lawn or garden.
GPA, or gallons per acre, is the standard measurement for application rate. Don’t let “acre” intimidate you if you’ve got a small yard. It’s just the universal measuring stick we use, like how your car’s fuel efficiency is measured in miles per gallon whether you’re driving across town or across the country. For smaller spaces, you’ll simply adjust the math proportionally.
Nozzle output refers to how much liquid flows through your sprayer nozzles in a given time, typically measured in gallons per minute. Think of it like different shower heads—some give you a gentle mist, others a powerful stream. Your nozzles control this flow.
Spray coverage describes the width your sprayer covers in one pass. For boom sprayers, we call this boom width—the total span of all your nozzles working together.
Ground speed is exactly what it sounds like: how fast you’re moving while spraying, measured in miles per hour. Walking speed is typically around 3 mph, but even small changes affect how much product you’re laying down.
Flow rate combines your nozzle output with your movement, determining the actual delivery of product to your plants. Getting these measurements right ensures you’re not wasting expensive products or, worse, harming your garden with too much chemical concentration.
The Core Sprayer Calibration Formulas Every Lawn Care Enthusiast Should Master
Formula #1: Calculating Your Application Rate (GPA)
Let’s dive into the most fundamental formula you’ll need: calculating your application rate, measured in gallons per acre (GPA). This is the bedrock of proper sprayer calibration, and once you understand it, everything else falls into place beautifully.
Here’s the formula:
GPA = (Total spray volume in gallons x 43,560) / Area sprayed in square feet
The number 43,560 represents the square feet in one acre. Don’t let that big number intimidate you – it’s simply converting your measurements to a standard rate that works across any lawn size.
Let’s break this down with a real-world scenario. Imagine you’re treating your lawn with an organic weed control solution. You walk at a steady pace and spray a test area measuring 1,000 square feet. After spraying, you measure the tank and find you’ve used 0.5 gallons.
Here’s how the math works:
GPA = (0.5 x 43,560) / 1,000 = 21,780 / 1,000 = 21.78 GPA
So you’re applying roughly 22 gallons per acre. Knowing this rate helps you calculate exactly how much product you need and ensures you’re not over-applying, which saves money and protects the environment.
For accurate measurements, here are my tried-and-true tips: Use a marked container or measuring cup to check your tank volume before and after. Measure your test area carefully using a measuring tape or pacing it off (a typical stride is about three feet). Always spray your test area at your normal walking speed – consistency is key. Run the test twice to verify your results match up.
Remember, accurate calibration means you’re applying just the right amount of product where it’s needed, which is better for your lawn, your wallet, and our planet.
Formula #2: Determining Nozzle Output
Knowing exactly how much product each nozzle delivers is like having a perfectly calibrated measuring cup in your kitchen – it’s the foundation for accurate spraying. When your nozzles deliver uneven amounts, you’re essentially creating a patchwork lawn with overdosed and underdosed areas, wasting both product and money while potentially harming your grass.
The catch-test method is your best friend here, and it’s surprisingly simple. Here’s how to do it:
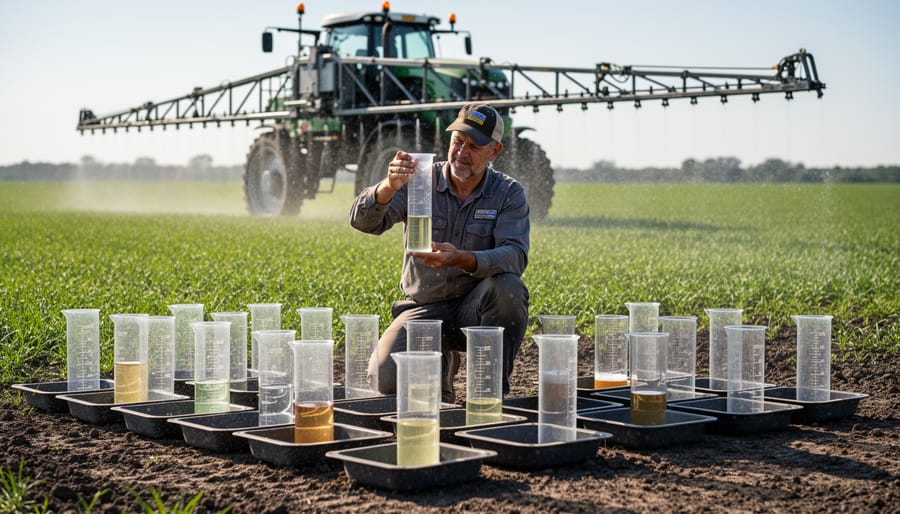
First, grab several identical containers – empty tuna cans or measuring cups work great. Place one container under each nozzle on your sprayer boom. Now spray into the containers for exactly one minute, keeping your sprayer at normal operating pressure. Measure the output from each container in fluid ounces.
The formula is straightforward: Nozzle Output (oz/min) = Total fluid collected / Time sprayed
For example, if you collect 12 ounces in one minute, your nozzle output is 12 oz/min. Easy, right?
Here’s the sustainability angle: consistent nozzle output means you’re applying exactly what your lawn needs – no more, no less. That’s better for the environment and your wallet.
If you notice uneven output between nozzles, check for clogs first. A 10% variation between nozzles is generally acceptable, but anything beyond that deserves attention. Worn nozzles are common culprits – they enlarge over time, delivering more product than intended. Replace any nozzle that varies significantly from the others.
Pro tip: Run this test at least once per season. Nozzles wear gradually, and you might not notice performance drops until you measure. I learned this the hard way after wondering why my fertilizer applications became increasingly patchy despite following the same routine.
Formula #3: Finding Your Optimal Ground Speed
Here’s something I learned the hard way: no matter how perfectly you’ve calibrated your nozzles, if your ground speed is inconsistent, your coverage will be all over the place. Think of it like watering with a hose while running versus walking—same flow rate, very different results.
The relationship is beautifully straightforward: slower speed means more product per area, faster speed means less. But here’s where it gets practical. Your optimal ground speed depends on your comfort level, terrain conditions, and ability to maintain consistency throughout the entire application.
The formula for calculating ground speed is:
Ground Speed (MPH) = (Distance in feet ÷ Time in seconds) × 0.682
For a simpler approach, time yourself walking or driving 100 feet at your normal spraying pace. Do this three times and average the results to account for natural variations.
Here’s my favorite real-world method: Mark a 50-foot course in your yard using stakes or flags. Walk it while pretending to spray, timing yourself with your phone. Most people comfortable with backpack sprayers walk at 2.5 to 3 MPH. Ride-on sprayers typically operate between 3 to 5 MPH.
The consistency part is crucial for sustainable, effective applications. Practice maintaining that same pace before you add any product to your tank. Your muscles develop memory for the rhythm. On a riding mower, use a landmark reference system—picking visual markers every 20 feet helps you self-correct if you’re speeding up or slowing down. This prevents over-application that wastes product and potentially harms your lawn, while ensuring adequate coverage where needed.
Formula #4: Converting Product Rates to Tank Mix
Here’s the formula that bridges the gap between product labels and your actual tank: Take the recommended rate per acre, multiply by your gallons per acre, then divide by your total tank size. Let me walk you through this because it’s honestly where most mixing mistakes happen, and I’ve been there too.
The basic formula looks like this: (Product rate per acre ÷ Gallons per acre) × Tank size = Amount of product to add
Let’s say you’re using a backpack sprayer with a 4-gallon capacity. Your herbicide label recommends 2 ounces per acre, and you’ve already calculated that your sprayer covers 0.5 acres per tank. Here’s your math: (2 oz ÷ 1 acre) × 4 gallons = 8 oz per tank. Wait, that doesn’t sound right, does it? That’s because we need to account for the fact you’re only covering half an acre. The corrected calculation: 2 oz × 0.5 acres = 1 oz of product in your 4-gallon tank.
For a larger pull-behind sprayer holding 25 gallons that covers 2 acres per tank, using the same product: 2 oz per acre × 2 acres = 4 oz of product total.
The most common mistake? Forgetting to match your coverage area to your tank size. I’ve seen folks accidentally double or triple their application rates this way, which wastes money and can harm your lawn. Always double-check: does your math result in the right rate per acre when you spread it back out? Another frequent error is mixing product for your entire tank when you only plan to spray a small area. Mix only what you need to avoid leftover chemicals that lose effectiveness over time. This approach saves resources and supports sustainable practices in your yard.
The Simple Step-by-Step Calibration Process That Works Every Time
Let’s walk through the complete calibration process together. I’ve done this countless times in my own garden, and I promise it’s much simpler than it sounds. The whole process takes about 20 minutes once you get the hang of it.
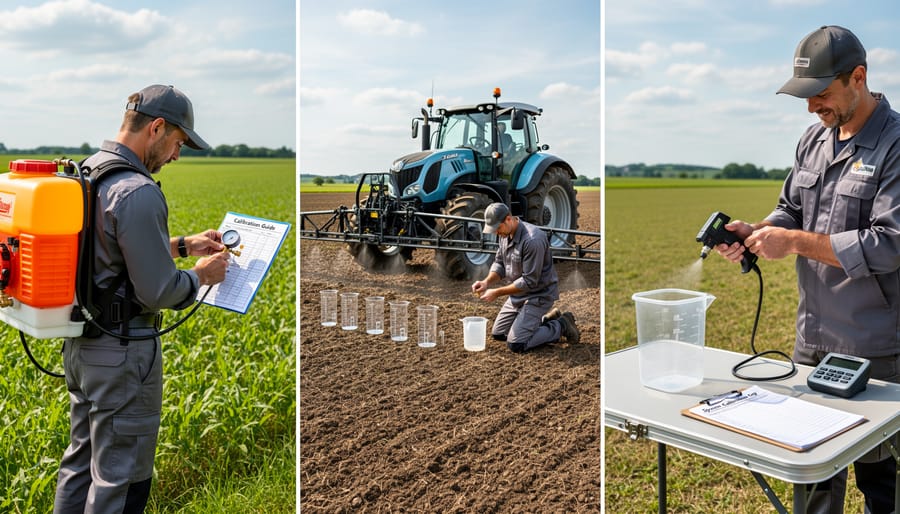
First, gather your tools. You’ll need a measuring tape or measuring wheel, a stopwatch or smartphone timer, several collection containers like mason jars or graduated cylinders, and a calculator. Having a notebook to record your measurements helps too, because trust me, you’ll forget those numbers otherwise.
Start by measuring your nozzle output. Place collection containers under each nozzle on your boom sprayer, or under your handheld nozzle. Run the sprayer for exactly one minute at your normal operating pressure. Pour the collected liquid into a measuring cup and record the output in ounces. If you have multiple nozzles, check each one because inconsistent outputs mean it’s time for nozzle replacement or adjustment.
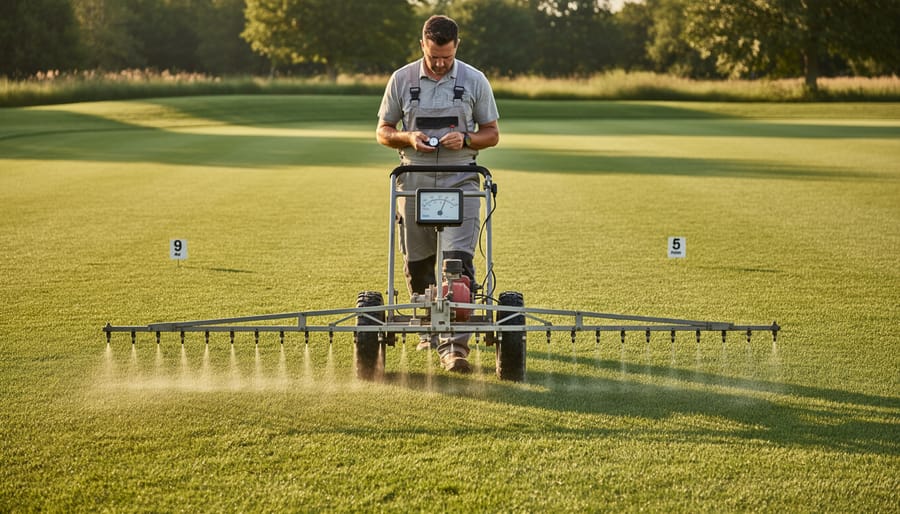
Next, measure your speed and coverage area. For boom sprayers, mark a 100-foot course in your yard. Time yourself driving this distance at your typical spraying speed. For backpack or handheld sprayers, measure how much area you can comfortably spray in one minute while maintaining good coverage.
Now the math part, which is actually pretty straightforward. Use the gallons per acre formula: multiply your nozzle output in ounces per minute by 5,940, then divide by the product of your speed in miles per hour and your nozzle spacing in inches. Don’t panic if math isn’t your strong suit. Most smartphone calculator apps make this easy, and you can also find free online calibration calculators.
Calculate your application rate by dividing the product label’s recommended amount per acre by your calibrated gallons per acre. This tells you exactly how much product to add to each tank.
Finally, do a test run. Mix a small batch according to your calculations and spray a measured area. This real-world verification catches any errors before you treat your entire lawn. Mark the sprayed area with flags and observe how the coverage looks.
The beauty of this process is that once you’ve calibrated, those numbers stay consistent as long as you maintain the same pressure, speed, and nozzles. I recalibrate at the beginning of each season and whenever I change products or notice uneven application. This simple routine saves product, protects your plants, and gives you confidence that you’re applying exactly what your lawn needs.
Quick Calibration Methods for Different Sprayer Types
Backpack Sprayers
Backpack sprayers deserve special attention since they’re workhorses for many of us tackling larger garden areas or spot-treating weeds. The good news? Calibrating them is actually simpler than you might think.
Here’s a practical approach: Walk at your normal spraying pace for 1 minute while spraying water into a measuring container. Multiply the ounces collected by 0.77 to get your gallons per acre rate. For example, if you collect 32 ounces in one minute, you’re applying about 25 gallons per acre (32 × 0.77).
For more precise work, especially when applying concentrated products, use this targeted method: Mark off a small area like 100 square feet, spray it at your normal speed, then measure what you used. Convert that to your application rate per 1,000 square feet.
The key is consistency—maintain the same walking speed, pump pressure, and nozzle distance each time you spray. This ensures you’re applying exactly what you intend, protecting both your plants and the environment while stretching your products further. A quick quarterly calibration check keeps everything accurate.
Boom Sprayers and Pull-Behind Units
Larger boom sprayers and pull-behind units require extra attention during calibration because you’re dealing with multiple nozzles working together. The key is ensuring each nozzle delivers the same amount of product across your entire spray width. Start by checking that all nozzles produce equal output – collect water from each nozzle for one minute and measure. If there’s more than a 10% difference between nozzles, it’s time for replacements.
For boom sprayers, use this adapted formula: gallons per acre = (gallons per minute × 5,940) ÷ (miles per hour × spray width in feet). The spray width becomes crucial here – a 10-foot boom requires different calculations than a 20-foot unit. Remember to measure your actual ground speed with a stopwatch over a known distance rather than relying on your tractor’s speedometer, which can be surprisingly inaccurate. This precision helps you avoid over-application, saving money and protecting the environment from unnecessary chemical runoff while ensuring complete, even coverage across your entire lawn or field.
Handheld and Spot Sprayers
For handheld pump sprayers and spot treatment bottles, calibration might seem less critical, but trust me, precision matters just as much here. Ever noticed brown patches where you spot-treated weeds a bit too enthusiastically? That’s usually an application rate issue.
Here’s a simple approach: spray water into a measuring cup for exactly 30 seconds at your normal pumping speed. If you collect 4 ounces, you’re applying 8 ounces per minute. Now measure how long it takes to cover a test area, like a 10-square-foot section. If that takes 15 seconds, you’re applying 2 ounces per 10 square feet, or about 87 ounces per 1,000 square feet.
For garden sprayers, the formula simplifies to: Application Rate = (Ounces collected / Time) × (Time to spray area / Area). This helps you avoid over-applying herbicides near desirable plants or wasting expensive organic treatments.
Pro tip: mark your spray bottle with tape at common mixing levels. Once calibrated, you’ll know exactly how much concentrate to add for consistent results every time, reducing waste and protecting both your wallet and the environment.
Common Calibration Mistakes and How to Avoid Them
We’ve all been there—you carefully mix your solution, measure everything precisely, and then realize your calibration was off. Don’t worry, it happens to the best of us! Let’s walk through the most common calibration mistakes so you can sidestep them with confidence.
The number one culprit? Inconsistent speed. When you’re testing your sprayer, it’s surprisingly easy to walk faster during the actual application than you did during calibration. Here’s a friendly tip: practice your walking pace with a stopwatch before you start. Mark off a measured distance and walk it several times until you can maintain that same steady rhythm. Your lawn will thank you for the consistency.
Pressure readings can be sneaky troublemakers too. Many gardeners check pressure at the pump but forget that pressure can vary at the nozzle, especially with longer hoses. Always verify pressure at the nozzle itself when calibrating, and recheck it periodically during application.
Environmental factors often catch people off guard. Wind can dramatically affect spray pattern and coverage, while temperature changes can alter how quickly products evaporate. Calibrate on a calm day similar to when you plan to spray, ideally with temperatures between 60-85°F.
Worn nozzles are silent saboteurs. Even slight wear can increase output by 10-15%, throwing off your entire calibration. Make it a habit to inspect nozzles before each season and replace any that show uneven spray patterns or increased flow rates.
Finally, calculation errors happen when we’re rushing. Double-check your math, use a calculator, and write down your formulas. Creating a simple calibration worksheet you can reuse makes the process foolproof. Remember, taking an extra five minutes to verify your calculations prevents wasting time, money, and products while protecting your lawn and the environment.
When to Recalibrate Your Sprayer (And Warning Signs You’re Overdue)
Think of sprayer calibration like tuning a musical instrument – it naturally drifts over time and needs regular attention to stay accurate. As a general rule, recalibrate your sprayer at the start of each growing season, and then again whenever you notice something feels off.
The warning signs are usually pretty obvious once you know what to watch for. Uneven coverage patterns are your first red flag – if some areas of your lawn look healthier while others show signs of stress or yellowing, your sprayer might be delivering inconsistent amounts. You might also notice that your concentrated products are lasting either much longer or running out faster than expected based on your coverage area. Both scenarios suggest your application rate has drifted from what you intended.
Visual damage to your lawn is the most serious indicator you’re overdue for recalibration. Brown patches, burned grass tips, or stunted growth often mean you’re over-applying, while persistent weeds or disease could signal under-application. Don’t ignore these signs – they’re costing you money and potentially harming your lawn.
From a sustainability perspective, recalibrating regularly prevents both product waste and environmental harm. Over-application sends excess chemicals into the soil and groundwater unnecessarily, while under-application means you’ll need to retreat areas, doubling your resource use. A quick calibration check every few months takes just minutes but saves significant waste over the season. If you’ve recently changed nozzles, adjusted pressure, or switched products, that’s another perfect time to run through your calibration formula again.
Helpful Tools and Resources to Make Calibration Easier
Getting your sprayer calibration right doesn’t mean you need to struggle with complex calculations on your own. There are fantastic tools available that make the process much smoother, whether you’re working with a tight budget or ready to invest in premium equipment.
For basic measurements, a good graduated measuring cup or container is essential. I’ve been using a simple plastic pitcher marked in both ounces and milliliters for years, and it cost less than five dollars. Pair this with a stopwatch or your phone’s timer app, and you’ve got the basics covered. For catching spray output, clear plastic containers work perfectly – you can even repurpose milk jugs with the tops cut off.
Digital options are game-changers for those who want to skip the math entirely. The SprayCalc app (available for both iOS and Android) walks you through calibration step-by-step and stores your equipment profiles for future reference. It’s free with basic features, though the premium version adds helpful calculators for mixing ratios. AgSpray Calculator is another solid choice, particularly praised by users for its intuitive interface.
For measuring nozzle output more precisely, consider investing in a flow meter. Budget-friendly options start around twenty dollars and simply attach between your sprayer and nozzle. They’re surprisingly accurate and eliminate guesswork. If you’re calibrating frequently, a digital scale that measures in grams can be incredibly helpful for weighing collected spray samples – more accurate than eyeballing liquid measurements in cups.
My honest recommendation? Start with the basics: measuring containers, a timer, and maybe download a free calculator app. These will handle ninety percent of your calibration needs. As you gain experience and confidence, you’ll know exactly which upgraded tools would genuinely make your life easier.
Taking the time to master sprayer calibration formulas might seem like extra work at first, but the payoff is absolutely worth it. When you apply the right amount of product exactly where it’s needed, you’re not just saving money on materials, you’re also protecting the environment from unnecessary chemical runoff and keeping your lawn healthier in the long run. Over-application wastes your hard-earned dollars and can damage the very grass you’re trying to nurture, while under-application means you’ll be out there doing the job all over again.
Think of calibration as your secret weapon for becoming a truly skilled lawn care practitioner. Every time you take those few minutes to measure your output rate and double-check your calculations, you’re making a responsible choice that ripples outward. Your family, your pets, and your neighbors benefit from more precise applications. The local waterways stay cleaner. And you gain the confidence that comes from knowing exactly what you’re doing.
Before your next application, whether it’s fertilizer, herbicide, or a simple lawn treatment, commit to running through the calibration process. Grab your measuring cup, walk your test area, and work through the formulas we’ve covered. You’ll quickly find that calibration becomes second nature, transforming you from someone who merely sprays their lawn into a knowledgeable, environmentally conscious lawn care expert who achieves consistently beautiful results while treading lightly on the planet.