Striping a lawn with a zero turn mower involves mowing around the edges of your lawn, before using the zero turn feature to tightly tuck into the first row and then create consecutive stripes, with the grass laid down in opposite directions.
This art involves mowing in different directions, bending grass blades to reflect light differently, and forming an alternating pattern of stripes.
Whether you’re using a riding mower or a push mower, the right tools, including a striping kit and a well-maintained mower deck, can help you achieve this.
Every step is crucial, from making the first pass to the last and final edge trim. So, let’s take a more in-depth look at how to create stunning lawns with stripes and make your yard stand out!
Essential Tools for Lawn Striping
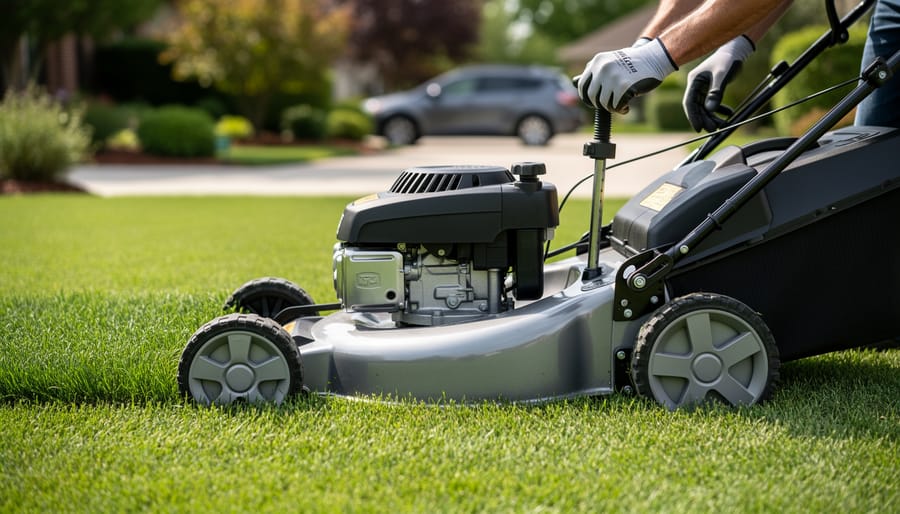
Two essential tools are indispensable to create a stunning lawn stripe: the right lawn mower and a striping kit. Many people prefer a push mower for lawn striping, as they are generally more accurate and only go where you push them.
Choosing the Right Lawn Mower
The choice of mower is crucial in lawn striping work. Riding mowers are ideal for larger lawns, while push mowers work well for smaller yards.
The mower should be capable of creating a straight line and bending the grass in the opposite direction on the ground with each pass. This bending of grass blades reflects light differently, creating the illusion of stripes.
The Role of Striping Kits

A striping kit enhances the striping work. It usually includes a roller that attaches to the mower’s deck. The roller bends the grass as you mow, making the stripes stand out more.
Whether creating a simple stripe pattern or a complex one like circles, the striping kit helps you achieve a professional look. It’s an essential tool to stripe your lawn and make it the envy of the neighborhood.
Planning Your Lawn Striping Patterns
Creating lawn stripes is an art that requires a bit of planning. The first step is to decide the orientation of your stripes.
This decision can be influenced by the shape of your lawn, the direction of light reflecting your house, or simply your personal preference.
The key is choosing a direction to make your stripes visible from the most commonly viewed angle.
Deciding the Orientation of Lawn Stripes
The orientation of your stripes can dramatically affect the visual impact of your lawn. For instance, mowing in the opposite direction on each pass can create a vibrant pattern of light and dark stripes.
This is due to the way the bent grass blade reflects light. Remember, the goal is to create a pattern that enhances the beauty of your yard.
The Art of Mowing Stripes: Step-by-Step Guide
Once you’ve planned your pattern, it’s time to start mowing. Creating stripes involves a few key steps: setting the stage with initial laps, mastering the straight line, and maintaining consistency in mowing.

Initial Laps: Setting the Stage for Striping
Start by mowing a perimeter around the edge of your lawn. This sets the stage for striping the perimeter and provides a neat border. It also gives you space to turn your mower at the end of each pass.
Mastering the Straight Line: Creating Basic Stripes
Next, start mowing in the direction you’ve chosen for your stripes. The striping kits attached to your mower will bend the grass blade as you mow, creating the striping effect. Remember to mow straight to ensure your stripes are neat and uniform.
Maintaining Consistency: Overlaps and Rhythm in Mowing
Consistency is vital in striping. Make sure to overlap your previous pass with each new one slightly. This ensures you don’t miss any grass and helps maintain the uniformity of your mowed stripes. Developing a rhythm in your mowing can also help you maintain straight lines and create a beautiful pattern on your lawn.
Advancing Your Lawn Striping Techniques
Once you’ve mastered basic striping, it’s time to experiment with more complex patterns. Two popular choices are the checkerboard and diamond patterns. These require more planning and precision but can create a stunning visual effect on your lawn.
Creating a Checkerboard Pattern on Your Lawn
A checkerboard pattern involves mowing your lawn in one direction and then mowing it again at a 90-degree angle. This creates a series of squares that resemble a checkerboard.
The striping kits attached to your mowers bend the grass blade in different directions with each pass, creating the checkerboard effect.
Experimenting with Diamond Pattern Striping

You must mow your lawn in diagonal lines for a diamond pattern. Start by cutting in one direction, then mowing again at a 45-degree angle. This creates a series of diamonds across your lawn.
Remember, consistency in your mowing and careful planning is the key to a successful pattern. Happy striping!
Dealing with Wet Grass and Shorter Grass Blade
Lawn striping is an art that can be affected by various factors, including the condition of the grass. Wet grasses and shorter grass blades present unique challenges that require specific techniques.
Mowing Tips for Moist Grass
Wet grasses can be tricky to mow and stripe. It tends to bend easily, which can make your stripes less visible. To create lawn stripes on the moist grass, mow slowly.
This gives the lawn stripers more time to bend the mow grass blade, enhancing the striping effect. Also, ensure your mower’s blades are sharp for a clean cut.
Adjusting Techniques for Shorter Grass Blade
A shorter blade can be harder to bend, making your stripes less pronounced. To overcome this, you may need to adjust your mowing patterns.
Consider making multiple passes over the same area or using a striping kit designed for shorter grass. You can create stunning stripes on any lawn with some practice and the proper techniques. Furthermore, if your grass is quite long, you need to cut the tall grass first, before doing a striping pass.
Finishing Touches to Your Striped Lawn
After you’ve mowed and created your stripes, it’s time for the finishing touches. Start by mowing a second circle around the perimeter of your yard.
This neatens the edge and covers any turning marks. Next, consider using striping kits to enhance the grass bends and make your stripes more pronounced.
Remember, the striping effect is more pronounced when the grass is healthy and has the proper length. Maintaining the grass at an appropriate height and regularly fertilizing and watering it to promote healthy growth is essential.
The goal is to create a great lawn that showcases the effort and care you’ve put into it. With these final touches, your striped lawn will be the envy of the neighborhood. Happy mowing!