When your riding mower fails to produce even a clicking sound when you turn the key, it often signals a serious electrical system issue. Understanding these common starting problems can save you time and money in repairs. The most frequent culprits include a dead battery, corroded battery connections, a faulty solenoid, or a malfunctioning safety switch. Before calling a repair service, simple troubleshooting steps like checking battery voltage, cleaning terminal connections, and testing the safety switches can often resolve the issue. This guide will walk you through the essential diagnostic steps to get your mower running again, helping you distinguish between quick DIY fixes and problems requiring professional attention. Whether you’re a seasoned gardener or new to mower maintenance, these proven solutions will help restore your machine’s starting power.
Safety First: Before You Begin
Before diving into any repairs on your riding mower, let’s ensure you’re working safely. Begin by parking your mower on a flat, level surface, preferably in a well-lit area. Remove the key from the ignition and disconnect the spark plug wire to prevent any accidental starts during your inspection.
You’ll need some basic tools for diagnosis: a socket set, adjustable wrench, multimeter for electrical testing, and a flashlight. Having a pair of insulated gloves and safety glasses is also essential, especially when working with the electrical system.
Make sure the mower has cooled down completely if it was recently running. Hot engine components can cause serious burns. Check that the area around you is clear of flammable materials, as you might be working with fuel components.
Keep a fire extinguisher nearby – it’s better to be prepared and not need it than the other way around. If you smell fuel strongly, wait for it to dissipate before proceeding. Never smoke or have open flames around while working on your mower.
Document your process by taking photos with your phone before removing any parts. This will help you remember how everything fits back together. If you’re unsure about any step, don’t hesitate to consult your owner’s manual or seek professional help.
Common Causes of No-Click Starting Issues
Dead or Weak Battery
A dead or weak battery is often the primary culprit when your riding mower won’t make any clicking sound. Understanding the symptoms of a bad lawn mower battery can help you diagnose the problem quickly. Start by checking the battery’s voltage using a multimeter – a healthy battery should read around 12.6 volts when fully charged. If it’s below 12 volts, your battery likely needs charging or replacement.
Look for signs of corrosion on the battery terminals, which appears as a white or greenish buildup. Clean the terminals using a wire brush and a mixture of baking soda and water if needed. Also, ensure the battery cables are securely connected – loose connections can prevent the necessary power from reaching the starter.
For a quick test, try jump-starting your mower using a car battery or portable jump starter. If the mower starts with a jump but won’t start again on its own, it’s time to replace the battery. Most riding mower batteries last 3-4 years, so if yours is older, consider a replacement as preventive maintenance.

Faulty Safety Switch Connections
Modern riding mowers are equipped with multiple safety switches to protect you during operation. When these switches malfunction or have loose connections, they can prevent your mower from starting – not even producing a click. The most common safety switches include the seat switch, brake pedal switch, and blade engagement switch.
Start by checking the seat switch, which ensures the mower only starts when someone is properly seated. Inspect the wiring underneath the seat for any visible damage or disconnected terminals. Next, locate the brake pedal switch, typically near the brake pedal mechanism. Make sure it’s properly aligned and the connections are secure.
To test these switches, you can temporarily bypass them one at a time (remember their locations for proper reconnection). If the mower starts after bypassing a particular switch, you’ve found your culprit. However, never operate the mower with bypassed safety switches – they’re essential for your protection.
Look for signs of corrosion on switch terminals, loose connections, or broken wires. Sometimes, simply cleaning the connections with electrical contact cleaner and ensuring tight connections can resolve the issue. If you find damaged switches, replace them immediately to maintain safe operation.

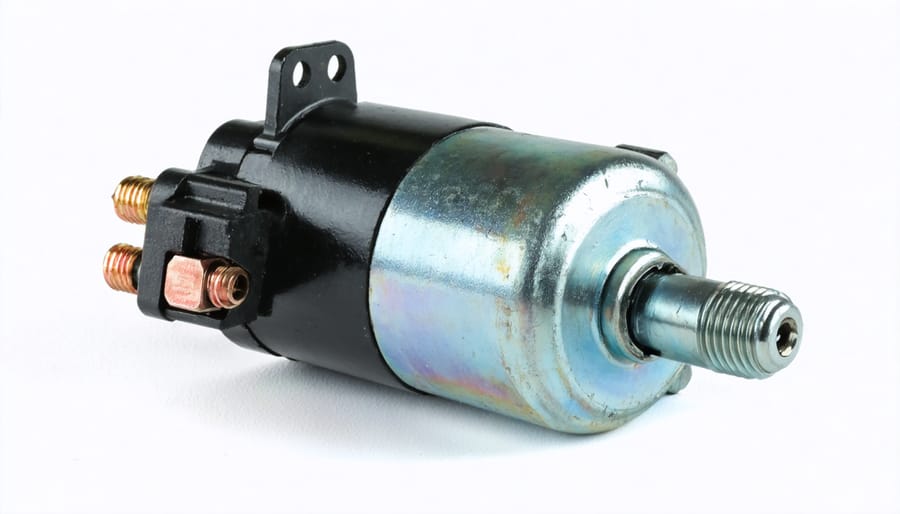
Solenoid Problems
When your riding mower produces no click sound when turning the key, a faulty starter solenoid is often the culprit. Understanding common faulty solenoid symptoms can help you diagnose the problem quickly. To test your solenoid, start by checking its connections – ensure they’re clean, tight, and free from corrosion. A simple test involves using a multimeter to measure the voltage across the solenoid terminals when someone turns the key. You should see 12 volts; if not, there might be a wiring issue or dead battery.
Another quick test is to bypass the solenoid by carefully touching a large screwdriver across its main terminals while someone turns the key. If the engine cranks, you’ve confirmed a bad solenoid. However, exercise caution with this test, as it can create sparks. Listen closely for any clicking sounds – even a faint click could indicate the solenoid is trying to engage but failing. If these tests confirm a faulty solenoid, replacement is usually the best solution, and it’s a fairly straightforward DIY task for most mower models.
Step-by-Step Diagnosis Process
When your riding mower fails to produce even a click when trying to start, following a systematic diagnosis process will help pinpoint the issue quickly. Begin by checking the safety switches – ensure you’re properly seated, the brake pedal is engaged, and the blade engagement switch is off. These switches are designed to prevent accidental starts and are often the culprit.
Next, inspect your battery connections. Look for loose, corroded, or dirty terminals. A visual check can reveal white or greenish buildup that prevents proper electrical flow. Clean the terminals with a wire brush and ensure all connections are tight. If the battery itself is more than three years old, test its voltage with a multimeter – a healthy battery should read around 12.6 volts.
Check your ignition switch by turning the key slowly through each position. You should feel distinct clicks at each setting. If the movement feels loose or inconsistent, the switch might be worn out. While you’re at it, examine the starter solenoid, which is typically located near the battery. Look for any signs of damage or burnt connections.
Don’t forget to verify the ground connection between the battery and the mower’s frame. A loose or corroded ground wire can prevent the electrical system from functioning properly. Also, check your main fuse – it’s usually located near the battery or under the hood. A blown fuse will be visibly darkened or have a broken metal strip inside.
If these steps don’t reveal the problem, inspect the starter motor connections. Loose or damaged wiring here can prevent the starting circuit from completing.
Quick Fixes and Solutions
Before calling a repair service, try these simple fixes that often resolve the “no click” starting issue. First, check your battery connections – loose or corroded terminals are a common culprit. Clean the terminals with a wire brush and ensure they’re tightly secured. If the connections look good, test your battery with a multimeter; it should read at least 12.6 volts when fully charged.
Next, inspect the safety switches, including the seat switch and brake pedal switch. Try starting the mower while firmly pressing the brake pedal and ensuring you’re properly seated. Sometimes, simply cleaning these switches with electrical contact cleaner can restore functionality.
Check your starter solenoid by listening carefully near it when turning the key. If you hear nothing, try gently tapping it with a wooden handle while someone turns the key – this temporary fix can indicate a failing solenoid that needs replacement.
Lastly, verify your fuses haven’t blown by checking the fuse box, typically located near the battery. Replace any blown fuses with ones of the same amperage rating.
When to Call a Professional
While many riding mower starting issues can be resolved through DIY troubleshooting, certain situations warrant professional intervention. Seek expert help if you’ve checked all basic components and still hear no click, especially if you notice burning smells or visible damage to electrical components. Call a professional when you discover corroded or damaged wiring that requires specialized knowledge to repair, or if the starter solenoid shows signs of internal failure beyond simple cleaning or tightening.
Consider professional service if you’re uncomfortable working with electrical systems or lack the proper diagnostic tools. Additionally, if your mower is still under warranty, attempting repairs yourself might void the coverage. Professional technicians should also be consulted when multiple systems seem to be failing simultaneously, or if you’ve replaced the battery and solenoid but the problem persists.
Remember, while paying for professional service might seem costly initially, it’s often more cost-effective than potentially causing additional damage through incorrect DIY repairs. A certified technician can not only fix the immediate problem but also identify and prevent potential future issues, ensuring your mower’s longevity and optimal performance.
Regular maintenance is your best defense against starting issues with your riding mower. Always check your battery connections, keep terminals clean, and test the battery voltage periodically. Remember to store your mower properly during off-seasons and schedule annual maintenance checks. By following the troubleshooting steps we’ve discussed and maintaining your mower properly, you can avoid most starting problems and extend your machine’s lifespan.