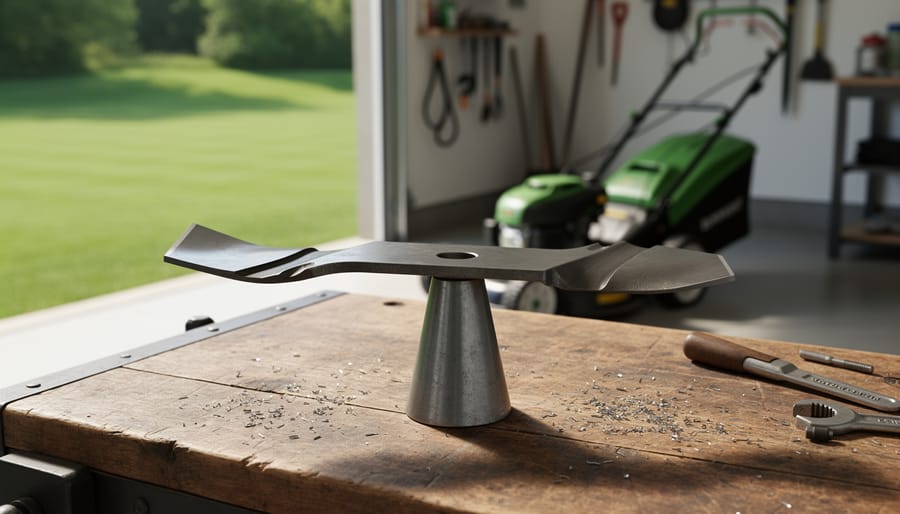
Remove your mower blade and suspend it horizontally through its center hole on a nail or specialized cone balancer—the heavier side will dip down, revealing imbalance. Mark the heavy side, then grind or file small amounts of metal from that end only, testing repeatedly until the blade remains level in all positions. Even a quarter-ounce difference creates destructive vibrations that damage spindle bearings, crack engine mounts, and deliver an uneven cut that leaves your lawn looking striped and ragged.
Most homeowners never balance their blades after sharpening, yet this overlooked step transforms mowing from equipment-destroying chaos into smooth, efficient operation. You’ll immediately notice reduced vibration, quieter operation, and cleaner cuts that help grass recover faster with less browning. The balancing process takes just five minutes using tools you likely own—a nail hammered into your garage wall works perfectly, though a $10 cone balancer offers slightly better precision for those who maintain multiple blades.
Balancing isn’t just about preventing costly repairs. An unbalanced blade spinning at 3,000 RPM creates forces that fatigue metal faster, leading to dangerous blade fractures mid-operation. It also wastes fuel as your engine works harder to compensate for wobbling weight distribution, and the uneven cutting height stresses grass plants unnecessarily. When combined with proper lawn care equipment maintenance, blade balancing becomes part of a sustainable approach that extends equipment life while improving lawn health—saving money and reducing the environmental impact of premature equipment replacement.
What Is Mower Blade Balancing (And Why It’s Not Just for Perfectionists)
The Real Cost of an Unbalanced Blade
An unbalanced mower blade might seem like a minor issue, but the ripple effects can seriously drain your wallet and compromise your lawn care results. Let’s talk about what’s really happening under your mower deck when that blade starts wobbling.
The most immediate casualty is your spindle assembly and bearings. These components are designed to handle the rotational force of a balanced blade, not the erratic hammering of an unbalanced one. That persistent vibration slowly destroys bearing surfaces, loosens mounting bolts, and can crack spindle housings. A replacement spindle assembly can easily cost between 75 and 200 dollars, not to mention labor if you’re not handy with tools.
Your engine takes a beating too. Think of it like driving with unbalanced tires at highway speeds. That constant shaking creates additional stress on motor mounts, can loosen electrical connections, and forces the engine to work harder to maintain blade speed. This shortened lifespan means replacing your mower years earlier than necessary.
Then there’s the quality issue. An unbalanced blade creates an inconsistent cutting height, leaving your lawn with that frustrating scalped-in-some-spots, shaggy-in-others appearance. You’ll find yourself mowing more frequently to compensate, wasting time, fuel, and energy.
Here’s the kicker: blade balancing costs practically nothing if you use simple DIY methods, maybe 20 dollars for a proper balancer. Compare that to hundreds in repair costs, and it’s clear that preventive maintenance through regular balancing is the financially smart, sustainable choice for any conscientious lawn keeper.
When to Balance Your Mower Blade
Always Balance After Sharpening
Here’s something that catches many folks off guard: even a perfectly balanced blade loses its equilibrium the moment you sharpen it. Think of it this way—when you file or grind that edge, you’re removing metal, and unless you’re some kind of sharpening wizard, you’re not taking off exactly the same amount from each side. Maybe one edge was duller and needed more work, or perhaps you just applied a bit more pressure on one pass. Whatever the reason, the result is the same: what was balanced before is now out of whack.
This is why balancing isn’t just a nice extra step—it’s an essential part of your sharpening routine. I learned this lesson the hard way after sharpening my blade beautifully one spring afternoon, skipping the balancing step because I was eager to get mowing. Within minutes, my mower was vibrating like a paint mixer, and I knew I’d made a rookie mistake. From an environmental perspective, running an unbalanced blade wastes fuel and wears out components faster, meaning more replacement parts and repairs. Make balancing your automatic follow-up to every sharpening session, and you’ll keep your mower running smoothly while extending its lifespan—better for your wallet and the planet.
Signs Your Blade Is Out of Balance
Your mower will usually give you pretty clear signals when something’s off with blade balance. The most obvious sign is excessive vibration during operation. If your mower suddenly feels like it’s shaking itself apart or rattling more than usual, an unbalanced blade is often the culprit. This isn’t just annoying—it’s your machine telling you something needs attention.
Take a close look at your lawn after mowing. Uneven cut patterns, where some sections appear perfectly trimmed while others look ragged or missed entirely, often point to balance issues. The blade may be favoring one side, creating inconsistent cutting heights across your lawn.
Listen to your mower too. Unusual noises like thumping, clunking, or a rhythmic wobbling sound typically indicate imbalance. A well-balanced blade should run relatively smoothly and quietly.
Finally, inspect the blade itself. Visible damage like bent tips, uneven wear on the cutting edges, or chunks missing from one side will throw off balance. Even if you can’t see obvious damage, running your fingers along both ends can reveal differences in edge thickness or wear patterns. Catching these signs early helps prevent more serious problems down the road and keeps your mowing routine sustainable and effective.
How to Balance Your Mower Blade: Two Proven Methods
Method 1: Using a Blade Balancer (The Easy Way)
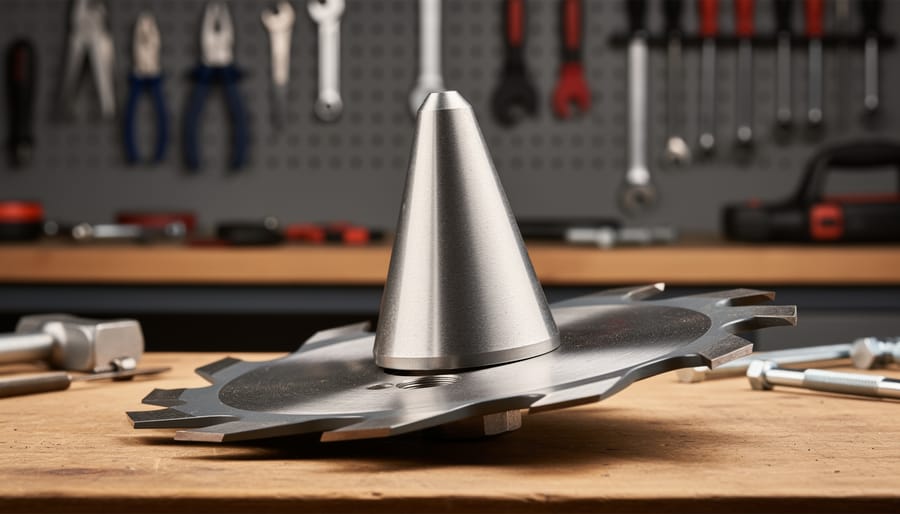
If you’re new to blade balancing, a cone-style or magnetic blade balancer is your best friend. These simple tools take the guesswork out of the process and cost between $10 and $25, making them a worthwhile investment for anyone serious about lawn care. Think of it as giving your mower blade a level playing field, literally.
Start by placing your balancer on a flat, stable surface away from drafts or vibrations. If you’re using a cone balancer, slide the blade’s center hole onto the cone so it can spin freely. With magnetic balancers, position the blade horizontally on the magnetic surface. The principle is the same for both: gravity reveals which side is heavier.
Here’s where patience pays off. Let the blade settle naturally without touching it. If one end dips down consistently, that side is heavier and needs attention. Sometimes the imbalance is obvious, but other times it’s subtle. Give it a minute to truly settle, especially if you’ve just sharpened the blade and removed metal from one side.
To correct the imbalance, you’ll need to remove small amounts of metal from the heavier end. Using a metal file or grinding wheel, carefully work the back edge of the blade, not the cutting edge you just sharpened. Make light passes and recheck frequently. I can’t stress this enough: remove just a little material at a time. It’s tempting to rush, but taking off too much means starting over with sharpening.
For product recommendations, the Oregon 42-047 Blade Balancer and the Maxpower 339390 Magnetic Balancer both deliver reliable results. The cone style offers precision, while magnetic balancers provide speed and convenience.
Once your blade remains horizontal on the balancer without tilting, you’re done. This balanced blade will now cut cleanly while reducing wear on your mower’s engine and bearings. It’s a small step that makes a genuine difference in your mower’s performance and longevity, supporting both sustainable equipment use and a healthier lawn.

Method 2: The Nail-Through-Wall Technique (No Tools Required)
Here’s my favorite method for balancing mower blades, and it costs absolutely nothing. This is sustainable lawn care at its finest – you’re probably already holding everything you need in your garage right now.
Start by finding a nail, bolt, or screwdriver that fits snugly through the center hole of your blade. The key word here is snugly – you want minimal wobble. I’ve had great success with a 16-penny nail or a long screwdriver shaft. Mount this horizontally between two sawhorses, ladder rungs, or even between two open drawers at the same height. Get creative with what you have available.
Once your improvised balance bar is secure and level, slide the blade onto it. Make sure the blade can spin freely without friction. Now comes the simple part: just wait and watch. The heavier side will naturally rotate downward due to gravity. It’s like magic, except it’s just physics doing its thing.
Give the blade a gentle spin and let it settle. Repeat this a few times to confirm which side consistently drops. That’s your heavy side, and it needs material removed. Mark this spot with a piece of tape or a marker so you don’t lose track.
To correct the imbalance, use a metal file, grinder, or even sandpaper to remove small amounts of metal from the heavy side. Work gradually – you can always remove more, but you can’t add it back. Remove material from the back of the blade only, never the cutting edge. After each adjustment, return the blade to your nail setup and test again.
This zero-waste approach takes patience, but it’s incredibly effective and requires no financial investment whatsoever.
How to Remove Metal to Correct Balance
Once you’ve identified the heavier side of your blade using a balancer, it’s time to remove a small amount of metal to achieve perfect balance. This step requires patience and a light touch, as it’s remarkably easy to remove too much material.
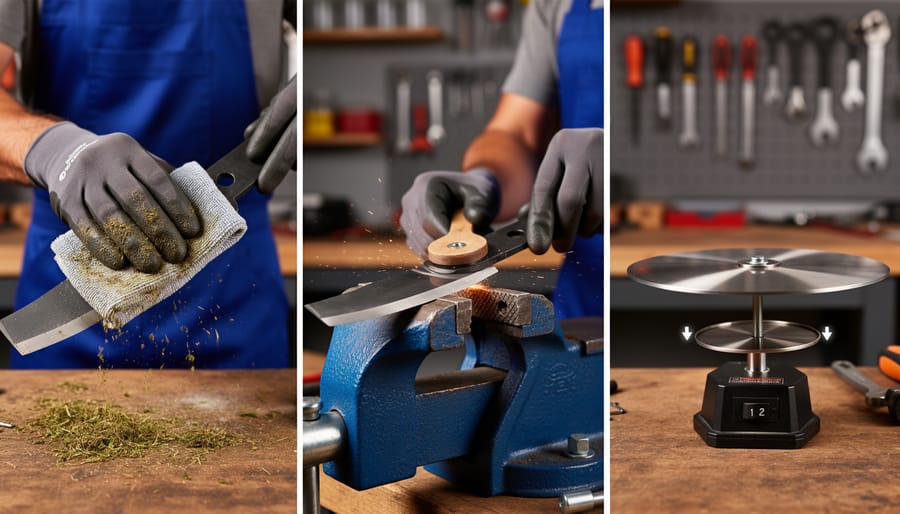
The safest approach is using a metal file or a bench grinder. If you’re using a file, work on the back (non-cutting) edge of the heavier side, making smooth, even strokes across the blade’s surface. This method gives you excellent control and virtually eliminates the risk of over-correction. I find it’s the best option for beginners who might be nervous about removing too much material.
For those comfortable with power tools, a bench grinder speeds up the process considerably. However, here’s where safety becomes paramount. Always wear safety glasses and work gloves. Keep the blade moving across the grinding wheel to avoid creating hot spots that can weaken the metal. Work in short bursts, checking your progress frequently on the balancer. Remember, you can always remove more metal, but you can’t put it back.
The golden rule is to remove material gradually. Make a few passes, then recheck the balance. It’s tempting to rush, especially when you’re eager to get back to mowing, but patience pays off here. Most blades only need a few grams removed to achieve proper balance.
Never remove metal from the cutting edge itself, as this affects sharpness and requires resharpening. Focus solely on the back edge or the blade’s body. This sustainable approach to maintenance ensures your blade lasts for many seasons while performing at its best.
Common Blade Balancing Mistakes (And How to Avoid Them)
Mistake 1: Removing Metal from the Cutting Edge
Here’s a balancing mistake that can actually create more problems than it solves. When you notice your blade is slightly heavier on one side, you might be tempted to grind or file metal directly from the cutting edge to even things out. Resist that urge! The cutting edge is where your blade does its work, and removing metal from this critical area dulls the blade and compromises its cutting ability. You’ll end up with a blade that needs sharpening much sooner than necessary. Even worse, this approach often leads to an endless cycle of imbalance. As you mow, the blade naturally wears unevenly based on your lawn’s contours and obstacles, so removing metal from the cutting edge means you’ll be constantly chasing perfect balance. Instead, always remove material from the back edge or flat surfaces of the blade where it won’t affect cutting performance. This sustainable approach keeps your blade sharper longer and reduces how often you need to sharpen and rebalance, saving you time and extending your blade’s lifespan.
Mistake 2: Skipping the Balance Check
I get it—you’ve just taken off a tiny bit of metal during a quick touch-up sharpening, and the balance check feels like overkill. Here’s the thing though: even removing a small amount of material can shift your blade’s center of gravity enough to cause problems. That slight imbalance creates vibration, which stresses your mower’s spindle bearings and engine shaft over time. Think of it like your car’s tires—you wouldn’t skip the balance after any work, right? The same principle applies here. Every sharpening session changes the blade’s weight distribution, even if it’s barely noticeable. Taking 30 seconds to check balance protects your equipment investment and ensures a cleaner cut. Plus, if you catch an imbalance early, fixing it is much easier than dealing with a worn-out spindle assembly later. Make balancing a non-negotiable part of your maintenance routine, and your mower will thank you with years of smooth, reliable service.
Connecting Balance to Your Complete Blade Maintenance Routine
The Perfect Maintenance Sequence
Getting your mower blade maintenance right isn’t about treating each task in isolation. Instead, think of it as a flowing sequence where each step sets up the next for success.
Start by removing the blade safely. Always disconnect the spark plug first, then tip your mower on its side (air filter up to prevent oil leaks). Use a block of wood to stabilize the blade while loosening the center bolt. Mark the blade’s orientation with a paint pen so you’ll know which side faces down during reinstallation.
Next, clean the blade thoroughly. Use a wire brush or putty knife to scrape away caked-on grass and debris. This isn’t just cosmetic, cleaning reveals nicks, cracks, or worn areas you might otherwise miss. A clean blade also gives you a true read during balancing later.
Now sharpen the blade, maintaining the existing angle (typically 30 to 45 degrees). Work evenly on both sides, removing the same amount of metal from each. This symmetrical approach naturally supports better balance, which is why sharpening and balancing work hand-in-hand as part of your equipment maintenance routine.
After sharpening, balance the blade using your preferred method. This step catches any weight differences created during sharpening and ensures smooth operation.
Finally, reinstall the blade with the marked side facing correctly. Torque the bolt to manufacturer specifications.
This complete sequence, performed every 20 to 25 mowing hours, keeps your blade performing like new for years, delaying replacement and reducing waste. That’s sustainable lawn care in action.
Deck Maintenance: The Often-Forgotten Partner
Here’s something many homeowners overlook: even perfectly balanced blades won’t perform their best in a gunked-up mower deck. Think of it this way—would you expect a freshly sharpened kitchen knife to work well if it’s covered in yesterday’s sticky residue? The same principle applies to your mower.
Grass clippings, mud, and moisture naturally accumulate under your deck after each mowing session. Left unchecked, this buildup creates several problems that directly impact blade performance. First, the extra weight of caked-on debris can throw off your carefully balanced blade. You might spend time getting everything perfectly balanced, only to have pounds of dried grass clumps creating new vibration issues within a few mows.
Second, buildup reduces airflow under the deck, which means your blade can’t create the proper suction to lift grass for a clean cut. You’ll notice ragged, uneven results despite having sharp, balanced blades.
The good news? Deck maintenance doesn’t require fancy products. After each mowing, tip your mower safely (consult your manual for the correct side) and use a putty knife or plastic scraper to remove clippings while they’re still fresh. For stubborn buildup, a stiff brush and plain water work wonders. Some folks spray cooking oil on a clean deck to prevent sticking—a simple, environmentally friendly solution.
Making deck cleaning part of your regular routine means your balanced blades can actually do their job properly, giving you the healthy, sustainable lawn you’re working toward.
Taking just a few minutes to balance your mower blades isn’t complicated, and the payoff is worth every second. You’ve seen how a balanced blade means a healthier lawn, less wear on your machine, and quieter, smoother operation. Best of all, you don’t need fancy equipment to get started. A simple nail-in-the-wall test works just as well as a commercial balancer for most home gardeners.
Make blade balancing part of your regular maintenance routine, right alongside sharpening. Check your balance every time you sharpen, and you’ll catch problems before they escalate into costly repairs or patchy lawn growth. This small habit extends your mower’s lifespan, reduces fuel consumption, and keeps replacement parts out of landfills, all hallmarks of sustainable equipment practices.
Before your next mow, take a moment to check your blade balance. Your lawn, your mower, and your wallet will thank you. Once you experience the difference a balanced blade makes, you’ll wonder why you ever skipped this simple step.