Mark your calendar with oil changes every 50 hours of operation or at least once per season, whichever comes first—dirty oil is the leading cause of engine failure in compact tractors, and this simple habit prevents costly repairs down the road. Check your air filter monthly during heavy use periods and replace it when you can see daylight through less than half the filter material, since a clogged filter reduces power by up to 20% and makes your engine work unnecessarily hard. Grease all fittings every 10 hours of use, paying special attention to front axle pivots and loader attachment points where dirt accumulation causes premature wear that leads to expensive part replacements.
Your tractor represents a significant investment in your lawn care routine, and a structured maintenance schedule transforms it from a potential money pit into a reliable partner for years to come. The difference between tractors that last 15 years versus those that fail after five often comes down to consistent, preventive care rather than reactive repairs. Most compact tractor problems—from hard starting to hydraulic leaks—stem directly from skipped maintenance tasks that take just minutes to complete.
This guide breaks down exactly when to perform each maintenance task throughout the year, connecting every action to the specific problems it prevents. You’ll discover which warning signs indicate immediate attention and which routine tasks deliver the biggest return on your time investment, all while keeping your equipment running sustainably and efficiently.
Why Your Compact Tractor Needs a Maintenance Schedule (And What Happens When You Skip It)
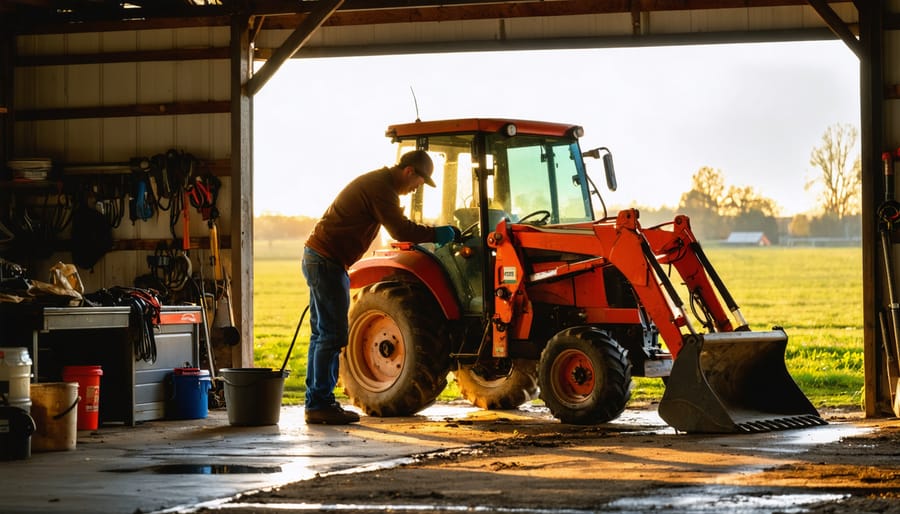
Your compact tractor works hard. Unlike larger farm equipment that might log a few intense weeks during planting or harvest, your machine tackles weekly mowing, seasonal grading, snow removal, and countless other tasks throughout the year. This constant use in varying conditions puts unique stress on every component, from the engine to the hydraulics.
Here’s what I’ve learned from years of maintaining equipment and talking with fellow property owners: skipping maintenance doesn’t save time or money. It just delays the inevitable breakdown until the absolute worst moment. I can’t count how many stories I’ve heard about tractors refusing to start during the first heavy snowfall or losing hydraulic pressure halfway through preparing a garden bed for spring planting. One neighbor spent an entire weekend hand-shoveling his driveway because he’d ignored a simple oil change that led to engine seizure.
The costs add up quickly when prevention turns into repair. A neglected air filter might save you fifteen minutes today, but that contaminated filter allows debris into the engine, potentially causing hundreds or thousands of dollars in damage. Regular maintenance catches small issues before they cascade into major failures. You’ll extend your equipment’s lifespan significantly, protecting your investment while keeping your property looking its best.
There’s an environmental angle here too that’s worth considering. Well-maintained tractors run more efficiently, burning less fuel and producing fewer emissions. Clean air filters, fresh oil, and properly inflated tires all contribute to better fuel economy and reduced environmental impact. When you commit to a maintenance schedule, you’re not just protecting your wallet and weekend plans, you’re also choosing a more sustainable approach to property care.
The good news? A simple, consistent schedule prevents most common problems before they start. Let’s look at what that schedule should include.
Before Every Use: Your Pre-Operation Checklist

Visual Walk-Around Inspection
Think of your daily walk-around as a friendly conversation with your tractor. Before you fire up that engine, take just five minutes to circle your machine and really look at it. You’ll be amazed at what you can catch early.
Start with the tires. Look for proper inflation, unusual wear patterns, or embedded debris that could lead to a flat mid-mow. Then scan underneath for any fresh oil, hydraulic fluid, or fuel leaks. A few drops might seem minor, but they’re often your first warning sign of a bigger issue brewing.
Next, give those visible bolts and connections a visual check. Vibration loosens hardware over time, and a missing bolt on your mower deck can turn into an expensive repair. Run your eyes along hoses for cracks or bulging, and inspect belts for fraying.
Check your mower deck for damage, bent blades, or grass buildup that affects cutting performance and puts extra strain on your engine. Look at hydraulic cylinders for moisture or corrosion.
The secret to making this routine stick is simplicity. Keep it quick and purposeful. Many tractor owners find that doing their walk-around at the same time each session turns it into muscle memory rather than a mental burden. You’re not just checking boxes; you’re building a relationship with your equipment that prevents headaches and extends its life sustainably.
Fluid Level Checks That Matter Most
Think of fluid checks as taking your tractor’s vital signs – a few minutes of attention can save you from costly breakdowns and keep your lawn care partner running strong for years.
Start with engine oil, your tractor’s lifeblood. Park on level ground, let the engine cool for a few minutes, then pull the dipstick, wipe it clean, reinsert it fully, and check the level. The oil should sit between the minimum and maximum marks. Dark, gritty oil needs changing, while milky oil signals water contamination requiring immediate attention.
Hydraulic fluid powers your loader and attachments. Check the sight glass or dipstick according to your manual – some tractors need the engine running, others don’t. Low levels mean potential leaks, so inspect hoses and connections. Clean fluid should be clear or amber, not cloudy or burnt-smelling.
Coolant prevents overheating during those long mowing sessions. Check the overflow reservoir when cold – never open a hot radiator cap. The level should meet the “full cold” line, and the mixture should be vibrant green, orange, or pink depending on type. Rusty or murky coolant loses effectiveness and signals it’s time for a flush.
These simple checks, done weekly during heavy use or monthly otherwise, catch problems before they strand you mid-project.
Quick Safety Systems Test
Before you start any mowing session, take just two minutes to run through these critical safety checks. Think of it as buckling your seatbelt before driving – small effort, huge protection.
First, test your PTO (power take-off) engagement. Start the tractor, engage the PTO briefly, then disengage it. It should respond smoothly without grinding or hesitation. A sluggish PTO can unexpectedly engage while you’re working near rotating blades, creating a serious hazard. Plus, catching PTO issues early prevents expensive transmission damage down the road.
Next, check your seat safety switch by standing up while the engine runs and the PTO is engaged. The engine should cut off immediately. If it doesn’t, this switch needs immediate attention – it’s your emergency shutoff if you fall from the seat.
Finally, test your brakes in an open area. They should engage firmly and evenly. Uneven braking causes loss of control on slopes and can damage your transmission over time. If one side grabs harder than the other, adjustment or replacement is needed.
These quick checks protect both you and your equipment investment while keeping your lawn care routine sustainable and worry-free.
Every 25-50 Hours: Your Regular Maintenance Rhythm
Engine Oil and Filter Changes
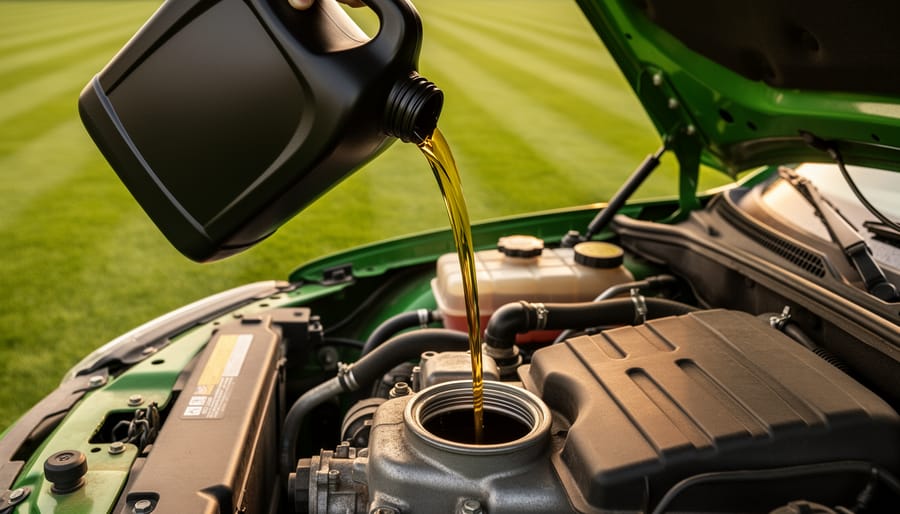
Changing your tractor’s engine oil and filter is one of those maintenance tasks that truly makes a difference in longevity and performance. Think of it as giving your hardworking machine a fresh start every time. Most compact tractors need oil changes every 50-100 hours of operation or annually, whichever comes first. If you’re using your tractor heavily during spring and fall lawn care seasons, you’ll likely hit those hours faster than you think.
Start by running your tractor for a few minutes to warm the oil, which helps it drain more completely. Position a suitable drain pan underneath, then remove the drain plug carefully. While the oil drains, replace the oil filter. Here’s a helpful tip: apply a thin layer of fresh oil to the new filter’s gasket before installation to ensure a proper seal.
Choosing the right oil matters tremendously for performance and sustainability. For most compact tractors, 10W-30 or 15W-40 works well, but check your owner’s manual first. If you’re in colder climates, lighter weight oils help with winter starting. Hot summer conditions may require heavier grades. Some newer tractors benefit from synthetic oils, which last longer and reduce environmental impact through extended change intervals.
Disposal is where environmental responsibility comes in. Never pour used oil down drains or onto the ground. Most auto parts stores and municipal recycling centers accept used oil and filters for free. Some even take the whole drain pan. By properly recycling, you’re protecting groundwater and keeping harmful contaminants out of your garden ecosystem. It’s a small effort that makes a meaningful difference for the environment we’re all working to nurture.
Air Filter Cleaning and Replacement
If you’re mowing regularly, especially in dry or dusty conditions, your air filter becomes your tractor’s first line of defense against engine damage. Think of it as your engine’s lungs—when clogged, performance suffers, fuel efficiency drops, and you’re working your equipment harder than necessary.
Most compact tractors use either foam or paper filters, and knowing which you have matters. Foam filters are washable and reusable—simply clean them with soap and water, let them dry completely, then lightly oil them before reinstalling. Paper filters can be gently tapped to remove loose debris, but once they’re truly dirty or damaged, replacement is your only option. A good rule of thumb: inspect your filter every 25 hours of operation or weekly during heavy mowing season.
Dusty conditions accelerate clogging significantly. If you notice reduced power, black exhaust smoke, or your tractor struggling on tasks it normally handles easily, check that filter first. A clean air filter can improve fuel efficiency by up to 10 percent while protecting your engine from costly damage. This simple maintenance step saves money and supports sustainable equipment care by extending your tractor’s lifespan and reducing unnecessary fuel consumption.
Mower Deck Maintenance
Your mower deck deserves more attention than it typically gets, and here’s why: a well-maintained deck directly impacts your lawn’s health and appearance. Think of it as the business end of your tractor, where all the cutting magic happens.
Start by cleaning the underside after every few mowing sessions. Grass clippings, moisture, and dirt create a thick buildup that reduces cutting efficiency and can harbor rust. Simply tilt the deck safely (following your manual’s instructions) and scrape away debris with a putty knife. A cleaner deck means better airflow and cleaner cuts.
Blade maintenance is non-negotiable for lawn health. Dull blades tear grass rather than cutting cleanly, leaving ragged edges that turn brown and invite disease. Sharpen blades at least twice per season, or more if you’re mowing frequently. After sharpening, always balance your blades using a simple cone balancer. Unbalanced blades create vibration that damages spindle bearings and produces uneven cuts.
Don’t forget spindle greasing every 25-50 hours of operation. Those grease fittings on your deck spindles keep bearings running smoothly. Skip this task, and you’ll face expensive spindle replacements down the road. A few pumps of grease is cheap insurance for maintaining that professional-quality cut your lawn deserves.
Every 100-200 Hours: Deeper Maintenance Tasks

Transmission and Hydraulic Service
Your tractor’s transmission and hydraulic systems are the muscle behind all that productive work, so keeping them healthy is essential for reliable performance. Think of transmission fluid like the lifeblood of your machine—it keeps everything moving smoothly and prevents costly breakdowns.
Most compact tractors use either gear-driven or hydrostatic transmissions. Gear transmissions typically need fluid changes every 200-300 hours or annually, while hydrostatic systems often require attention every 400 hours or once yearly. Check your owner’s manual for specific intervals, as this varies by manufacturer.
During service, replace both the fluid and filters to trap contaminants that accelerate wear. I learned this lesson when a friend skipped filter changes and faced expensive repairs—don’t make that mistake! While you’re at it, inspect hoses and connections for leaks, which often appear as puddles under your parked tractor or wet spots around fittings.
Hydrostatic transmissions offer smoother operation and easier speed control, making them popular for lawn care tasks, but they’re more sensitive to dirty fluid. Gear transmissions are simpler and more forgiving but require clutch engagement. Understanding your system helps you spot problems early—like sluggish response indicating low fluid levels or unusual noises suggesting contamination. Regular fluid checks between services take just minutes and can prevent major headaches down the road.
Fuel System Care
Your tractor’s fuel system deserves regular attention to prevent those frustrating morning no-starts. Think of it as keeping your equipment’s bloodstream clean and flowing smoothly.
Start with fuel filter replacement every 200 hours or annually, whichever comes first. A clogged filter is one of the most common culprits behind sputtering engines and poor performance. It’s a simple swap that takes just minutes but saves hours of headaches later.
Don’t overlook your water separator if your tractor has one. Check it monthly and drain any accumulated water immediately. Water contamination leads to corrosion and fuel system damage, especially problematic during humid summer months or after extended storage.
Ethanol-blended fuels present unique challenges for small engines. This common gas additive attracts moisture and can degrade rubber fuel lines over time. For sustainable equipment care, consider using ethanol-free fuel when available, or add a quality fuel stabilizer if your tractor sits idle for more than 30 days. This simple step prevents gummed-up carburetors and extends component life.
Always store your tractor with a full tank to minimize condensation buildup, but add stabilizer first. These preventive measures keep your fuel system healthy and your tractor ready to work when you need it most.
Cooling System Maintenance
Your tractor’s cooling system works incredibly hard, especially during those long summer mowing sessions, and it deserves some regular attention to keep everything running smoothly. Think of it as preventive care that saves you from overheating headaches down the road.
Start by checking your radiator monthly during heavy-use seasons. If you’re working in dusty conditions or managing larger lawn areas, debris and grass clippings can quickly clog the radiator fins. A simple spray-down with a garden hose from the back of the radiator (pushing debris out, not in) keeps air flowing freely. This five-minute task can prevent costly overheating damage.
Your coolant needs replacing annually or according to your manual’s specifications. Old coolant loses its protective properties and can lead to corrosion inside your engine. When you’re changing it, that’s the perfect time to inspect all hoses and belts. Look for cracks, soft spots, or any signs of wear. Squeeze the hoses gently – they should feel firm, not mushy. Belts should have minimal play when you press them.
Catching a worn belt before it snaps saves you from being stranded mid-mow. These straightforward maintenance steps protect your investment while keeping your tractor ready for reliable lawn care season after season.
Seasonal Maintenance: Preparing for Storage and Spring Startup
Winter Storage Done Right
When Old Man Winter arrives, proper storage can mean the difference between a tractor that fires right up in spring and one that leaves you frustrated. Think of winter storage as tucking your tractor in for a long nap—you want it comfortable and protected.
Start with fuel stabilization to prevent that sticky, gummy buildup that clogs carburetors and fuel lines. Add a quality fuel stabilizer to a full tank (a full tank prevents condensation), run the engine for a few minutes to circulate it through the system, then either drain the carburetor or run the engine until it stops. Your spring self will thank you.
Next up is battery care. Remove the battery and store it somewhere cool but not freezing. Clean the terminals, give it a full charge, and top it off monthly to maintain its health. This simple step prevents the dreaded dead battery scenario come planting season.
Moisture is your tractor’s enemy during storage. If you’re storing outdoors, invest in a breathable, weather-resistant cover rather than plastic tarps that trap moisture and create a rust-promoting sauna. For sustainable covering, canvas tarps last years and won’t end up in landfills. Store in a dry, ventilated space whenever possible.
Finally, inflate tires to the recommended pressure to prevent flat spots and cracking. If storing long-term, consider placing the tractor on blocks to remove weight from the tires entirely. These preventive steps ensure your reliable companion is ready when warm weather returns.
Spring Awakening Checklist
After months of winter rest, your tractor needs a thorough wake-up call before tackling spring tasks. Start with fresh fuel, as gasoline degrades over time and can lead to common spring startup problems. If you didn’t add fuel stabilizer before storage, drain the old fuel completely and replace it with fresh gas.
Next, reconnect and charge your battery. Cold temperatures drain battery power, so give it a full charge before attempting to start. While you’re at it, inspect the terminals for corrosion and clean them with a wire brush if needed.
Now for the detective work: check carefully for winter damage. Rodents love to nest in warm engine compartments and may have chewed through wires or hoses. Look for telltale signs like shredded materials or droppings. Inspect belts, hoses, and fluid levels for any weather-related deterioration.
These steps are crucial for getting equipment running after storage and preventing frustrating delays when you’re eager to start your lawn care season. A little preparation now saves hours of troubleshooting later.
Troubleshooting Common Maintenance-Related Problems
Engine Performance Issues
When your trusty garden tractor starts acting up, it’s often telling you something about its maintenance needs. Hard starting typically points to air filter clogs, old fuel, or dirty spark plugs—all straightforward fixes you can tackle yourself. If your compact tractor won’t start at all, checking these basics should be your first step before calling in professional help.
Loss of power during mowing often stems from a clogged air filter restricting airflow, or dirty fuel filters that limit fuel supply to the engine. These are quick wins—simply replacing filters according to your maintenance schedule usually restores performance immediately. Rough running or sputtering might indicate water in your fuel system or carbon buildup from irregular use.
Here’s a good rule of thumb: if the issue involves filters, fluids, or spark plugs, you’re looking at DIY territory. However, if you’ve addressed these basics and still experience problems like persistent knocking sounds, excessive smoke, or complete power loss, it’s time for professional diagnosis. These symptoms could signal internal engine wear or fuel system issues requiring specialized tools and expertise. Keeping up with preventive maintenance means you’ll rarely face these bigger problems.
Hydraulic and PTO Problems
Before you start pricing out expensive hydraulic repairs or specialist visits, let’s explore some simple maintenance solutions that often resolve these frustrating issues. Weak loader performance is frequently caused by low hydraulic fluid levels or contaminated fluid rather than pump failure. Check your fluid reservoir first, then inspect for leaks around hoses and connections. If the fluid looks milky or contains debris, a complete flush and filter replacement often restores full power.
When implements won’t engage properly, the culprit is often debris buildup around connections or worn splines that just need cleaning and lubrication. For PTO problems, start with the basics: verify proper engagement lever operation, check for obstructions, and ensure your PTO shield isn’t rubbing. Strange grinding or clicking noises during operation might just mean your universal joints need fresh grease. Regular greasing every 10 hours of operation prevents most of these noises and extends component life significantly. This proactive approach saves money and keeps your equipment running smoothly while reducing waste from premature part replacement.
Unusual Noises and Vibrations
Your tractor will tell you when something’s wrong, you just need to listen. That grinding sound from the transmission or unusual squealing from belts aren’t random quirks to ignore. They’re early warning signs that can save you from expensive repairs down the road.
Different sounds indicate specific problems. A knocking noise often points to loose engine components or worn bearings, while clicking sounds during operation might signal low hydraulic fluid or air in the lines. Excessive vibration when you engage the PTO or mower deck usually means blade imbalance or loose mounting bolts.
Here’s the practical approach: when you notice something unusual, stop immediately and investigate. Check for loose parts, inspect fluid levels, and examine belts for wear. Keep a simple maintenance log noting when odd noises appear, as patterns help diagnose intermittent issues. Regular inspections during your scheduled maintenance catch most problems before they become noisy emergencies. Remember, addressing strange sounds promptly prevents minor adjustments from becoming major overhauls, which is better for both your wallet and the environment by extending your equipment’s lifespan.
Creating Your Personal Maintenance Log
Think of your maintenance log as your tractor’s health diary. Whether you’re recording oil changes or troubleshooting that occasional rough start, keeping detailed records protects your investment and makes future decisions so much easier.
For warranty compliance, this isn’t optional. Most manufacturers require proof of regular maintenance to honor warranty claims. A simple missed oil change record could cost you thousands down the road. When it comes to resale value, buyers pay premium prices for tractors with documented care histories. It shows you’ve been a responsible steward of the machine.
The analog approach works beautifully for many of us. Keep a dedicated spiral notebook in your tractor shed or garage. Date each entry, note the hour meter reading, and describe what you did. Include observations like “engine running slightly warmer than usual” or “noticed small hydraulic leak near pump.” These notes become invaluable for spotting patterns before they become problems. Attach receipts and parts information with a simple stapler or folder pocket.
If you prefer digital tracking, several smartphone apps designed for equipment maintenance make the job even easier. You can set automatic reminders based on hours or calendar dates, snap photos of issues you’re monitoring, and back everything up to the cloud. Some apps even let you scan receipts directly into your maintenance records.
The key is choosing a system you’ll actually use consistently. Start each season by reviewing your log from the previous year. This helps you anticipate upcoming needs and budget accordingly. As you build this practice, you’re not just maintaining a machine but developing a sustainable relationship with your equipment. You’ll start recognizing its rhythms, catching small issues early, and ultimately spending more time enjoying your property and less time dealing with unexpected breakdowns.
Here’s the truth that every experienced tractor owner eventually learns: spending a few minutes on regular maintenance is infinitely easier than dealing with a breakdown in the middle of mowing season. Think of it this way—would you rather spend 15 minutes checking fluids on a pleasant Saturday morning, or three hours troubleshooting why your tractor won’t start when you’ve got a lawn full of overgrown grass?
The beautiful thing about developing a maintenance routine is that it gets easier over time. What might feel overwhelming at first quickly becomes second nature. You’ll start to recognize what “normal” looks, sounds, and even smells like for your equipment, making it much easier to spot potential problems before they become serious. This confidence translates into better care for your lawn and garden, because you’re working with reliable equipment that performs consistently.
Beyond the practical benefits, maintaining your tractor properly aligns perfectly with sustainable gardening practices. Well-maintained equipment runs more efficiently, uses less fuel, produces fewer emissions, and lasts significantly longer—keeping machinery out of landfills and reducing the environmental impact of manufacturing replacements.
Ready to get started? Don’t feel like you need to tackle everything at once. Begin with just the pre-operation checklist tomorrow before you fire up your tractor. Walk around, check those fluid levels, inspect the tires, and look for anything unusual. That single habit will set you on the path to becoming a confident, capable tractor owner who’s ready for any lawn care challenge.