**Check the fuel system first**—old gasoline loses combustibility after 30 days, causing 80% of starting failures. Drain any fuel older than a month, replace the fuel filter, and inspect the carburetor for gum deposits that block the jet openings.
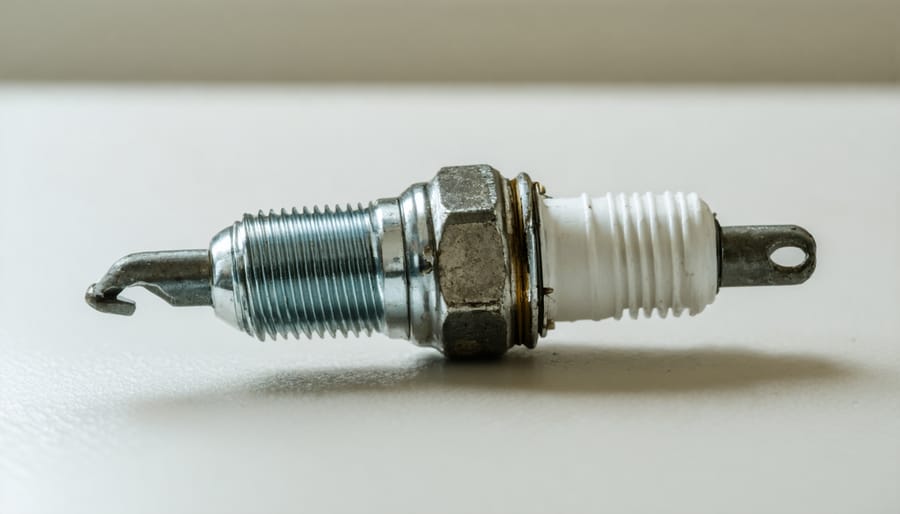
**Test the spark plug by removing it and grounding it against the engine while pulling the starter cord**. A strong blue spark means ignition is working; a weak orange spark or no spark requires plug replacement or magneto adjustment. Clean carbon buildup with a wire brush before replacing.
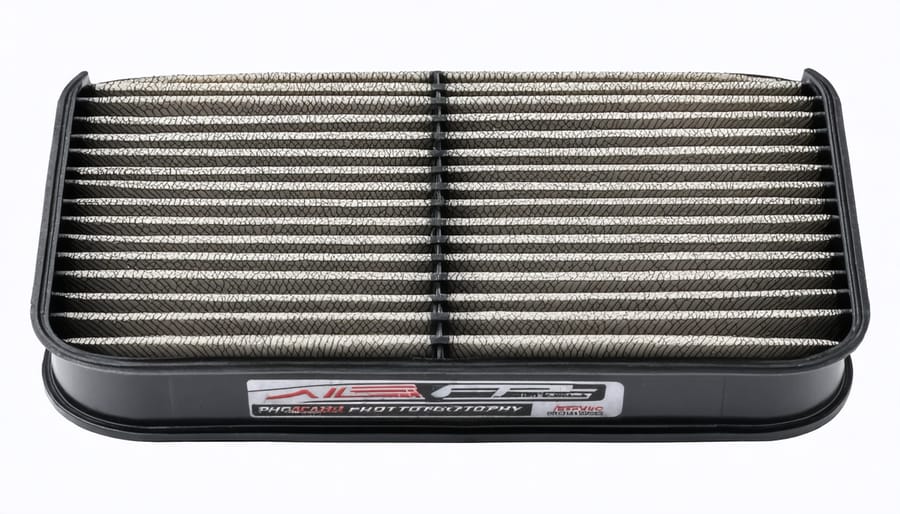
**Examine the air filter for dirt, grass clippings, or oil saturation that restricts airflow**. A clogged filter creates an overly rich fuel mixture that floods the engine. Tap foam filters clean or replace paper elements—this five-minute fix resolves many “won’t start” complaints.
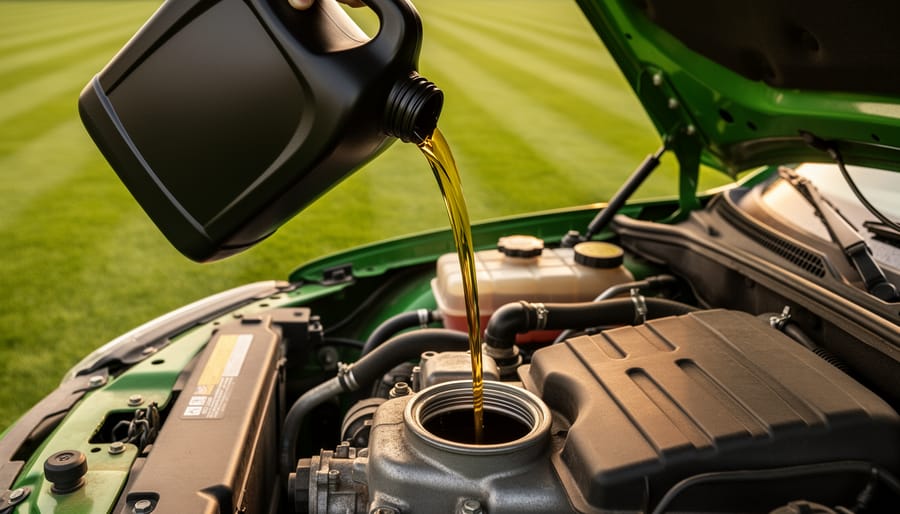
**Verify the oil level sits between the dipstick marks**, as low-oil shutoff sensors prevent engine damage by blocking ignition. Similarly, check that the blade isn’t jammed with debris underneath the deck, which prevents the engine from turning over.
Most mower problems stem from these four systems: fuel delivery, spark generation, air intake, and basic maintenance oversights. This guide walks you through systematic troubleshooting that progresses from simple 5-minute checks to more involved repairs, helping you determine whether you need a screwdriver or a small engine mechanic. You’ll save money, reduce waste by extending your mower’s life, and gain confidence handling future issues—all while keeping your lawn care routine sustainable and self-sufficient.
Understanding the Basics: What Your Mower Engine Needs to Run
Think of your mower engine like your body getting ready for a morning jog—it needs four essential elements working together to spring into action. Understanding these basics will transform you from a frustrated mower owner into a confident troubleshooter.
**Fuel** is your engine’s breakfast. Just as you can’t run on empty, your mower needs clean, fresh gasoline to power through your lawn. Old fuel that’s been sitting in your garage since last season? That’s like trying to fuel up on spoiled milk—it simply won’t give your engine the energy it needs.
**Air** is the breath your engine takes. Every combustion requires oxygen, and your mower pulls this through an air filter. Imagine trying to breathe through a dirty bandana—that’s what your engine experiences with a clogged filter. It needs a clear pathway to gulp in the air necessary for combustion.
**Spark** is the wake-up call that ignites everything. The spark plug creates a tiny lightning bolt at precisely the right moment, igniting the fuel-air mixture. Without this crucial spark, you’ve got all the ingredients but no way to start the cooking process.
**Compression** is the squeeze that makes it all work. As the piston moves, it compresses the fuel-air mixture into a small space before the spark ignites it. Think of it like pumping up a bicycle tire—that pressure is essential. Without adequate compression, your engine lacks the power to run efficiently.
When your mower won’t start, one of these four elements is missing or inadequate. The good news? By checking each systematically, you’ll quickly pinpoint the problem and get back to creating that beautiful, sustainable lawn you’re cultivating.
First Things First: The Quick Safety Check
Before we dive into solving your mower’s mysterious behavior, let’s talk about staying safe—because a well-maintained lawn isn’t worth a trip to the emergency room! These few minutes of prep work will protect both you and the environment.
**Always start by disconnecting the spark plug wire.** This simple step prevents accidental starts while your hands are near the blade or engine components. Think of it as removing the key before working under the hood of your car.
**Let that engine cool down completely**—at least 15 minutes after use. Hot metal and fuel vapors are a dangerous combination, and patience here prevents burns and potential fires.
**Work in a well-ventilated area**, preferably outdoors or in an open garage. Engine fumes contain carbon monoxide and other nasties you definitely don’t want to breathe in confined spaces.
When handling fuel, use approved containers and work away from any ignition sources. Never drain old fuel onto the ground—it’s terrible for your soil and groundwater. Instead, take it to a recycling center or hazardous waste facility. Many auto parts stores accept old fuel for proper disposal.
Keep a fire extinguisher nearby, wear safety glasses, and keep kids and pets at a safe distance. Now you’re ready to troubleshoot safely!
The Most Common Culprit: Fuel System Problems
Old or Contaminated Fuel
Old fuel is one of the sneakiest culprits behind mower startup problems. If your gas has been sitting for more than 30 days—especially during off-season storage—there’s a good chance it’s gone stale and is causing your engine grief.
Here’s what happens: gasoline begins to break down and oxidize over time, losing its combustibility. Even more problematic is ethanol-blended fuel (that’s most pump gas nowadays), which absorbs moisture from the air. This creates a gummy residue that clogs your carburetor and fuel lines, and in worst cases, causes internal corrosion. You’ll notice symptoms like difficulty starting, rough idling, sputtering during operation, or the engine dying unexpectedly.
To check your fuel, pour a small amount into a clear container. Fresh gas appears clear or slightly amber. Stale fuel looks darker, cloudy, or separated, and often smells sour or varnish-like. If you spot debris floating around, that’s contamination calling for immediate action.
Never pour old fuel down drains or onto the ground—that’s harmful to our waterways and soil. Instead, transfer it to an approved container and take it to your local hazardous waste facility or auto parts store that accepts old gasoline.
Prevention beats cure every time. Before storing your mower for winter, either run the tank completely dry or add a fuel stabilizer to fresh gas. Look for eco-friendly options like ethanol-free fuel or plant-based stabilizers that protect your engine without harsh chemicals. This simple habit saves you springtime headaches and keeps your mower running smoothly season after season.

Clogged Fuel Filter and Lines
A clogged fuel filter is like trying to breathe through a straw filled with debris—your mower simply can’t get the fuel it needs to run smoothly. If your engine sputters, loses power under load, or refuses to start despite having fresh gas, a blocked filter or fuel line might be the culprit.
Most mowers have an in-line fuel filter positioned between the tank and carburetor. It’s typically a small, clear or colored cylinder that lets you peek inside. If you see dark sediment, rust particles, or the filter appears cloudy rather than translucent, it’s time for action. Also check the fuel lines themselves—they can crack with age or develop kinks that restrict flow.
To inspect, first turn off the fuel valve (if equipped) and carefully disconnect the filter using pliers to slide off the clamps. Replace disposable filters entirely—they’re inexpensive insurance for your engine. For fuel lines, look for brittleness or discoloration. Replacements are readily available at hardware stores and are simple to install.
Here’s a sustainable maintenance tip: clean or replace your fuel filter at the start of each mowing season, and whenever you’re storing your mower for winter. This simple habit prevents fuel system issues and extends your engine’s life, keeping your trusty mower out of the landfill longer while saving you money on repairs.
Carburetor Issues
The carburetor is your mower’s mixing maestro, blending fuel and air in just the right proportions. When it acts up, your engine struggles—or refuses to start altogether. If your mower turns over but won’t start, or runs rough and sputtery, the carburetor often deserves a closer look.
**Common culprits include:**
**Gummed-up passages** happen when old fuel breaks down, leaving sticky residue that blocks tiny jets and channels. You’ll notice hard starting, stalling, or poor performance. Prevention is your best friend here—always use fresh fuel and add a fuel stabilizer if storing your mower for more than a month.
**A stuck float** causes flooding or fuel starvation. The float controls how much gas enters the carburetor bowl, and when it sticks, everything goes haywire. You might see fuel leaking from the air filter or smell raw gasoline.
For basic cleaning, try running carburetor cleaner through the system first—it’s the least invasive approach. If problems persist, removing and disassembling the carburetor for a thorough cleaning often works wonders. However, if you’re uncomfortable with small parts and springs flying everywhere (we’ve all been there!), or if cleaning doesn’t solve the issue, professional help or replacement becomes worthwhile. Modern ethanol-blended fuels are particularly hard on carburetors, making prevention through proper fuel management your most sustainable solution.
No Spark? Troubleshooting Your Ignition System
Testing and Replacing the Spark Plug
The spark plug is often the culprit when your mower refuses to start, and checking it is refreshingly straightforward. Before you begin, disconnect the spark plug wire—this simple safety step prevents accidental starts while you’re working.
Removing the spark plug requires a spark plug socket (usually 13/16″ or 5/8″ for most mowers). Once it’s out, you’ve got a diagnostic treasure in your hands. A healthy spark plug has a light tan or gray electrode. Black, sooty buildup indicates a too-rich fuel mixture or a dirty air filter. If you see white deposits or a blistered appearance, the engine’s running too hot. Oil-fouled plugs that look wet and dark suggest engine wear issues beyond simple fixes.
Testing is easy: reconnect the wire, rest the plug’s threads against the engine (metal to metal), and pull the starter cord while watching for a strong blue spark. No spark or a weak orange one? Time for replacement.
Gap checking matters more than many realize. Use a gap tool to measure the space between the center and side electrodes—typically 0.030 inches for most mowers, but check your manual. Even new plugs sometimes need adjustment.
While you can clean lightly soiled plugs with a wire brush, replacement is surprisingly affordable—usually under $5. I replace mine annually regardless, treating it as preventive maintenance that saves frustration mid-season.
When choosing replacements, stick with your manufacturer’s recommended part number for optimal performance. Most auto parts stores can cross-reference if the original isn’t available.
Dispose of old spark plugs responsibly at recycling centers that accept metal waste—they contain recyclable materials and shouldn’t end up in regular trash.
Checking the Ignition Coil and Kill Switch
If your mower has fuel and air but still won’t start, the ignition system is your next detective stop. Don’t worry—testing it is easier than you might think, and you can tackle most checks with basic tools you probably already own.
Start by inspecting the spark plug wire. Give it a gentle tug to ensure it’s firmly connected to both the spark plug and the ignition coil. Look for any cracks, fraying, or damage along the wire’s length. These connections can work loose from vibration over time, especially if you’re mowing bumpy terrain. A loose connection means no spark, which means no start.
Next, check your safety kill switch—that little lever you press against the handle while mowing. This switch is designed to cut the engine if you let go, which is great for safety but frustrating when it malfunctions. Make sure the wire connected to this switch isn’t disconnected or damaged. Sometimes grass clippings and debris interfere with the switch mechanism itself, so clean around it thoroughly.
To test if your ignition coil is actually firing, you can perform a simple spark test. Remove the spark plug, reconnect it to the wire, and ground the plug’s threads against the engine (be careful here). Pull the starter cord and watch for a blue spark. No spark? You’re likely dealing with ignition coil problems.
Before rushing to replace the coil—which can be pricey—double-check all wire connections one more time. Sometimes the simplest solution saves the day. If everything checks out and you’re still spark-free, replacement becomes necessary, but you’ve eliminated the easy fixes first.
Air Flow Matters: Diagnosing Air Filter and Cooling Problems
Cleaning or Replacing Your Air Filter
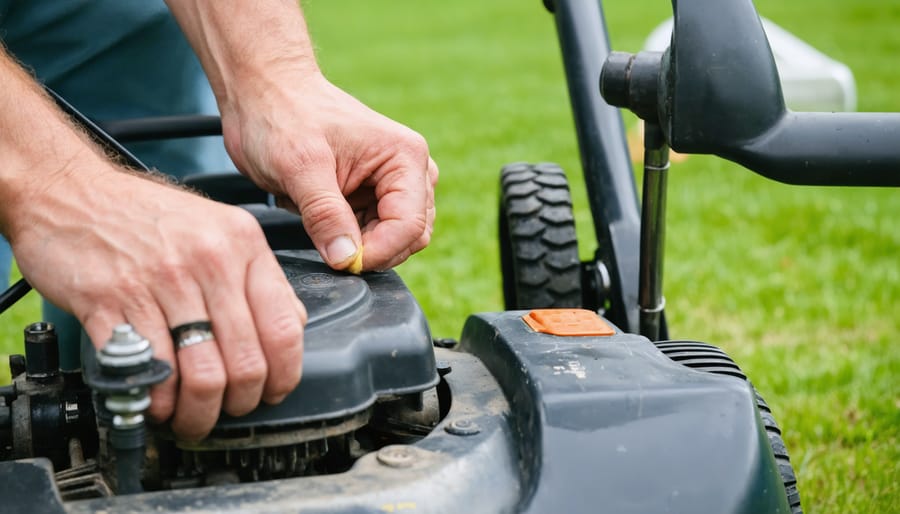
Your air filter is like a protective mask for your mower’s engine—it keeps dust, grass clippings, and debris from entering the combustion chamber. A clogged filter can starve your engine of oxygen, making it run poorly or not start at all. The good news? Checking and cleaning it takes just minutes.
First, locate your air filter. It’s typically housed in a plastic or metal cover near the carburetor, usually on the side of the engine. Consult your owner’s manual if you’re unsure—it’ll show you exactly where to look.
Once you’ve found it, remove the cover (usually held by clips or a single screw) and identify your filter type. Paper filters are accordion-style and white or yellow when new, while foam filters are spongy and often have an oily feel.
For foam filters, wash them in warm, soapy water, squeeze gently (never wring), and let them air dry completely. Once dry, apply a few drops of clean motor oil, squeeze to distribute evenly, then reinstall. This oil coating actually helps trap particles more effectively—a sustainable way to extend filter life.
Paper filters can be gently tapped against a hard surface to dislodge loose dirt, but they can’t be washed. If it’s dark gray, damaged, or hasn’t been replaced in a season, invest in a new one. They’re inexpensive insurance against costly engine repairs.
Clean foam filters monthly during mowing season and replace paper filters annually. This simple habit prevents fuel waste from inefficient combustion and extends your engine’s lifespan significantly.

Cooling Fins and Ventilation
Your mower engine works hard and generates significant heat during operation. Just like your car radiator, the cooling fins around the engine cylinder are designed to dissipate this heat—but they can’t do their job when they’re caked with dried grass clippings, dust, and debris. This buildup acts like an insulating blanket, trapping heat and causing your engine to overheat and stall, especially during longer mowing sessions.
Checking and cleaning these fins should become part of your regular maintenance routine. Start by disconnecting the spark plug for safety, then use a stiff brush or compressed air to remove debris from between the fins. You’ll often find a surprising amount of material packed in there! For stubborn buildup, a wooden or plastic scraper works well without damaging the metal fins.
While you’re at it, inspect the engine housing vents and any cooling shrouds. These direct airflow across the engine, and even small obstructions can reduce cooling efficiency dramatically. Clean these areas thoroughly after every few mowing sessions—more frequently if you’re mulching or cutting in dusty conditions.
Prevention is your friend here: let grass dry before mowing when possible, and develop the habit of brushing off your mower after each use. This simple five-minute task prevents the compressed buildup that causes overheating problems down the road.
When Your Mower Starts But Won’t Stay Running
Few things are more frustrating than hearing your mower roar to life, only to sputter out moments later. If your mower starts then dies, you’re dealing with a different beast than a no-start situation—and the good news is, the fixes are often straightforward.
**Check the Fuel Cap First**
This might sound too simple, but a clogged fuel cap vent is surprisingly common. Modern fuel caps have tiny vents that allow air into the tank as fuel flows out. When these get blocked by dirt or debris, they create a vacuum that starves the engine. Try loosening the fuel cap slightly and restarting. If the mower runs better, you’ve found your culprit. Clean or replace that cap—it’s an easy, eco-friendly fix that saves you from unnecessary parts replacement.
**Examine Your Carburetor**
When an engine starts but won’t maintain power, the carburetor is often restricting fuel flow. That old fuel we talked about earlier? It leaves behind varnish deposits that partially block the tiny jets and passages. The engine gets enough fuel to start on the choke, but once it needs more fuel under load, it starves out.
Remove the carburetor bowl and check for gummy residue. A good carburetor cleaner and some patience can restore proper function. For a more sustainable approach, consider using fuel stabilizer year-round to prevent these deposits from forming in the first place.
**Governor Problems Under Load**
The governor regulates engine speed, and if it’s sticking or misadjusted, your mower might start beautifully but die when you engage the blades. Watch the governor arm as the engine runs—it should move smoothly. If it’s sticky, a drop of penetrating oil on the linkage pivot points often works wonders.
**Vapor Lock Issues**
On hot days, fuel can vaporize in the lines before reaching the carburetor, causing the engine to die repeatedly. If your mower runs fine when cool but struggles in heat, try relocating fuel lines away from the engine or adding heat shielding.
Strange Sounds and Smoke: Warning Signs You Shouldn’t Ignore
Your mower is trying to tell you something, and it’s worth listening! Think of unusual sounds and smoke as your machine’s way of crying for help—catching these warning signs early can save you from costly repairs down the road.
**Decoding the Noises**
A healthy mower hums along steadily, so any change deserves attention. Knocking or pinging sounds often indicate low oil levels or worn internal parts—stop immediately and check your oil dipstick. Grinding noises might mean blade damage or bearing issues, while high-pitched squealing typically points to belt problems or lack of lubrication. A rattling sound could be something as simple as a loose blade bolt (easily tightened) or as serious as internal engine damage.
**Reading the Smoke Signals**
Smoke color tells a specific story. Blue smoke means you’re burning oil—check your oil level and look for overfilling or a tilted mower that’s caused oil to leak where it shouldn’t. For detailed guidance on white smoke issues, which usually indicate water in the fuel or a blown head gasket, specialized troubleshooting may be needed. Black smoke signals too much fuel reaching the engine, often from a dirty air filter or carburetor problems—both issues you can often address yourself.
**When to Stop Immediately**
If you notice sudden loud knocking, seizing sounds, or heavy smoke of any color, shut down immediately. Continuing to run could transform a fixable problem into an expensive disaster. Check oil levels first—running dry even briefly can destroy an engine. Apply lubricant to visible moving parts and pivot points as routine maintenance.
For persistent unusual noises or smoke after basic checks, seeking professional help protects both your investment and your safety.
Preventive Maintenance: Keeping Your Mower Running Smoothly
The best way to avoid engine trouble? Stop problems before they start. A simple maintenance routine takes just minutes but can save you hours of frustration and significantly extend your mower’s life—which is better for your wallet and the planet.
**Start with the basics every 5-10 hours of use.** Check your oil level before each mowing session—it takes 30 seconds and prevents catastrophic engine damage. Clean or replace the air filter regularly; a clogged filter is like asking your engine to breathe through a pillow. I make it a habit to tap out foam filters and rinse them with biodegradable soap every few mows. Paper filters? Replace them when they look dirty—they’re too clogged to clean effectively.
**Fuel freshness matters more than most people realize.** Gasoline degrades in as little as 30 days, creating gummy deposits that clog your carburetor. Use only what you need each season, and consider adding an eco-friendly fuel stabilizer if you must store gas. Better yet, run your tank nearly empty before winterization and storage—this prevents stale fuel issues entirely.
**Blade maintenance is engine maintenance too.** Dull or unbalanced blades force your engine to work harder, reducing efficiency and lifespan. Sharpen blades 2-3 times per season using a file or grinder, and check balance by hanging the blade on a nail—both sides should level out.
**Choose sustainable products when possible.** Look for biodegradable oils, phosphate-free cleaners, and fuel stabilizers made from plant-based ingredients. These work just as well as conventional products without introducing harsh chemicals into your soil.
Keep a simple log—even just notes in your phone—tracking oil changes, filter replacements, and blade sharpening. This habit creates accountability and helps you spot patterns before they become problems. Preventive maintenance isn’t glamorous, but it’s the difference between a mower that serves you reliably for 15 years versus one that becomes landfill waste after five.
You’ve just learned that most mower engine problems aren’t nearly as intimidating as they first appear. Armed with a few basic tools and the troubleshooting steps we’ve covered, you can tackle the majority of issues that keep your mower from starting or running smoothly. There’s genuine satisfaction in getting your hands a little dirty and hearing that engine roar back to life—not to mention the money you’ll save by avoiding repair shop fees.
That said, knowing your limits is just as important as knowing your capabilities. If you’ve worked through the troubleshooting checklist and still can’t identify the problem, or if you encounter issues involving internal engine components, there’s no shame in calling a professional. Sometimes an expert’s diagnostic skills and specialized equipment are exactly what’s needed.
As you maintain your mower, remember that proper care extends its lifespan and reduces waste—keeping equipment out of landfills is an important part of environmental stewardship. Regular maintenance, using clean fuel, and addressing small problems before they become big ones means your mower will serve you reliably for years to come. You’re not just fixing a machine; you’re making a sustainable choice for your lawn and our planet.